How to Detect Basement Wall Leaks
To detect a basement wall leak, look for moisture that appears after rain, returns in the same location, follows cracks or wall-floor seams, or leaves staining, efflorescence, or damp patches on the foundation wall. A true wall leak usually has a repeatable pattern. Condensation and general humidity usually affect broader surfaces instead of one consistent entry area.
If you have already noticed warning signs such as damp patches or mineral deposits, it helps to first understand how those symptoms develop. You can review the common indicators in Signs of Water Seepage Through Basement Walls before moving into detection.
This guide focuses on how to confirm, trace, and locate basement wall leaks using practical observation methods and simple tests. The goal is to follow evidence instead of guessing where water is entering.
How Basement Wall Leaks Actually Behave
Visible moisture does not always mark the exact entry point. Water can travel through cracks, block cores, mortar joints, or the wall-floor seam before it appears on the interior surface.
Water Does Not Always Appear Where It Enters
When water pushes through a foundation wall, it follows the path of least resistance. This means it may:
- Enter through a crack higher up and appear lower on the wall
- Travel along internal pores or joints before surfacing
- Move toward the wall-floor seam before becoming visible
- Spread sideways before forming a damp patch
This behavior is especially common in concrete block walls, where hollow cavities allow water to shift internally before emerging.
Leaks Follow Predictable Structural Paths
Although water movement can be indirect, it is not random. Leaks typically follow consistent structural features such as:
- Cracks in poured concrete
- Mortar joints in block walls
- Wall-floor seams (cold joints)
- Pipe penetrations or utility openings
Recognizing these high-probability areas makes detection more accurate and reduces guesswork.
Leaks Are Often Triggered by External Conditions
Many basement wall leaks are not constant. Instead, they appear when conditions outside the home change, especially during heavy rain or snowmelt.
Key behavioral patterns include:
- Moisture appearing during or shortly after rainfall
- Damp areas becoming more visible during prolonged storms
- Moisture gradually drying once weather improves
This connection to weather is a strong indicator that moisture is entering from outside the structure. If you want a deeper explanation of this relationship, see Why Basement Walls Leak During Rain.
Step-by-Step Method to Detect Basement Wall Leaks
Accurate detection requires more than a single observation. The most reliable approach combines timing, pattern recognition, and simple verification methods.
Step 1: Confirm Moisture Timing
The first step is to determine when moisture appears. This helps narrow down the likely source.
- If moisture appears after rain → likely seepage or wall leak
- If moisture appears randomly → possible plumbing issue
- If moisture appears during humid indoor conditions → possible condensation
This timing-based approach eliminates many false assumptions early in the process.
Step 2: Identify Consistent Moisture Zones
Leaks are usually consistent in location. Even if the intensity changes, the general area tends to remain the same.
Look for:
- Damp spots that reappear in the same location
- Recurring streaks or staining patterns
- Moisture near specific cracks or seams
- Wet areas that follow structural lines
This consistency is one of the strongest indicators of a true wall leak rather than general humidity.
Step 3: Trace the Moisture Path
Once a damp area is identified, work backward from the most saturated area toward nearby cracks, seams, penetrations, or higher wall sections.
Focus on:
- The darkest or most saturated part of the wall
- The direction of streaks or flow patterns
- Nearby cracks, joints, or seams
- Areas slightly above the visible moisture
In many cases, the visible damp spot is below the actual entry point. Tracing upward or along structural features often leads closer to the source.
If you want to take this process further into a full structured evaluation, you can review How to Inspect Basement Walls for Water Intrusion.
Where Basement Wall Leaks Usually Enter
Once you’ve confirmed that moisture is likely coming from a basement wall, the next step is locating where the water actually enters. This is often more difficult than it seems because visible moisture is not always at the entry point.
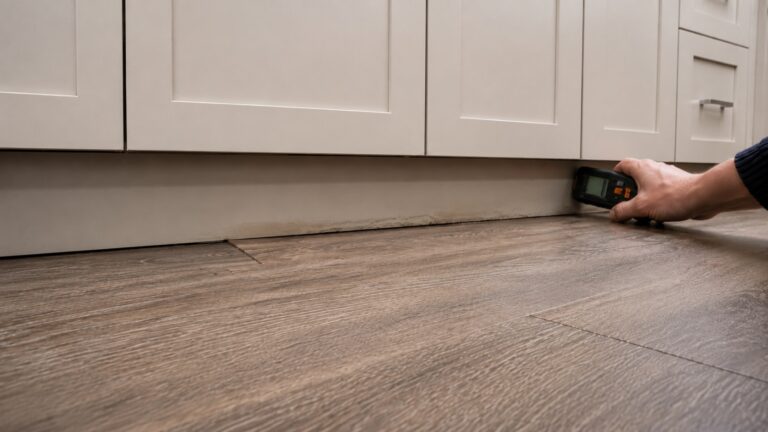
Check the Wall-Floor Seam (Cold Joint)
The joint where the wall meets the floor is one of the most common entry points for water. Even if moisture appears higher on the wall, it may ultimately collect at this seam.
Signs that the seam may be the entry point include:
- Moisture concentrated along the base of the wall
- Dampness spreading outward onto the floor
- Water pooling in corners
- Repeated wetness after rain in the same location
Because the wall-floor seam is a joint between the foundation wall and slab, it can provide a path of lower resistance for water under pressure.
Inspect Cracks and Joints Carefully
Cracks and joints are natural weak points in basement walls. Even very small openings can allow water to pass through under pressure.
Focus on:
- Vertical or diagonal cracks in poured concrete
- Horizontal or vertical mortar joints in block walls
- Areas where cracks intersect with damp zones
- Any cracks that show staining or mineral deposits
Moisture often travels along these features, making them key indicators of where seepage begins.
Check Around Pipe and Utility Penetrations
Any location where pipes or cables pass through the foundation creates a potential entry point for water.
Look for:
- Dampness around pipe openings
- Gaps or deteriorated sealant
- Water staining near utility penetrations
- Localized moisture that doesn’t follow typical wall patterns
These areas can be overlooked during initial inspections but often play a role in leak development.
Simple Tests Homeowners Can Use to Confirm Basement Wall Leaks
After you identify a likely leak area, a few simple tests can help confirm whether moisture is entering through the wall or forming on the surface.
The Plastic Sheet Test (Seepage vs. Condensation)
This test helps determine whether moisture is coming from inside the wall or forming due to indoor humidity.
How to perform the test:
- Cut a piece of clear plastic sheeting
- Tape all four edges tightly against a clean section of the wall near the damp area
- Leave it in place for 24–48 hours
Results interpretation:
- Moisture on the outside of the plastic → condensation
- Moisture between the plastic and wall → moisture coming through or out of the wall
This is one of the most reliable low-cost methods for distinguishing between moisture sources.
The Pattern Marking Method
This method helps determine whether a leak is active and how it changes over time.
Steps:
- Mark the edges of a damp area using pencil or tape
- Check the area after the next rain event
- Compare changes in size, shape, and intensity
If the area expands or reappears in the same pattern, it confirms active seepage rather than a one-time event.
The Dry-and-Observe Test
This simple approach involves manually drying a damp section of the wall and observing how quickly moisture returns.
- Dry the area using a towel or fan
- Monitor the wall over several hours or days
- Note how quickly dampness reappears
Fast return of moisture — especially after rain — strongly suggests active water intrusion through the wall.
How Detection Differs Based on Wall Type
The type of basement wall affects how leaks behave and how easy they are to detect. Understanding these differences improves accuracy during the detection process.
Poured Concrete Walls
Poured concrete walls are more uniform, which makes leak detection relatively straightforward.
Common detection clues include:
- Defined streaks starting from cracks
- Localized damp patches with clear boundaries
- Moisture centered around specific structural features
Because water typically follows visible cracks or joints, tracing the source is often easier.
Concrete Block Walls
Block walls are more complex due to their internal structure. Water can travel inside hollow cores before becoming visible.
Detection challenges include:
- Moisture appearing away from the actual entry point
- Multiple damp areas without a clear origin
- Water emerging from mortar joints rather than cracks
In these cases, detection relies more heavily on observing repeated patterns over time rather than a single visual clue.
Safety note: Do not cut into finished walls near outlets, electrical panels, or wiring unless power is safely controlled and you know what is behind the surface. If the wall is soft, moldy, or repeatedly wet, stop at detection and move to a proper inspection.
Finished Basement Walls
Finished walls can hide leak sources, making detection more indirect.
Warning signs include:
- Stains bleeding through drywall
- Warping or soft spots in finished surfaces
- Musty odors behind walls or storage areas
- Localized damage that worsens after rain
In finished spaces, partial exposure or removal of obstructions may be necessary to confirm the exact source of moisture.
If detection becomes difficult because the foundation wall is hidden, move into a more structured basement wall inspection before deciding whether broader basement waterproofing and water-control work is needed.
How to Distinguish Basement Wall Leaks from Other Moisture Problems
Accurate detection depends on correctly identifying the source of moisture. Basement environments often contain multiple moisture sources, and misdiagnosing the problem can lead to ineffective solutions.
Seepage vs. Condensation
Condensation forms when humid air contacts cooler surfaces. It is influenced by indoor conditions rather than external water pressure.
Key differences include:
- Condensation appears on multiple surfaces (walls, pipes, windows)
- Seepage appears in consistent, localized areas
- Condensation is more common in warm, humid conditions
- Seepage is strongly linked to rainfall or saturated soil
If moisture appears only on specific wall sections and follows structural patterns, seepage is far more likely.
Seepage vs. Plumbing Leaks
Plumbing leaks originate from pipes, fixtures, or appliances and are not influenced by weather conditions.
Differences include:
- Plumbing leaks occur regardless of rain
- Leaks are usually near plumbing fixtures or lines
- Seepage follows cracks, seams, or wall patterns
- Seepage reappears after storms in the same locations
If moisture consistently appears after rainfall and aligns with structural features, plumbing is unlikely to be the source.
Seepage vs. General Basement Humidity
High humidity can create a damp environment but does not produce localized wall patterns.
Key distinctions:
- Humidity affects the entire space evenly
- Seepage creates defined damp areas
- Humidity does not leave mineral deposits
- Seepage often results in staining or efflorescence
Understanding these differences ensures that detection efforts focus on the correct issue.
Hidden Areas Where Basement Wall Leaks Often Go Undetected
Not all leaks are visible in open areas. Many basement wall leaks develop behind obstructions or in low-visibility locations, making them harder to identify without deliberate inspection.
Behind Stored Items
Boxes, shelving, and stored belongings placed against basement walls can trap moisture and conceal early leak signs.
Check for:
- Damp or warped cardboard boxes
- Moisture on the back of stored items
- Localized musty odors behind storage
- Discoloration on items touching the wall
Moving stored items periodically allows you to inspect the wall surface directly and detect hidden problems early.
Corners and Wall Intersections
Basement corners and wall intersections are common leak zones due to structural stress and construction joints.
Look for:
- Dampness concentrated in corners
- Water pooling at intersection points
- Cracks forming near corner seams
- Recurring moisture in the same corner after rain
These areas often require closer attention because they can concentrate water flow from multiple directions.
When Detection Means You Should Take Action
Detecting a basement wall leak is only the first step. What you do next depends on how the leak behaves and how severe the intrusion appears. Some situations can be monitored temporarily, while others require immediate action.
When Monitoring May Be Enough
In early stages, you may choose to observe the problem further before making changes.
- Moisture appears only during heavy or prolonged rain
- Damp areas are small and localized
- No visible material damage or mold
- Moisture dries completely between events
In these cases, continue tracking patterns and confirm consistency over multiple rain cycles.
When to Move From Detection to Inspection
If the leak is recurring or expanding, a more structured evaluation is needed.
- Moisture returns after most rain events
- Damp areas grow larger or spread
- Staining, peeling paint, or minor deterioration appears
- Humidity levels rise in the basement after storms
At this point, detection has done its job: it has shown that the problem is recurring. The next step is a fuller basement wall water intrusion inspection to understand the scope and likely cause.
Once the source is confirmed, you can compare the findings with prevention options in How to Prevent Water Seepage Through Basement Walls.
When to Consider Professional Evaluation
Some detection results indicate that the issue has moved beyond simple seepage and may involve larger drainage or structural concerns.
- Water is actively dripping or flowing into the basement
- Standing water forms along the wall or floor edge
- Cracks widen or new cracks appear
- Mold growth develops near damp areas
- Seepage occurs even without recent rainfall
These signs suggest that pressure, water volume, or structural conditions exceed what basic monitoring can address. In these cases, professional assessment may be necessary.
Frequently Asked Questions About Detecting Basement Wall Leaks
How can I confirm a basement wall leak without tools?
You can confirm a leak by observing patterns over time. If moisture appears after rain in the same location, follows cracks or seams, and leaves staining or residue, it is likely seepage. Simple tests like the plastic sheet method can help verify this.
What is the easiest way to find where water is entering?
Start by identifying the dampest area, then trace upward and along structural features like cracks or joints. Water often travels before becoming visible, so the entry point may be slightly above the visible moisture.
Do basement wall leaks always show visible water?
No. Early-stage leaks often appear as dampness, discoloration, or mineral deposits rather than flowing water. These signs still indicate that moisture is entering the wall.
Can I detect a leak if my basement is finished?
Yes, but it may be more difficult. Look for indirect signs such as staining, warping, soft spots, or musty odors. In some cases, partial access to the wall may be needed to confirm the source.
How do I know if a basement wall leak is getting worse?
A basement wall leak is getting worse when damp areas expand, moisture appears after smaller rain events, staining becomes darker, paint or masonry begins to deteriorate, or water reaches the wall-floor seam more often. Marking the damp area after each storm makes progression easier to see.
What to Do After Detecting a Basement Wall Leak
Once you confirm that moisture returns after rain, follows the same wall pattern, or appears at cracks, joints, seams, or penetrations, treat it as an active basement wall leak rather than a random damp spot.
Use your detection notes to decide the next step: monitor a small isolated area, inspect the wall more thoroughly if the pattern keeps returning, or seek professional help if water is active, cracks are changing, mold is present, or seepage continues without recent rain.
For a broader location-by-location moisture inspection process, see How to Find Hidden Moisture in Different Areas of Your Home.
Key Takeaways
- Basement wall leaks often appear after rain and follow consistent patterns.
- Water does not always appear at the entry point—tracing moisture paths is essential.
- Simple tests like plastic sheeting can help confirm seepage vs. condensation.
- Cracks, joints, and wall-floor seams are the most common leak locations.
- Hidden areas behind storage or finished walls can conceal early leaks.
- Detection should lead to inspection or action if moisture becomes recurring or severe.
2 Comments
Comments are closed.