How to Dry Basement Areas After Water Exposure (Step-by-Step Recovery Guide)
After basement water exposure, the goal is to remove standing water, dry the air, move moisture out of walls and floors, and keep drying long enough for hidden materials to stabilize. A basement can look dry while concrete, drywall, insulation, wood framing, or stored items are still holding moisture.
Start by stopping the water source, removing standing water, clearing wet contents, running fans, and using dehumidification. If the basement stays damp after the first drying attempt, the issue may be part of a recurring moisture pattern explained in why basements stay damp.
This guide explains the drying steps in order, what materials need extra attention, and when drying alone is not enough. If musty odors, spotting, or visible growth have already appeared, review signs of mold growth in basements before continuing with basic cleanup.
What to Do Immediately After Water Exposure
The first hours after water exposure are critical. Acting quickly reduces how much moisture is absorbed into materials and helps prevent long-term damage.
Safety first: Do not enter standing water if electrical outlets, appliances, cords, or the electrical panel may be affected. If the water may contain sewage, floodwater, chemical contamination, or heavy debris, treat it as contaminated water and call a qualified cleanup professional instead of handling it as a simple drying project.
Stop the Water Source First
Before beginning any drying efforts, identify and stop the source of the water. This may involve:
- Turning off a leaking appliance or plumbing line
- Clearing blocked drains
- Addressing water entry from walls or floors
If water is entering due to external conditions, such as rainfall, it may be related to issues covered in why basement walls leak during rain. Drying efforts will be limited if water continues entering the space.
Remove Standing Water as Quickly as Possible
Standing water significantly slows the drying process and increases the amount of moisture absorbed by materials. Removing it quickly is the most important first step.
Common methods include:
- Using a wet/dry vacuum for small amounts of water
- Using a sump pump or portable pump for larger volumes
- Manual removal with buckets if necessary
The faster standing water is removed, the less moisture will penetrate floors, walls, and stored items.
Clear Out Affected Items
Items that have absorbed water can slow down drying and trap moisture in the space. Removing or repositioning them improves airflow and helps surfaces dry more evenly.
Focus on:
- Moving furniture away from walls
- Removing soaked cardboard boxes or fabrics
- Separating items to allow air circulation
This step is especially important because stored materials often hold moisture longer than structural surfaces.
Start Air Movement Immediately
Once standing water is removed and the area is cleared, begin creating airflow. Moving air helps moisture evaporate from surfaces and prevents it from settling back into materials.
To improve airflow:
- Use fans to move air across wet surfaces
- Position fans to create cross-ventilation where possible
- Avoid directing air into one spot without circulation
Air movement alone is not enough to fully dry a basement, but it is a critical early step that supports the entire drying process.
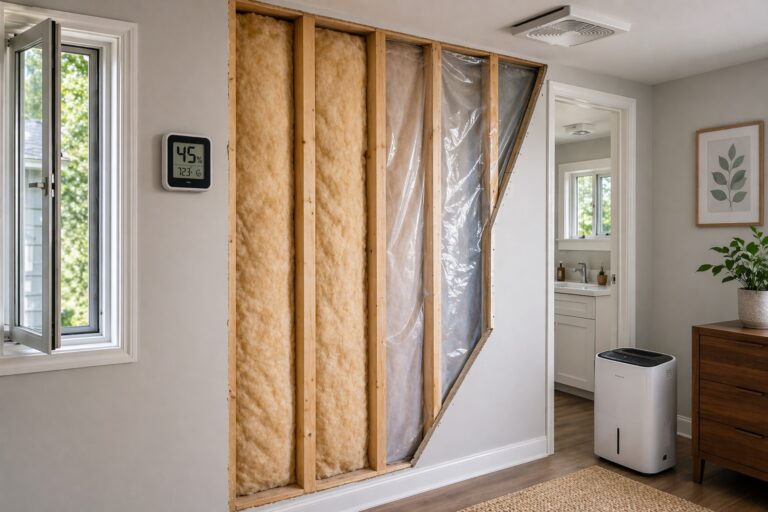
Control Humidity as Early as Possible
As moisture evaporates from surfaces, it enters the air. Use a dehumidifier early so that moisture is removed from the basement instead of settling back onto cool walls, floors, and stored materials.
Humidity is one of the main reasons mold forms even after water appears to be gone, as explained in why mold forms in basement areas. Managing humidity early helps prevent this cycle.
Drying Air and Reducing Humidity
After standing water is removed and airflow begins, the next priority is controlling humidity. As water evaporates from surfaces, it increases moisture in the air. If that moisture is not removed, it can settle back onto materials and slow the drying process.
Use Dehumidifiers to Remove Moisture from the Air
Dehumidifiers play a central role in basement drying because they actively pull moisture out of the air. This prevents re-condensation and allows evaporation to continue efficiently.
To improve effectiveness:
- Run the dehumidifier continuously during the drying process
- Use a hygrometer and aim to bring basement humidity below 50% if possible
- Keep doors and windows closed when outside air is humid
- Empty the water collection container regularly or use continuous drainage if available
In humid climates or during warm weather, bringing in outside air can actually slow drying. This is because outdoor air may contain more moisture than the air inside the basement.
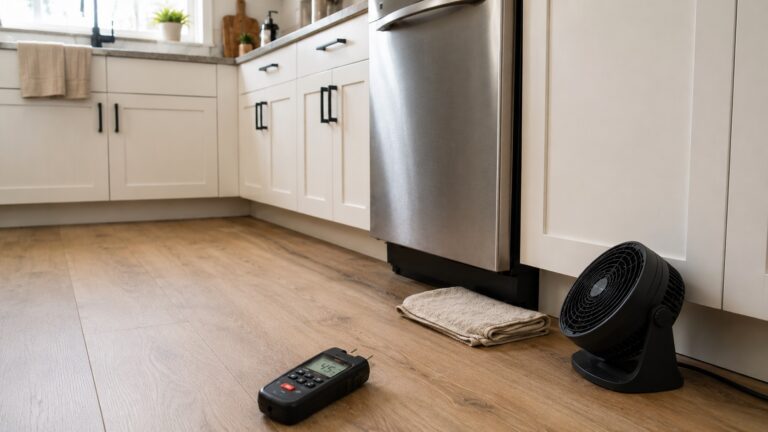
Combine Airflow with Humidity Control
Fans and dehumidifiers work best together. Fans help moisture evaporate from surfaces, while dehumidifiers remove that moisture from the air.
Without this combination:
- Moisture can build up in the air
- Drying slows significantly
- Condensation may continue forming on cool surfaces
This is why using only fans is often not enough to fully dry a basement.
Drying Basement Walls and Floors
Once air conditions are under control, the focus shifts to drying structural surfaces such as walls and floors. These materials absorb moisture during water exposure and release it slowly over time.
Drying Concrete Walls
Concrete and masonry walls can absorb significant amounts of moisture, even if they appear dry on the surface. This moisture must evaporate gradually.
To support drying:
- Direct airflow across wall surfaces using fans
- Keep the area open to allow air circulation
- Monitor for recurring dampness or dark patches
Concrete may feel dry before all internal moisture has evaporated. Continued airflow and humidity control are necessary to complete the drying process.
For a deeper wall-specific process, see how to dry basement walls after water intrusion.
Drying Basement Floors
Basement floors, especially concrete slabs, often retain moisture after water exposure. This is because water can soak into the surface and remain there even after visible moisture disappears.
Effective drying steps include:
- Keeping airflow directed across the floor surface
- Using dehumidification to remove evaporated moisture
- Avoiding covering the floor with rugs or materials that trap moisture
If carpet, padding, laminate, vinyl plank, or rugs are present, moisture may remain underneath even when the walking surface feels dry. Do not reinstall or cover flooring until the slab and any trapped layers have had time to dry.
Watch for Moisture Returning After Initial Drying
In some cases, surfaces may appear to dry but then become damp again. This can happen when moisture continues to move through materials or enters from external sources.
Common signs include:
- Walls becoming damp again after drying
- Recurring dark patches on floors
- Musty smells returning after initial improvement
When this occurs, it may indicate an ongoing moisture issue rather than a one-time event. These conditions are often linked to persistent problems described in how to fix persistent basement moisture problems.
If moisture continues to return, drying alone may not fully resolve the issue.
Drying Wood, Drywall, and Insulation
After addressing air moisture and drying large surfaces, attention must shift to materials that absorb water more deeply. These materials often take longer to dry and can retain hidden moisture even after surfaces feel dry.
Drying Wood Framing and Structural Components
Wood framing, such as studs and ceiling joists, absorbs moisture quickly and releases it slowly. Because wood is organic, it also provides a suitable surface for mold growth if it remains damp.
To support drying:
- Maintain continuous airflow across exposed wood surfaces
- Keep humidity controlled with active dehumidification
- Allow adequate time for moisture to evaporate from within the material
Wood may feel dry on the surface while still holding moisture internally. Continue drying until moisture levels stabilize; if framing was heavily soaked, a moisture meter or professional inspection may be needed before closing the area back up.
Drying Drywall in Finished Basements
Drywall presents a unique challenge because it absorbs water into its core. While the surface may dry relatively quickly, internal moisture can remain trapped.
Signs that drywall is still affected include:
- Soft or weakened sections
- Discoloration that spreads over time
- Persistent dampness or odor
Because drywall can hold hidden moisture, monitor it carefully during drying. If drywall is soft, swollen, crumbling, moldy, or wet above the base of the wall, drying alone may not be enough and removal may be safer than trying to save it.
Insulation and Hidden Moisture Concerns
Insulation is particularly difficult to dry because it traps moisture within its structure. Even when surrounding materials dry, insulation can remain damp and support mold growth.
Warning signs include:
- Persistent musty odor
- Moisture returning after initial drying
- Discoloration near insulated areas
Because insulation is often hidden behind walls or rim joist areas, it can continue holding moisture unnoticed. Wet fiberglass, cellulose, or other absorbent insulation may need to be removed rather than dried in place.
How Long Basement Drying Takes
Drying time depends on the amount of water exposure, the materials involved, and how quickly drying begins.
Typical timelines include:
- Light moisture exposure: 24–48 hours
- Moderate saturation: 2–5 days
- Heavy flooding: 5–10 days or longer
These timelines assume continuous airflow, active dehumidification, and exposed wet materials. Surface dryness is not enough; concrete, framing, drywall, insulation, and flooring layers can still hold moisture after the room looks normal.
Common Basement Drying Mistakes to Avoid
Drying a basement incorrectly can leave behind hidden moisture that leads to mold growth later. Avoiding common mistakes helps ensure that the drying process is effective.
Using Only Fans Without Dehumidification
Fans help moisture evaporate, but they do not remove it from the air. Without dehumidification, moisture can remain in the space and slow overall drying.
Not Creating Proper Airflow
Air needs to move across surfaces to carry moisture away. Simply placing a fan in the room without directing airflow toward wet areas is less effective.
Stopping the Drying Process Too Early
One of the most common mistakes is stopping once surfaces appear dry. Internal moisture can still be present, especially in materials like wood, drywall, and concrete.
Ignoring Hidden Moisture Areas
Moisture often remains behind walls, under flooring, and inside insulation. Focusing only on visible surfaces can allow hidden moisture to persist and lead to mold.
Failing to Address the Moisture Source
If the original cause of water exposure is not resolved, the basement may become wet again. This can restart the drying process and increase the risk of long-term damage.
Understanding why water entered the basement in the first place—such as conditions explained in how to waterproof basements and control water intrusion—is essential for preventing future issues.
When Drying Alone Is Not Enough
In many cases, proper drying can resolve moisture issues after water exposure. However, there are situations where drying alone is not sufficient, especially when moisture has penetrated deeply into materials or when the source of water has not been fully addressed.
Signs That Drying May Not Be Enough
Watch for these warning signs during or after the drying process:
- Persistent musty odors even after surfaces appear dry
- Moisture returning to the same areas
- Visible mold developing after drying
- Soft or deteriorating materials such as drywall or wood
These conditions suggest that moisture is still present or that damage has progressed beyond what simple drying can resolve.
Hidden Moisture Can Continue Causing Problems
Even when a basement appears dry, moisture can remain trapped in hidden areas such as behind walls, under flooring, or inside insulation. This hidden moisture can lead to mold growth over time.
If mold begins to develop, it is important to understand how to address it properly using guidance such as how to remove mold permanently. Drying alone does not eliminate mold once it has formed.
Recurring Water Exposure Requires a Long-Term Solution
If water exposure happens repeatedly, drying becomes a temporary fix rather than a permanent solution. In these cases, the underlying issue must be addressed to prevent future damage.
Common long-term solutions include:
- Improving drainage around the foundation
- Sealing entry points where water enters
- Managing humidity and airflow more effectively
Preventive strategies such as those outlined in how to prevent recurring moisture damage can help reduce the likelihood of future water exposure.
When to Consider Professional Help
Professional evaluation may be necessary when:
- The affected area is large or widespread
- Water has been present for several days
- Water may contain sewage, floodwater, or contamination
- Electrical components may have been affected
- Structural materials are heavily saturated
- The source of moisture cannot be identified
In these situations, professional moisture meters, dehumidification equipment, material removal, or contamination controls may be needed to fully dry the basement and prevent further damage.
Frequently Asked Questions About How to Dry Basement Areas After Water Exposure
How long does it take to fully dry a basement?
Drying time depends on the amount of water, the materials affected, and how quickly airflow and dehumidification begin. Light moisture may dry within 24–48 hours, while soaked drywall, insulation, carpet, or heavy flooding can take several days or longer.
Can I dry a basement without a dehumidifier?
Only very light moisture may dry with airflow alone. After standing water, wet contents, damp concrete, or soaked drywall, a dehumidifier is usually needed because basement air traps moisture and can redeposit it on cool surfaces.
Will mold grow if I do not dry the basement quickly?
Yes. Basement materials that stay damp, especially drywall, insulation, stored cardboard, fabrics, and wood framing, can support mold growth within 24 to 48 hours. Removing standing water quickly and keeping humidity controlled lowers the risk.
What materials are most at risk after water exposure?
Materials such as wood, drywall, insulation, and fabric are especially vulnerable because they absorb and retain moisture. These materials require careful drying and monitoring.
How can I tell if my basement is completely dry?
A basement is closer to dry when surfaces stay dry, humidity remains stable on a hygrometer, and damp spots or musty odors do not return. Hidden materials may still hold moisture, so heavily soaked drywall, insulation, wood, or flooring may need additional inspection before repairs or coverings are replaced.
Conclusion
A basement is not fully recovered just because the standing water is gone. Keep drying until humidity is controlled, materials stop releasing moisture, musty odors do not return, and walls, floors, stored items, and hidden areas remain dry.
If dampness returns after drying, treat it as a source problem rather than a drying problem. At that point, the next step is to find where water is entering or why moisture is staying trapped before repairs, paint, flooring, or stored items are put back in place.
Key Takeaways
- Basement drying must remove moisture from the air, visible surfaces, and hidden materials
- Airflow and dehumidification must work together for effective drying
- Different materials dry at different rates and may hold hidden moisture
- Drying may take several days when concrete, framing, drywall, insulation, or flooring layers are involved
- Stopping drying too early can lead to mold growth
- Recurring moisture requires addressing the underlying cause
- Professional help may be needed for severe, contaminated, electrical, or persistent water damage