How to Remove Mold Permanently: Science-Based Methods That Actually Work
If mold keeps coming back after cleaning, the cleaner is rarely the real problem. Mold usually returns because moisture, hidden contamination, or damaged material was never fully corrected.
Permanent mold removal depends on three things working together: finding the moisture source, correcting the damp condition, and cleaning or removing contaminated material the right way.
This mold removal hub focuses on how to remove mold, decide when materials must be cleaned or replaced, and prevent mold from returning after cleanup. For the broader home moisture system — including detection, repair, prevention, humidity control, and structural moisture risks — start with the complete guide to finding, fixing, and preventing moisture problems in homes.
Quick Summary: To remove mold permanently, stop the moisture source first. Then decide whether the affected material can be cleaned or must be removed. Nonporous surfaces can often be cleaned, but porous materials like drywall, insulation, carpet padding, and damaged wood may need removal if mold has grown into them. After cleanup, the area must stay dry.
The Permanent Mold Removal Principle
Mold is a moisture problem, not just a cleaning problem.
Mold can only keep growing when the conditions around it support growth. In most homes, that means moisture is present long enough for mold to grow on drywall paper, wood, dust, insulation, carpet backing, ceiling materials, or other organic surfaces.
That is why wiping visible mold is not the same thing as solving a mold problem. Cleaning may remove surface growth, but it does not correct the damp condition that allowed mold to grow.
The basic rule is simple: stop the moisture first, then clean, remove, dry, or replace the affected material based on how deeply mold has entered it.
Two mold problems that look similar can require very different repairs. Surface mold on a painted bathroom wall is not the same as mold inside drywall, behind baseboards, under laminate flooring, or inside a ceiling cavity.
The goal is not to kill every mold spore in the house. Mold spores are common indoors and outdoors. The real goal is to remove active mold growth, remove contaminated materials when necessary, and keep the area dry enough that mold cannot continue growing.
Why Mold Keeps Coming Back After Cleaning
When mold returns after cleaning, the problem is usually one of four things:
- The original moisture source was never fixed.
- Mold was growing behind or inside the surface that was cleaned.
- Porous material stayed contaminated after surface treatment.
- Humidity, condensation, or dampness returned after cleanup.
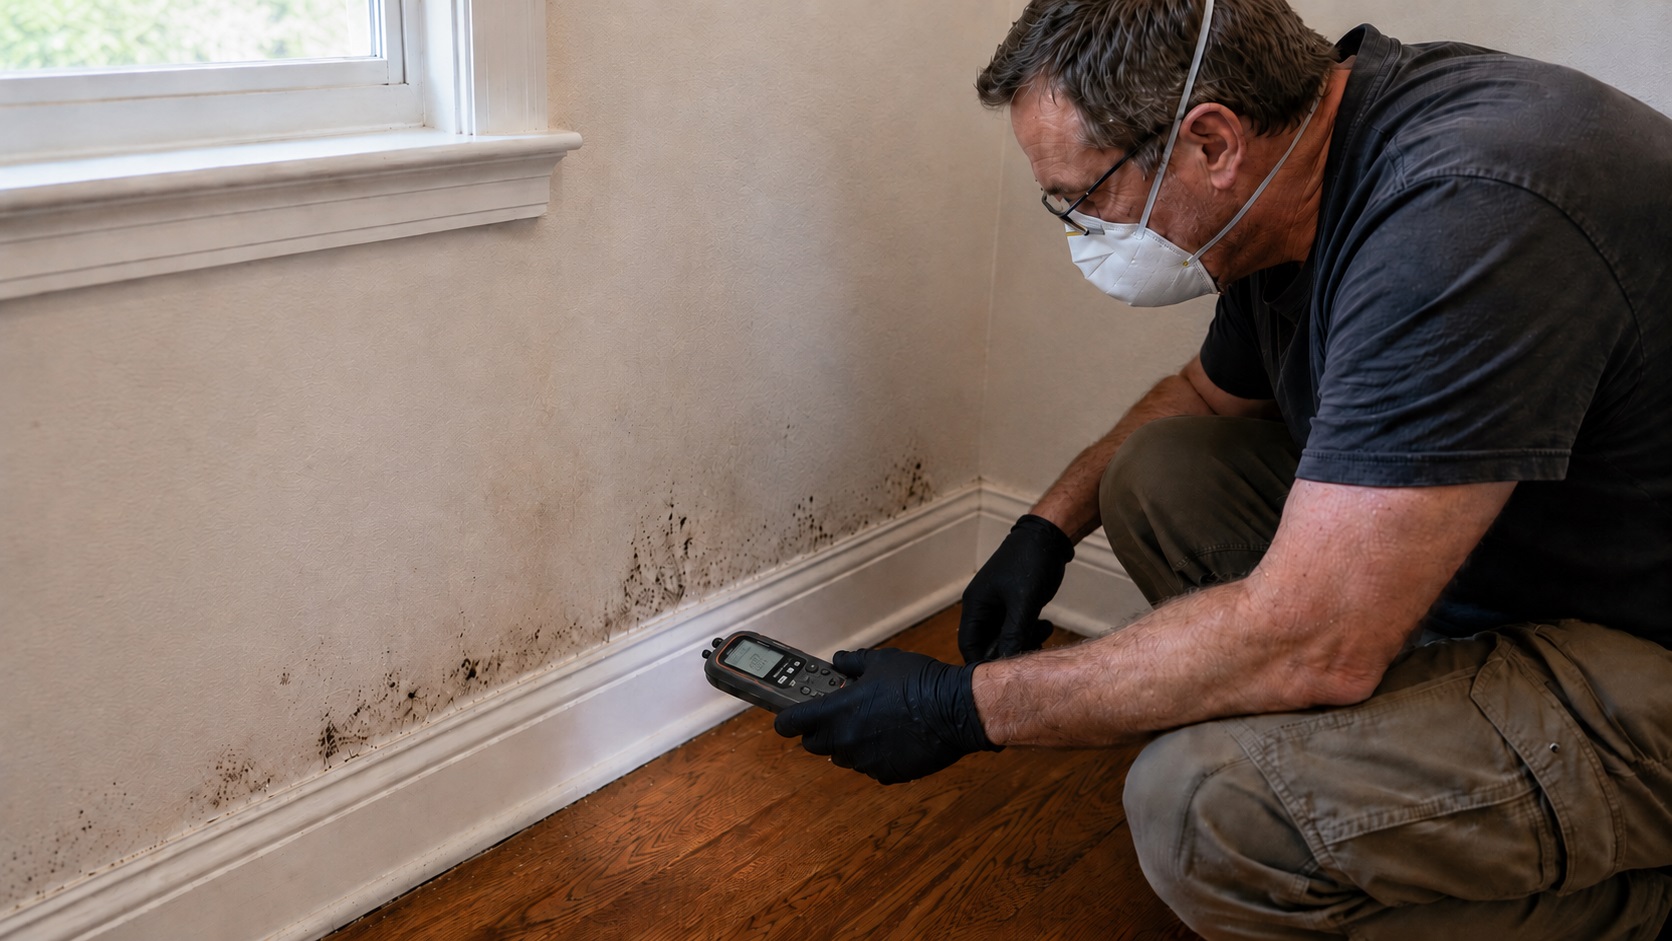
For example, mold on the face of drywall may be only the visible part of a deeper problem. If the back side stayed wet, cleaning the painted surface does not remove hidden growth. The same pattern can happen behind baseboards, under flooring, above ceilings, around windows, inside HVAC components, or behind exterior wall materials.
If mold returns in the same place, do not keep repeating the same cleaning method. Repeated mold usually means the area needs a closer moisture investigation. It may also mean the affected material needs to be opened, removed, dried, or evaluated more carefully.
If the main issue is repeated mold after previous cleanup, use the guide on why mold keeps coming back after cleaning to narrow down the recurrence pattern. If the concern is whether cleanup failed, use signs mold was not fully removed to look for warning signs that contamination may still be present.
The Permanent Mold Removal Sequence
Permanent mold removal is a sequence. If the steps happen out of order, the cleanup may look successful at first but fail later.
1. Find the moisture source
Before cleaning, identify why the area became damp. The source may be a plumbing leak, roof leak, window leak, basement seepage, HVAC condensation, high humidity, failed flashing, poor ventilation, or water trapped inside a wall or floor system.
If the source is not obvious, the visible mold may be only a symptom. Cleaning the symptom without finding the moisture path allows the problem to continue behind the surface.
2. Stop the moisture
Mold cleanup should not begin as a final repair until the active moisture source is controlled. That may mean fixing a leak, drying wet material, improving drainage, correcting condensation, reducing humidity, repairing flashing, or addressing a basement water intrusion problem.
If moisture is still entering the area, mold can return even after aggressive cleaning.
3. Identify whether the material can be cleaned
The material matters. Smooth, nonporous surfaces are usually easier to clean than porous materials. Porous materials can absorb moisture and allow mold to grow beneath the surface.
Drywall, insulation, carpet padding, ceiling tiles, MDF, particle board, and heavily damaged wood may not be safe to treat with surface cleaning alone if mold has penetrated the material.
4. Remove unsalvageable contaminated material
When mold has entered porous material, the safest long-term solution is often removal. This is especially true when the material stayed wet, smells musty, has softened, is crumbling, or has visible growth on both sides.
Trying to save contaminated material may leave mold fragments, spores, and damp organic material in place.
5. Clean salvageable surfaces safely
Surfaces that can be saved should be cleaned with the right protection, containment, and method. The goal is to physically remove mold growth, not just bleach or disguise the stain.
For small areas, careful DIY cleanup may be reasonable when the moisture source is fixed and the material is safe to clean. For larger, hidden, recurring, or HVAC-related mold, professional remediation is often the safer path.
6. Dry the area completely
Cleanup is not complete until the area is dry. Rebuilding, repainting, or reinstalling trim over damp material can trap moisture and restart mold growth.
Use drying time, ventilation, dehumidification, and moisture checks as needed before closing the area back up.
7. Verify that the problem is controlled
After cleanup, watch the area for returning odor, staining, swelling, peeling paint, condensation, or damp readings. Mold that returns quickly usually means moisture or contaminated material remains.
8. Prevent recurrence
The final step is long-term control. Keep the area dry, monitor previously affected spots, manage humidity, fix leaks quickly, and avoid covering damp material with paint, trim, flooring, insulation, or new drywall.
Find Where Mold Is Hiding Before You Clean
Visible mold is not always the full problem. Mold often appears on a surface because moisture has been moving behind that surface for days, weeks, or longer.
Hidden mold is more likely when there is a musty odor, recurring staining, bubbling paint, soft drywall, swollen trim, damp flooring, ceiling discoloration, or mold that returns soon after cleaning.
If you are not sure where the mold is coming from, start with the area where the symptoms appear:
- Use signs of mold behind walls if staining, odor, soft drywall, or recurring discoloration points to a wall cavity problem.
- Use signs of mold inside ceiling cavities if the warning signs are near a ceiling, attic space, roof leak, bathroom above, or overhead plumbing line.
- Use signs of mold behind baseboards if the lower wall, trim, floor edge, or wall-floor joint smells musty or shows staining.
- Use signs of mold under laminate flooring if laminate flooring is swelling, separating, smelling musty, or showing dark changes near seams or edges.
- Use signs odors are linked to mold growth if the main warning sign is a persistent musty smell without obvious visible growth.
Do not rely only on what you can see from the room side. Mold often follows the moisture path, and that path may run behind drywall, under flooring, inside trim gaps, above ceilings, or behind exterior wall assemblies.
Remove Mold Based on the Material, Not Just the Stain
The right mold removal method depends on the material. A dark spot on painted drywall, unfinished wood, ceiling drywall, bathroom paint, or insulation may look similar, but those materials do not handle moisture or cleaning the same way.
Before choosing a cleanup method, ask three questions:
- Is the mold only on the surface, or has it entered the material?
- Did the material stay wet long enough to lose strength, swell, crumble, or smell musty?
- Can the material be cleaned without trapping contamination or moisture behind it?
Drywall mold
Drywall is one of the most common mold materials because the paper facing provides a food source and the gypsum core can hold moisture. If mold is only on a cleanable painted surface, limited cleanup may be possible. If mold has entered the paper, the back side, or the wall cavity, removal may be needed.
For drywall-specific cleanup and replacement decisions, use how to remove mold from drywall.
Painted wall mold
Painted walls can sometimes be cleaned when the paint film is intact and the mold is surface-level. But peeling paint, bubbling, softness, staining that returns, or a musty smell from the wall can point to moisture behind the painted surface.
For cleaning finished wall surfaces without damaging the paint more than necessary, use how to remove mold from painted walls.
Ceiling mold
Ceiling mold needs extra caution because the source may be above the room: a roof leak, attic condensation, bathroom leak, plumbing line, or HVAC issue. Cleaning the visible ceiling stain does not solve the problem if the upper side of the ceiling drywall or insulation is still damp.
For exposed ceiling-surface cleanup, use how to clean mold from ceilings. If the ceiling drywall itself may be contaminated, use how to remove mold from ceiling drywall.
Bathroom wall mold
Bathroom mold is often caused by repeated humidity, condensation, poor exhaust ventilation, wet grout lines, shower overspray, or damp painted surfaces. Some bathroom wall mold is surface-level, but recurring bathroom mold may point to a deeper moisture or ventilation problem.
For bathroom-specific cleaning guidance, use the best way to clean mold from bathroom walls.
Drywall vs wood
Drywall and wood behave differently after mold growth. Drywall is often more likely to need removal when the paper face or back side is contaminated. Wood may sometimes be cleaned, dried, and treated if it is still structurally sound, but damaged, rotted, or deeply contaminated wood needs a more careful decision.
For the material comparison, use mold on drywall vs wood.
Know When Mold-Damaged Materials Should Be Repaired or Replaced
One of the biggest mold cleanup mistakes is trying to save material that should be removed. Another is removing material that could have been cleaned and dried safely. The right decision depends on the material, the depth of contamination, how long it stayed wet, and whether it still performs its job.
In general, replacement is more likely when a material is porous, stayed wet, smells musty after cleaning, has visible mold on more than one side, has softened, has lost strength, or will be sealed inside a wall, ceiling, floor, or insulation cavity.
Repair may be possible when the source is fixed, the material is structurally sound, contamination is limited, and the affected surface can be cleaned and dried without leaving hidden mold behind.
Use these material-specific guides before deciding what to save:
- Should You Repair or Replace Mold-Damaged Drywall?
- Should You Repair or Replace Mold-Damaged Wood?
- Should You Repair or Replace Mold-Damaged Insulation?
Do not cover mold-damaged material with paint, paneling, flooring, insulation, or trim until the material decision is clear. Covering the area can hide the problem while moisture and contamination remain active behind the surface.
Mold by Location and Moisture Source
Mold removal also depends on where the moisture starts. The same cleaning method will not solve every mold problem because basement mold, HVAC mold, siding-related mold, and window-area mold usually come from different moisture paths.
Use the location of the mold to narrow the source before deciding whether the area can be cleaned, opened, dried, repaired, or professionally remediated.
Mold in exterior walls, siding, windows, and doors
Mold near exterior walls often points to water entering from outside the wall system. The source may be failed siding, missing flashing, leaking windows, exterior door gaps, wall penetrations, or water trapped behind cladding.
Do not treat these problems as simple indoor surface mold until the exterior moisture path is understood. Cleaning the inside surface may hide the symptom while the wall keeps getting wet from outside.
- Use signs of mold growth in exterior walls if mold, odor, or staining appears on exterior-facing walls.
- Use signs of mold growth behind exterior siding if the issue may be trapped behind siding or sheathing.
- Use signs of mold growth around windows if mold appears around trim, frames, sills, or nearby drywall.
- Use signs of mold growth around exterior doors if staining, swelling, or odor appears near door frames or thresholds.
- Use signs of mold growth caused by flashing failures if mold appears near roof-wall intersections, windows, doors, chimneys, or other transition points.
Mold in basements and sump pump areas
Basement mold is usually connected to moisture from below grade. Common sources include wall seepage, floor moisture, poor drainage, high basement humidity, hydrostatic pressure, damp stored items, or sump pump problems.
Basement mold should be handled as a moisture-control problem first. If the basement keeps getting damp, cleaning the mold will not prevent it from returning.
- Use signs of mold growth in basements for broad basement warning signs.
- Use signs of mold growth on basement walls if the issue appears on foundation walls, finished walls, or wall coverings.
- Use signs of mold growth on basement floors if mold, odor, or staining appears near concrete, flooring, or floor-wall joints.
- Use signs of mold growth caused by sump pump failures if mold appears after pump failure, standing water, or repeated basement dampness.
Mold in HVAC systems and ducts
HVAC mold is different from ordinary surface mold because air movement can spread odor and particles through the home. Mold in HVAC systems may come from condensation, dirty coils, clogged drain lines, damp ducts, poor filtration, or oversized equipment that does not dehumidify well.
Do not treat suspected HVAC mold as a simple wipe-down issue. Mold inside air handlers, ducts, coils, drain pans, or insulation often requires a more careful inspection and may need professional cleaning or repair.
- Use signs of mold growth in HVAC systems if the warning signs appear near vents, air handlers, coils, or drain pans.
- Use why mold forms inside HVAC systems if you need to understand the source of the problem.
- Use signs of mold growth from HVAC condensation if condensation appears to be the main moisture source.
- Use signs of mold growth in HVAC ducts if odor, dust, visible growth, or symptoms seem connected to air movement.
- Use why mold forms inside HVAC ductwork if the problem may be inside the duct system itself.
Mold in garages, laundry rooms, and water heater areas
Utility and service areas often develop mold because they combine moisture sources with poor airflow. Garages may have damp concrete, stored cardboard, exterior air leaks, or roof/wall moisture. Laundry rooms may have dryer vent leaks, washer hose leaks, drain problems, or trapped humidity. Water heater areas may have slow leaks, condensation, pan overflow, or damp flooring.
- Use signs of mold growth in garages if mold appears on stored items, drywall, concrete edges, or garage wall surfaces.
- Use signs of mold in laundry rooms if the problem is near washers, dryers, hoses, drains, or damp walls.
- Use signs of mold growth near water heaters if mold appears around the tank, drain pan, base, nearby drywall, or surrounding floor.
Seasonal Mold Problems
Some mold problems appear or worsen during certain seasons. That does not mean the mold is random. It usually means seasonal conditions are changing the moisture balance inside the home.
Summer mold is often connected to high humidity, air conditioning condensation, damp basements, and moisture trapped in poorly ventilated areas. Winter mold is often connected to condensation on cold surfaces, poor airflow, closed windows, roof or attic moisture, and humidity that cannot escape.
Seasonal transitions can also expose hidden problems. A home may develop mold after weather shifts, heavy rain, freeze-thaw cycles, spring thaw, humid summer air, or heating-season condensation.
- Use why mold problems get worse in summer if mold increases during hot or humid weather.
- Use why homes develop mold problems in winter if condensation, closed-house conditions, or cold surfaces seem involved.
- Use why mold problems often appear after seasonal changes if mold shows up after weather shifts rather than after one obvious leak.
Mold Cleanup Products and Safety Gear
The right product can help with mold cleanup, but it does not solve the problem on its own. Cleaners, sprays, brushes, respirators, gloves, and coatings only work as part of the larger process: stop the moisture, remove or clean the contaminated material, dry the area, and prevent the condition from returning.
For small surface mold cleanup, homeowners may need a suitable cleaning product, scrubbing tool, gloves, eye protection, and a respirator depending on the size and risk of the job. For larger or hidden mold, safety gear alone does not make the job safe enough for DIY work.
Use these guides to choose the right cleanup category:
- Best Mold Cleaning Products for Household Use
- Best Mold Removal Sprays for Indoor Use
- Best Mold Removal Brushes and Tools
- Best Mold Safety Equipment for Homeowners
- Best Respirators for Mold Cleanup
- Best Protective Gloves for Mold Removal
- Best Mold Prevention Coatings for Walls
Do not use mold products to cover up active moisture problems. Mold-resistant coatings, primers, and sprays are not substitutes for drying wet material, removing contaminated porous material, or fixing leaks.
DIY Mold Removal vs Professional Mold Remediation
Some mold problems can be handled by a careful homeowner. Others need a mold remediation professional. The difference is not only the size of the stain. The real question is whether the mold is limited, accessible, surface-level, and caused by a moisture source that has already been fixed.
DIY mold removal may be reasonable when:
- The affected area is small and easy to access.
- The moisture source is known and fixed.
- The material is nonporous or only lightly affected on the surface.
- There is no sign of hidden mold inside walls, ceilings, ducts, or flooring.
- The person doing the cleanup can use proper protection and ventilation.
- The mold does not keep returning after cleanup.
Professional remediation is usually safer when:
- Mold is widespread, recurring, or hidden.
- Drywall, insulation, subflooring, framing, or ceiling cavities may be contaminated.
- The mold source is unclear.
- HVAC systems or ductwork may be involved.
- There is a persistent musty odor with no obvious surface mold.
- Materials need controlled removal and containment.
- Insurance documentation, estimates, or formal remediation records may be needed.
If you are unsure where your situation falls, use these guides before starting demolition or cleanup:
- When to Hire a Mold Remediation Professional
- Signs You Need Professional Mold Removal
- How to Choose a Mold Remediation Company
- Questions to Ask Before Hiring a Mold Remediation Company
- What to Expect During Mold Remediation
A professional should not simply spray visible mold and leave. Proper remediation usually involves identifying the moisture source, isolating the affected area when needed, removing contaminated material, cleaning remaining surfaces, drying the space, and helping confirm that the conditions that caused mold have been corrected.
Mold Remediation Costs, Quotes, and Scams
Mold remediation cost depends on the size of the affected area, the location of the mold, how much material must be removed, whether containment is needed, and whether the moisture source has been corrected. A small surface cleanup is very different from mold behind walls, inside ceilings, inside HVAC systems, or across multiple rooms.
Cost also depends on what the contractor includes. One quote may include containment, removal, cleaning, drying, disposal, and post-cleanup verification. Another may only include surface treatment. Comparing price alone can be misleading if the scope of work is not the same.
Before hiring anyone, make sure the quote explains what will be removed, what will be cleaned, how the work area will be contained, how the moisture source will be addressed, and what documentation you will receive afterward.
- Use how much mold remediation costs to understand the main price factors.
- Use how much mold inspection costs if you need testing, inspection, or professional evaluation before cleanup.
- Use how much mold removal from walls costs if the affected area is inside drywall, framing cavities, or finished wall systems.
- Use how to compare mold remediation quotes before choosing between contractors.
- Use how to avoid mold remediation scams if a company uses pressure tactics, vague pricing, scare language, or treatment-only promises.
A good remediation quote should describe the work clearly enough that you know what problem is being solved. Be cautious with any company that promises permanent mold removal without explaining the moisture source, contaminated material, containment needs, or drying process.
Mold Damage, Insurance, and Documentation
If mold damage may become an insurance issue, document it before tearing out materials. Take photos, record the moisture source if known, save invoices, and document visible damage before cleanup changes the evidence.
Insurance coverage can depend on the cause of the moisture, how sudden the event was, whether the damage was reported promptly, and what the policy excludes. Mold from a sudden covered water event may be treated differently than mold from long-term neglect, slow seepage, high humidity, or maintenance problems.
This hub cannot tell you what your specific policy covers, but it can help you avoid common documentation mistakes. Before cleanup, record the visible mold, the suspected water source, damaged materials, affected rooms, dates, repair invoices, inspection reports, and contractor estimates.
- Use how to document mold damage for insurance claims before removing materials or cleaning evidence.
- Use what mold damage insurance typically covers to understand common coverage patterns and limitations.
- Use how to avoid insurance claim denials for mold damage if you need to protect your claim from missing documentation, delayed reporting, or unclear repair records.
When the damage is significant, consider documenting first, then contacting the insurer or a qualified professional before disturbing the area. That is especially important when mold is connected to a burst pipe, appliance leak, storm damage, roof leak, or other event that may need proof.
How to Prevent Mold After Removal
After cleanup, the rule is simple: keep the area dry. If moisture returns, mold can restart on the same material or on newly installed material.
The most important prevention step is to correct the moisture source that caused the mold. That may mean repairing a leak, improving ventilation, managing humidity, fixing exterior water entry, drying a basement, correcting HVAC condensation, or removing materials that keep absorbing moisture.
After cleanup, use these prevention habits:
- Keep indoor humidity under control, especially in basements, bathrooms, laundry rooms, closets, and poorly ventilated areas.
- Dry leaks and wet materials quickly instead of waiting for them to air-dry slowly.
- Do not paint, caulk, insulate, or rebuild over damp material.
- Watch previously affected areas for returning odor, staining, swelling, peeling paint, or condensation.
- Use exhaust fans, dehumidifiers, drainage improvements, or ventilation changes when moisture keeps returning.
- Store cardboard, fabrics, and porous belongings away from damp floors and walls.
- Inspect nearby hidden areas if mold returns after cleanup.
If the broader issue is repeated moisture damage, use how to prevent recurring moisture damage to build a long-term prevention plan. If indoor humidity may be part of the problem, use how to test indoor humidity levels. If you need equipment guidance, use how to choose and use a dehumidifier effectively.
Permanent Mold Removal Checklist
Use this checklist before treating a mold problem as finished:
- Find the moisture source before cleaning.
- Stop the leak, condensation, humidity problem, seepage, or water intrusion.
- Identify whether mold is only on the surface or inside porous material.
- Remove materials that cannot be cleaned safely.
- Clean salvageable surfaces with proper protection and containment.
- Dry the area completely before rebuilding, repainting, or reinstalling trim.
- Check nearby hidden areas for remaining mold or dampness.
- Use the right safety gear for the cleanup risk.
- Hire a professional when mold is widespread, hidden, recurring, or inside HVAC systems.
- Document damage before removal if insurance may be involved.
- Monitor humidity and moisture afterward so the problem does not restart.
If any item on this checklist is missing, the mold problem may not be fully resolved. The most common failure is cleaning first and investigating moisture later. Reverse that order: find the moisture, stop it, then clean or remove the affected material.
Frequently Asked Questions
Can mold be removed permanently?
Active mold growth can be removed permanently from a specific area when the moisture source is corrected and contaminated material is cleaned or removed properly. However, mold spores are always present in normal indoor and outdoor air, so the goal is not to remove every spore from the home. The goal is to remove active growth and keep the area dry enough that mold cannot keep growing.
Why does mold come back after cleaning?
Mold usually comes back because the moisture source was never fixed, the material stayed damp, hidden mold remained behind the surface, or porous material was cleaned only on the face. If the same area grows mold again, treat it as a moisture investigation, not just a cleaning failure.
Does killing mold remove the problem?
No. Killing mold is not the same as removing mold contamination. Dead mold fragments and spores can still remain on or inside material. Effective cleanup focuses on physical removal, safe disposal of unsalvageable material, drying, and moisture control, not just applying a product that claims to kill mold.
When does moldy drywall need to be removed?
Moldy drywall is more likely to need removal when the paper facing is contaminated, the back side is moldy, the drywall stayed wet, the material is soft or crumbling, or the mold is inside the wall cavity. Surface cleaning may not be enough when drywall has absorbed moisture or mold has grown into the paper layer.
Can I remove mold myself?
Small, surface-level mold may be reasonable for a homeowner to clean if the moisture source is fixed, the material is safe to clean, and proper protection is used. DIY cleanup is not a good choice when mold is widespread, hidden, recurring, inside HVAC systems, or connected to contaminated porous materials that need controlled removal.
When should I hire a mold remediation professional?
Hire a professional when mold is extensive, hidden inside walls or ceilings, tied to HVAC systems, returning after repeated cleaning, or caused by a moisture source you cannot identify. Professional remediation is also wise when materials need containment, demolition, disposal, drying, or documentation for insurance or property records.
How long does mold take to grow after water damage?
Mold can begin developing quickly after water damage when materials stay wet. The exact timing depends on moisture, temperature, material type, airflow, and contamination, but wet drywall, insulation, carpet padding, and wood should be dried as soon as possible. Use how long mold takes to grow after water damage for the detailed timeline.
What is the most important step after mold removal?
The most important step after mold removal is keeping the area dry. That means confirming the moisture source is fixed, drying the material before rebuilding, monitoring humidity, and watching the area for returning odor, staining, swelling, or condensation. Mold removal is only permanent if the conditions that caused mold are gone.
Next Steps: Choose the Mold Problem You Have
If you are not sure what to do next, start with the situation that best matches what you see.
- If mold may be hidden behind finished surfaces, start with signs of mold behind walls, signs of mold inside ceiling cavities, or signs of mold behind baseboards.
- If you need to clean a specific material, use the guides on removing mold from drywall, removing mold from painted walls, or cleaning mold from ceilings.
- If you are deciding whether damaged materials can stay, compare whether to repair or replace mold-damaged drywall, repair or replace mold-damaged wood, or repair or replace mold-damaged insulation.
- If the mold appears in a specific area, use the related guides for basement mold growth, HVAC mold growth, mold growth around windows, or mold in laundry rooms.
- If the mold may require professional help, review when to hire a mold remediation professional, how to choose a mold remediation company, and what to expect during mold remediation.
- If cost, quotes, or insurance are the next concern, start with mold remediation cost, comparing mold remediation quotes, or documenting mold damage for insurance.
Permanent mold removal is not one product or one cleaning method. It is the process of correcting moisture, handling contaminated material correctly, drying the area fully, and choosing the right next step for the specific place mold is growing.
80 Comments
Comments are closed.