How to Clean Mold From Ceilings (Safe Ceiling Mold Cleaning Without Making It Worse)
To clean mold from ceilings safely, protect yourself from overhead exposure, cover the area below, apply a ceiling-safe cleaner lightly, wipe gently, and dry the surface completely. This process is best for small surface mold spots on firm, finished, painted ceilings. Soft drywall, sagging areas, spreading stains, or recurring mold usually point to a deeper moisture problem that should not be handled as simple surface cleaning.
The key is to clean the mold without soaking the ceiling, scraping the surface aggressively, or spreading spores through the room. Ceiling mold cleanup should stay controlled, especially in bathrooms, kitchens, laundry areas, and rooms where warm humid air collects near the ceiling.
If ceiling mold continues to return after cleaning, the problem is usually moisture-related, not just a surface-cleaning issue. For broader mold cleanup and recurrence guidance, see how to remove mold permanently.
This guide focuses on cleaning visible surface mold from stable ceiling surfaces. If the ceiling drywall feels soft, swollen, sagging, crumbly, wet, or repeatedly moldy, the issue may involve the drywall material itself. In that case, see can moldy ceiling drywall be cleaned, or does it need replacing?.
Why Mold Grows on Ceilings
Ceiling mold usually forms when moisture collects overhead and stays there long enough to support growth. Because warm, humid air rises, ceilings are often exposed to steam, condensation, and trapped moisture before walls or lower surfaces show obvious signs of a problem.
Common causes of mold on ceilings include bathroom humidity, condensation on cooler ceiling surfaces, poor airflow, roof leaks, plumbing leaks, or moisture trapped above the ceiling. Identifying the cause matters because cleaning the visible mold will not prevent it from returning if the ceiling keeps getting damp.
The pattern of the mold matters. Speckled mold above a shower usually points to humidity and condensation, while mold around a stain, sagging area, or single spreading spot may point to a leak or moisture above the ceiling.
When Surface Mold on Ceilings Can Be Cleaned Safely
Not all ceiling mold requires professional removal. In many homes, mold that forms on painted ceiling surfaces is shallow and limited to the outer layer. When growth remains surface-level and covers a small area, careful cleaning is usually possible.
Before beginning any cleaning process, it is important to evaluate the size of the affected area and the condition of the ceiling material.
Small Mold Spots on Painted Ceilings
Small patches of ceiling mold are typically safe to clean when the affected area is limited, the surface is painted or finished, and the ceiling remains structurally sound. These situations commonly occur in bathrooms where humidity builds up from repeated showers and leaves light surface spotting on the ceiling.
Surface mold that is suitable for careful cleaning often includes:
- Small dark spots or speckles on painted ceilings
- Thin surface discoloration
- Localized mold growth near corners or edges
- Growth limited to a clearly defined area
These cases usually result from condensation rather than water damage.
Firm, Finished Ceiling Surfaces
Before cleaning, check that the ceiling surface remains firm and intact. Painted ceilings should feel solid and stable when lightly pressed, with no sagging, softness, crumbling, or swelling.
Signs that the ceiling surface is stable include:
- No sagging areas
- No soft or crumbling materials
- No visible cracks spreading outward
- No large water stains
If these warning signs are present, stop before cleaning. This article is for surface cleaning only; damaged ceiling drywall may need a clean-or-replace decision instead.
When Mold Appears After Humidity Exposure
Many ceiling mold problems are caused by humidity rather than direct water intrusion, especially in bathrooms where shower steam collects overhead.
Humidity-driven ceiling mold commonly appears in:
- Bathrooms with frequent hot showers
- Ceilings above tubs or showers
- Upper corners where warm air collects
- Areas with limited ventilation
Preventing future growth often requires improving airflow and humidity control. If the ceiling mold is caused by shower steam, bathroom mold prevention strategies can help reduce the moisture conditions that allow mold to return.
Situations That May Require Professional Help
Some ceiling mold should be evaluated before cleaning, especially when the ceiling shows signs of water damage, unstable material, spreading stains, or repeated growth.
Consider professional evaluation when:
- Mold covers a large section of the ceiling
- The ceiling material feels unstable
- Water stains continue to grow
- Mold returns repeatedly after cleaning
- Strong musty odors remain present
Expanding stains are often an early warning of deeper damage. Learn how to recognize critical indicators in signs of ceiling water damage.
These conditions may signal hidden moisture problems that require more than surface cleaning. Warning signs such as musty odors from above, recurring stains, or mold around ceiling penetrations are covered in signs of mold inside ceiling cavities.
Safety Preparation Before Cleaning Mold From Ceilings
Cleaning mold from ceilings requires careful preparation before any cleaning begins. Because ceiling work involves overhead exposure, dripping liquid, and ladder use, safety preparation helps prevent injury and reduces the chance of spreading mold particles throughout the room.
Supplies Needed to Clean Mold From Ceilings
Having the right supplies ready before starting helps you clean more safely and avoid unnecessary ladder movement. Ceiling mold cleanup should use controlled moisture, gentle tools, and materials that protect the room below from drips or falling residue.
Useful supplies may include:
- Disposable gloves
- Safety goggles
- An N95 mask or respirator
- Plastic sheeting or drop cloths
- A spray bottle or damp cloth for controlled application
- Mild detergent solution, diluted white vinegar, or a mold cleaner labeled safe for painted surfaces
- Soft sponges, microfiber cloths, or soft-bristle brushes
- Clean towels for drying
- Bags for used cleaning materials
Avoid abrasive scrubbers, heavy soaking, or harsh chemical mixtures that may damage paint, weaken ceiling materials, or cause excess liquid to drip from the ceiling. The goal is to use enough cleaner to treat the mold without saturating the surface.
Tip: Apply cleaner to the cloth or sponge instead of spraying heavily overhead. This gives better control and reduces dripping into your eyes, fixtures, flooring, or ceiling seams.
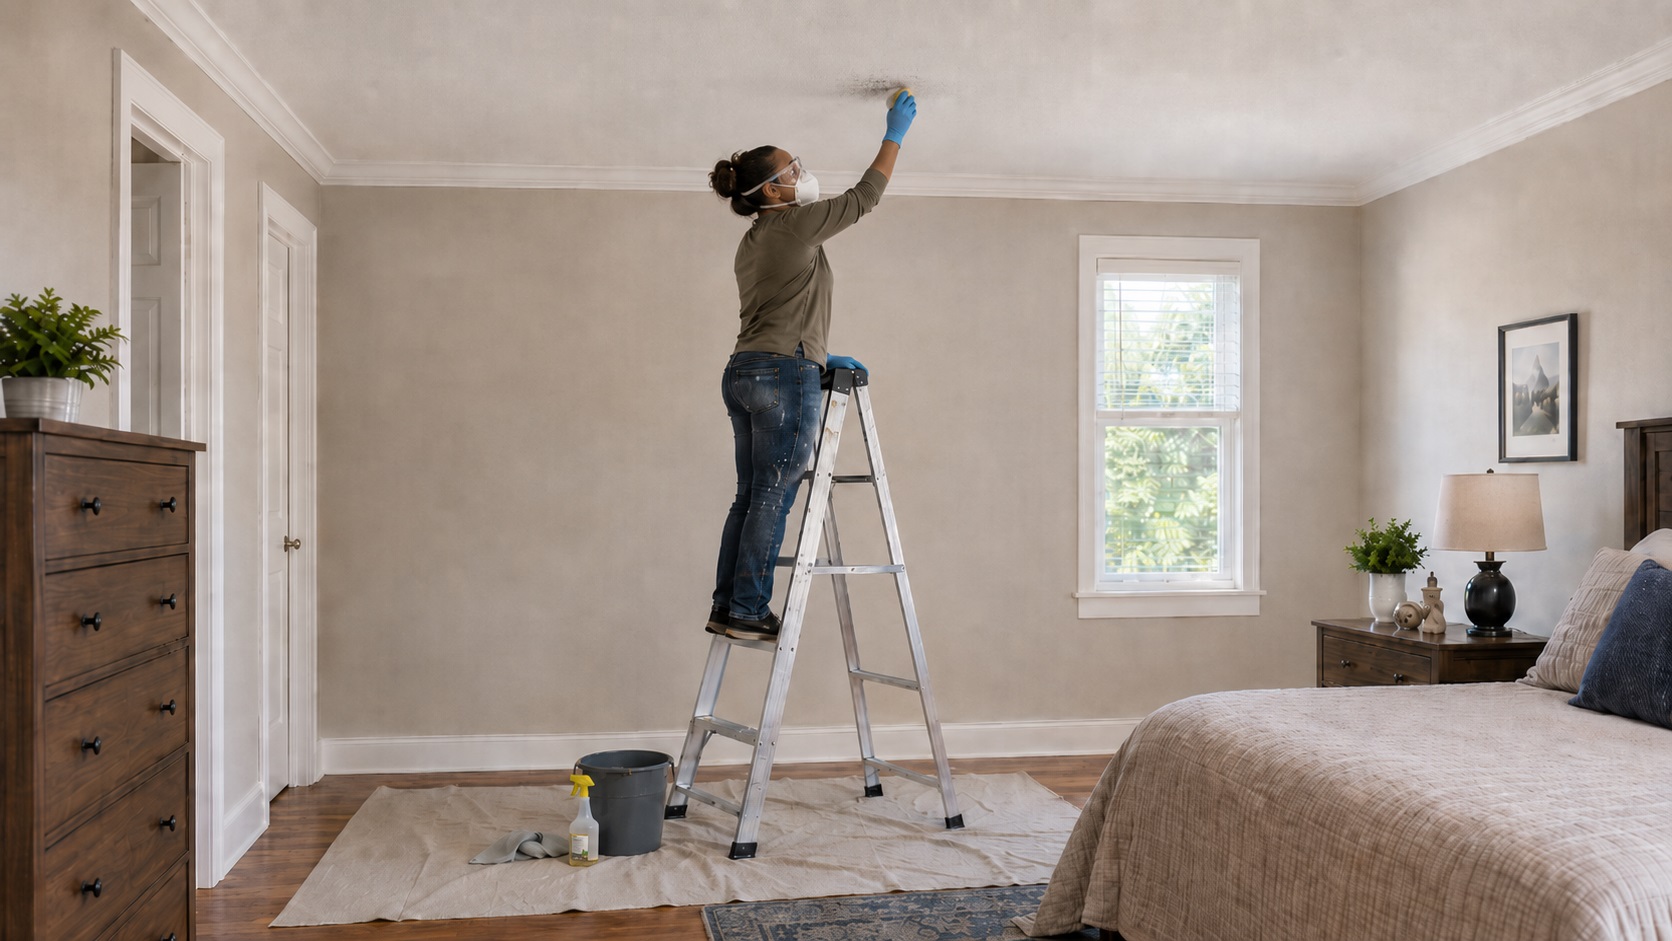
Wear Proper Protective Equipment
Protective equipment helps reduce exposure to mold particles and cleaning solutions. Since ceiling cleaning involves working directly underneath the affected surface, overhead exposure risk is higher than when cleaning walls.
Recommended protective items include:
- Disposable gloves to protect skin
- Safety goggles to shield eyes from dripping solution
- An N95 mask or respirator to reduce inhalation of mold particles
- Long sleeves to limit skin contact
Eye protection is especially important because cleaning solution can drip unexpectedly during overhead work.
Protect Floors and Surrounding Surfaces
Cleaning ceilings often creates drips that fall directly below the work area. Without protection, floors, fixtures, and furniture may become contaminated or damaged.
Before starting, protect nearby areas by:
- Covering floors with plastic sheets or drop cloths
- Moving furniture away from the work zone
- Covering fixtures that cannot be moved
- Keeping electrical items protected from moisture
Proper containment helps prevent mold particles from spreading to clean surfaces. If the mold is near a ceiling light, exhaust fan, or electrical fixture, avoid spraying directly into the fixture and turn off power to that fixture before cleaning around it.
Use a Stable Ladder Positioned Safely
A secure ladder is essential when working on ceilings. Many injuries occur when ladders are placed on unstable surfaces or when users reach too far instead of repositioning the ladder.
Use a stable ladder that lets you reach the ceiling without leaning backward or stretching sideways. Do not stand on toilets, tubs, counters, chairs, or unstable furniture to clean overhead mold.
Safe ladder practices include:
- Placing the ladder on a dry, level surface
- Keeping both feet firmly positioned
- Avoiding leaning too far sideways
- Repositioning the ladder instead of overreaching
If the floor becomes wet during cleaning, pause and dry the area before continuing.
Prepare Cleaning Tools Before Starting
Having tools ready before beginning helps prevent interruptions that may increase safety risks. Searching for supplies while standing on a ladder increases the chance of losing balance.
Common ceiling cleaning tools include:
- Spray bottle with cleaning solution
- Soft sponge or microfiber cloth
- Soft-bristle brush for textured areas
- Clean towels for drying
Using gentle tools reduces the risk of damaging painted ceiling surfaces.
Ensure Adequate Ventilation During Cleaning
Ventilation helps reduce airborne mold particles and speeds drying after cleaning. Running an exhaust fan or opening windows improves air circulation and reduces moisture buildup.
Ventilation is especially important in bathrooms where humidity levels can remain elevated. If ceiling mold is related to frequent condensation, improving ventilation practices described in bathroom mold prevention strategies can help reduce future growth.
Check the Ceiling Condition Before Applying Liquid
Before applying cleaning solution, inspect the ceiling carefully. Applying liquid to damaged materials may worsen structural problems.
Look for warning signs such as:
- Soft or spongy ceiling surfaces
- Sagging areas
- Peeling paint or cracked drywall
- Expanding water stains
If these signs are present, stop before applying cleaner. The ceiling may need drying, repair, or professional inspection before surface cleaning is safe.
How to Clean Mold From Ceilings Step by Step
Once safety preparation is complete, the next step is cleaning the mold using controlled, gentle methods. Ceiling cleaning requires careful application to prevent dripping, surface damage, or spreading mold particles. Following a structured process helps ensure the mold is removed effectively without creating new problems.
Step 1: Mix a Safe Cleaning Solution
Begin by preparing a cleaning solution suitable for painted ceiling surfaces. The solution should be strong enough to remove mold but gentle enough to protect paint and ceiling finishes.
Common ceiling-safe cleaning solutions include:
- Mild household detergent mixed with water
- White vinegar diluted with water
- Commercial mold-cleaning solutions labeled safe for painted surfaces
Avoid overly strong chemical mixtures or excessive concentrations, as these can damage paint or weaken ceiling materials. Never mix bleach, ammonia, vinegar, or commercial cleaners together, because incompatible chemicals can release dangerous fumes.
Comparing Common Ceiling Mold Cleaning Solutions
Several cleaning solutions can be used for surface mold on ceilings. Choosing the right option depends on the ceiling material, paint condition, and severity of the mold growth.
| Cleaning Solution | Best Use | Important Notes |
|---|---|---|
| Mild Detergent and Water | General cleaning of light surface mold | Safe for most painted ceilings and less likely to damage finishes |
| Diluted White Vinegar | Small mold spots caused by humidity | May help reduce odor and surface mold, but should be applied lightly |
| Commercial Mold Cleaner | More stubborn surface mold | Use products labeled safe for painted surfaces and follow instructions carefully |
Whichever solution you choose, test a small area first if the paint is old, flat, stained, or already peeling.
Step 2: Apply the Solution Lightly
Apply the cleaning solution using a spray bottle or damp cloth. The goal is to lightly moisten the moldy area without saturating the ceiling.
To reduce dripping and improve control:
- Use a light mist rather than heavy spraying
- Aim directly at the affected area
- Avoid soaking the ceiling surface
- Work in small sections
Applying too much liquid increases the risk of drips and may allow moisture to penetrate the ceiling material.
Step 3: Gently Clean the Molded Surface
After applying the solution, use a soft sponge, microfiber cloth, or soft-bristle brush to clean the mold. Gentle pressure helps lift mold from the surface without damaging the paint layer.
During cleaning:
- Use slow, controlled motions
- Avoid aggressive scrubbing
- Focus only on the affected area
- Reapply solution lightly if needed
Textured ceilings require extra care because mold may collect in uneven surfaces. Use minimal pressure to avoid removing texture material.
If the mold is on damaged, exposed, soft, sagging, or repeatedly wet ceiling drywall rather than a stable painted surface, the cleanup decision may be different. See whether moldy ceiling drywall can be cleaned or needs replacing for ceiling-drywall-specific guidance.
Step 4: Wipe Away Residue Carefully
After cleaning, use a clean, damp cloth to remove remaining residue. This step helps eliminate loosened mold particles and cleaning solution from the surface.
Wipe gently and avoid leaving excess moisture behind.
Removing residue helps reduce the chance of streaking or surface buildup.
Step 5: Inspect the Area After Cleaning
Once the visible mold is removed, inspect the area carefully to confirm that no remaining patches are present.
Look for:
- Remaining discoloration
- Missed spots near edges
- Mold remaining in textured grooves or uneven areas
- Signs of deeper staining
If mold persists despite repeated cleaning, it may indicate deeper moisture conditions requiring further evaluation.
Recurring growth after cleaning often signals unresolved humidity issues. Reviewing why mold keeps coming back after cleaning can help identify the underlying causes.
Ceiling Mold Cleaning Mistakes to Avoid
Cleaning ceiling mold incorrectly can worsen damage or spread contamination. Avoiding common mistakes helps protect ceiling materials and reduces the risk of mold returning after cleaning.
Using Too Much Liquid
Oversaturating the ceiling is one of the most common mistakes. Excess liquid can soak into ceiling materials, allowing moisture to spread deeper into the structure. Always apply cleaning solutions lightly and work in small controlled sections.
Scrubbing Too Aggressively
Harsh scrubbing can damage paint layers or textured finishes. Damaged surfaces may become more vulnerable to moisture and future mold growth. Gentle pressure is usually enough to remove surface mold safely.
Mixing Strong Chemicals Improperly
Combining cleaning chemicals can create dangerous fumes and damage ceiling finishes. Use only one cleaning solution at a time and follow manufacturer instructions carefully.
Ignoring the Moisture Source
Cleaning mold without addressing moisture allows it to return. If humidity, condensation, or leaks continue, mold may reappear even after thorough cleaning. Identifying and correcting the moisture source is essential for long-term control.
How Long Ceiling Mold Cleaning Usually Takes
The time required to clean ceiling mold depends on the size of the affected area, the type of ceiling surface, and how quickly the area dries afterward. Small patches of surface mold may take less than an hour to clean, while larger areas can require additional time for preparation and drying.
Most ceiling cleaning tasks follow this general timeline:
- Preparation and setup: 10–20 minutes
- Cleaning small mold areas: 15–45 minutes
- Drying time with good airflow: 1–2 hours
- Final inspection and ventilation: 15–30 minutes
Drying time is especially important. Even after visible mold is removed, moisture left behind can allow mold to return. Maintaining airflow until the ceiling feels completely dry helps prevent recurring growth.
How to Dry the Ceiling Properly After Cleaning
Drying the ceiling after cleaning is just as important as removing the mold itself. Any moisture left behind can allow mold to return quickly. Proper drying removes residual moisture and helps restore normal surface conditions.
Increase Airflow Immediately After Cleaning
Air movement is the most effective way to dry ceiling surfaces. Increasing airflow allows moisture to evaporate more quickly and reduces the chance of regrowth.
Helpful drying methods include:
- Running bathroom exhaust fans
- Using portable fans to move air across surfaces
- Opening doors to improve airflow
- Allowing air to circulate throughout the room
Airflow should continue until the ceiling is completely dry to the touch. If the ceiling became wet from leaks or water intrusion rather than surface cleaning, follow more detailed recovery steps outlined in how to dry ceilings after water damage.
How to Prevent Mold From Returning to Ceilings
Preventing ceiling mold requires reducing moisture that collects overhead. Because warm air rises, ceilings are often the first place where humidity settles and lingers after showers, cooking, or poor ventilation.
If mold returns repeatedly after cleaning, broader moisture causes may be involved. Situations like these are explained in why mold keeps coming back after cleaning.
Run Exhaust Fans During Moisture-Producing Activities
Bathrooms and kitchens produce large amounts of steam that rises toward ceilings. Running exhaust fans during showers or cooking helps remove moisture before it settles on overhead surfaces.
Allow Ceilings to Dry After Humidity Exposure
After showers or cleaning activities, allow time for the room to dry fully. Leaving doors open, running ventilation systems, or improving airflow helps ceilings dry faster and reduces the chance of recurring mold spots.
Watch for Early Ceiling Stains or Spots
Checking ceilings periodically helps identify small spots before they spread. Early cleaning and improved ventilation often prevent larger mold problems from forming.
When to Call a Professional for Ceiling Mold
Some ceiling mold situations require professional help rather than surface cleaning. Repeated mold, spreading stains, strong musty odors, large mold patches, or signs of damaged ceiling material often mean the problem is not limited to the visible surface.
Surface cleaning may not be enough when you notice:
- Mold returning to the same ceiling spot after cleaning
- Dark stains that keep spreading or reappearing
- Paint that bubbles, peels, or separates from the ceiling
- Ceiling material that feels weak, damp, or unstable
- Sections of ceiling that look uneven or slightly sagged
- A musty odor that remains even after visible mold is cleaned
- Mold covering a larger section of the ceiling instead of a small isolated patch
When these warning signs appear, the priority should be finding and correcting the moisture source before repainting or repeating surface cleaning. Otherwise, the mold may return because the ceiling material is still staying damp.
Large Areas of Mold Growth
Extensive mold covering large sections of the ceiling may exceed safe cleaning limits. Large areas increase exposure risk and often signal ongoing moisture problems.
Professional help may be needed when:
- Mold spreads across wide ceiling areas
- Multiple rooms show mold growth
- Mold returns quickly after cleaning
- The affected area continues expanding
Large growth areas may require specialized containment and removal techniques.
Ceiling Material That Does Not Feel Stable
Do not treat unstable ceiling material as a normal cleaning project. If the surface feels soft, weak, damp, crumbly, swollen, or sagging, stop before applying cleaner. The problem may involve water-damaged drywall, hidden moisture, or contamination above the ceiling.
In that situation, the next step is evaluation, drying, or repair rather than repeated surface cleaning.
Mold That Returns After Cleaning
Recurring mold usually means the moisture source has not been corrected. Surface cleaning may remove visible growth temporarily, but mold can return if the ceiling continues to collect condensation, stay damp from a leak, or hide moisture above the surface.
If mold keeps returning in the same area, inspect for moisture problems before cleaning or repainting again. For deeper recurrence causes, see why mold keeps coming back after cleaning.
Can You Paint Over Ceiling Mold After Cleaning?
Painting over ceiling mold before the surface is clean and dry can trap moisture and allow the problem to return. Paint may hide discoloration temporarily, but it will not fix active mold growth or a damp ceiling.
Before repainting, make sure:
- Visible mold has been removed
- The ceiling is completely dry
- The moisture source has been corrected
- The surface remains firm and stable
- No stains are spreading or returning
If the mold was caused by humidity, improving ventilation before repainting helps prevent the same spots from returning. If the mold was caused by water intrusion, the ceiling may need drying or repair before paint is applied.
FAQ: Cleaning Mold From Ceilings
Can I clean ceiling mold without damaging paint?
Yes, gentle cleaning with mild solutions and soft tools helps protect painted surfaces. Avoid aggressive scrubbing or soaking the ceiling, as excessive moisture can damage paint and ceiling materials.
How long does it take for ceilings to dry after cleaning?
Drying time varies depending on airflow and humidity levels. With proper ventilation, most ceiling surfaces dry within one to two hours.
Is ceiling mold dangerous?
Small areas of surface mold on firm painted ceilings may be cleanable, but they still indicate moisture conditions that should be corrected. Larger areas, recurring mold, musty odors, spreading stains, or unstable ceiling material should be evaluated more carefully.
Why does mold return after cleaning?
Mold often returns when moisture conditions remain unchanged. High humidity, condensation, or hidden water sources allow mold to regrow even after surface cleaning.
Should I repaint the ceiling after cleaning mold?
Repainting may be helpful after a firm ceiling surface has been cleaned and completely dried. However, do not paint over active mold, damp stains, unstable ceiling material, or a recurring moisture source. Repainting should only occur once the ceiling is clean, dry, stable, and the moisture problem has been corrected.
Conclusion: Clean Surface Mold Carefully and Fix the Moisture Source
Cleaning mold from ceilings works best when the growth is small, surface-level, and located on a firm painted ceiling. Use protective gear, control dripping, apply cleaner lightly, wipe gently, and dry the surface completely before repainting or returning the room to normal use.
If the mold returns, spreads, appears near stains, or develops on unstable ceiling material, surface cleaning is not enough. The next step is to find the moisture source and determine whether hidden water damage, cavity mold, or damaged ceiling material is involved.
For broader mold cleanup and prevention guidance, see how to remove mold permanently.
Key Takeaways
- Small surface mold spots on firm, finished, painted ceilings can often be cleaned carefully.
- Avoid soaking the ceiling, scrubbing aggressively, or mixing cleaning chemicals.
- Use protective gear because overhead cleaning increases exposure to drips, dust, and mold particles.
- Dry the ceiling completely after cleaning to reduce the chance of mold returning.
- Soft, sagging, stained, wet, or repeatedly moldy ceiling material may need evaluation instead of surface cleaning.