How to Fix Persistent Moisture Under Kitchen Floors
Persistent moisture under kitchen flooring is a serious warning sign that something is preventing normal drying. Unlike surface spills that disappear within hours, trapped moisture beneath flooring layers can remain hidden for days or even weeks. When moisture continues returning after cleaning or drying attempts, the problem usually requires corrective action rather than additional surface drying.
Moisture trapped beneath flooring can weaken structural materials, damage underlayment, and create conditions where mold can grow. The fix is not simply to keep drying the surface. You need to stop the moisture source, determine how deep the water traveled, open access if trapped layers cannot dry, and replace materials that have swollen, softened, or deteriorated.
If dampness keeps returning after cleaning, drying, or small leak repairs, the floor may need more than surface treatment. This article focuses on repair decisions for kitchen flooring, while this broader guide to structural moisture problems in homes explains how hidden moisture affects subfloors, framing, and other building materials.
Why Moisture Persists Under Kitchen Floors
Persistent dampness usually means one of two things: water is still entering the flooring system, or trapped moisture cannot escape from beneath the finished floor, underlayment, cabinets, or subfloor.
Finished flooring, underlayment, cabinet bases, adhesive layers, and subfloor panels can all slow evaporation. That is why a kitchen floor may look dry on top while moisture remains trapped underneath.
Ongoing Leak Sources Continue Adding Moisture
The most common reason moisture persists beneath kitchen floors is an active leak that continues feeding water into the system. Even very small leaks can introduce enough moisture to keep materials wet indefinitely.
Common sources of ongoing moisture include:
- Dishwasher supply line leaks
- Refrigerator water line leaks
- Sink plumbing leaks
- Drain pipe failures
- Loose compression fittings
Leaks beneath appliances are especially difficult to detect because moisture spreads under cabinets and flooring rather than forming visible puddles. If moisture repeatedly appears after drying attempts, reviewing why kitchen floors stay wet after cleaning can help determine whether hidden moisture conditions are contributing to the issue.
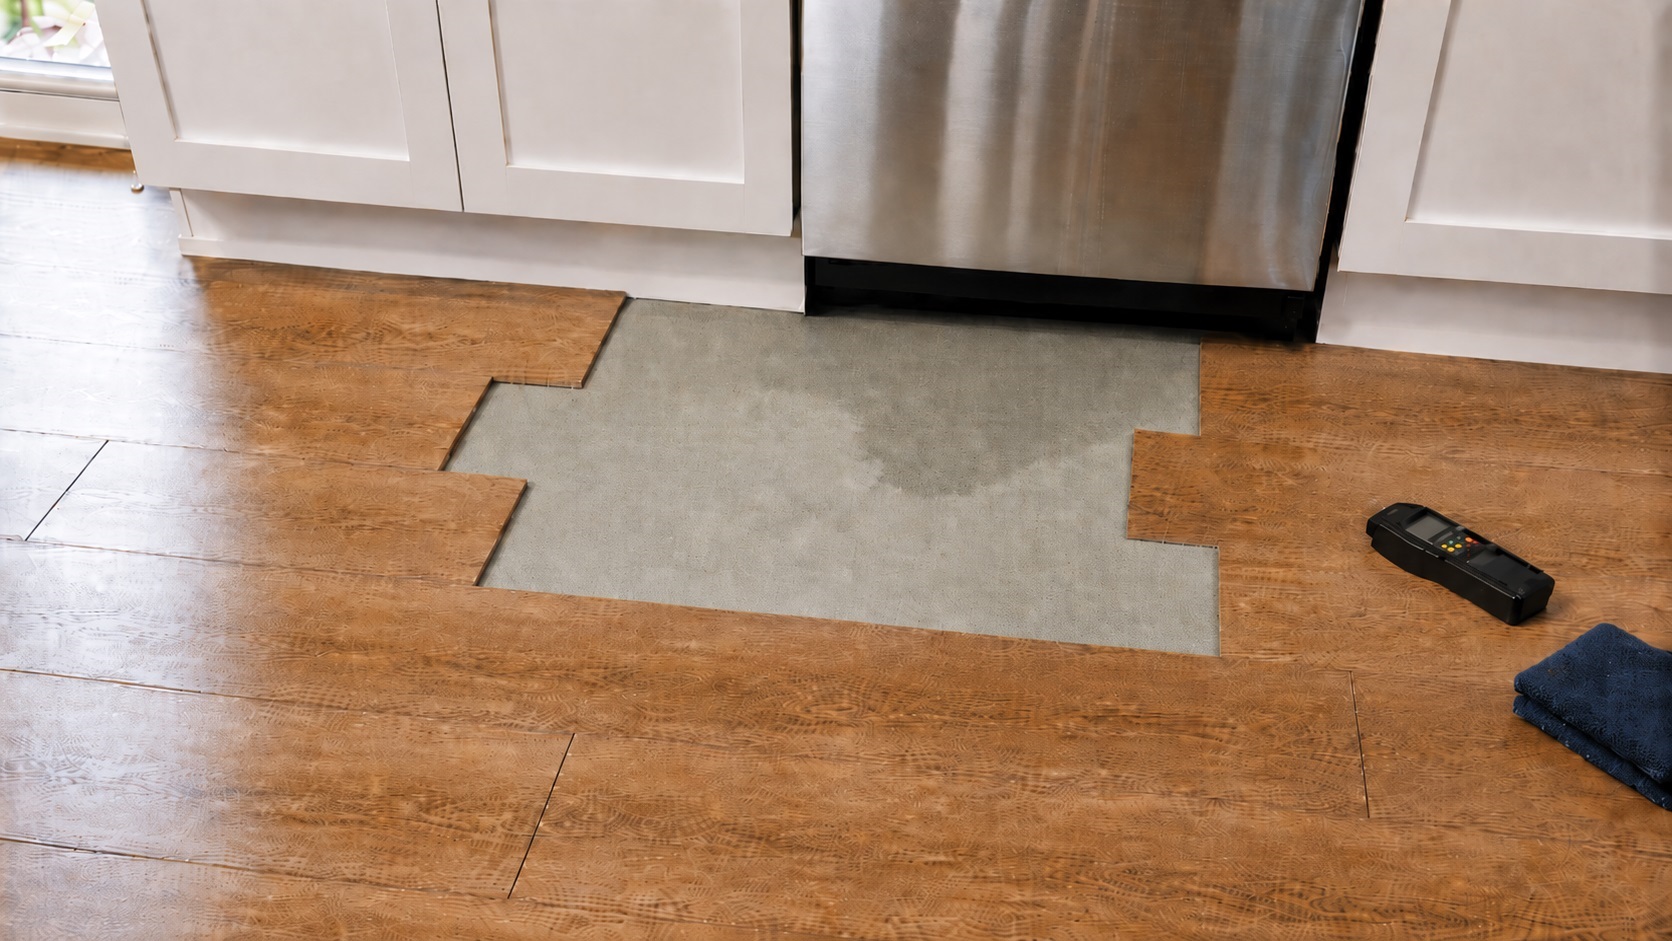
Trapped Moisture Beneath Flooring Layers
Even after a leak stops, moisture may remain in underlayment, adhesive, seams, cabinet toe-kick spaces, or the upper surface of the subfloor. These areas dry slowly because they are covered by finished flooring and receive little direct airflow.
Trapped moisture commonly occurs when:
- Water enters seams between flooring panels
- Cabinet bases restrict airflow
- Underlayment materials absorb water
- Flooring covers moisture-prone areas
- Drying attempts do not reach hidden spaces
In these situations, surface drying methods alone rarely resolve the problem.
Subfloor Saturation Makes Drying Difficult
When moisture penetrates into the subfloor, drying becomes significantly more difficult. Subfloor materials such as plywood or particle board absorb water deeply and release it slowly.
Subfloor saturation often develops when:
- Leaks remain unnoticed for several days
- Water spreads beneath cabinets or appliances
- Previous leaks were not fully dried
- Moisture accumulates repeatedly over time
If moisture has reached the subfloor, the repair may need to move beyond surface drying and into direct access, moisture testing, or replacement of damaged sections.
Moisture Problems That Usually Require More Than Surface Drying
The repair approach depends on whether the problem is still being fed by water, merely trapped in absorbent layers, or already damaging the subfloor. Those three conditions should not be treated the same way.
Ongoing Leaks Beneath Appliances
Appliances are among the most common sources of persistent moisture. These leaks may remain hidden for long periods because water spreads beneath flooring materials instead of collecting on the surface.
Appliances most likely to create hidden moisture include:
- Dishwashers
- Refrigerators with ice makers
- Water filtration systems
- Garbage disposals
- Sink plumbing assemblies
If moisture appears near appliances or cabinets, the repair should begin with the supply line, drain, valve, fitting, or appliance connection that is feeding the floor. Flooring repair should wait until that source is corrected.
Moisture Trapped Beneath Cabinets
Cabinet bases create enclosed spaces where airflow is limited. Water entering these areas often remains hidden, allowing moisture to spread into flooring layers without immediate detection.
Cabinet-related moisture problems commonly occur when:
- Leaks develop near sink plumbing
- Water spreads beneath cabinet bases
- Drying airflow cannot reach affected areas
- Previous water exposure remains unresolved
Because cabinet structures restrict airflow, trapped moisture beneath these areas often requires targeted corrective actions.
Subfloor Saturation Problems
Subfloor saturation is one of the most serious causes of persistent moisture beneath kitchen flooring. When water reaches the structural subfloor, it becomes absorbed into wood-based materials that release moisture slowly over time. This slow release can make floors feel damp even after visible water has been removed.
Subfloor saturation typically develops when moisture remains trapped for extended periods or the same area is exposed to repeated small leaks.
Common signs of subfloor saturation include:
- Persistent dampness that returns after drying
- Soft or spongy areas underfoot
- Visible swelling along seams or edges
- Musty odors that do not disappear
- Discoloration that spreads over time
If these symptoms are present, further investigation is necessary to determine whether structural materials have been affected. In many cases, learning how to detect moisture under kitchen floors can help confirm whether deep moisture remains beneath the flooring.
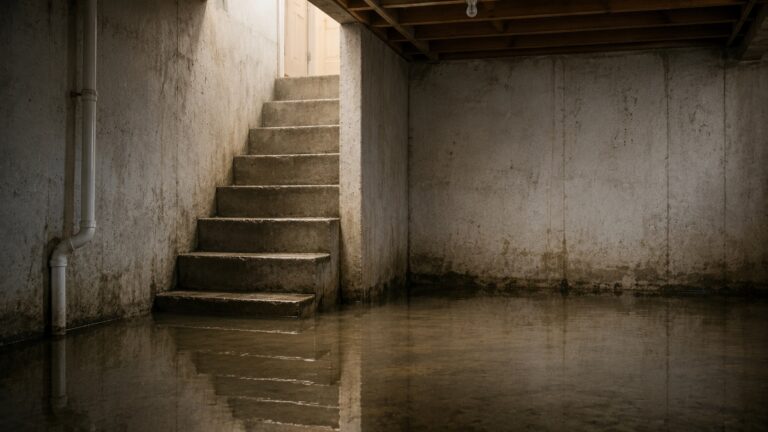
Moisture Migration From Nearby Areas
Moisture beneath kitchen flooring does not always originate from the kitchen itself. It can also move in from nearby rooms, wall cavities, crawl spaces, basements, or shared framing pathways.
Moisture migration commonly occurs when:
- Moisture rises from basement or crawl space areas
- Water enters through wall leaks
- Moisture moves through shared framing structures
- Moisture or humid air moves in from adjacent rooms
Poor Airflow Around Cabinets and Appliances
Poor airflow rarely causes a kitchen floor leak by itself, but it can keep damp materials from drying after water gets beneath the flooring. This is especially common around cabinet toe-kicks, appliance recesses, floor transitions, and tight spaces behind dishwashers or refrigerators.
Airflow problems usually need to be corrected after the leak source is fixed. Otherwise, fans or ventilation improvements may only dry the surface while moisture remains trapped under the floor.
How to Identify the True Moisture Source
Fixing persistent moisture starts with a simple order of inspection: check active water sources first, then flooring seams and edges, then nearby structures that may be moving moisture into the kitchen. Repairing the floor before this step can hide the problem without stopping it.
Inspect Plumbing Connections
Plumbing connections are among the most common sources of hidden moisture. Small leaks may not produce visible puddles but can gradually introduce moisture into flooring layers.
Key plumbing components to inspect include:
- Sink supply lines
- Dishwasher connections
- Refrigerator water lines
- Drain pipes beneath sinks
- Compression fittings and joints
If plumbing leaks are suspected, dry the area, run the fixture or appliance, and check again with good lighting. A fitting that stays dry when unused but becomes damp during a wash cycle, ice maker fill, or sink drain test is more useful than a single visual inspection.
Check Flooring Edges and Seams
Flooring seams and edges often allow moisture to enter hidden spaces. Once moisture enters these openings, it may remain trapped beneath the surface.
Common inspection locations include:
- Seams between flooring panels
- Edges along baseboards
- Transitions between flooring types
- Areas near appliance bases
- Cabinet toe-kick areas
A short seam and edge check is useful before repair, but detailed testing belongs in a full moisture inspection. If the damp area is not obvious, use this guide to inspect kitchen flooring for hidden moisture before opening or replacing materials.
Evaluate Surrounding Structures
When moisture sources are not obvious, surrounding structures may contribute to hidden moisture movement. Walls, subfloor areas, and adjacent rooms can all transfer moisture into kitchen flooring.
Situations requiring structural evaluation include:
- Repeated moisture patterns in the same area
- Moisture appearing without recent cleaning
- Persistent odors despite drying attempts
- Signs of moisture in nearby rooms
In complex cases, reviewing how to inspect kitchen flooring for hidden moisture can help determine whether the problem is limited to the floor surface, trapped below the finish layer, or connected to a deeper structural moisture path.
Repair Options Based on Moisture Severity
Repair strategies vary depending on how deeply moisture has affected the flooring system. Understanding severity levels helps determine whether simple corrections or structural repairs are required.
A practical rule is to separate surface dampness from trapped-layer moisture. If the visible floor dries quickly and stays dry after the leak is fixed, limited correction may be enough. If moisture returns, odors remain, seams swell, or the floor feels soft, the repair usually needs access below the finished surface.
Minor Moisture Corrections
Minor moisture problems usually involve localized dampness that has not yet caused structural damage. These situations often result from small leaks or limited moisture exposure.
Typical minor corrective actions include:
- Repairing the small leak or loose fitting that caused the dampness
- Moving appliances or opening toe-kick areas long enough to improve airflow
- Confirming the area stays dry after the repair instead of judging by one dry surface check
- Removing only limited trim or transition pieces if they are blocking drying access
Minor corrections are only enough when the area stays dry after the source is fixed and no swelling, soft spots, odor, or recurring dampness remains.
Moderate Moisture Repairs
Moderate moisture problems usually involve repeated dampness or early signs of material damage beneath the flooring. In these cases, moisture has likely reached underlayment materials or sections of the subfloor, requiring more direct corrective action.
Moderate repairs often become necessary when moisture returns after drying, seams remain swollen, or the floor smells musty even after the visible surface has dried.
Typical moderate repair actions include:
- Removing limited sections of flooring to allow drying access
- Drying saturated underlayment materials
- Repairing or replacing leaking plumbing components
- Improving ventilation beneath cabinets
- Replacing moisture-damaged underlayment sections
Moderate repairs often prevent the problem from progressing into more serious structural damage. However, do not reinstall flooring over damp underlayment or a wet subfloor just because the surface looks dry. Delaying corrective action or closing the floor too soon increases the likelihood of further deterioration.
Major Structural Repairs
Major repairs are required when moisture has caused structural damage to flooring systems. This condition usually develops when moisture remains trapped for extended periods or when leaks remain undetected for long durations.
Major repair indicators include:
- Soft or collapsing floor sections
- Severe swelling or buckling
- Persistent musty odors
- Visible mold growth
- Significant subfloor deterioration
Major repairs may require removal of large sections of flooring and replacement of damaged structural materials. In these situations, consulting experienced repair professionals becomes necessary to ensure safe restoration.
When Professional Repairs Become Necessary
Professional help becomes important when the problem may involve the subfloor, mold, contaminated water, electrical risk near appliances, or flooring that cannot be safely lifted, dried, or reinstalled by the homeowner.
Professional repair services are often recommended when:
- Moisture persists longer than 72 hours
- Flooring becomes soft or unstable
- Odors remain after drying attempts
- Mold growth becomes visible
- Large areas of flooring show damage
If mold is suspected beneath flooring, avoid sealing the area back up, installing new flooring, or painting over stained materials until the moisture source and affected materials have been evaluated. Reviewing how to remove mold permanently can help determine safe remediation options before repairs continue.
Prevent Moisture From Returning After Repairs
Once repairs are completed and moisture levels return to normal, the goal is not to repeat the full repair process again. Basic monitoring can catch a slow leak or damp area before it spreads back into underlayment or subfloor materials.
- Inspect plumbing connections periodically
- Monitor previously affected flooring areas
- Maintain airflow beneath cabinets and appliances
- Watch for early signs of returning dampness
For complete long-term prevention strategies, review this guide on how to prevent recurring moisture under kitchen flooring.
Frequently Asked Questions About How to Fix Persistent Moisture Under Kitchen Floors
What Is the First Step for Fixing Moisture Trapped Under a Kitchen Floor?
The first step is to stop any active water source before repairing the floor. After that, check whether the moisture is limited to the surface, trapped in underlayment, or affecting the subfloor. Moderate or severe cases may require partial flooring removal.
Can Moisture Under Kitchen Flooring Be Removed Without Taking Up the Floor?
Sometimes. If the leak was small, the surface dries quickly, and moisture does not return, improved airflow may be enough. If underlayment or subfloor materials are saturated, sections of flooring may need to be lifted so the hidden layers can dry or be replaced.
When Should Flooring Be Replaced?
Flooring replacement becomes necessary when materials show signs of swelling, buckling, or structural weakening. Persistent moisture exposure often leads to permanent damage that cannot be reversed through drying alone.
How Do I Know If the Subfloor Is Damaged?
Signs of subfloor damage include soft spots, uneven flooring, persistent dampness, and strong odors. Structural movement or visible deterioration often indicates advanced moisture damage.
When Should Persistent Kitchen Floor Moisture Be Handled Professionally?
Professional evaluation is usually wise when dampness lasts more than 72 hours, the floor feels soft, odors remain, mold is suspected, or the same area becomes wet again after a leak repair. These signs suggest the problem may involve trapped layers or structural materials.
Key Takeaways
- Stop the moisture source before repairing or reinstalling flooring.
- Check whether moisture is only on the surface, trapped in underlayment, or affecting the subfloor.
- Minor cases may only need leak repair, airflow, and monitoring.
- Recurring dampness, swelling, odor, or soft spots usually mean hidden layers need direct access.
- Do not close the floor back up until the source and affected materials have been addressed.
- Call a professional when moisture lasts beyond 72 hours, mold is suspected, or the floor feels unstable.
One Comment
Comments are closed.