How to Inspect HVAC Ductwork for Moisture Damage (Without Causing Further Issues)
Moisture inside HVAC ductwork can start as light condensation, but repeated moisture can eventually affect duct insulation, metal surfaces, nearby drywall, and surrounding building materials. If you have already noticed signs of duct moisture or confirmed that moisture is present, the next step is to inspect the system for damage without cutting, opening, or disturbing the ductwork.
Inspection is different from detection. Detection asks, “Is moisture present?” Inspection asks, “What has the moisture affected?” That means checking visible duct surfaces, duct insulation, nearby vents, ceilings, and surrounding materials for signs that the problem is minor, developing, or serious.
If you are still identifying symptoms or confirming moisture, you may want to review signs of moisture in HVAC ducts or how to detect moisture inside air ducts before continuing.
When You Should Inspect Ductwork for Moisture Damage
Not every instance of condensation requires a full inspection. However, when moisture becomes recurring or begins affecting materials, a closer evaluation is necessary.
Situations That Warrant Inspection
You should inspect your ductwork when you notice:
- Condensation forming repeatedly in the same locations
- Damp or sagging insulation around ducts
- Water stains near vents or along ceiling areas
- Musty odors during HVAC operation
- Signs that moisture is not drying quickly
These indicators suggest that moisture may be affecting the system beyond surface-level condensation.
Why Inspection Matters
Inspection helps determine whether the issue is limited to surface condensation or has begun affecting insulation, duct metal, drywall, ceiling materials, or nearby structural components.
That distinction matters because light surface moisture may call for monitoring and prevention, while damaged insulation, staining, odors, or spreading moisture usually require stronger corrective action.
If you are unsure what is causing the moisture, this guide on why HVAC ducts develop condensation explains the underlying factors.
Safety Considerations Before Inspecting Ducts
Before inspecting HVAC ductwork, it is important to prioritize safety. Many duct systems are located in areas that may present risks, such as attics, crawl spaces, or areas near electrical components.
If water is near the air handler, electrical wiring, outlets, junction boxes, or HVAC controls, stop the inspection and avoid touching the equipment until it can be evaluated safely.
Focus on Accessible and Safe Areas
Inspection should be limited to areas that are easy to access and do not require dismantling or altering the duct system. Safe inspection locations include:
- Exposed ductwork in basements
- Accessible attic spaces with proper flooring
- Crawl spaces that are dry and safe to enter
- Areas around vents and registers
Avoid inspecting areas that are difficult to reach or require removing materials. In these cases, professional evaluation is a safer option.
Avoid Invasive Inspection Methods
It is important not to open ductwork, cut insulation, or insert tools into ducts. These actions can damage the system, reduce efficiency, and create safety hazards.
Instead, focus on observing visible conditions and using indirect indicators to evaluate moisture impact.
Know When to Stop
Inspection should stop if you encounter:
- Areas that are unsafe to access
- Visible mold or strong odors suggesting contamination
- Ceiling, wall, framing, or material damage that may require professional assessment
Recognizing these limits helps prevent further damage and ensures that more complex issues are handled appropriately.
How to Inspect Visible Duct Sections
Visible duct sections provide the most direct opportunity to evaluate moisture damage. These areas allow you to examine both the duct surface and surrounding insulation without invasive methods.
Check for Surface Damage on Ducts
Begin by examining the outer surface of exposed ducts. Moisture often leaves visible signs that indicate how long it has been present.
Look for:
- Rust or corrosion on metal surfaces
- Water streaks running along the duct
- Discoloration or uneven surface appearance
- Areas where condensation frequently forms
Also check seams, elbows, low points, duct hangers, and connections near registers because moisture often collects or leaves streaking in these areas first.
Rust is particularly important because it develops over time and suggests repeated moisture exposure rather than a one-time event.
Observe Patterns, Not Just Individual Spots
When inspecting ducts, focus on patterns rather than isolated signs. A single spot of condensation may not indicate a problem, but repeated signs in the same area suggest ongoing moisture conditions.
Pay attention to:
- Sections of ductwork that consistently show moisture
- Changes in appearance over time
- Areas where multiple signs appear together
A repeat pattern in the same elbow, branch line, attic run, or register area is more important than one isolated wet spot that disappears and does not return.
If condensation appears frequently in certain sections, understanding how to reduce it is important. This is covered in how to prevent condensation in HVAC ducts.
How to Inspect Duct Insulation for Moisture Damage
Duct insulation is often the first component affected by moisture, and it can also hide problems that are not immediately visible on the duct surface. Because insulation surrounds the duct system, it absorbs and retains moisture more easily, making it a critical area to inspect.
Check for Physical Changes in Insulation
Moisture exposure typically changes the shape and structure of insulation. These changes are often easier to spot than direct moisture inside the duct itself.
Look for:
- Insulation that appears sagging or uneven along duct runs
- Sections that look compressed or flattened
- Gaps where insulation has shifted or pulled away
- Outer coverings that appear wrinkled or distorted
These signs suggest that insulation may have absorbed moisture and lost its original structure.
Check for Dampness or Coolness
In accessible areas, a light touch on the outer jacket of the insulation may help determine whether moisture is being retained. Wear gloves, avoid squeezing or tearing the insulation, and do not touch insulation that appears moldy, contaminated, or heavily wet.
Indicators include:
- Insulation that feels damp or slightly wet
- A persistent cool sensation even when surrounding air is dry
- Moisture returning shortly after drying
These conditions often indicate that moisture is being retained within the insulation rather than evaporating quickly.
Look for Discoloration or Surface Changes
Moisture can also cause visible changes in the appearance of insulation materials.
Watch for:
- Darkened or uneven color patterns
- Stains on the outer surface
- Areas that appear different from surrounding sections
Discoloration may indicate prolonged exposure to moisture, especially when combined with other signs such as sagging or dampness.
If insulation appears damaged or compromised, it often means moisture has been present for some time. In these cases, further evaluation or corrective action may be necessary.
How to Inspect Surrounding Materials for Moisture Impact
Moisture problems in ductwork can extend beyond the ducts themselves. Over time, condensation can affect nearby materials such as ceilings, walls, insulation, framing, or other building components.
Inspecting these areas helps determine whether moisture has spread and how serious the issue may be.
Check Ceilings Near Duct Runs
Ceilings located below attic ductwork are especially vulnerable to moisture damage. Water from condensation can travel along ducts or drip onto surrounding materials.
Look for:
- Water stains or discoloration
- Soft spots in drywall
- Bubbling or peeling paint
- Uneven or sagging ceiling surfaces
These signs suggest that moisture has moved beyond the duct system and may be affecting ceiling materials or nearby building components.
Inspect Walls Around Vent Openings
Walls near vents can also show signs of moisture exposure. Because vents are connected directly to ductwork, they often reveal early signs of spreading moisture.
Check for:
- Discoloration around vent edges
- Peeling or flaking paint
- Surface changes that develop over time
- Dust that appears damp or clumped
Changes in wall surfaces near vents can indicate that moisture is escaping or forming in the duct system behind them.
Look for Odors and Air Quality Changes
Odor is another important indicator of moisture impact. While not always visible, it can reveal conditions affecting both ductwork and surrounding materials.
Pay attention to:
- Musty or damp smells when the HVAC system starts
- Odors that are stronger in certain rooms
- Smells that persist over time
Persistent odors may indicate that moisture has affected insulation or other materials. If odors are strong or worsening, it may be helpful to compare findings with this guide on signs of mold growth in HVAC ducts.
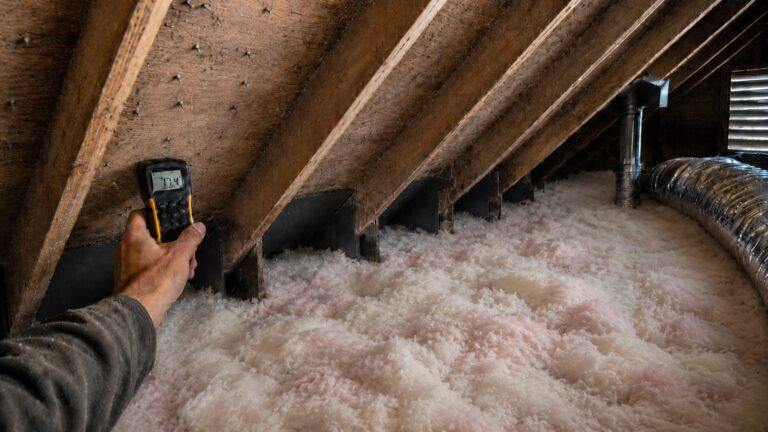
Use Moisture Meters on Surrounding Materials
Moisture meters can be used to check materials near ductwork, such as drywall or wood. These tools provide additional confirmation when visual signs are unclear.
When using a moisture meter:
- Test a suspected area and a nearby dry-looking area for comparison
- Focus on drywall, wood, trim, or ceiling materials near ducts and vents
- Look for repeated elevated readings in the same area rather than one isolated reading
Elevated readings in areas near ductwork suggest that moisture may be affecting those materials, even if it is not directly visible.
Moisture meters should not be used on metal ducts, as readings on metal surfaces are unreliable.
A cool duct surface can also feel damp when it is only cold, so confirm suspected moisture with visible signs, nearby material changes, or repeated observations over time.
Signs of Minor vs Moderate vs Severe Moisture Damage
After checking duct surfaces, insulation, and surrounding materials, classify what you found by severity. The goal is not to diagnose every cause, but to decide whether the condition can be monitored, needs corrective action, or requires professional evaluation.
Instead of focusing on a single sign, it is important to evaluate patterns and how multiple indicators come together.
Minor Moisture Impact
Minor moisture impact typically involves early-stage conditions where moisture has not yet caused lasting damage.
Common signs include:
- Light condensation on duct surfaces
- No visible insulation damage
- No staining on nearby materials
- No persistent odors
In these cases, moisture may be temporary or just beginning to develop. The focus should be on monitoring conditions and preventing further moisture buildup.
Addressing contributing factors early can often prevent the issue from progressing.
Moderate Moisture Damage
Moderate damage indicates that moisture has begun to affect materials but has not yet caused widespread or severe deterioration.
Signs of moderate damage include:
- Damp or slightly compressed insulation
- Small rust spots on duct surfaces
- Minor staining on ceilings or walls
- Recurring moisture patterns in specific areas
At this stage, the problem is no longer temporary. Moisture is affecting materials and may continue to worsen if conditions are not addressed.
Further evaluation and corrective action are typically needed. This may include drying affected materials, correcting condensation conditions, and monitoring the same areas to make sure moisture does not return.
Significant Moisture Damage
Significant damage suggests that moisture has been present for an extended period and is affecting both duct components and surrounding materials.
Indicators include:
- Sagging or heavily compressed insulation
- Widespread rust or corrosion
- Visible water damage to ceilings or walls
- Persistent musty odors
These signs indicate that moisture is not only recurring but also accumulating in ways that affect system performance and nearby materials.
At this level, inspection alone is not enough. Action is required to address both the moisture and its impact.
Severe Moisture Damage
Severe damage occurs when moisture has progressed beyond the duct system and is affecting structural elements or indoor air conditions.
Signs include:
- Soft or deteriorating drywall near duct runs
- Insulation that remains wet or has collapsed
- Strong, persistent odors that do not improve
- Evidence that moisture is widespread across multiple areas
Severe damage often requires professional evaluation and may involve repair or replacement of affected materials.
How to Interpret Your Inspection Findings
Inspection results are most useful when they are interpreted as a whole. Individual signs can be misleading, but patterns across multiple areas provide a clearer picture of what is happening.
Look for Consistency Across Multiple Indicators
Higher confidence in your findings comes from seeing multiple signs that support each other. For example:
- Damp insulation combined with visible condensation
- Staining near vents along with elevated moisture readings
- Odors paired with visible material changes
When these indicators align, it becomes more likely that moisture has had a meaningful impact on the system.
Distinguish Between Temporary and Ongoing Issues
Temporary conditions may produce signs that disappear quickly, while ongoing issues create patterns that repeat or worsen over time.
Key differences include:
- Temporary: isolated condensation, no lasting material changes
- Ongoing: repeated moisture, material damage, persistent symptoms
Understanding this difference helps determine whether monitoring is sufficient or whether further action is needed.
Avoid Over- or Under-Estimating the Problem
It is important to avoid both extremes:
- Assuming minor signs indicate severe damage
- Ignoring early signs that may worsen over time
Using a structured approach to inspection helps maintain a balanced assessment and reduces the risk of misinterpretation.
If moisture is confirmed and damage is present, the next step is often to address the moisture directly. This is covered in how to dry HVAC ducts after moisture exposure.
When Inspection Indicates a Serious Problem
After completing a full inspection, certain findings indicate that the issue goes beyond minor moisture exposure and may require more immediate or advanced action. Recognizing these signs helps prevent further damage and ensures that problems are addressed appropriately.
Indicators of a Serious Moisture Issue
A more serious problem is likely when you observe:
- Widespread moisture across multiple duct sections
- Insulation that remains damp or has lost its structure
- Visible damage to ceilings, walls, or nearby materials
- Persistent odors that do not improve over time
These signs suggest that moisture has moved beyond isolated condensation and is affecting the system and surrounding structure in a more significant way.
When Professional Evaluation Is Recommended
Professional inspection may be necessary when:
- Moisture is difficult to locate or confirm fully
- Damage appears extensive or worsening
- Air quality concerns are present
- Parts of the duct system are inaccessible
If moisture damage appears to involve nearby drywall, framing, ceiling materials, or other building components, it may help to compare your findings with this broader guide to structural moisture problems in homes.
Professionals have access to tools and methods that allow them to evaluate internal duct conditions and hidden areas without causing damage.
If moisture has already caused visible damage, it may also be necessary to consider drying and repair options. These are covered in how to dry HVAC ducts after moisture exposure.
What to Do After Inspecting HVAC Ductwork
Once you have completed your inspection and determined the level of moisture impact, the next step is deciding how to respond. The right approach depends on the severity of what you found.
For Minor Moisture Conditions
If inspection shows only light condensation with no material damage:
- Continue monitoring conditions over time
- Focus on prevention strategies to reduce moisture
- Address environmental factors such as humidity
Preventing recurrence at this stage is often enough to avoid further issues.
For Moderate Moisture Damage
If moisture has begun to affect insulation or nearby materials:
- Document where the damage appears and whether it repeats
- Dry affected surrounding materials when safe to do so
- Correct the conditions that allow condensation or dampness to return
- Avoid sealing, painting, or covering damaged areas until the moisture source is understood
Taking action at this stage helps prevent the problem from becoming more severe.
For Significant or Severe Damage
If inspection reveals widespread moisture impact or structural concerns:
- Seek professional evaluation
- Assess whether materials need repair or replacement
- Address both moisture and its underlying causes
At this level, the response usually needs to address both the damaged materials and the condition that allowed moisture to keep returning.
Frequently Asked Questions About How to Inspect HVAC Ductwork for Moisture Damage
Can I inspect HVAC ducts myself?
Yes, you can inspect exposed ducts, vent areas, nearby drywall, ceilings, and accessible insulation from the outside. Do not cut duct wrap, open duct sections, enter unsafe attics or crawl spaces, or touch equipment where water is near electrical components.
What signs show that duct moisture has caused actual damage?
Actual damage is more likely when moisture leaves rust, staining, damp or collapsed insulation, recurring wet areas, musty odors, or changes in nearby drywall, ceiling materials, or trim. Light condensation by itself does not always mean damage has occurred.
How do I know if duct insulation is ruined?
Duct insulation may be compromised if it is sagging, compressed, stained, loose, or still damp after surrounding conditions have dried. Wet or collapsed insulation can reduce thermal protection and allow condensation to keep returning.
Is rust on ducts a serious issue?
Small amounts of rust indicate past moisture exposure but are not always severe. Widespread corrosion or worsening rust suggests a more persistent problem.
Do I need tools to inspect ductwork?
Basic inspection can be done visually, but tools like moisture meters can help evaluate surrounding materials. These tools should not be used directly on metal ducts.
When is inspection not enough?
Inspection alone is not enough when moisture has caused visible damage, persists over time, or cannot be fully evaluated. In these cases, further action such as drying or professional assessment is needed.
Conclusion
Inspecting HVAC ductwork for moisture damage means looking beyond the question of whether moisture is present. The real goal is to see whether repeated moisture has affected duct surfaces, insulation, nearby vents, ceilings, walls, or other materials.
Limit the inspection to safe, visible, non-invasive checks. If you find damp insulation, spreading stains, persistent odors, corrosion, or moisture that keeps returning, the problem has moved beyond simple observation and needs corrective action.
For a complete overview of how moisture behaves throughout a home and how to manage it effectively, see this guide on how to find, fix, and prevent moisture problems in homes.
Key Takeaways
- Inspection evaluates damage, not just the presence of moisture
- Duct insulation is often the first area affected by moisture
- Surrounding materials can reveal how far moisture has spread
- Damage should be classified from minor to severe based on patterns
- Recurring moisture indicates a need for further action
- Professional help may be required for widespread or serious damage
One Comment
Comments are closed.