How to Dry HVAC Ducts After Moisture Exposure
To dry HVAC ducts after moisture exposure, stop the moisture source first, remove any standing water, open accessible vents or panels, increase airflow, lower indoor humidity, and confirm that hidden areas are dry before returning the system to normal use. Light condensation may dry with airflow and dehumidification, but standing water, saturated insulation, flexible duct low spots, or musty odors need closer inspection.
If you’re noticing damp vents, unusual humidity, or early musty odors, act quickly. Damp duct systems can support mold growth when moisture remains trapped, especially when dust and poor airflow are present. If you’re unsure whether moisture is already causing problems, review the early signs of moisture in HVAC ducts before moving forward.
This guide focuses on drying HVAC ducts safely after moisture exposure. It does not cover full duct repair, mold remediation, or replacement decisions except where drying alone may no longer be enough.
Safety note: Do not run the HVAC system if water is actively entering the equipment, electrical components may be wet, sewage or floodwater is involved, or mold growth is suspected inside the ducts. In those cases, shut the system down and get professional evaluation before circulating air through the home.
Why Drying HVAC Ducts Quickly Is Critical
Moisture inside ductwork becomes risky because ducts contain dust, hidden seams, low spots, and materials that may hold water longer than visible surfaces suggest.
Mold Can Begin Growing Faster Than Expected
One of the biggest risks of damp ductwork is how quickly mold can develop. When moisture combines with dust inside the system, mold spores can begin growing within one to two days under the right conditions.
This is why delays in drying are so risky. Even if ducts appear only slightly damp, the internal environment may already support mold growth. These conditions are closely related to the causes explained in why mold forms inside HVAC ductwork, where moisture is the primary trigger.
Moisture Spreads Through Airflow
HVAC systems continuously move air throughout the home. When moisture is present inside the system, airflow can distribute that moisture to different sections of the ductwork.
This means a small damp area can quickly affect:
- Multiple duct sections
- Several rooms in the home
- Air quality across the entire system
Without proper drying, this spread increases the amount of ductwork that must be inspected and dried.
Hidden Moisture Can Persist Even After Surfaces Look Dry
One of the most common mistakes homeowners make is assuming ducts are dry because visible surfaces no longer appear wet. In reality, moisture can remain hidden inside:
- Insulated duct linings
- Flexible duct interiors
- Duct seams and joints
- Low points where water collects
This hidden moisture is often what leads to recurring problems later. If drying is incomplete, symptoms such as those described in signs of mold growth in HVAC ducts may begin to appear.
Early Drying Prevents Long-Term Damage
Addressing moisture quickly helps prevent both biological and structural issues. Proper drying reduces the likelihood of:
- Mold growth inside ducts
- Deterioration of insulation materials
- Recurring moisture problems
- More complex repairs later
For long-term protection, drying should always be paired with moisture control strategies like those outlined in how to prevent recurring moisture damage.
Assessing the Level of Moisture Exposure
Before starting the drying process, it’s important to understand how much moisture is present and how far it has spread. Not all duct moisture problems are the same, and the drying approach depends on severity.
Light Condensation vs. Significant Moisture
Some HVAC moisture issues involve only light condensation, while others involve standing water or saturated materials.
- Light condensation: Small droplets on vents or inside ducts, usually caused by humidity or temperature differences
- Moderate moisture: Damp surfaces, minor pooling in low areas, or persistent condensation
- Severe moisture exposure: Standing water, soaked insulation, or water intrusion from leaks or flooding
Light condensation can often be resolved with airflow and humidity control. More severe exposure requires a more aggressive drying approach.
Localized vs. System-Wide Moisture
It’s also important to determine whether the moisture is limited to one area or affecting the entire system.
Localized issues may include:
- A single damp vent
- Condensation in one section of ductwork
- Moisture near a specific component
System-wide issues often involve:
- Multiple vents showing moisture
- Widespread humidity problems
- Persistent damp air throughout the home
System-wide moisture usually points to broader conditions such as those explained in why HVAC ducts stay damp, which must be addressed alongside drying.
Safe Initial Steps Before Drying
Proper preparation is critical. Attempting to dry ductwork without addressing the source of moisture or ensuring safe conditions can lead to incomplete drying or further damage.
Stop the Moisture Source First
Drying will not be effective if moisture is still entering the system. Before beginning, identify and stop the source of the problem.
Common sources include:
- Condensation from HVAC operation
- Clogged or overflowing drain lines
- Leaky duct connections
- High indoor humidity levels
- External water intrusion from roofs or crawlspaces
If the cause is not clear, review why HVAC ducts develop condensation and why HVAC ducts stay damp before assuming the ducts will dry and stay dry.
Determine Whether to Turn Off the System
In some cases, temporarily turning off the HVAC system can prevent moisture from spreading further. This is especially important if:
- Water is actively entering the system
- Standing water is present in ductwork
- Moisture is being distributed through airflow
Fan-only mode may help with light condensation after the source is controlled, but do not use the system to dry ducts if standing water, suspected mold, contaminated water, or wet electrical components are involved. In those situations, external fans, dehumidification, and professional evaluation are safer than circulating air through the duct system.
Access Affected Areas
Drying is more effective when you can reach the areas where moisture is present. This may involve:
- Removing vent covers
- Inspecting visible duct sections
- Opening access panels where possible
Improving access allows air to circulate more effectively and helps moisture evaporate faster.
Remove Any Standing Water
If water is present in the system, it should be removed before attempting to dry surfaces. Standing water will slow down evaporation and increase the risk of mold growth.
Depending on the situation, this may involve:
- Absorbing water with cloths or towels
- Using a wet/dry vacuum
- Draining low points in flexible duct sections
Once standing water is removed, the focus can shift to drying residual moisture. If water has reached insulation, flex duct low spots, or HVAC equipment, do not assume towel drying or a wet/dry vacuum is enough.
Preparing the System for Effective Drying
After initial steps are complete, the system must be set up to support effective drying. This involves improving airflow, reducing humidity, and creating conditions where moisture can evaporate.
Open Vents and Maximize Air Circulation
Closed vents restrict airflow and prevent moisture from drying. Opening all supply and return vents allows air to move more freely through the system.
This helps:
- Distribute airflow evenly
- Reduce stagnant air zones
- Speed up evaporation inside ducts
Use Fan-Only Mode When Appropriate
Running the HVAC system in fan-only mode can help circulate air without adding heating or cooling, but it is only appropriate when the moisture source has stopped and no contamination is suspected. Use this approach for light condensation, not for ducts with standing water, visible debris, mold-like growth, or saturated insulation.
If the system continues producing condensation while the fan runs, stop using the system for drying and rely on external airflow, dehumidification, and source correction instead.
Introduce External Airflow When Possible
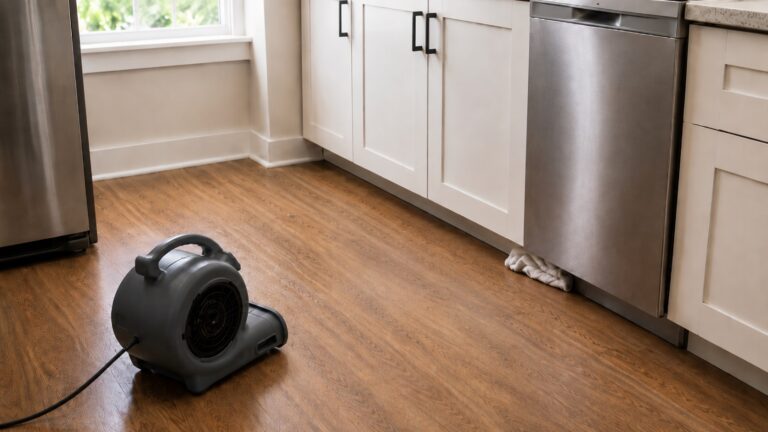
Adding airflow from outside the HVAC system can improve drying conditions. This may include:
- Using portable fans near vent openings
- Increasing ventilation in affected areas
- Allowing fresh air to circulate where possible
Improved airflow helps remove moisture-laden air and replace it with drier air, accelerating evaporation.
Reduce Indoor Humidity
Lowering humidity is essential for effective drying. If the surrounding air is already saturated with moisture, evaporation slows dramatically.
To reduce humidity:
- Use a dehumidifier
- Limit activities that add moisture, such as cooking or showering
- Ensure proper ventilation in humid areas
High humidity conditions similar to those described in why indoor air feels damp even without leaks can significantly slow the drying process if not addressed.
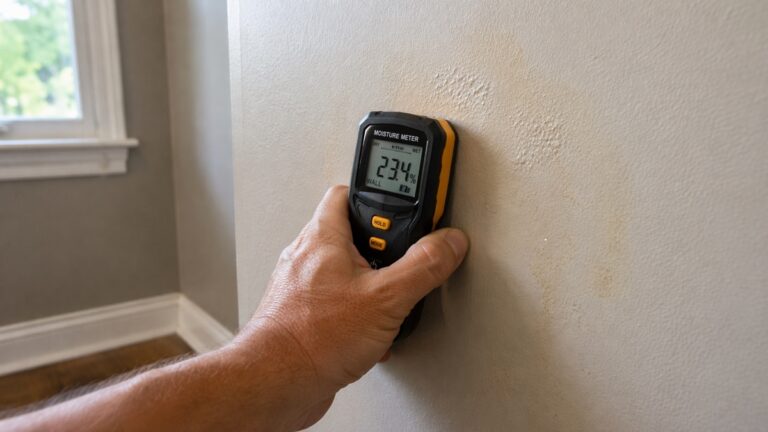
Use a hygrometer near affected supply and return areas while drying; if room humidity remains high, duct surfaces will dry much more slowly and condensation may return.
How to Dry HVAC Ducts Effectively
Once moisture sources are controlled and the system is prepared, the next step is actively drying the ductwork. Effective drying depends on combining airflow, humidity control, and time. Skipping any of these elements can leave hidden moisture behind.
Increase Airflow Through the System
Air movement is the most important factor in drying. Moving air helps carry moisture away from damp surfaces and speeds up evaporation.
To improve airflow:
- Run the HVAC fan in fan-only mode only when the source is controlled and no contamination is suspected
- Open all vents and registers to maximize circulation
- Use portable fans near vent openings to boost airflow
Consistent airflow helps prevent stagnant conditions that allow moisture to linger.
Use Dehumidification to Support Drying
Even strong airflow cannot dry ducts effectively if indoor humidity remains high. Dehumidification is essential because it removes moisture from the air, allowing evaporation to continue.
Effective methods include:
- Using portable dehumidifiers in affected areas
- Running whole-home dehumidification systems if available
- Maintaining indoor humidity at a moderate level
Reducing humidity is especially important in conditions similar to those described in why indoor humidity levels become too high, where moisture naturally accumulates indoors.
Improve Ventilation Where Possible
Introducing fresh air can help replace moisture-laden air with drier air, accelerating the drying process. This may involve:
- Opening windows in low-humidity conditions
- Using exhaust fans to remove humid air
- Increasing airflow in enclosed areas such as attics or crawlspaces
Better ventilation removes humid air from the areas feeding the duct system, making drying more efficient.
Drying Different Types of Duct Materials
Not all duct systems dry the same way. The material of the ductwork plays a major role in how moisture behaves and how long drying will take.
Metal Ducts
Metal ductwork is the easiest type to dry because it does not absorb water. Moisture remains on the surface and can evaporate relatively quickly with proper airflow.
Drying metal ducts typically involves:
- Maintaining steady airflow
- Reducing humidity levels
- Ensuring no condensation continues to form
When conditions are controlled, metal ducts can often dry within a short period.
Flexible Ducts
Flexible ductwork is more challenging to dry because it can trap moisture in low points or within the inner lining. If ducts sag, water may collect and remain for extended periods.
Effective drying may require:
- Repositioning sagging sections to eliminate low spots
- Increasing airflow to affected areas
- Allowing additional time for moisture to evaporate
If moisture remains trapped, it can lead to conditions similar to those explained in why HVAC ducts stay damp, where drying becomes difficult.
Insulated Ducts
Insulated ducts present the greatest drying challenge. Insulation can absorb moisture and hold it internally, making it difficult to fully remove water.
Drying insulated ducts may require:
- Extended drying time
- Consistent airflow and dehumidification
- Monitoring for persistent dampness
In some cases, heavily saturated insulation may not dry completely, increasing the risk of mold development if moisture remains trapped.
How Long It Takes to Dry HVAC Ducts
Drying time varies depending on the amount of moisture, environmental conditions, and duct material. While timelines can vary, realistic expectations help guide the process.
- Light condensation: 6 to 24 hours
- Moderate moisture: 24 to 72 hours
- Significant saturation: several days or longer
Factors that affect drying time include:
- Indoor humidity levels
- Airflow strength
- Temperature conditions
- Extent of moisture exposure
- Type of duct material
These timelines assume that the moisture source has been fully stopped and drying conditions are properly maintained.
Signs That HVAC Ducts Are Fully Dry
Confirm drying before returning the system to normal operation. Do not rely only on the vent surface; check accessible duct interiors, low points, nearby insulation, and the air coming from the vents.
- No visible condensation or dampness
- No musty or unusual odors during operation
- Stable humidity readings near affected supply and return vents
- No recurring moisture around vents
When these conditions stay stable after the system cycles, the risk of trapped moisture is much lower.
Signs That Drying Is Incomplete
Incomplete drying can lead to recurring problems. Warning signs include:
- Musty smells that persist or return
- Moisture reappearing after initial drying
- Surfaces that still feel damp
- Early signs of mold forming
If these issues occur, additional drying or further investigation may be needed. For a more focused inspection process, use the steps in how to detect moisture inside air ducts.
When Drying HVAC Ducts Is Not Enough
Drying is effective when moisture exposure is limited and materials can fully release trapped water. However, there are situations where drying alone will not resolve the problem. If moisture keeps returning after drying, the issue may need the repair-focused approach covered in how to fix persistent HVAC duct moisture problems.
Signs Moisture Has Penetrated Materials
If moisture has soaked into duct insulation or remained trapped for an extended period, it may not fully evaporate. Warning signs include:
- Persistent musty odors after drying
- Dampness that returns after airflow stops
- Visible discoloration inside ducts or around vents
- Early signs of mold growth
These conditions suggest that moisture remains embedded in materials rather than just on the surface.
When Mold May Already Be Developing
If drying is delayed or incomplete, mold may begin forming during the process. In these cases, drying alone will not eliminate the problem.
Symptoms such as those described in signs of mold growth in HVAC ducts may indicate that contamination has already started.
When Moisture Conditions Cannot Be Controlled
Drying also becomes difficult when the underlying environment continues to introduce moisture. This can occur when:
- Humidity levels remain high
- Condensation continues forming inside ducts
- Airflow problems prevent proper drying
These ongoing conditions are often tied to causes explained in why mold forms inside HVAC ductwork, and must be addressed to prevent recurrence.
When to Call a Professional
While many drying situations can be handled with proper airflow and humidity control, some cases require professional assistance—especially when moisture exposure is severe or difficult to access.
Situations That Often Require Professional Help
- Standing water inside ductwork
- Widespread moisture affecting multiple areas
- Persistent dampness that does not improve
- Suspected mold growth inside ducts
- Insulated ducts that may be saturated
These conditions often require specialized equipment or inspection methods that go beyond basic drying techniques.
What Professionals Can Do
HVAC and water damage professionals may use:
- High-capacity air movers
- Industrial dehumidifiers
- Moisture detection tools
- Inspection cameras for internal duct evaluation
They can also identify deeper issues such as persistent dampness patterns similar to those discussed in why HVAC ducts stay damp, which may require more advanced solutions.
Frequently Asked Questions About How to Dry HVAC Ducts After Moisture Exposure
Can wet air ducts be dried without replacement?
In many cases, yes. Metal ducts and lightly damp systems can often be dried successfully. However, heavily saturated insulation or flex ducts may not dry completely and could require replacement.
How long does it take to dry HVAC ducts?
Drying time varies based on moisture levels and conditions. Light condensation may dry within hours, while more significant moisture can take several days or longer.
Should I run my HVAC system to dry the ducts?
Fan-only mode can help with light condensation after the moisture source is controlled. Do not run the system if there is standing water, suspected mold, contaminated water, or wet electrical equipment. In those cases, use external drying and get professional evaluation before circulating air.
Can mold grow during the drying process?
Yes. Mold can develop if moisture remains trapped in dust, insulation, flex duct low spots, or seams during an incomplete drying process. That is why drying should include moisture-source control, airflow, dehumidification, and confirmation that hidden areas are dry.
Are flexible ducts harder to dry than metal ducts?
Yes. Flexible ducts can trap moisture in low areas and inner linings, making them more difficult to dry completely compared to metal ductwork.
What happens if HVAC ducts stay damp?
If ducts remain damp, they create ideal conditions for mold growth, reduced air quality, and long-term system issues. Persistent moisture often leads to recurring problems.
Key Takeaways
- Drying HVAC ducts quickly reduces the risk of trapped moisture, odors, and mold growth
- Airflow and dehumidification are the most important drying factors
- Hidden moisture can remain even after surfaces appear dry
- Flexible and insulated ducts are harder to dry than metal ducts
- Drying will fail if the moisture source is not stopped
- Persistent dampness may require professional evaluation
- Early drying reduces the risk of trapped moisture in seams, flex duct low spots, and insulation