How to Detect Door Leaks Inside Walls
To detect door leaks inside walls, start at the exterior door opening and work downward. Check the interior casing, lower drywall, baseboards, threshold edge, nearby flooring, and wall-floor joint after rain. Look for damp trim, soft drywall, recurring stains, musty odor, swelling, or elevated moisture readings that return after storms.
If you have already noticed warning signs such as damp flooring, swelling trim, or recurring stains, those symptoms often indicate that moisture is moving beyond surface materials. If you are still in the early recognition stage, reviewing Signs of Water Leaks Around Exterior Doors can help confirm whether the patterns you are seeing are consistent with door-related water intrusion.
Hidden leaks inside walls are especially concerning because moisture spreads gradually along structural materials. Instead of remaining in one location, water moves downward through framing components and spreads outward across surfaces such as subfloors and wall plates. Without proper detection, this movement can lead to mold growth, weakened framing, and extensive repair costs.
For broader help tracing hidden moisture in walls, floors, ceilings, and other vulnerable areas, see How to Find Hidden Moisture in Different Areas of Your Home.
Why Door Leaks Often Spread Inside Walls
Water rarely stays confined to the point where it first enters around an exterior door. Once moisture passes through gaps in seals, flashing, or threshold components, it begins moving along nearby structural materials. This movement often occurs inside hidden spaces where moisture remains unnoticed until damage becomes more severe.
Gravity plays the most important role in determining how water spreads. After entering around a door frame or threshold, moisture travels downward through the structure. It collects along lower wall sections, subfloor edges, and bottom plates. These areas tend to remain damp longer because water naturally settles there rather than evaporating quickly.
Capillary action also contributes to moisture movement inside walls. Porous materials such as wood framing, drywall, and insulation absorb water and carry it across surfaces. Instead of forming obvious puddles, moisture may spread slowly through these materials, creating hidden damp zones that remain invisible for long periods.
Wind-driven rain increases the likelihood of hidden leaks. During storms, strong wind pressure forces water into small openings around the door assembly. Even narrow gaps can admit moisture under these conditions. Once inside, the water continues moving along hidden pathways that may not become visible until multiple wetting cycles occur.
Another reason door leaks spread inside walls is delayed drying. Insulation materials often trap moisture, slowing evaporation and allowing dampness to persist long after rainfall stops. When drying is incomplete, repeated rain events add new moisture before the previous moisture fully evaporates. This cycle gradually increases the amount of water inside structural cavities.
This is why door leaks should be traced by pattern, not just by the first visible stain. The highest damp point usually helps identify where water entered, while the wettest lower area often shows where it collected.
Where Hidden Door Leaks Usually Develop
Detecting door leaks inside walls becomes easier when you understand where moisture typically collects. Exterior door assemblies contain multiple layers of materials, and water usually follows predictable pathways once it enters through small gaps or failed seals. These hidden locations often show moisture damage long before visible symptoms appear in open areas.
Focusing inspection efforts on the most common moisture zones helps reduce guesswork. Instead of checking random areas, homeowners can target the locations where hidden water accumulation is most likely to occur.
Behind Door Trim and Casing
One of the most common locations for hidden door leaks is behind the interior trim and casing surrounding the door frame. Trim pieces cover the small gaps between the door frame and wall structure. If exterior seals fail, water can enter these hidden gaps without immediately becoming visible inside the room.
Moisture behind trim often produces subtle symptoms such as slight swelling, loose trim edges, or faint discoloration near the corners of the frame. In some cases, trim may appear intact while moisture continues to accumulate behind it. This hidden accumulation can weaken surrounding materials over time.
Check both lower corners of the casing, the miter joints, and the narrow gap where the casing meets the wall. Compare the leak-side trim with the same trim on the opposite side of the door. A localized difference in swelling, paint cracking, or moisture reading is more useful than one isolated reading by itself.
If visible trim damage is present, it may be helpful to evaluate the surrounding door assembly carefully. Structural weaknesses that allow water to enter are discussed in Why Exterior Doors Develop Water Leak Problems, which explains how installation and sealing failures create hidden leak pathways.
Inside Lower Wall Cavities
Lower wall cavities near exterior doors are highly vulnerable to hidden moisture. Water that enters around the door frame naturally flows downward and collects along the base of the wall. Because gravity drives this movement, the lowest sections of framing materials often experience the highest moisture exposure.
Moisture accumulation inside lower wall cavities can produce early signs such as soft drywall near baseboards or faint staining along the bottom of the wall. These symptoms often appear gradually, becoming more noticeable after repeated exposure to rain.
Lower wall areas remain damp longer than upper sections because moisture collects there and dries slowly. If repeated wetting occurs, the risk of hidden structural damage increases significantly.
Beneath Door Threshold Assemblies
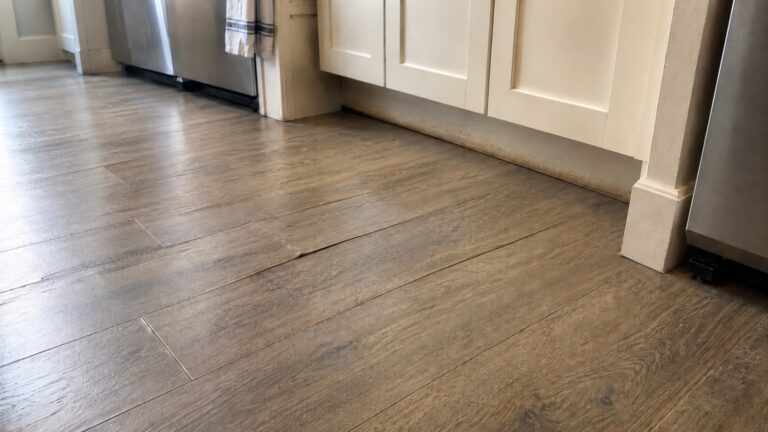
The threshold is one of the most important moisture control components in an exterior door system. When water passes beneath the threshold, it often spreads into subfloor materials and nearby wall bases. Because this area is concealed beneath flooring surfaces, hidden moisture may remain undetected for extended periods.
Signs of moisture beneath thresholds may include soft flooring near the door, slight movement under foot pressure, or recurring dampness along the threshold edge. These symptoms suggest that water may be traveling beneath the surface rather than remaining visible on top of the floor.
Pay special attention to the inside corners of the threshold, the flooring seam directly beside the sill, and any flooring that changes sound or feel under light foot pressure. These areas often reveal a threshold leak before the center of the floor looks damaged.
Threshold-related leaks often occur alongside other structural weaknesses. Preventative strategies that reduce moisture entry are explained in How to Prevent Water Intrusion Around Doors, which focuses on maintaining protective components that help limit water penetration.
Around Flashing and Structural Seals
Flashing materials installed around exterior doors are designed to direct water away from structural openings. When flashing fails or is improperly installed, water may bypass protective layers and travel inside wall assemblies. This type of hidden leak often produces widespread moisture movement before visible damage appears.
Because flashing is concealed behind exterior materials, failures may remain unnoticed until interior symptoms develop. Moisture entering through these pathways may appear as stains on nearby walls or recurring dampness that seems unrelated to visible exterior conditions.
When flashing failures are suspected, additional inspection of the door frame structure may be necessary. Detailed frame inspection methods are outlined in How to Inspect Door Frames for Water Damage, which explains how to evaluate vulnerable structural components surrounding the door opening.
Step-by-Step Process to Detect Door Leaks Inside Walls
Detecting hidden door leaks requires a systematic approach rather than guesswork. Following a structured sequence helps confirm whether moisture is present, identify its location, and determine how far it has spread. Each step builds on the previous one, reducing uncertainty and preventing unnecessary damage to structural materials.
Step 1 — Identify Suspicious Surface Symptoms
Detection begins by identifying surface symptoms that suggest moisture may be present inside walls. These symptoms often include recurring stains, swelling materials, soft drywall, or persistent odors near the door area. Even small changes in appearance should be documented carefully.
If you are unsure whether the symptoms you are seeing indicate a leak, reviewing Signs of Water Leaks Around Exterior Doors can help confirm whether visible patterns match typical moisture behavior near door assemblies.
Mark the exact location of each symptom before testing. A stain at the lower hinge side, swelling at one casing corner, or dampness beside the threshold can point to different leak paths.
Step 2 — Check Moisture Patterns Over Time
Moisture patterns provide valuable clues about leak behavior. Observing when dampness appears—such as after rain or during windy storms—helps determine whether water is entering from outside. Tracking these patterns over several days or weeks can reveal consistent relationships between weather events and moisture symptoms.
Recurring moisture patterns are rarely accidental. When dampness returns repeatedly in the same location, it strongly suggests that water is following a hidden pathway inside the wall.
Step 3 — Test Suspicious Areas for Moisture
Test the door area in a pattern instead of checking one random spot. Compare moisture readings at the lower casing, lower drywall, baseboard, threshold edge, and nearby floor. Then compare those readings with a dry control area on the same wall away from the door.
Avoid forcing tools behind trim or cutting drywall during the first pass. The goal is to confirm whether moisture is present and whether the wettest readings form a pattern that points back toward the door opening.
Step 4 — Trace Moisture Movement Direction
Tracing moisture movement helps identify the likely entry point of the leak. Water typically travels downward from the original entry location. By examining the highest point where moisture symptoms appear, homeowners can often locate the approximate source of intrusion.
Moisture movement patterns may also spread horizontally along structural components. Recognizing these patterns improves detection accuracy and reduces the likelihood of overlooking hidden leak paths.
Step 5 — Confirm Hidden Moisture Zones
A hidden moisture zone is more likely when several clues line up: the area becomes damp after rain, readings are higher than nearby dry materials, stains or swelling return in the same location, and the pattern starts near the door opening before moving downward.
If readings stay elevated during dry weather, the wall may be holding trapped moisture rather than simply showing temporary surface dampness.
Tools That Help Detect Hidden Door Leaks
Tools are most useful when they confirm a pattern already seen around the door. Use them to compare the lower casing, baseboard, threshold edge, nearby drywall, and a dry control area instead of relying on one isolated reading.
Moisture Meters
Moisture meters are among the most useful tools for detecting hidden door leaks inside walls. These devices measure moisture content in building materials, helping confirm whether drywall, wood, or trim contains elevated moisture levels.
Pin-type moisture meters use small probes to measure moisture at specific points. Pinless meters scan below the surface without puncturing materials. Both types can help identify moisture patterns when used carefully around door frames, baseboards, and threshold areas.
Readings should be compared between suspicious areas and nearby dry areas. A single reading does not always prove a leak, but consistent elevation in areas near the door assembly suggests hidden moisture may be present.
Thermal Imaging Cameras
Thermal imaging cameras can help identify temperature differences that may indicate hidden moisture. Damp materials often appear cooler than surrounding dry materials because evaporation affects surface temperature. This makes thermal imaging useful for identifying suspicious zones that require further testing.
However, thermal imaging does not directly measure moisture. Temperature differences may also result from insulation gaps, air leaks, or exterior temperature changes. For this reason, thermal findings should always be confirmed with moisture testing or closer inspection.
Inspection Cameras
Inspection cameras may be useful when access points already exist or when limited openings are created during controlled investigation. These cameras can show hidden staining, insulation wetness, or framing damage inside wall cavities.
Inspection cameras should not be the first tool used in every situation. They are most helpful when other evidence already suggests hidden moisture and a closer visual look is needed before larger repair decisions are made.
Signs That Moisture Has Entered the Wall Cavity
Visible symptoms around doors may indicate that moisture has moved beyond the surface and entered the wall cavity. These warning signs should be evaluated carefully, especially when they appear repeatedly after storms or worsen over time.
Soft or Spongy Drywall Near the Door
Soft drywall near an exterior door often indicates moisture absorption inside the wall. Drywall loses strength when exposed to repeated dampness, especially near lower wall sections where water collects. Pressing gently on the surface may reveal softness, crumbling texture, or slight movement.
Soft drywall should not be ignored, even if the surface looks mostly normal. Moisture may be affecting the backside of the drywall or nearby framing materials before obvious visible damage develops.
Swollen Baseboards or Door Trim
Swelling in baseboards or trim near exterior doors often suggests that moisture is entering hidden areas. Wood and composite trim materials absorb moisture and expand, causing gaps, raised edges, or separation from the wall.
When swelling appears near the base of the door frame, it may indicate that water has traveled behind the trim or beneath the threshold. These symptoms are especially significant when they return after wet weather.
Recurring Stains Near Door Corners
Recurring stains near door corners often point to hidden leak pathways. Water entering around flashing, seals, or threshold joints may appear as discoloration on nearby drywall or trim. If stains fade and then return after rain, the leak is likely ongoing.
Stain location helps identify the likely moisture path. Stains near the upper frame may suggest water entering around the head of the door, while stains near the lower corners often point to threshold or side-frame leakage.
Musty Odors Near the Door Area
Musty odors near exterior doors may indicate trapped moisture inside hidden materials. Odors often develop when dampness remains in wall cavities, insulation, or subfloor materials. Because odor can appear before visible damage, it should be taken seriously when it remains localized near a door assembly.
If the smell is strongest near the threshold, baseboard, or lower wall section, hidden moisture may be collecting behind surface materials. Persistent odors after rain are especially concerning.
How to Tell Whether the Leak Is Active
Detecting moisture is only part of the process. Homeowners also need to determine whether the leak is active, intermittent, or related to an older event. Active leaks require faster action because new moisture continues entering the structure.
Several patterns can help distinguish active leaks from old damage. These patterns are most reliable when documented over time rather than judged from one observation.
Moisture Appears After Rain
Moisture that appears or worsens after rainfall strongly suggests an active exterior leak. Door leaks are often influenced by weather conditions, especially wind-driven rain. If dampness increases after storms and improves during dry periods, water is likely entering from outside.
Documenting this pattern helps confirm the leak source. Taking photos after rain and during dry conditions can make changes easier to recognize.
Readings Stay Elevated During Dry Weather
Moisture readings that remain elevated during dry weather may indicate trapped moisture inside wall materials. This does not always mean water is still entering, but it does show that materials have not fully dried. Persistent readings require careful monitoring because trapped dampness can support mold growth and material deterioration.
If readings rise again after the next storm, the leak is likely active rather than isolated.
Damage Continues Expanding
Expanding stains, spreading softness, or worsening trim movement indicate that moisture exposure is continuing. Old damage usually remains stable unless new water enters or trapped moisture continues spreading through materials.
When damage expands over time, the leak should be treated as ongoing until proven otherwise.
When to Open Walls for Inspection
Opening walls should always be considered a last step rather than an immediate reaction. Controlled investigation helps avoid unnecessary damage and limits repair costs. In many cases, leaks can be confirmed using surface testing and observation before wall removal becomes necessary.
Do not open wall sections near electrical outlets, switches, or wiring until power risk has been considered. If the area is wet, moldy, structurally soft, or close to electrical components, professional inspection is safer than exploratory cutting.
When Moisture Readings Are Consistently High
Consistently high moisture readings near an exterior door may justify further investigation. If readings remain elevated across multiple checks and do not improve during dry weather, moisture may be trapped inside the wall cavity.
Opening the wall may be necessary when surface inspection cannot determine the extent of moisture involvement. In these situations, controlled access helps confirm whether insulation, framing, or sheathing materials are affected.
When Structural Materials Feel Soft
Soft structural materials suggest more serious moisture damage. If drywall, trim, or subfloor areas feel spongy, deteriorated, or unstable, hidden materials may also be compromised. Waiting too long in these conditions can allow damage to spread.
Professional evaluation is often recommended when structural materials feel soft near a door opening. Exterior doors rely on surrounding framing for stability, so hidden damage should be evaluated carefully.
When Mold or Odor Is Present
Mold growth or persistent musty odor may indicate that moisture has been trapped for an extended period. Surface cleaning alone does not confirm that the wall cavity is dry. If odor continues after surface drying, hidden materials may still be damp.
Opening walls may be necessary when mold or odor suggests hidden contamination. However, mold-related investigation should be performed carefully, especially if the affected area is large or occupants have health concerns.
Common Mistakes When Detecting Door Leaks Inside Walls
Door leaks are easy to misread because the visible damage is not always where the water entered. Avoiding the mistakes below helps prevent false confidence, unnecessary wall damage, and missed moisture behind trim, thresholds, or lower wall materials.
Assuming Surface Dryness Means the Wall Is Dry
Surface materials may dry faster than hidden components. A door area can look dry while moisture remains inside drywall, insulation, framing, or subfloor materials. This is especially common after small leaks that occur repeatedly over time.
Relying only on visible dryness can delay proper detection. Moisture readings and pattern tracking provide a more reliable understanding of hidden conditions.
Checking Only the Visible Door Frame
Door leaks often move beyond the visible frame. Water may travel behind trim, beneath the threshold, or into nearby flooring before symptoms appear. Checking only the visible frame can miss the true extent of moisture movement.
A complete detection process should include the surrounding wall, baseboard, threshold, and flooring areas.
Ignoring Weather Patterns
Weather patterns provide important clues. A leak that appears only after wind-driven rain may not be obvious during calm rainfall. Ignoring these conditions can make detection difficult and lead to incorrect assumptions about the source.
Recording when symptoms appear helps identify whether the leak is related to rain direction, storm intensity, or specific exterior conditions.
Caulking Before Confirming the Leak Path
Caulking visible gaps before confirming the leak path can trap moisture inside the wall or hide symptoms without solving the problem. While sealing may eventually be part of the repair process, it should not replace proper detection.
The source of water entry should be understood before final sealing or repair decisions are made.
When Professional Leak Detection Is Needed
Professional leak detection is most useful when the moisture pattern is clear but the entry point is not. This is common around exterior doors because water can enter through flashing, threshold, siding, trim, or wall-seal failures before appearing indoors.
When Moisture Spreads Rapidly
Rapidly spreading moisture suggests that water intrusion is significant and ongoing. In these situations, delays increase the likelihood of structural damage and mold development. Professional detection helps locate the source quickly and prevent further spread.
When Mold Growth Appears
Visible mold near a leaking exterior door usually means the area has stayed damp long enough for deeper materials to be involved. Professional detection is often needed when mold appears along trim, lower drywall, baseboards, or threshold areas and the leak path is not obvious.
If mold develops near exterior doors, reviewing Signs of Mold Growth Around Exterior Doors can help clarify how moisture-related mold patterns typically develop in these locations.
When Structural Stability Is Uncertain
Structural instability near exterior doors may present safety risks. Signs such as shifting frames, severe material softening, or difficulty closing doors indicate potential damage to load-bearing components. Professional inspection becomes essential when these conditions appear.
Frequently Asked Questions About Detecting Door Leaks Inside Walls
Can water leak inside a wall without visible damage?
Yes, water can leak inside walls without producing visible surface damage. Moisture often travels behind drywall, insulation, and trim before becoming visible. In early stages, the only signs may be subtle odors, minor staining, or slightly softened materials near the base of the wall.
Because hidden moisture spreads slowly, surface materials may appear normal while internal components remain damp. This is why recurring patterns—such as dampness after rain—should always be monitored closely, even when visible damage seems minor.
How long does it take for water to spread inside a wall?
Water can begin spreading inside wall cavities as soon as it passes behind the casing, jamb, threshold, or flashing area. Visible damage may not appear for days or weeks because the first moisture often collects behind trim, inside lower drywall, along bottom plates, or at the subfloor edge.
Short-term leaks may only leave minor dampness, but repeated exposure over weeks or months can weaken materials around the door opening.
Should I open drywall to check for a hidden door leak?
Opening drywall should be considered only after confirming that moisture is present and cannot be traced using surface inspection methods. Unnecessary demolition increases repair costs and may damage areas that are otherwise structurally sound.
If moisture readings remain elevated or visible damage continues to spread, controlled removal of a small section of drywall may help confirm the extent of hidden moisture. In many cases, professional guidance is recommended before opening structural surfaces.
What tools are most helpful for detecting hidden door leaks?
A moisture meter is usually the most helpful first tool because it lets you compare the lower casing, baseboard, threshold edge, nearby drywall, and a dry control area away from the door. Thermal imaging can help find cooler damp zones, but it should be confirmed with a meter or direct inspection. An inspection camera may help when a small access point already exists, but it should not be used as an excuse for unnecessary wall damage.
Can small door leaks damage structural framing?
Yes. Small exterior door leaks can damage framing when water repeatedly reaches the jack studs, bottom plate, subfloor edge, or threshold support. The risk is higher when the area dries slowly between storms or moisture readings stay elevated during dry weather.
Early detection helps confirm whether the leak is only affecting surface trim or has moved into structural materials around the door opening.
Conclusion: Accurate Detection Prevents Costly Structural Damage
Door leaks inside walls should be detected by pattern: where moisture appears after rain, where readings stay elevated, and how the damp area moves from the door opening into lower wall or floor materials. The most important clues are recurring stains, soft lower drywall, swelling trim, damp threshold edges, and moisture that remains during dry weather.
Once hidden moisture is confirmed, the next step is to identify why the door is leaking and whether surrounding materials have already been damaged. For related next steps, see Why Exterior Doors Develop Water Leak Problems, How to Prevent Water Intrusion Around Doors, and How to Inspect Door Frames for Water Damage.
3 Comments
Comments are closed.