How to Dry Walls After Water Damage (Step-by-Step Guide to Prevent Mold and Structural Damage)
To dry walls after water damage, stop the water source first, remove standing water, increase airflow, lower indoor humidity, open trapped wall areas when needed, and monitor moisture until the wall is dry inside—not just on the surface.
Wet drywall, insulation, and framing can hold moisture long after the wall looks dry. If that moisture stays trapped, mold growth, softened drywall, odor, and structural deterioration become more likely.
If the water source is still unclear, use the how to find hidden water leaks inside walls guide before drying begins. This article focuses on the drying process itself: what to do first, how to dry wet walls, when to open wall cavities, and when drywall should be removed instead of saved.
What to Do Immediately After Walls Get Wet
The first few hours after water exposure are critical. Start by making the area safe, stopping the water source, removing standing water, and beginning airflow before moisture spreads deeper into wall materials.
Safety warning: Do not run fans, dehumidifiers, or wet/dry vacuums near wet outlets, standing water, or damaged wiring. If water may contain sewage, floodwater, chemicals, or other contamination, avoid DIY drying and call a water damage professional.
Step 1: Stop the Source of Water
Before drying begins, the source of water must be stopped. Continued water flow allows moisture to spread deeper into materials and increases the likelihood of mold growth.
Common actions include:
- Turning off water supply lines
- Repairing leaking plumbing connections
- Stopping appliance leaks
- Blocking exterior water entry points
- Addressing roof leaks or drainage problems
If the water source is unclear, identifying it quickly prevents recurring damage. Using methods from the how to find hidden water leaks inside walls guide helps locate hidden leak sources.
Step 2: Remove Standing Water Immediately
Standing water spreads rapidly into wall materials and flooring. Removing visible water reduces the amount of moisture absorbed into structural components.
Effective water removal methods include:
- Using wet/dry vacuums
- Mopping excess water
- Using absorbent towels or cloths
- Pumping water from flooded areas
The less water the wall absorbs early, the less moisture must be removed later with airflow and dehumidification.
Step 3: Protect Nearby Materials
Move furniture, rugs, stored items, and saturated wall coverings away from wet walls so they do not keep the wall damp or block airflow.
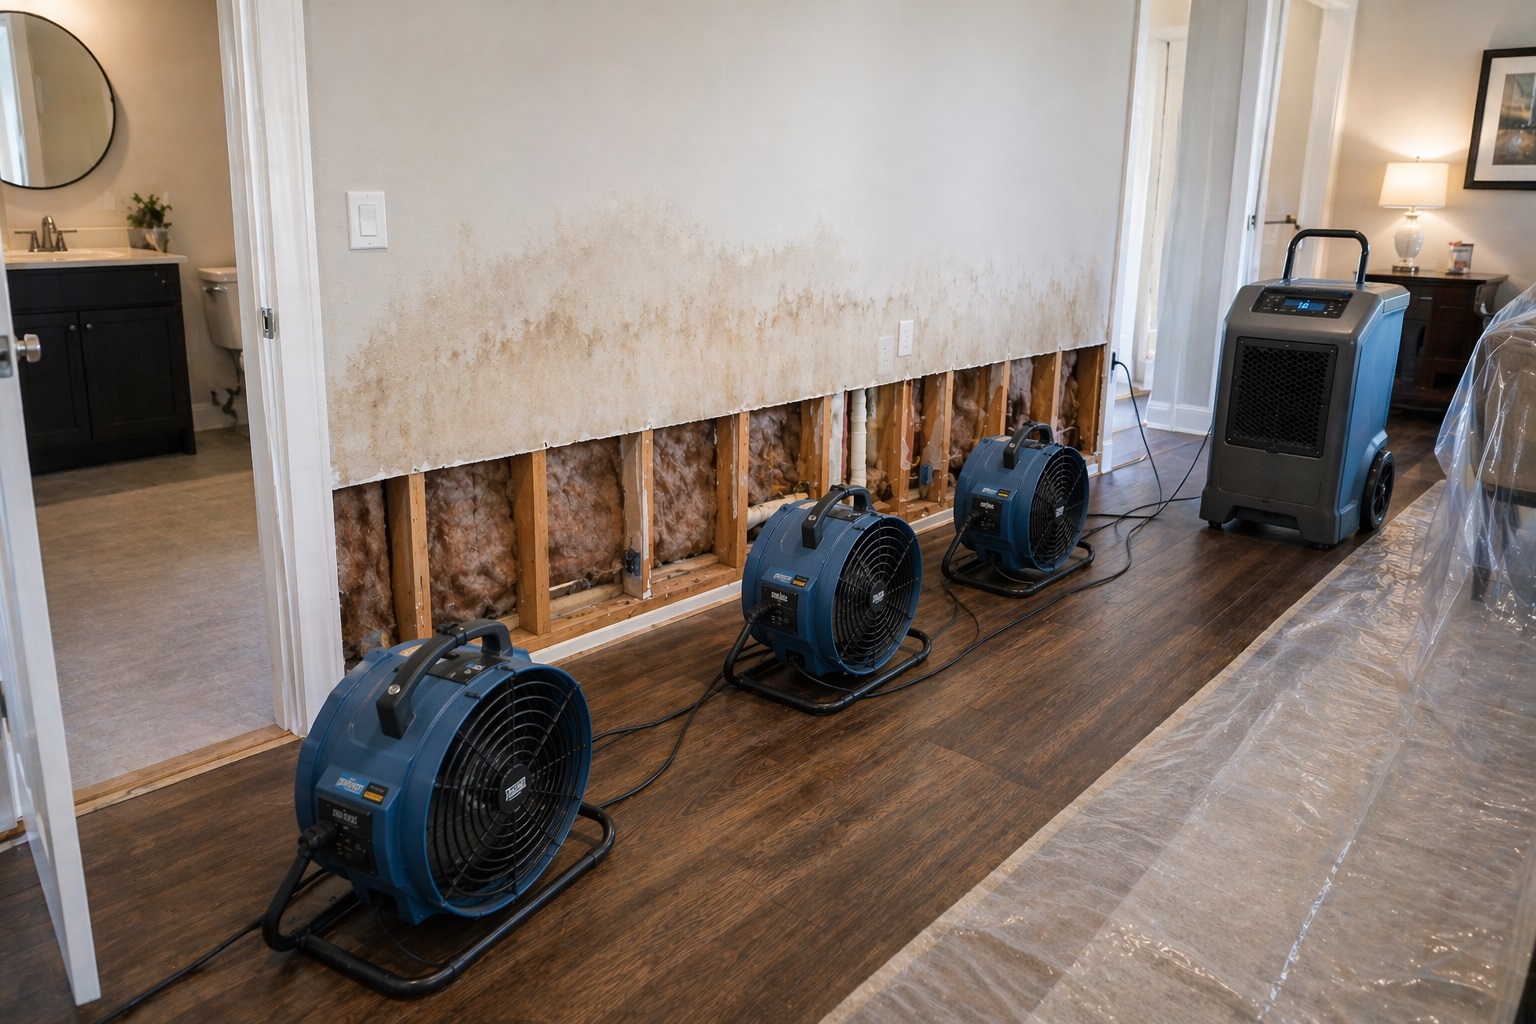
Step 4: Begin Airflow Immediately
Begin airflow as soon as the area is safe. Open windows only when outdoor air is drier than indoor air, use fans to move air across wet wall surfaces, and keep airflow consistent during active drying.
Step-by-Step: How to Dry Walls After Water Damage
Once the immediate response steps are complete, the goal is to keep air moving across the wet wall, pull moisture out of the room air, and confirm that hidden materials are drying—not just the visible surface.
Step 1: Increase Air Circulation Around Wet Walls
Continuous airflow helps moisture evaporate from wet wall surfaces, but fans should move air across the wall rather than only blowing into the room.
Effective air circulation methods include:
- Positioning fans directly toward wet areas
- Using multiple fans to increase airflow coverage
- Allowing air to move across wall surfaces
- Maintaining uninterrupted airflow during drying
Keep fans running continuously during active drying unless electrical safety, contaminated water, or visible mold makes the area unsafe.
Step 2: Use Dehumidifiers to Remove Moisture From Air
Dehumidifiers remove moisture from indoor air, allowing wet materials to dry more effectively. This step is especially important in enclosed spaces where moisture accumulates.
Dehumidifier use helps:
- Reduce humidity levels
- Speed up evaporation
- Prevent condensation
- Improve drying efficiency
Maintaining indoor humidity below 50–60% helps prevent mold growth during the drying process. For faster drying, many situations benefit from keeping humidity closer to the 30–50% range when conditions allow.
Track room humidity with a hygrometer while drying. For help measuring humidity correctly, use the How to Test Indoor Humidity Levels guide.
Step 3: Remove Baseboards if Necessary
Baseboards may trap moisture along the bottom of the wall. Remove them when water has reached the lower drywall, when the baseboard is swollen, or when moisture readings stay high near the floor line.
Removing baseboards helps:
- Expose damp lower drywall edges
- Improve airflow behind trim
- Reveal swelling, staining, or hidden moisture near the floor line
This step is especially important when water exposure affects lower wall sections.
When to Open Wall Cavities to Speed Up Drying
In many water damage situations, moisture becomes trapped inside wall cavities. When this occurs, surface drying alone is not enough to remove moisture completely.
Opening small sections of wall materials allows trapped moisture to escape and improves airflow inside enclosed spaces.
Signs That Walls May Need to Be Opened
Wall cavities may require opening when moisture remains trapped inside insulation or framing materials. Surface drying alone may not remove moisture from enclosed spaces.
Common signs that wall cavities should be opened include:
- Water exposure lasting more than several hours
- Visible swelling or warping of drywall
- Persistent damp odors
- Moisture readings remaining elevated
- Flooding affecting lower wall sections
If moisture remains trapped inside wall cavities, mold growth may begin within 24 to 48 hours. Reviewing the how long does mold take to grow after water damage guide helps determine urgency.
How to Open Walls Safely for Drying
Opening small sections of drywall can help trapped moisture escape, but only after the area is safe to work in. Do not cut into walls if outlets, wiring, plumbing, contaminated water, or structural damage may be involved.
Safe wall opening steps include:
- Removing baseboards before cutting drywall
- Cutting small openings near the base of walls
- Creating evenly spaced ventilation openings
- Avoiding cutting into plumbing, electrical lines, outlets, or unknown wall cavities
Opening small sections improves airflow and allows moisture to evaporate from hidden areas. If you are unsure what is inside the wall, stop and get professional help before cutting.
What to Do if Wet Wall Insulation Is Behind the Drywall
If water has reached insulation inside the wall cavity, surface drying is usually not enough. Saturated fiberglass often needs removal because it can hold moisture against drywall and framing, while foam insulation may still trap water around seams, edges, and nearby materials.
Open the wall only when it is safe, inspect the insulation, and do not close the wall until the cavity is dry. For detailed material-specific guidance, use the How to Dry Insulation After Water Damage guide.
How to Dry Drywall After Water Damage
Drywall absorbs moisture quickly and may retain water inside its core. Proper drying techniques help prevent mold growth and preserve structural strength when the drywall has not been contaminated, softened, or damaged beyond saving.
Position Fans to Maximize Airflow
Fan placement plays a major role in drying efficiency. Proper positioning ensures consistent airflow across wet surfaces.
Recommended fan placement strategies include:
- Positioning fans directly facing wet walls
- Spacing fans evenly across affected areas
- Maintaining airflow across entire wall surfaces
- Running fans continuously during drying
Multiple fans improve coverage and reduce drying time, especially when a large wall area or multiple rooms were affected.
Use Cross-Ventilation Only When Outdoor Air Is Drier
Cross-ventilation can help move moist indoor air outside, but it only helps when outdoor air is drier than indoor air. If outdoor air is humid, keep the space controlled with fans and dehumidifiers instead.
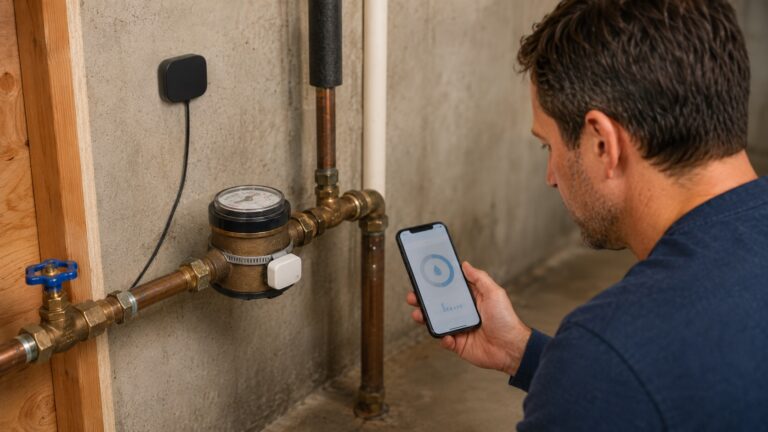
Monitor Drywall Moisture Levels During Drying
Moisture meters help determine whether drywall is drying properly. A wall can feel dry on the surface while moisture remains inside the drywall core, behind baseboards, or inside the wall cavity.
Moisture meters help identify:
- Areas that remain damp
- Moisture concentration zones
- Incomplete drying conditions
- Safe repair readiness
If you need a tool for checking drying progress, the best moisture meters for home use guide can help you choose one.
Understanding moisture readings improves drying accuracy. Reviewing the moisture levels that indicate water damage guide helps determine when materials are fully dry. Detailed repair methods are covered separately in the How to Fix Water-Damaged Drywall guide.
How Long It Takes Walls to Dry After Water Damage
Drying time varies depending on the amount of water exposure, material type, airflow conditions, and humidity levels. While minor moisture exposure may dry quickly, heavily saturated materials require more time and careful monitoring.
Use timelines only as a rough guide; moisture readings and hidden wall conditions matter more than the number of days alone.
Typical Drying Times for Different Wall Materials
Different materials absorb moisture at different rates. The time required to dry each material depends on how deeply moisture penetrates.
| Material | Typical Drying Time | Notes |
|---|---|---|
| Drywall | 24–72 hours | Longer if insulation is wet |
| Wood Framing | 48–96 hours | Depends on moisture depth |
| Insulation | Often requires removal | Difficult to dry fully when saturated |
| Plaster Walls | 3–7 days | Dense materials dry slowly |
These timelines assume proper airflow and humidity control. Poor ventilation, wet insulation, trapped wall cavities, or high humidity may significantly increase drying time.
Factors That Affect Drying Time
Several environmental and structural factors influence how quickly walls dry after water exposure.
The most important drying factors include:
- Amount of water exposure — Larger leaks require longer drying times.
- Airflow conditions — Continuous airflow speeds evaporation.
- Humidity levels — High humidity slows drying.
- Material thickness — Dense materials retain moisture longer.
- Temperature conditions — Warm temperatures increase evaporation.
The fastest safe drying happens when airflow, humidity, temperature, and hidden wall conditions are all controlled together.
Signs That Walls Are Drying Properly
Walls are drying properly when moisture readings steadily decline, surfaces no longer feel cool or damp, musty odors fade, and indoor humidity stays under control.
Check readings in multiple places, especially near the floor line, behind removed baseboards, near the original water source, and around any area that still smells damp. If moisture signs are unclear, use the signs of hidden moisture in walls guide to compare symptoms.
Signs Moisture Is Still Trapped Inside the Wall
Moisture may still be trapped inside the wall if musty odors continue, damp areas return after drying, moisture readings stay elevated, or room humidity remains high after dehumidification.
Recurring dampness may point to an active leak, incomplete drying, poor airflow, or exterior water intrusion. If the source is unclear, learn to trace hidden water leaks inside walls.
When Wall Drying Is Failing
Wall drying may be failing if moisture readings stay high, damp areas return, odors worsen, or mold begins forming during the drying process. Common causes include a hidden leak, saturated insulation, poor airflow, blocked ventilation openings, or moisture trapped inside the wall cavity.
If mold begins forming, stop treating the project as simple drying. Review how long mold takes to grow after water damage to understand the urgency and consider professional help before closing or rebuilding the wall.
When Wet Drywall Must Be Removed Instead of Dried
Not all wet drywall can be saved. Removal may be necessary when drywall stayed wet too long, feels soft or crumbly, has visible swelling, was exposed to contaminated water, or shows mold growth.
- Drywall that remains wet for more than 24 to 48 hours has a higher mold risk.
- Swollen, bulging, crumbling, or separating drywall often cannot regain its original strength.
- Visible mold may mean contamination has spread into porous material or hidden wall areas.
This article does not cover drywall repair steps. If damaged drywall must be replaced, use the How to Fix Water-Damaged Drywall guide after the source is fixed and the area is dry.
How to Prevent Mold While Drying Wet Walls
During active drying, mold prevention depends on low humidity, steady airflow, and daily moisture checks. Keep humidity below 60%, aim for 30–50% when possible, keep air moving across wet surfaces, and check moisture readings until the wall is dry inside.
For help interpreting readings, use the moisture levels that indicate water damage guide. For long-term prevention after drying, see how to prevent mold behind walls.
When to Call Professionals for Wall Drying
Call a professional when the affected area is large, water may be contaminated, multiple rooms are wet, structural components remain saturated, moisture readings stay elevated, or drying requires equipment beyond normal fans and household dehumidifiers.
Professional help is also important when drywall, insulation, framing, or electrical areas may be involved and you cannot confirm that the wall cavity is safe and dry.
What to Do Before Closing or Repainting a Dried Wall
Before closing, repainting, or rebuilding a dried wall, confirm that the water source is fixed, moisture readings have returned to a safe range, odors are gone, and no soft, crumbling, or moldy material remains. For broader prevention after the wall is dry, use the How to Prevent Recurring Moisture Damage guide.
If mold has already developed on wet drywall, drying alone is not enough. Use the How to Remove Mold From Drywall guide before closing, painting, or rebuilding the wall.
2 Comments
Comments are closed.