How to Inspect Exterior Flashing for Damage
To inspect exterior flashing for damage, start by checking the places where water is most likely to enter: roof-to-wall intersections, window and door heads, chimney bases, roof penetrations, siding transitions, deck ledgers, and exterior trim joints. Look for lifted metal, gaps, corrosion, staining, soft trim, loose materials, debris buildup, and areas that stay wet longer than nearby surfaces.
Exterior flashing is the water-control layer that directs rain away from seams and joints. When it becomes loose, corroded, buried, separated, or poorly integrated with surrounding materials, water can enter behind siding, roofing, trim, insulation, or framing before an indoor leak becomes obvious.
This guide explains how to inspect exterior flashing for damage from a homeowner’s perspective. It focuses on what you can safely observe without tearing apart siding or roofing. For the broader water-entry system this belongs to, see how water enters homes through structural gaps. If you are already seeing active moisture symptoms, first review signs of failed exterior flashing. If you are trying to confirm whether flashing is the actual source of water entry, see how to detect water intrusion from flashing failures.
When You Should Inspect Exterior Flashing
Flashing should be inspected before obvious leaks appear. Many flashing problems develop slowly, and by the time stains show up indoors, water may already have been entering the wall or roof assembly for months.
Inspect Flashing During Seasonal Maintenance
A basic flashing inspection should be part of your spring and fall home maintenance routine. These seasons are useful because they usually occur before or after heavy rain, heat, wind, snow, or freeze-thaw stress.
During seasonal checks, look for changes around exterior joints and transitions. You are not trying to perform a full professional inspection. You are looking for visible warning signs that flashing may no longer be protecting the area properly.
Inspect After Heavy Storms
Storms can expose flashing weaknesses that may not show up during normal rainfall. Wind-driven rain, heavy runoff, and debris impact can loosen materials or force water into vulnerable seams.
After major storms, inspect areas such as:
- Roof-to-wall intersections
- Window and door perimeters
- Chimney bases
- Skylights and roof penetrations
- Siding transitions
- Deck ledger connections
If you notice new staining, loose materials, or gaps after a storm, the flashing system may need closer evaluation.
Inspect Before Exterior Repairs or Replacements
Any time siding, roofing, windows, doors, trim, or decks are being repaired or replaced, flashing should be checked. Many leaks begin because flashing was skipped, damaged, buried incorrectly, or not integrated properly during exterior work.
If you are hiring a contractor, ask how flashing will be inspected and protected during the project. Flashing is not an optional detail—it is part of the water-control system that prevents recurring moisture damage.
Safety Before You Start
Exterior flashing inspection can involve roofs, ladders, wet surfaces, and elevated areas. Safety matters more than getting a perfect view. Many useful observations can be made from the ground, through windows, from attic access points, or with binoculars.
Useful tools include binoculars, a phone camera with zoom, a flashlight for attic or soffit views, gloves for checking accessible trim, and a notepad or photos to compare the same area after the next rain.
Do Not Walk on the Roof Unless You Are Trained
Most homeowners should not walk on the roof to inspect flashing. Roof surfaces can be slippery, steep, fragile, or unstable. Walking on roofing materials can also damage shingles, tiles, membranes, or flashing components.
If flashing cannot be inspected safely from the ground or a stable ladder position, leave that portion to a qualified professional.
Do not place a ladder near overhead electrical lines, on soft soil, on wet surfaces, or against damaged siding, gutters, or trim.
Use Ground-Level Inspection First
Start from the ground and look upward. You can often identify obvious issues without climbing.
Use binoculars or your phone’s zoom feature to inspect:
- Loose flashing near chimneys
- Lifted metal at roof edges
- Gaps around windows or doors
- Damaged trim near flashing locations
- Water stains beneath exterior joints
This approach helps you identify problem areas without unnecessary risk.
Avoid Inspecting During Rain or Wind
Do not inspect exterior flashing during active rain, strong wind, lightning, or icy conditions. Wet surfaces make ladders and roofs dangerous. Wait until conditions are dry and visibility is clear.
After the storm passes, inspect for new water stains, displaced materials, or damp areas that remain wet longer than surrounding surfaces.
Step-by-Step Exterior Flashing Inspection
Use this inspection as a visual screening process, not as a destructive investigation. The goal is to find visible clues that flashing may be loose, missing, reversed, corroded, blocked, or poorly integrated with the surrounding materials.
Step 1: Start With a Full Exterior Walkaround
Begin by walking around your home and observing all exterior surfaces. Look for changes, inconsistencies, or damage near areas where different materials meet.
Focus on:
- Transitions between roof and walls
- Edges around windows and doors
- Chimney and vent penetrations
- Siding joints and trim boards
- Deck attachment points
You are not looking for perfect conditions—you are looking for anything that appears out of place compared to surrounding materials.
Step 2: Inspect Roof-to-Wall Flashing Areas
Roof-to-wall intersections are one of the most critical flashing locations. These areas often use step flashing combined with counter flashing to direct water away from the wall.
From a safe vantage point, check the lower edge of the wall, the step-flashing line, and the area where siding or counter flashing overlaps the roof surface. Look for:
- Flashing pieces that appear lifted or out of alignment
- Visible gaps between flashing and siding
- Rust or corrosion on exposed metal
- Missing or displaced flashing sections
- Missing or damaged kick-out flashing where a roof edge terminates against a wall
If these areas show irregularities, water may be able to enter behind the siding or roofing materials.
Step 3: Check Around Windows and Doors
Windows and doors rely heavily on properly installed flashing. Even small failures can allow water to enter the wall assembly.
Start at the top of the opening, because failed head flashing often sends water down the sides or behind the trim. Inspect for:
- Gaps or cracks along the top edge (head flashing area)
- Soft or deteriorating trim
- Peeling paint near edges
- Uneven joints between frame and siding
- Blocked weep paths, clogged sill channels, or trim details that appear to trap water instead of shedding it
If the area below the window shows signs of staining or softness, it may indicate water entering above the opening and traveling downward.
Step 4: Inspect Chimneys and Roof Penetrations
Chimneys, vents, skylights, and other penetrations interrupt the roof surface and require specialized flashing systems.
Check for:
- Loose or bent flashing around the base
- Gaps where flashing meets roofing materials
- Sealant failure combined with visible separation
- Debris buildup that traps moisture
Because these areas are exposed to direct rainfall, flashing damage here often leads to more noticeable leaks.
Step 5: Examine Siding Transitions and Trim
Flashing is often hidden behind siding, but its performance can still be evaluated indirectly by looking at the surface materials.
Look for:
- Bulging or warped siding panels
- Stains or streaks running down walls
- Soft or deteriorating trim boards
- Visible gaps at horizontal joints
These signs suggest that water may be entering behind the siding, possibly due to flashing issues.
Step 6: Check Deck Ledger Connections
The connection between a deck and the house is a common location for flashing problems. Proper flashing should prevent water from entering the wall where the deck attaches.
Inspect for:
- Gaps between the ledger board and wall
- Signs of rot or soft wood
- Water staining on the wall above or below the deck
- Missing or damaged flashing at the connection point
Because this area is exposed to repeated moisture, even small flashing issues can lead to significant damage.
What to Look for at Each Location
While each flashing area has unique features, there are common warning signs that indicate potential problems.
Gaps and Separation
Any visible gap between flashing and adjacent materials is a potential entry point for water. These gaps may be caused by movement, improper installation, or material deterioration.
Corrosion and Material Damage
Metal flashing should be intact and free of significant rust. Corrosion weakens the material and can lead to holes or cracks where water can enter.
Loose or Displaced Flashing
Flashing should sit flat and remain securely attached. Pieces that are lifted, bent, or out of position may not direct water properly.
Cracked or Missing Sealant (With Context)
While sealant is not the primary barrier, cracked or missing sealant combined with other issues can indicate that the flashing system is under stress or failing.
Signs of Water Movement
Look for evidence that water is not draining properly, such as:
- Streaking or staining patterns
- Areas that stay wet longer than others
- Accumulated debris holding moisture
These signs often point to underlying problems with flashing or drainage.
Interior Clues That Support Your Exterior Inspection
While exterior inspection is the primary focus, interior observations can help confirm whether what you see outside is actually allowing water into the structure. Flashing failures often show up inside before they are clearly visible outside.
Check Walls Adjacent to Exterior Flashing Areas
After inspecting outside, go indoors and examine the corresponding wall or ceiling areas. Focus on locations directly below or near the flashing you checked.
Look for:
- Discoloration or staining on drywall
- Soft or swollen wall surfaces
- Bubbling or peeling paint
- Trim separating from the wall
If these interior signs line up with exterior flashing areas, it strengthens the likelihood that the flashing is not performing correctly.
Look for Moisture Patterns After Rain
Interior checks are most useful after rainfall. This is when moisture is most likely to be present.
Pay attention to:
- New or darker stains after storms
- Localized dampness near exterior walls
- Ceiling marks below roof-to-wall intersections
- Moisture around windows or doors
These patterns can help confirm whether water is entering from outside rather than from plumbing or humidity-related issues.
For a more focused process after your visual inspection, see how to detect water intrusion from flashing failures.
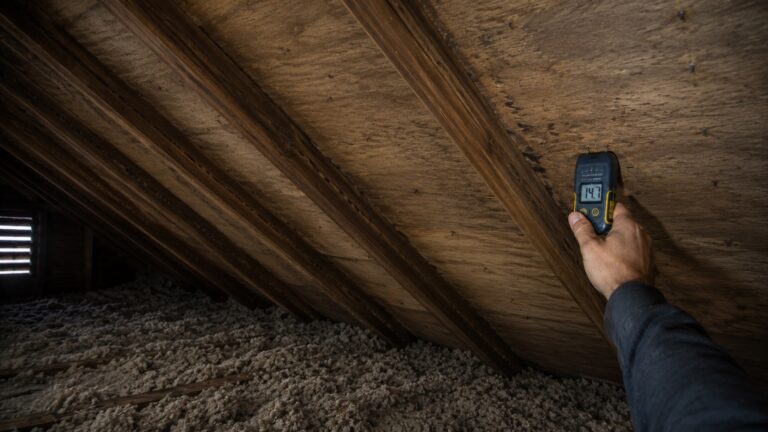
Check Attic or Accessible Spaces
If your home has an attic or other accessible space near the suspected flashing area, it can provide additional clues.
Look for:
- Damp insulation
- Darkened or stained wood
- Water tracks along sheathing or framing
- Localized discoloration near penetrations
These signs often appear before moisture reaches finished interior surfaces.
Common Mistakes During Flashing Inspection
Flashing inspections become unreliable when you look only at the most obvious stain, treat caulk as the whole solution, or ignore how water drains across the wall or roof.
Focusing Only on One Area
Water may enter at one location and appear at another. Inspecting only the visible problem area can cause you to miss the true source.
Always look above and around the affected area to identify potential entry points.
Assuming Caulk Failure Is the Root Cause
Cracked or missing sealant is easy to spot, but it is often not the main issue. Flashing is what should direct water out and away before it reaches the wall or roof assembly. If flashing is missing, reversed, buried, or improperly integrated, resealing the surface may only hide the problem while water continues entering behind the exterior layer.
Understanding the underlying causes helps avoid misdiagnosis. For more detail, see why exterior flashing develops leaks.
Ignoring Subtle Changes
Small signs such as slight discoloration, minor gaps, or early material wear may seem insignificant but can indicate the beginning of a flashing problem.
Waiting for obvious damage increases the risk of hidden structural issues.
Overlooking Drainage Conditions
Flashing performance is closely tied to how water flows across the exterior. Ignoring drainage issues can lead to incorrect conclusions about flashing condition.
Consider whether water is:
- Pooling near the inspected area
- Overflowing from gutters
- Being directed toward the wall instead of away from it
Improving drainage may be necessary even if the flashing itself appears intact.
When to Call a Professional
Some flashing issues cannot be confirmed through visual inspection alone. In these cases, professional evaluation is recommended.
Hidden or Inaccessible Flashing
Flashing is often concealed behind siding, roofing, or trim. If the suspected problem area cannot be safely or clearly viewed, a professional inspection may be required.
Recurring Moisture Problems
If stains return after rain, trim stays soft, paint keeps bubbling, or moisture appears in the same area after minor repairs, the underlying issue may involve hidden or improperly integrated flashing.
Structural Damage or Soft Materials
Soft walls, rotting wood, or widespread deterioration indicate that water has been entering for an extended period. This type of damage requires a more thorough evaluation.
Unclear Inspection Results
If your inspection reveals mixed or inconclusive signs, a professional can use specialized tools and techniques to identify the source of the problem more accurately.
Frequently Asked Questions About How to Inspect Exterior Flashing for Damage
Can I inspect flashing without going on the roof?
Yes. Many exterior flashing problems can be spotted from the ground with binoculars or a phone camera zoom. Focus on lifted metal, gaps, staining, soft trim, missing kick-out flashing, and areas that stay wet longer than nearby surfaces.
What is the easiest way to check exterior flashing for damage?
The easiest method is to inspect high-risk transitions first: roof-to-wall intersections, window and door heads, chimney bases, roof penetrations, siding transitions, and deck ledger connections. Then check the matching indoor wall, ceiling, or attic area after rain.
Should I inspect flashing after every storm?
You do not need a full inspection after every normal rain, but you should check after severe wind-driven rain, hail, falling debris, gutter overflow, roof work, siding work, or any storm followed by new staining or dampness.
Can flashing look fine but still leak?
Yes. Some flashing is hidden behind siding, roofing, trim, or counter flashing. Surface materials may look normal while water enters through a missing overlap, reversed layer, buried edge, or failed integration behind the visible exterior surface.
How do I inspect window flashing safely?
Inspect window flashing from the ground or a stable ladder position. Focus on the top edge of the window, the side trim, the sill area, blocked weep paths, peeling paint, soft trim, and stains below the opening rather than trying to remove trim or expose hidden flashing.
Final Inspection Tip
The most useful flashing inspection is not a single glance at one suspicious area. Check the exterior transition, the surface below it, the drainage path above it, and the matching interior or attic area after rain. If those clues line up, treat the flashing as a likely water-entry point and get a closer evaluation before covering, painting, or sealing the area.
Key Takeaways
- Inspect flashing at roof-to-wall intersections, window and door heads, chimney bases, roof penetrations, siding transitions, and deck ledger connections.
- Look for lifted metal, gaps, corrosion, staining, soft trim, missing kick-out flashing, blocked drainage paths, and materials that stay wet after rain.
- Compare exterior clues with matching interior, ceiling, attic, or trim symptoms after rainfall.
- Do not assume caulk alone will fix a flashing problem, especially if flashing is missing, reversed, buried, or poorly integrated.
- Call a professional when flashing is hidden, inaccessible, unsafe to inspect, or connected to recurring stains, soft materials, or structural damage.