How to Inspect Kitchen Flooring for Hidden Moisture
To inspect kitchen flooring for hidden moisture, start with the highest-risk areas: under sink cabinets, around dishwashers, behind refrigerators, along seams, at floor edges, and inside toe-kick spaces. Look for swelling, soft spots, musty odors, staining, loose edges, and moisture patterns that spread away from a leak source.
This inspection should begin with visible and accessible areas before using moisture testing or removing any panels. If the floor looks normal but feels soft, smells musty, or has recently been exposed to a leak, hidden moisture may still be trapped beneath the finished flooring.
Early warning signs described in signs of water damage under kitchen flooring can help you decide where to inspect first. For broader room-by-room moisture checks, see how to find hidden moisture in different areas of your home.
Key Takeaways
- Start inspection in high-risk areas: sink cabinets, dishwashers, refrigerators, seams, floor edges, and toe-kick spaces.
- Soft spots, swelling, staining, musty odors, and loose edges can indicate hidden moisture beneath flooring.
- Use visual inspection first, then moisture testing to confirm suspicious areas.
- Do not force appliances, panels, or flooring materials during inspection.
- Call for professional inspection if moisture persists, spreads, or appears near electrical or structural components.
When Inspection Is Necessary
Detailed flooring inspection is most useful after a leak, appliance change, recurring spill pattern, musty odor, or visible change in the floor surface.
After Known Water Leaks
Any plumbing leak increases the chance that water has entered hidden areas beneath flooring materials. Even short-term leaks can allow moisture to travel into seams, under cabinets, or beneath appliances.
Inspection is recommended after:
- Sink or faucet leaks
- Dishwasher malfunctions
- Refrigerator water line failures
- Plumbing connection leaks
- Overflow incidents
Water exposure events often leave hidden moisture behind, even when surfaces appear dry.
If water came from sewage, floodwater, or a contaminated overflow, avoid pulling panels or handling wet materials until the area can be evaluated safely.
When Flooring Feels Soft or Uneven
Soft or spongy flooring often indicates internal moisture damage. These areas may feel different from surrounding sections and can signal weakening subfloor materials.
Inspection should be performed if flooring shows:
- Localized soft spots
- Uneven walking surfaces
- Movement when stepped on
- Reduced structural firmness
These conditions suggest that moisture may have affected materials beneath the surface.
When Musty Odors Appear
Persistent musty odors commonly indicate hidden moisture or early mold activity, especially when the smell is strongest after the kitchen has been closed overnight or after appliances have run.
If odors appear without an obvious source, inspect nearby floor seams, cabinet bases, appliance openings, and toe-kick spaces before assuming the smell is only from trash, drains, or food residue.
After Appliance Installation or Replacement
Installing new appliances introduces the possibility of improper connections or unnoticed leaks. Even minor connection issues can allow slow moisture release beneath flooring.
Inspection after appliance installation helps confirm that water lines and connections remain secure.
Following Repeated Moisture Events
Repeated spills or ongoing water exposure increase the likelihood that moisture has penetrated flooring seams. Over time, these events allow water to accumulate in hidden areas.
Regular inspection helps confirm whether repeated exposure has created hidden moisture conditions.
Preparation Before Inspecting Kitchen Flooring
Before inspecting, clear the areas most likely to hide moisture: the sink base cabinet, the dishwasher opening, the refrigerator area, and the toe-kick space beneath cabinets.
Gather Basic Inspection Tools
Kitchen flooring inspections typically require simple tools that improve visibility and access to hidden spaces.
Common inspection tools include:
- Flashlight for illuminating dark areas
- Inspection mirror for viewing tight spaces
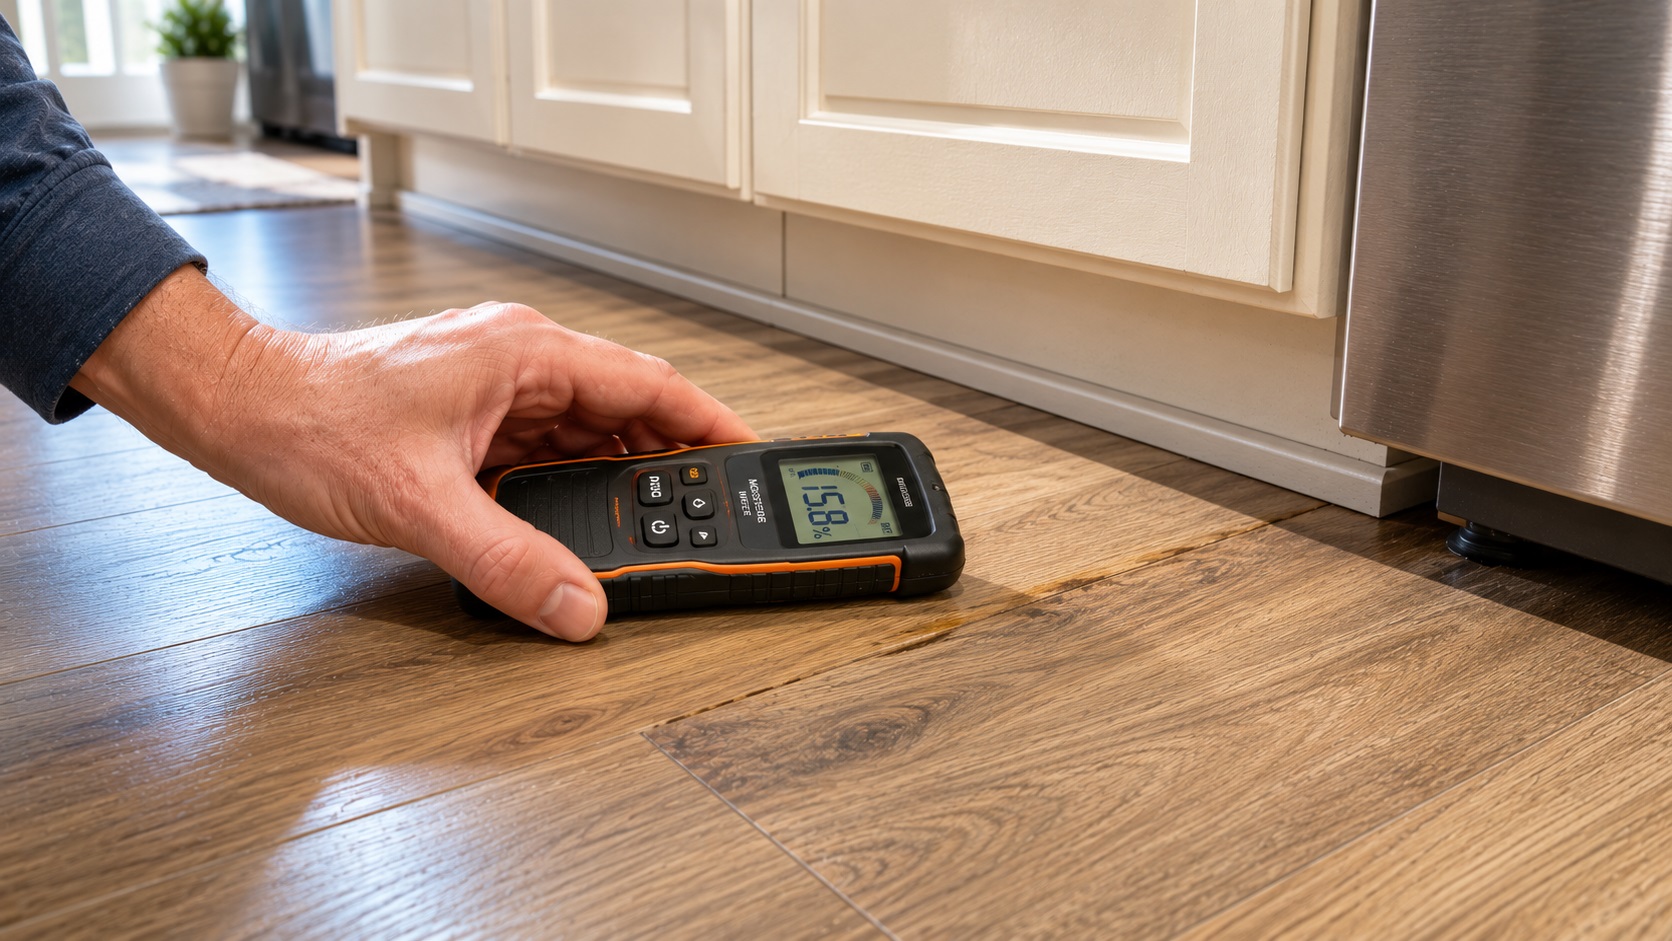
- Moisture meter for confirming moisture presence
- Screwdriver for accessing removable panels
- Protective gloves for safe handling
Use the flashlight and mirror first, then use a moisture meter only to confirm suspicious areas rather than randomly testing the entire floor.
For a fuller explanation of meter use and confirmation methods, see how to detect moisture under kitchen floors.
Identify High-Risk Inspection Zones
Kitchen moisture problems rarely develop randomly. Instead, they typically originate from specific locations where water exposure is frequent.
Before beginning inspection, identify these high-risk zones:
- Under sink cabinets
- Behind refrigerators
- Beneath dishwashers
- Along cabinet bases
- Near plumbing access points
Focusing attention on these areas increases the likelihood of identifying hidden moisture early.
Step-by-Step Kitchen Flooring Inspection Process
Work from the easiest checks to the harder-to-see areas. Start with the visible floor, then move to cabinets, appliance openings, floor edges, and toe-kick spaces.
Step 1 — Inspect Surface Conditions
Surface inspection provides the first indication of hidden moisture. Many moisture problems produce visible changes before deeper damage becomes obvious.
Begin by examining visible flooring areas for irregularities.
Look for:
- Swelling along seams
- Warped or buckled flooring sections
- Surface discoloration
- Loose or separating edges
- Uneven surface textures
These changes may indicate that moisture has entered beneath flooring materials.
Step 2 — Check for Soft or Flexible Areas
After visual inspection, test flooring firmness. Hidden moisture often weakens subfloor materials, causing flooring to feel unstable.
Walk slowly across the kitchen floor and observe how each section responds to pressure.
Compare suspicious areas with a known dry section of the same floor so normal flex is not mistaken for moisture damage.
Pay attention to:
- Spongy movement underfoot
- Localized softness
- Flexing when stepped on
- Unusual surface response
Areas showing softness often require further inspection to determine whether moisture damage exists beneath the surface.
Step 3 — Inspect Cabinet Interior Flooring Areas
Cabinet interiors provide valuable inspection access points because they often sit directly above areas where moisture develops. Plumbing connections and hidden water lines increase the likelihood of leaks beneath cabinets.
Begin by emptying cabinet contents to allow clear visibility of the base materials.
Inspect the cabinet floor and surrounding areas for:
- Swelling or bubbling surfaces
- Soft cabinet base materials
- Discoloration or staining
- Peeling finishes
- Persistent dampness
Cabinet bases often reveal early moisture problems before flooring damage becomes visible elsewhere.
Pay special attention to the plumbing areas beneath sinks. Look closely at water supply lines, drain pipes, and connection fittings for signs of moisture or residue buildup.
If staining or corrosion appears near plumbing connections, moisture may be entering the flooring system from above.
Step 4 — Inspect Appliance Areas Carefully
Kitchen appliances represent some of the highest-risk moisture zones. Dishwashers and refrigerators commonly develop slow leaks that allow water to migrate beneath flooring materials.
Inspect areas around these appliances carefully.
Inspect Around Dishwashers
Dishwashers produce frequent water exposure, making them a leading source of hidden moisture problems.
Check:
- The floor directly in front of the dishwasher
- Adjacent cabinet walls
- Base materials near installation openings
- Signs of repeated dampness
- Moisture or staining at the lower front corners of the opening
Even small leaks can gradually introduce moisture beneath surrounding flooring materials.
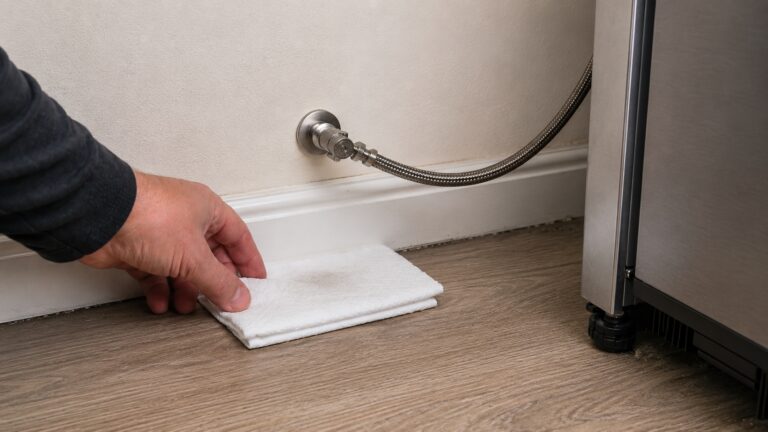
Inspect Behind Refrigerators
Refrigerators with water lines pose additional moisture risk. Slow leaks from supply lines may go unnoticed for extended periods.
Carefully inspect:
- The floor area behind the refrigerator
- Water supply connections
- Nearby seams or transitions
- Signs of moisture residue
If possible, gently move the refrigerator forward just enough to inspect behind it. Do not pull against a tight water line, and stop if the refrigerator resists movement or the flooring begins to scrape.
Step 5 — Examine Floor Edges and Wall Junctions
Moisture frequently travels toward floor edges and accumulates along walls. These areas act as collection points where hidden moisture becomes concentrated.
Inspect all floor edges carefully.
Look for:
- Gaps forming along wall edges
- Raised flooring seams
- Warped trim materials
- Discoloration along baseboards
- Changes in surface firmness
Edge inspection helps identify moisture migration patterns that originate from distant leak sources.
Step 6 — Inspect Toe-Kick Spaces Beneath Cabinets
Toe-kick panels often conceal areas where moisture accumulates beneath cabinets. These panels are frequently removable, allowing inspection without damaging flooring materials.
If the toe-kick panel is removable, loosen it carefully without prying against finished flooring or forcing nailed trim.
Once access is available, inspect:
- Cabinet base materials
- Subfloor edges
- Hidden moisture staining
- Signs of swelling or decay
- Musty odors trapped in enclosed spaces
Toe-kick inspection provides valuable visibility into areas that remain hidden during routine cleaning or maintenance.
How to Identify Hidden Subfloor Moisture
Subfloor moisture is usually suspected when surface symptoms persist, spread, or return after the visible floor has dried.
Look for Persistent Surface Changes
Repeated surface changes often indicate moisture movement beneath the flooring system. Even minor irregularities may suggest developing subfloor problems.
Watch for:
- Recurring swelling along seams
- Gradual discoloration patterns
- Expanding soft areas
- Continued surface distortion
Persistent changes often signal long-term moisture retention beneath the flooring.
Check for Moisture Migration Patterns
Moisture rarely remains stationary. Instead, it spreads outward from the original leak source, creating visible migration patterns.
Typical migration indicators include:
- Damage expanding across adjacent areas
- Discoloration moving along seams
- Surface changes appearing in multiple locations
- Uneven moisture distribution patterns
Migration patterns help identify the likely origin of moisture problems.
Confirm Findings Using Moisture Testing
When visual inspection suggests hidden moisture, testing helps confirm whether moisture remains inside flooring materials.
If moisture confirmation becomes necessary, structured testing methods outlined in how to detect moisture under kitchen floors provide reliable techniques for verifying moisture presence.
Use testing to confirm patterns found during inspection, not as a substitute for checking leak sources, seams, cabinet bases, and appliance areas.
When Inspection Indicates Structural Risk
Some inspection findings suggest moisture has moved beyond surface flooring and may be affecting the subfloor or nearby framing.
Signs of Subfloor Weakening
Subfloor weakening is one of the most serious outcomes of prolonged moisture exposure. Identifying early structural changes allows corrective action before major failure occurs.
Watch for:
- Large soft or spongy floor areas
- Floor sections that flex noticeably when stepped on
- Cracking or separation along seams
- Uneven surfaces spreading across multiple areas
- Persistent surface distortion
These conditions suggest that moisture may have compromised structural integrity beneath the flooring.
Indicators of Long-Term Moisture Exposure
Some inspection findings indicate moisture has remained present for extended periods. Long-term exposure increases the likelihood of mold growth and structural damage.
Common indicators include:
- Persistent musty odors
- Multiple areas of discoloration
- Visible mold growth near seams
- Recurring moisture detection results
- Deteriorating cabinet base materials
Long-term moisture conditions require careful evaluation and prompt response.
Signs That Moisture May Be Spreading
When damage spreads beyond the original leak area, the inspection should focus on how far water may have traveled beneath the flooring.
Watch for:
- Expanding damage zones
- Changes appearing in nearby rooms
- Increasing softness across wide sections
- Moisture appearing in previously dry areas
These changes suggest that moisture movement is continuing beneath the flooring.
When Professional Inspection May Be Required
Some inspection findings exceed the scope of safe homeowner investigation. In these cases, professional evaluation helps identify structural damage and hidden moisture conditions that require specialized equipment.
When Large Areas Show Damage
Extensive damage across multiple flooring sections suggests that moisture has spread widely beneath the surface. Professional inspection helps determine the full extent of affected materials.
Large-area damage indicators include:
- Multiple soft zones across the floor
- Widespread surface distortion
- Structural instability across large sections
- Persistent moisture readings across multiple areas
These conditions increase the likelihood of structural involvement.
When Moisture Persists Without Visible Cause
Moisture that remains present without an obvious source may indicate hidden plumbing leaks or concealed structural damage. Professional inspection tools help locate hidden moisture sources that are difficult to identify visually.
If moisture continues to appear despite repairs, the issue may need deeper diagnosis. See how to fix persistent moisture under kitchen floors for the next decision-making step.
When Electrical or Plumbing Risks Are Present
Inspection near electrical wiring or major plumbing systems introduces safety risks. If these hazards are suspected, professional assistance helps prevent accidental damage or injury.
Situations requiring caution include:
- Inspection near electrical wiring beneath appliances
- Suspected plumbing damage behind walls
- Evidence of electrical exposure to moisture
- Unclear system layouts beneath flooring
Safety should always remain the highest priority during inspection.
When Mold Growth Is Suspected
Visible mold growth or strong mold odors often indicate prolonged moisture exposure. Mold contamination may extend beyond visible areas, requiring specialized evaluation methods.
If mold is suspected beneath flooring, additional guidance outlined in why kitchen floors develop mold after leaks explains how moisture conditions support mold growth beneath flooring systems.
How to Document Inspection Findings
Recording inspection results helps you see whether suspicious areas are drying, spreading, or returning after normal kitchen use.
Take Photographs of Suspicious Areas
Photographs provide visual records that help compare conditions over time. Documenting early symptoms allows easier identification of changes during follow-up inspections.
Photograph:
- Swollen seams
- Discolored flooring
- Soft surface areas
- Cabinet base damage
- Visible moisture residue
Use the same angle and lighting during follow-up photos so changes are easier to compare.
Record Inspection Locations
Keep notes simple: mark the location, what you saw, whether it felt soft or damp, and whether the area changed during the next follow-up check.
Include:
- Inspection dates
- Specific locations inspected
- Observed symptoms
- Changes detected over time
- Follow-up inspection results
Monitor Changes Over Time
Some moisture problems develop slowly. Monitoring conditions over time helps confirm whether moisture levels are increasing, decreasing, or remaining stable.
Follow-up inspections should focus on previously identified areas to determine whether corrective action has been successful.
FAQs About Hidden Moisture Under Kitchen Flooring
How often should kitchen flooring be inspected for hidden moisture?
Kitchen flooring should be inspected at least once or twice per year, especially in homes with high water usage or older plumbing systems. Additional inspections are recommended after leaks, appliance failures, or repeated spill events.
Can hidden moisture exist even if the floor looks normal?
Yes. Many moisture problems begin beneath the surface where damage is not immediately visible. Flooring materials may appear normal while moisture remains trapped inside subfloor layers or beneath cabinets.
Is it necessary to remove flooring during inspection?
Most inspections do not require removing flooring. Many moisture conditions can be identified through visual checks, cabinet inspections, appliance openings, floor edges, and accessible areas such as toe-kick spaces. Flooring removal is usually reserved for confirmed damage or professional evaluation.
What is the most common source of hidden moisture under kitchen floors?
Plumbing leaks beneath sinks are among the most common causes of hidden moisture. Dishwashers, refrigerators, and water supply lines also contribute significantly to moisture problems beneath flooring systems.
When should professional inspection be considered?
Professional inspection is recommended when large soft areas appear, moisture persists without an identifiable source, mold growth becomes visible, or structural damage is suspected.
Next Steps After Inspecting Kitchen Flooring
If inspection finds soft spots, staining, musty odors, or confirmed moisture, the next step is to address the source and dry the affected area before damage spreads. For recovery steps, see how to dry kitchen flooring after leaks.
If the inspection shows no obvious damage, recheck high-risk areas after the next dishwasher cycle, refrigerator use, or sink activity. Moisture that returns after normal kitchen use usually points to an active leak or repeated water exposure.
2 Comments
Comments are closed.