How to Dry Kitchen Flooring After Leaks
To dry kitchen flooring after a leak, stop the water source, remove standing water, dry seams and edges, open airflow, reduce indoor humidity, and keep drying until the floor, edges, and hidden areas under cabinets or appliances remain consistently dry. The surface may look dry long before moisture beneath vinyl, laminate, tile grout, hardwood, underlayment, or subfloor materials is gone.
Kitchen leaks from dishwashers, refrigerator water lines, sink overflows, and plumbing connections can spread under flooring quickly. The goal is not just to wipe up visible water, but to prevent trapped moisture from remaining beneath the finished floor.
If you are unsure whether water has moved beyond the visible wet area, this guide to detecting moisture under kitchen floors explains how to check for hidden dampness before you stop drying.
What Happens When Kitchen Flooring Gets Wet
When water enters kitchen flooring, it rarely stays confined to one location. Instead, it spreads beneath the surface through seams, joints, and porous materials. The extent of this movement depends on the flooring type, the amount of water involved, and how quickly drying begins.
Water Moves Downward Before It Moves Sideways
Most kitchen floors include a finished surface, seams or grout lines, underlayment, and a structural subfloor. After a leak, water can move downward first, then spread sideways beneath the finished flooring. That is why dampness, odor, swelling, or staining may appear several feet from the original leak.
Moisture Becomes Trapped Beneath Flooring Materials
One of the most important reasons to dry flooring quickly is that many materials trap moisture easily. Vinyl, laminate, tile, and hardwood flooring systems are designed to resist surface wear, but they can slow evaporation when moisture becomes trapped below.
Moisture often becomes trapped beneath flooring when:
- Water enters seams between flooring panels
- Leaks occur near walls or cabinets
- Appliances release water behind hidden areas
- Underlayment materials absorb moisture
- Air circulation is limited
Once trapped, moisture may remain for days or longer if airflow cannot reach the damp layer, especially near wood-based underlayment or subfloor materials.
If moisture remains beneath the floor after cleanup, early signs such as odor or discoloration may appear. Recognizing these symptoms early is discussed in this article on signs of mold under kitchen floors.
Different Flooring Materials Absorb Moisture Differently
Before choosing a drying method, identify which flooring material was affected. The risk is different for laminate, vinyl, tile, and hardwood.
- Laminate flooring: Highly vulnerable to swelling because its core contains compressed wood fibers.
- Vinyl flooring: Resists surface water but allows moisture to enter through seams and edges.
- Tile flooring: Tile surfaces resist water, but grout lines allow moisture to reach subfloor materials.
- Hardwood flooring: Expands and warps when moisture enters the wood fibers.
If moisture exposure occurred during a recent leak, identifying whether hidden water remains is an important step before long-term damage develops. Proper inspection methods are explained in this guide to inspecting kitchen flooring for hidden moisture.
First Steps to Take Immediately After a Leak
Quick action makes a major difference in preventing mold growth and structural damage. The first few hours after a leak are critical because moisture spreads rapidly while materials are still saturated.
Following a structured response helps limit the amount of water that enters hidden flooring layers.
Stop the Water Source Immediately
The most important first step is stopping the water source. Drying efforts are ineffective if water continues to enter the flooring system.
Depending on the source of the leak, this may involve:
- Turning off the dishwasher or refrigerator water supply
- Closing a shutoff valve under the sink
- Repairing or tightening leaking plumbing connections
- Stopping an overflowing appliance
- Shutting off the main water supply in severe situations
If the leak involved sewage, floodwater, or dirty water from a backed-up drain, do not treat it as a normal drying job. Contaminated water can require removal, disinfection, and professional cleanup rather than simple airflow and towels.
Stopping the leak quickly limits the amount of water that enters flooring materials. Even a few extra minutes of water exposure can significantly increase drying time.
Remove Standing Water as Quickly as Possible
Once the water source has been stopped, removing standing water becomes the next priority. Water sitting on the surface increases the chance of penetration into seams and edges.
Effective methods for removing standing water include:
- Using towels to absorb pooled water
- Using a wet vacuum to remove larger amounts of water
- Pushing water away from cabinets and walls
- Focusing on seams and joints where water can enter
Wet vacuums are especially helpful when water spreads across large areas. They remove moisture more effectively than towels alone, especially when water has begun entering seams.
If standing water reaches seams, toe-kicks, appliance gaps, or cabinet edges, assume some moisture may have moved below the visible surface and continue drying those areas even after the main puddles are gone.
Open Airflow as Soon as Possible
Airflow should begin as soon as standing water is removed because damp seams, grout lines, cabinet bases, and appliance gaps dry slowly without moving air.
To begin increasing airflow:
- Open nearby windows if outdoor humidity is low
- Turn on ceiling fans or ventilation systems
- Move appliances slightly away from walls if safe to do so
- Clear obstacles blocking air circulation
Air movement helps moisture evaporate from surfaces and underlying materials. Early airflow setup can significantly reduce total drying time.
However, airflow alone may not dry moisture trapped below vinyl, laminate, grout, cabinets, or appliances. If the floor still feels damp, cool, soft, or musty after the first drying period, continue with deeper drying and inspection steps.
How to Remove Remaining Surface Moisture Safely
After visible water is gone, make a second pass along seams, edges, toe-kicks, transitions, appliance gaps, and low spots. These are the areas most likely to let water slip below the finished floor.
Focus on Seams, Edges, and Low Spots
Seams and edges are the most vulnerable entry points for water. These areas allow moisture to move beneath the finished flooring surface, especially in laminate and vinyl installations.
Carefully check:
- Seams between flooring panels
- Edges along baseboards
- Transitions between rooms
- Flooring near appliances
- Areas beneath toe-kicks
Use dry towels to press firmly along seams and joints. Applying pressure helps absorb moisture trapped just below the surface. Continue replacing towels until they no longer collect noticeable moisture.
Use Wet Vacuums for Hidden Surface Moisture
Wet vacuums are especially effective when moisture has entered seams or collected beneath thin flooring materials. These devices remove water that standard cleaning methods cannot easily reach.
Use only a wet/dry vacuum rated for water pickup. Do not use a standard household vacuum on wet flooring.
Wet vacuum use is particularly helpful when:
- Water entered multiple seams
- The leak lasted several minutes or longer
- Water spread across a large section of flooring
- Flooring contains many joints or transitions
Run the wet/dry vacuum slowly along seams, grout lines, baseboard edges, toe-kicks, and transitions instead of making quick passes only across the open floor.
How to Dry Different Types of Kitchen Flooring
Kitchen flooring materials do not dry the same way. Vinyl may hide water underneath, laminate may swell at the seams, tile may pass moisture through grout, and hardwood may cup or buckle as it absorbs water.
Drying Vinyl Kitchen Flooring
Vinyl flooring resists water on the surface but remains vulnerable along seams and edges. Water entering beneath vinyl often spreads between the flooring and the subfloor, making hidden moisture a common problem.
Effective drying methods for vinyl include:
- Remove water from seams, edges, and transitions first
- Run fans across the surface and toward perimeter gaps
- Dry cabinet edges and appliance gaps where vinyl meets fixed objects
- Watch for lifting, bubbling, or damp edges after drying
If vinyl flooring begins lifting slightly along edges, moisture may already be trapped beneath the material. In these cases, additional inspection may be necessary to determine whether hidden water remains beneath the surface.
Drying Laminate Kitchen Flooring
Laminate flooring is highly vulnerable to moisture because its core contains compressed wood fibers. Once water enters laminate seams, swelling can occur quickly, often within hours.
Key drying steps for laminate include:
- Blot seams immediately instead of letting water sit between planks
- Run fans across the floor while keeping indoor humidity low
- Check plank edges for swelling, raised seams, or soft spots
- Inspect nearby cabinets and transitions for spreading moisture
Laminate flooring that remains damp for extended periods often develops permanent swelling. If swelling continues after drying attempts, further investigation may be required to determine whether moisture remains beneath the flooring.
Drying Tile Kitchen Flooring
Tile flooring resists water penetration on the surface, but grout lines allow moisture to pass into underlying materials. Many homeowners mistakenly assume tile floors do not require drying attention after leaks.
Important drying steps for tile include:
- Blot and air-dry grout lines, not just the tile surface
- Run airflow across baseboards, transitions, and cabinet edges
- Check for damp grout, musty odor, or staining after drying
- Inspect adjacent flooring if water crossed into another room
Moisture trapped beneath tile may remain undetected for several days. If musty odors develop after drying attempts, hidden moisture beneath grout or underlayment may be present.
Drying Hardwood Kitchen Flooring
Hardwood flooring absorbs water rapidly and expands when exposed to moisture. If drying begins quickly, damage may be limited. However, prolonged exposure often leads to warping or buckling.
Recommended drying steps for hardwood include:
- Remove surface water immediately with towels or a wet/dry vacuum
- Use steady airflow instead of high heat
- Watch for cupping, raised edges, gaps, or board movement
- Keep humidity low while the wood releases moisture gradually
Hardwood flooring requires careful monitoring because damage may continue developing even after surface moisture appears gone.
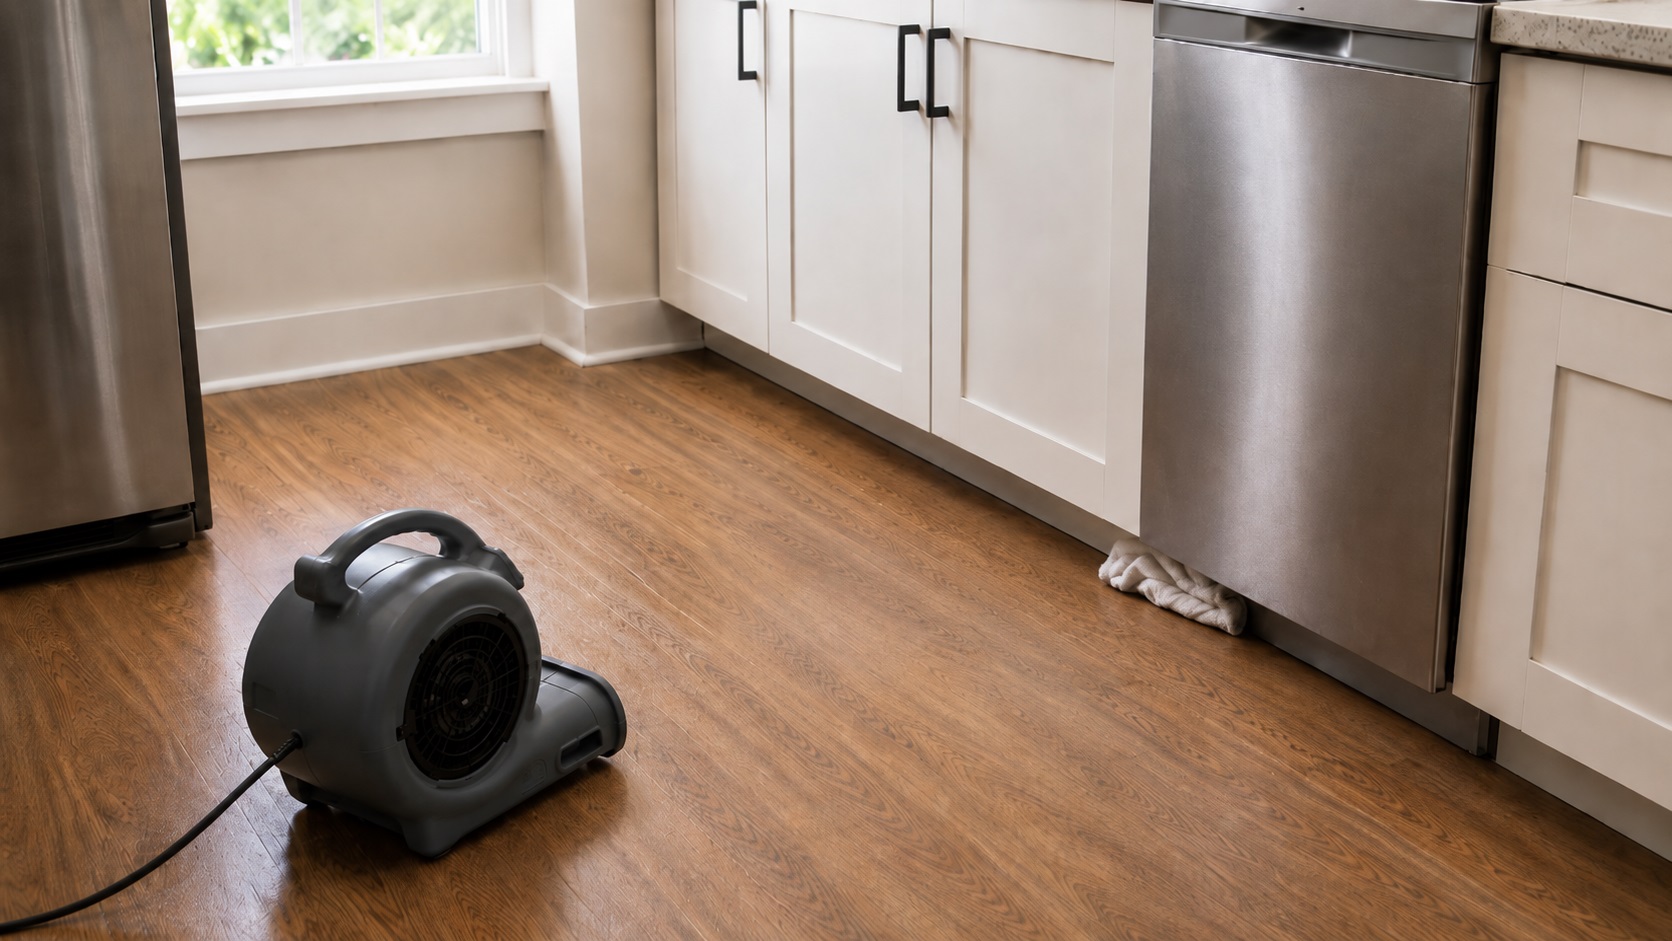
How to Dry Under Cabinets and Appliances
Moisture beneath cabinets and appliances is easy to miss after kitchen leaks. These areas receive limited airflow and often trap water long after visible surfaces appear dry.
These hidden spaces should be checked early because cabinet bases, toe-kicks, and nearby subfloor materials often stay damp after the open floor looks dry.
Move Appliances When Safe to Do So
If possible, carefully move appliances such as refrigerators or dishwashers to expose hidden floor areas, but do not move or unplug appliances while standing in water. Shut off power first if water is near cords, outlets, or appliance electrical components.
When moving appliances:
- Shut off power first if water is near cords, outlets, or appliance electrical parts
- Shut off water lines before moving
- Move slowly to avoid damaging flooring
- Inspect hidden areas for dampness or staining
Once exposed, these areas should be dried using airflow and absorbent materials.
Check Toe-Kick Areas Carefully
Toe-kick areas at the base of cabinets frequently trap water after leaks. Moisture entering beneath cabinets may spread into subfloor materials without becoming visible.
Pay close attention to:
- Cabinet base edges
- Seams between flooring and cabinetry
- Hidden corners beneath cabinet fronts
- Areas near plumbing lines
If moisture remains in these areas, drying efforts must continue until surfaces remain consistently dry.
Using Fans and Airflow the Right Way
Fans work best when they move air across wet flooring, seams, cabinet bases, and appliance gaps instead of simply blowing into the room. The goal is to remove humid air from damp surfaces and replace it with drier air.
Avoid using high heat to force the floor dry. Excessive heat can cup hardwood, distort some vinyl products, and dry the surface faster than the material below it.
Position Fans to Move Air Across the Floor
Fans should be positioned so that air flows horizontally across wet flooring rather than directly downward. Moving air across the surface increases evaporation and helps remove moisture from seams and joints.
Effective fan placement includes:
- Positioning fans at floor level
- Aiming airflow across wet areas
- Using multiple fans for larger spaces
- Directing airflow toward exits such as doorways or open windows
Running fans continuously during the drying period significantly improves results. Stopping airflow too early often allows moisture to remain trapped beneath flooring layers.
Use Dehumidifiers When Indoor Humidity Is High
Humidity levels play a major role in drying speed. When indoor humidity remains high, evaporation slows, making it difficult for moisture to leave wet materials.
Dehumidifiers remove moisture from the air, allowing water to evaporate more efficiently from flooring surfaces. They are especially helpful in humid climates or during rainy weather when natural drying conditions are limited.
For best results, run fans and a dehumidifier together: fans move moisture out of damp materials, and the dehumidifier removes that moisture from the air.
How Long Kitchen Flooring Takes to Dry
Drying time depends on the flooring type, leak size, exposure time, airflow, humidity, and whether water reached underlayment or subfloor materials. These timelines are estimates, not proof that hidden layers are dry.
Typical Drying Time for Minor Water Exposure
Minor water exposure, such as small spills cleaned immediately, usually dries relatively quickly when airflow is maintained.
Typical drying time for minor exposure:
- Surface moisture: 24 to 48 hours
- Seams and edges: 48 to 72 hours
These estimates assume the water did not sit long enough to reach underlayment, subfloor materials, or enclosed spaces under cabinets and appliances.
Drying Time for Moderate Water Exposure
Moderate water exposure occurs when water spreads across a larger area or remains on the floor for several minutes before cleanup begins.
Typical drying time for moderate exposure:
- Surface layers: 2 to 4 days
- Subfloor moisture: 3 to 7 days
Monitoring moisture conditions during this period helps ensure hidden dampness does not persist beneath flooring materials.
Drying Time for Severe Water Exposure
Severe exposure includes large leaks, flooding events, or water remaining trapped beneath cabinets or appliances.
Typical drying time for severe exposure:
- Surface drying: 3 to 5 days
- Subfloor drying: 7 to 14 days or longer
Severe moisture conditions often require extended drying and, in some cases, professional evaluation to confirm full recovery.
Signs Your Kitchen Floor Is Drying Properly
Knowing whether the floor is drying properly is just as important as starting the drying process. Stopping too early can leave moisture beneath the finished surface.
For wood, laminate, or suspected subfloor moisture, a moisture meter can provide a better check than touch alone. Use it as a confirmation tool, not as the only sign that drying is complete.
No Musty Odors Remain
The absence of musty odors is a good sign, but it is not proof that hidden layers are dry. Odor should be checked along with firmness, stain movement, edge swelling, and moisture readings when possible.
If musty smells return after drying attempts, hidden moisture may still be present. In these cases, reviewing signs of mold under kitchen floors can help determine whether further action is required.
Flooring Feels Firm and Stable
Fully dried flooring should feel solid underfoot. Spongy, soft, or uneven areas often indicate moisture remains beneath the surface.
Stable flooring typically shows:
- No soft or flexible areas
- No visible warping or swelling
- No lifting edges or gaps
- No damp or cool-feeling surfaces
If the floor still feels soft, springy, uneven, or cool in one area, keep drying and inspect for moisture below the surface.
No New Discoloration Appears
Continued discoloration after drying may indicate moisture remains below the finished floor, especially near seams, grout lines, baseboards, cabinet edges, or appliance areas. If stains keep spreading, inspect for hidden moisture before assuming the floor is dry.
When Drying Is Not Enough
Basic drying is not enough when water has remained trapped too long, the floor changes shape, odors persist, or dampness returns after several days of active drying.
Moisture Persists Beyond Several Days
If flooring remains damp after several days of active drying, hidden moisture may be trapped beneath materials that are difficult to reach.
Warning signs that drying may be insufficient include:
- Damp areas lasting longer than 48 hours
- Recurring moisture near seams
- Persistent musty odors
- New stains appearing after drying
- Soft or unstable flooring sections
When these conditions occur, further inspection may be necessary to determine whether moisture remains beneath the surface. Learning how to inspect kitchen flooring for hidden moisture can help confirm the extent of the problem.
Structural Changes Begin to Appear
Warping, swelling, or buckling often indicate that moisture exposure has already affected structural materials. At this stage, drying alone may not fully restore the affected flooring.
Common structural warning signs include:
- Raised or separated flooring panels
- Significant swelling near seams
- Cracking or shifting flooring sections
- Cabinet bases showing water damage
These symptoms often require more advanced corrective action. If moisture keeps returning beneath the floor after drying attempts, this guide to fixing persistent moisture under kitchen floors explains when the problem has moved beyond basic drying.
What to Check After the Floor Dries
After the floor is dry, the most important prevention step is fixing the leak source completely. Recheck appliance connections, sink plumbing, cabinet bases, seams, and prior wet areas over the next several days. If moisture returns, treat it as an unresolved leak or trapped-moisture problem rather than a normal drying delay.
For long-term prevention steps, see this guide on preventing recurring moisture under kitchen flooring.
Frequently Asked Questions About How to Dry Kitchen Flooring After Leaks
How Long Does Kitchen Flooring Take to Dry After a Leak?
Drying time depends on the amount of water exposure and flooring type. Minor spills may dry within 24 to 48 hours, while moderate leaks often require several days. Severe water exposure may require one to two weeks of drying.
Can I Dry Kitchen Flooring Without Removing It?
Sometimes. Flooring is more likely to dry in place when the leak was small, cleanup started quickly, seams are tight, and the floor stays flat and firm. Removal may be needed when water remains under vinyl, laminate swells, hardwood cups, tile grout stays damp, or musty odor returns after drying.
Do I Need a Dehumidifier to Dry Kitchen Flooring?
A dehumidifier is most helpful when the room feels humid, outdoor air is damp, drying takes more than a day, or water reached seams, cabinets, or underlayment. Fans move moisture out of materials, while the dehumidifier removes that moisture from the air.
How Do I Dry Under Kitchen Cabinets?
Start by drying the cabinet base edges, toe-kick area, and seams where flooring meets the cabinets. Use fans at floor level and a dehumidifier if humidity is high. If moisture remains trapped behind a toe-kick or inside a cabinet base, limited access or professional drying may be needed.
What Happens If Kitchen Flooring Stays Wet Too Long?
Laminate can swell, hardwood can cup or buckle, tile grout can stay damp, vinyl can trap moisture underneath, and wood-based subfloor materials can soften or support mold. If the floor changes shape or smells musty, drying alone may no longer be enough.
Key Takeaways
- Stop the leak and remove standing water before setting up fans or dehumidifiers.
- Dry seams, grout lines, toe-kicks, appliance gaps, transitions, and cabinet edges—not just the open floor.
- Vinyl, laminate, tile, and hardwood each hide or absorb moisture differently.
- Do not use high heat to force drying, especially on hardwood or vinyl flooring.
- Odor, swelling, soft spots, cool areas, or spreading stains mean hidden moisture may still be present.
- If dampness returns after several days of drying, inspect for trapped moisture or an unresolved leak.