How to Dry Walls After Flashing Water Intrusion
When water enters through failed flashing, it often moves behind the finished wall surface and wets drywall, insulation, sheathing, or framing. Drying the painted surface is not enough if moisture is still trapped inside the wall cavity.
The safest approach is to stop the leak first, remove surface water, increase airflow, lower indoor humidity, and verify that hidden materials are drying. If drying is delayed or incomplete, mold can begin forming in as little as 24 to 48 hours.
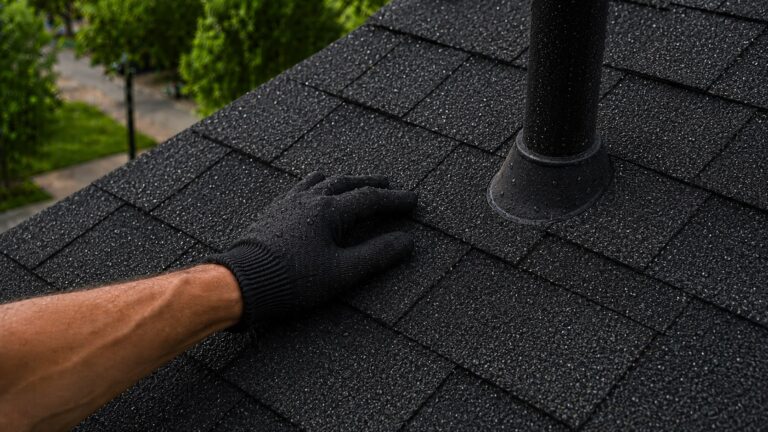
This guide focuses on how to dry walls after flashing-related leaks. If you’re still unsure what caused the water intrusion, you may want to review why improper flashing installation causes leaks to better understand how these issues begin.
Why Proper Drying Is Critical After Flashing Leaks
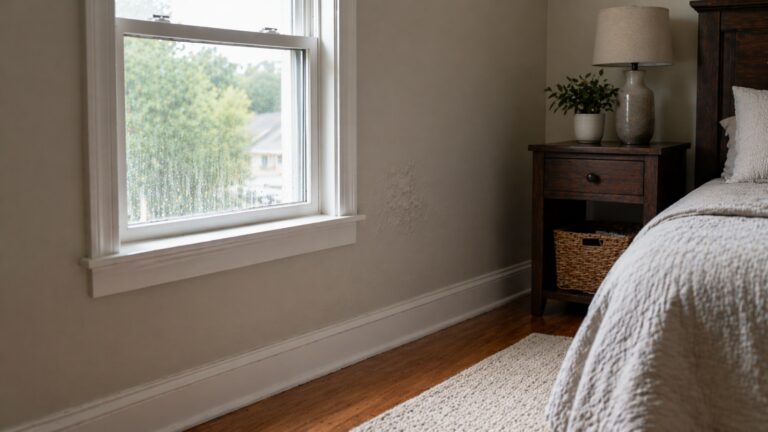
Flashing failures often leak slowly during rain, so wall damage may build up before you see an obvious wet spot. Check for hidden moisture when:
- Drywall may feel only slightly damp on the surface
- Insulation inside the wall may be saturated
- Wood framing may be holding moisture without visible signs
If this moisture is not removed, several problems can develop:
- Mold growth inside wall cavities
- Deterioration of drywall and finishes
- Reduced insulation effectiveness
- Long-term structural weakening
In many cases, mold becomes the first visible sign of incomplete drying. If you’re already seeing mold, compare it to signs of mold growth caused by flashing failures to determine whether flashing-related moisture is still active.
How Water Affects Wall Structures
A flashing leak can wet several layers at once. Drywall, insulation, and framing dry at different speeds, so the wall should not be considered dry just because the paint feels dry.
Drywall
Drywall absorbs water quickly through its paper surface and internal gypsum core. Even if the surface appears dry, moisture can remain trapped inside.
Signs drywall has absorbed water include:
- Soft or spongy texture
- Bubbling or peeling paint
- Visible staining or discoloration
Drywall that remains wet for extended periods becomes a high-risk area for mold growth.
Insulation
Insulation is one of the most problematic materials when it gets wet. Depending on the type:
- Fiberglass insulation can trap water against drywall and framing, especially when it is compressed or enclosed
- Cellulose insulation absorbs moisture readily and is harder to dry in place
Wet insulation can trap moisture inside the wall even if the drywall surface dries, making it difficult to fully remove water without intervention.
Wood Framing
Wood absorbs moisture more slowly but retains it longer. Framing members such as studs and plates can remain damp even after surrounding materials appear dry.
If moisture persists, wood can:
- Support mold growth
- Warp or swell
- Begin to deteriorate over time
Because these materials are hidden, drying must go beyond surface-level methods to ensure the entire wall system is properly addressed.
Step-by-Step Process to Dry Walls After Flashing Water Intrusion
Drying walls properly requires a structured approach. Skipping steps or relying on surface drying alone often leads to hidden moisture problems and future mold growth.
Safety note: If water reached outlets, switches, light fixtures, or wiring, shut off power to the affected area and have the electrical system checked before using fans, dehumidifiers, or other drying equipment nearby.
1. Stop the Water Source First
Before any drying can begin, the source of water intrusion must be stopped. If flashing is still allowing water into the wall, drying efforts will fail.
Look for signs of ongoing intrusion, especially after rain. If the cause is unclear, reviewing how to detect water intrusion from flashing failures can help confirm whether moisture is still entering the structure.
Begin removing moisture as soon as it is safe, but do not treat the wall as resolved until the flashing leak has been stopped. If new rainwater keeps entering, drying equipment will only manage the symptom temporarily.
2. Remove Any Standing or Surface Water
If water has collected on surfaces, remove it immediately. This reduces the amount of moisture that needs to be evaporated and speeds up the drying process.
You can use:
- Towels or absorbent materials
- Wet/dry vacuums
- Floor extraction tools
Remove liquid water early, then check nearby baseboards, flooring edges, trim joints, and the lower wall for moisture that may have wicked away from the original leak path.
3. Increase Airflow Around the Affected Area
Air movement is essential for evaporation. Without airflow, moisture will remain trapped inside the wall system.
Effective airflow methods include:
- Positioning fans to blow across wall surfaces
- Creating cross-ventilation by opening windows, if conditions allow
- Circulating air continuously, not intermittently
Aim airflow across damp surfaces and toward the room, not into sealed cavities. If the wall is opened, air can be directed through the exposed cavity so wet studs, sheathing, and plates can dry evenly.
4. Use Dehumidification to Remove Moisture from the Air
As water evaporates, it increases indoor humidity. If this moisture is not removed, drying will slow or stop entirely.
Using a dehumidifier helps:
- Lower humidity levels
- Speed up evaporation
- Prevent moisture from reabsorbing into materials
This step is especially important in enclosed spaces where airflow alone is not sufficient. Use a hygrometer to monitor the room and try to keep indoor relative humidity below about 50% during drying when possible.
5. Apply Controlled Heat and Continuous Air Movement
Gentle warmth can help evaporation when it is paired with airflow and dehumidification. Avoid trying to “bake” the wall dry, because fast surface drying can hide moisture deeper in the assembly.
However, heat should be used carefully:
- Avoid excessive heat that can damage materials
- Maintain consistent conditions rather than rapid temperature swings
The goal is steady, controlled drying — not rapid surface drying that leaves hidden moisture behind.
When You Need to Open the Wall
In some cases, drying from the surface is not enough. If moisture has penetrated deeply into the wall, opening it may be necessary to prevent long-term damage.
Signs That Walls Should Be Opened
- Drywall feels soft, swollen, crumbly, or distorted
- Paint is bubbling, seams are opening, or drywall paper is separating
- Insulation is likely wet or packed against the damp area
- Moisture readings remain elevated after 48–72 hours of active drying
- Musty odors remain strong after drying equipment has been running
Opening the wall allows:
- Air to reach hidden materials
- Wet insulation to be removed
- Faster and more complete drying
When Walls May Be Left Intact
If moisture exposure was minimal and addressed quickly, walls may dry without being opened. This is more likely when:
- The leak was brief and limited
- Drying began immediately
- No insulation was significantly affected
- No odor or mold is present
If conditions are uncertain, it is safer to assume moisture may be trapped and monitor the area closely.
A moisture meter can help confirm progress, but compare readings against a nearby dry wall of similar material instead of relying on one isolated number.
How Long It Takes Walls to Dry After Flashing Water Intrusion
Drying time depends on how much water entered the wall, how quickly drying began, whether insulation is wet, and whether the leak source has been stopped. A wall can feel dry on the surface while the cavity remains damp.
Typical Drying Time Ranges
- Light moisture exposure: 24–72 hours with active airflow and dehumidification
- Moderate saturation: 3–7 days, especially if trim, drywall edges, or framing are damp
- Heavy saturation: 7–14 days or longer, and some materials may need removal instead of drying in place
These timelines assume proper drying conditions, including airflow and dehumidification. Without these, drying can take significantly longer.
Why Surface Drying Can Be Misleading
Paint and drywall faces can dry before insulation, framing, or the drywall core. That is why drying should be verified by conditions, odor, and moisture readings rather than touch alone.
Hidden moisture may still exist in:
- Drywall cores
- Insulation
- Wood framing
If drying stops too early, this moisture can lead to mold growth and long-term damage.
Signs Walls Are Not Drying Properly
Monitoring the drying process is just as important as starting it. If moisture is not being removed effectively, problems can continue even after initial efforts.
Persistent Musty Odor
A lingering musty smell indicates that moisture — and possibly mold — is still present inside the wall.
Recurring Dampness
If an area feels damp again after appearing dry, it may be drawing moisture from inside the wall cavity.
Stains That Continue to Spread
Expanding discoloration suggests that moisture is still moving through the material rather than drying out.
Visible Mold Growth
Mold appearing during or after drying is a clear sign that moisture has not been fully removed. These patterns often resemble those described in signs of mold growth caused by flashing failures, especially when linked to repeated moisture exposure.
How to Prevent Mold During the Drying Process
After a flashing leak, mold risk is highest where damp drywall, insulation, or framing stay enclosed with limited airflow.
During drying, mold prevention comes down to four practical controls: keep air moving continuously, run dehumidification, remove materials that cannot dry in place, and monitor the area for odor, staining, or rising moisture readings.
When to Call a Professional
While small areas of moisture can sometimes be managed with basic drying methods, larger or more persistent problems often require professional intervention.
You should consider professional help if:
- Walls remain damp after 48–72 hours of active drying
- Musty odors persist or return after the room seems dry
- Visible mold appears or covers more than a small surface area
- Water reached electrical components, exterior sheathing, or structural framing
- You cannot confirm whether the wall cavity, insulation, or framing is dry
A restoration professional can check wall cavities, remove wet insulation, set up controlled drying equipment, and verify moisture levels before the wall is closed again.
If the underlying issue has not been addressed, continued intrusion may occur. In those cases, reviewing how to fix persistent flashing problems can help determine the next steps after drying is complete.
Common Mistakes to Avoid When Drying Walls
Most failed drying attempts happen because the wall looks dry before the hidden materials are actually dry.
Relying on Surface Drying Alone
Drying the visible surface without addressing moisture inside the wall is one of the most common errors. This often leads to:
- Hidden moisture remaining inside drywall and insulation
- Mold forming out of sight
- Recurring dampness weeks later
Skipping Dehumidification
Fans alone are not enough. Without removing moisture from the air, evaporation slows and water may reabsorb into materials.
Delaying the Drying Process
Waiting even a day or two before starting can significantly increase mold risk. Moisture spreads quickly through porous materials, making early action critical.
Leaving Wet Insulation in Place
Insulation that remains wet will continue holding moisture inside the wall, even if everything else appears dry. This often leads to long-term mold problems.
Assuming the Problem Is Resolved Too Soon
Walls can appear dry while still containing hidden moisture. Stopping the drying process early is one of the leading causes of recurring damage.
Frequently Asked Questions
Can walls dry on their own after a flashing leak?
In some cases, minor moisture may dry naturally, but most flashing-related water intrusion requires active drying. Without airflow and dehumidification, moisture can remain trapped inside walls.
Do I need to remove drywall to dry the wall?
Not always. If moisture exposure is minimal and drying begins quickly, walls may dry without removal. However, if insulation is wet or moisture persists, opening the wall is often necessary.
Why are flashing leaks harder to dry than surface leaks?
Flashing leaks often send water behind the exterior cladding or into the wall cavity before the interior surface looks wet. That means drywall, insulation, sheathing, or framing may need drying even when the visible stain looks small.
Can fans alone dry wet walls?
Fans help move moisture out of damp surfaces, but they do not remove that moisture from the room. For flashing-related wall leaks, fans should usually be paired with dehumidification and moisture checks inside or around the affected wall area.
What tools are most effective for drying walls?
The most effective tools include:
- Air movers or fans to move air across damp surfaces
- A dehumidifier to remove moisture from the room
- A hygrometer to monitor indoor humidity
- A moisture meter to compare the affected wall with nearby dry materials
Conclusion
Drying walls after flashing water intrusion means drying the wall assembly, not just the painted surface. Stop the leak source, remove surface water, keep air moving, control humidity, and verify that drywall, insulation, and framing are no longer holding moisture.
Once drying is complete, the next step is preventing the issue from happening again. For flashing-specific prevention, review how to prevent flashing failures. For broader long-term moisture control, see how to prevent recurring moisture damage.
Key Takeaways
- Flashing leaks can leave moisture behind drywall, insulation, and framing.
- Do not rely on a dry painted surface as proof the wall cavity is dry.
- Use airflow, dehumidification, humidity monitoring, and moisture checks together.
- Open the wall if insulation is wet, drywall is distorted, odors persist, or moisture readings stay elevated.
- After drying, fix the flashing issue so rainwater cannot re-enter the wall.