How to Dry Walls After Window Leaks (Step-by-Step Recovery Guide)
To dry walls after a window leak, first stop the water entry, remove surface moisture, open the area for airflow, run fans across the wall, use a dehumidifier, and monitor the wall until hidden moisture is gone. The visible wet spot is often only part of the problem because water can move behind trim, into drywall edges, and into insulation around the window opening.
If you recently noticed wet drywall, bubbling paint, damp trim, or staining below a window, start drying immediately. Moisture left inside wall materials for more than a day or two increases the risk of mold growth, especially if insulation or the back side of the drywall became wet. If you suspect mold has already started, reviewing signs of mold growth around windows can help identify early warning patterns.
Because drying alone does not prevent future problems, it is also important to understand how moisture continues entering structures. The parent resource on how to prevent recurring moisture damage explains how to stop leaks from returning after drying is complete.
For a broader look at why window openings let moisture into wall systems, see the guide on how windows and doors cause hidden moisture problems.
What Happens When Walls Get Wet From Window Leaks
When water enters around a window, it rarely stays only on the visible surface. Instead, moisture spreads along predictable structural paths inside the wall. Understanding this movement helps explain why drying must go beyond surface cleanup.
Water typically enters through gaps around the frame or failed seals. Once inside, it follows gravity and spreads through nearby materials.
How Moisture Moves Inside Wall Assemblies
Moisture entering through a window opening often travels downward behind trim and drywall edges. This allows water to reach materials that are not immediately visible.
The most common moisture movement pattern looks like this:
- Water enters through frame gaps or failed seals
- Moisture travels downward behind trim
- Drywall edges absorb water quickly
- Insulation inside the wall becomes damp
- Moisture spreads into surrounding materials
Because drywall absorbs water rapidly, damage can begin even when only small amounts of moisture are present. In many cases, the visible wet area represents only a portion of the actual moisture spread.
If repeated leaks occur, these moisture patterns often become more severe. Understanding the underlying causes described in why window flashing failures cause leaks helps explain how water repeatedly enters window assemblies.
Why Drywall Is Especially Vulnerable
Drywall is one of the most moisture-sensitive materials found around window openings. Its paper backing absorbs water quickly, allowing moisture to spread across large areas even when leaks appear minor.
Once drywall becomes wet, several changes occur:
- Paper surfaces absorb moisture
- Drywall strength begins to weaken
- Paint finishes lose adhesion
- Hidden mold risk increases
If drywall remains wet for extended periods, structural integrity may decline. This often leads to bubbling paint, sagging surfaces, or visible staining.
How Insulation Traps Moisture Inside Walls
Insulation surrounding window frames plays a major role in moisture retention. When water enters wall cavities, insulation slows drying by trapping moisture within its fibers.
Common insulation-related effects include:
- Moisture remaining trapped for extended periods
- Reduced airflow inside wall cavities
- Slower drying of surrounding materials
- Increased risk of mold growth
Because insulation remains hidden behind drywall, moisture inside cavities often goes unnoticed. This is one reason mold can develop even after surface drying appears successful.
Why Quick Drying Prevents Mold Growth
Mold begins forming quickly when moisture remains present. In many cases, mold spores can begin colonizing damp materials within 24 to 48 hours.
Fast drying reduces this risk significantly. The sooner moisture is removed from surfaces and wall cavities, the less opportunity mold has to establish itself.
If mold growth is suspected during drying, understanding why mold forms around window frames helps identify moisture patterns that support ongoing growth.
Immediate Steps to Take After Discovering a Window Leak
The first few hours after discovering a window leak are critical. Acting quickly reduces moisture absorption and prevents damage from spreading into surrounding materials.
Safety note: Do not place fans, extension cords, or dehumidifiers where water is still dripping or pooling. If outlets, wiring, or the wall cavity near the window may be wet, shut off power to that area and have it checked before running drying equipment.
Stop the Water Source First
Before beginning any drying process, the source of water must be stopped. Continuing moisture exposure makes drying ineffective and increases damage.
Common ways to stop water entry include:
- Closing and locking the window so the sash compresses against the weatherstripping
- Taping or covering the exterior side temporarily if rain is still entering
- Clearing blocked weep holes or sill tracks if water is backing up inside the frame
- Moving runoff away from the window with a temporary diverter when possible
If water continues entering during rain events, structural failure may be involved. Persistent intrusion often requires repairs described in how to fix persistent window leak problems.
Remove Surface Water Immediately
Standing water should be removed as quickly as possible. Surface water increases the amount of moisture that enters surrounding materials.
Effective removal methods include:
- Using towels to absorb visible water
- Blotting damp areas rather than wiping
- Removing wet decorative items or coverings
- Drying window sills thoroughly
Removing surface moisture early reduces the amount of water absorbed into drywall and insulation.
Protect Surrounding Materials
Water from a window leak can spread into nearby trim, flooring, furniture, and baseboards if the area stays crowded. Moving vulnerable items away from the wall also gives fans room to move air across the damp surface.
Protective steps include:
- Moving furniture away from the affected wall
- Removing rugs or flooring near the window
- Protecting baseboards and trim surfaces
- Allowing open space for airflow
Creating open space around wet areas improves airflow and supports faster drying during the next stages.
How to Dry Wet Drywall Around Windows
After stopping the water source and removing visible moisture, the next step is drying wet drywall around the affected window. This stage determines whether the wall can recover or whether deeper damage develops. Proper drying techniques prevent moisture from remaining trapped inside materials.
Drywall dries through evaporation, which depends on airflow, humidity control, and temperature. Without these factors working together, moisture can remain hidden even when surfaces feel dry.
Start With Surface Drying
Surface drying removes moisture from exposed drywall before it spreads deeper into surrounding materials. This step should begin as soon as possible after removing standing water.
Effective surface drying methods include:
- Blotting damp drywall gently with absorbent towels
- Removing decorative coverings such as wallpaper or wall hangings
- Allowing exposed surfaces to remain uncovered
- Preventing additional moisture from contacting the wall
Blotting is more effective than wiping because it absorbs water without spreading moisture across the surface.
If stains begin forming during drying, comparing these changes with signs of water damage around windows helps determine whether deeper moisture movement is occurring.
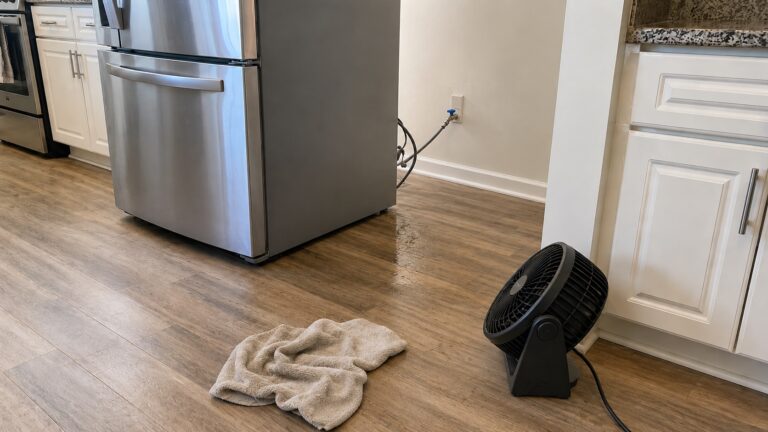
Position Fans to Create Continuous Airflow
Airflow is one of the most important factors in drying wet drywall. Fans increase evaporation by moving moisture away from wet surfaces.
Proper fan placement matters because air should sweep moisture away from the damp wall surface instead of forcing air directly into a wet opening.
For best results:
- Place fans so air moves across the wall surface, not directly into it
- Use multiple fans when possible to increase coverage
- Position fans at slight angles to encourage air circulation
- Allow continuous airflow without interruptions
Airflow helps prevent moisture from remaining trapped near wall surfaces. Even moderate airflow dramatically improves drying efficiency.
Use Dehumidifiers to Remove Moisture From Air
While fans move moisture away from surfaces, dehumidifiers remove moisture from the surrounding air. This combination accelerates drying by preventing humid air from slowing evaporation.
Effective dehumidifier use includes:
- Placing the unit in the same room as the affected wall
- Closing windows and doors during operation
- Emptying the collection tank regularly
- Running the unit continuously during drying
Dehumidifiers are especially important during humid weather. Keep the room closed off from outdoor air when possible and aim for a lower indoor humidity level during active drying so moisture can keep evaporating out of the wall instead of lingering near the surface.
If the room stays humid even with a unit running, the guide on how to choose and use a dehumidifier effectively explains sizing, placement, and runtime in more detail.
Encourage Moderate Temperature Conditions
Temperature plays an important role in drying speed. Warm air holds more moisture than cold air, allowing evaporation to occur more efficiently.
Safe temperature strategies include:
- Maintaining normal indoor heating levels
- Avoiding extremely cold environments during drying
- Using moderate warmth to support evaporation
Avoid using intense heat directly against wet drywall. High heat can damage finishes, dry the surface too quickly, or leave moisture trapped deeper inside the wall.
How to Dry Moisture Inside Wall Cavities
Moisture inside wall cavities is more difficult to remove than surface moisture. Because these areas are enclosed, airflow is limited and drying occurs slowly without intervention.
Hidden moisture is one of the most common causes of mold growth after window leaks. Proper cavity drying prevents long-term structural damage.
Recognizing When Wall Cavities Are Wet
Hidden moisture inside wall cavities is often present when visible signs appear on surrounding materials.
Indicators that wall cavities may be wet include:
- Persistent damp odors near windows
- Soft drywall edges around the frame
- Water stains spreading downward from the window
- Paint bubbling or peeling near openings
If these signs appear, moisture may already exist inside the wall assembly.
In situations where hidden moisture is suspected, learning how to detect moisture around window frames helps confirm whether moisture remains trapped inside concealed areas.
When Opening Wall Sections Becomes Necessary
Some window leaks require removing wet trim or opening a small section of damaged drywall below or beside the window. This exposes the edge of the drywall, the insulation around the rough opening, and the framing areas where water often collects.
Opening wall sections may be necessary when:
- Insulation becomes saturated
- Water pools inside the wall cavity
- Drywall remains wet after several days
- Musty odors persist despite drying efforts
Removing small sections of damaged drywall improves ventilation and reduces drying time. This also allows inspection of insulation and framing materials.
Drying Wet Insulation Materials
Wet insulation slows drying significantly because it traps moisture inside wall cavities. When insulation remains wet, surrounding materials stay damp longer.
Drying insulation depends on moisture severity.
Minor moisture exposure:
- May dry with airflow and dehumidification
Severe moisture exposure:
- Often requires insulation removal and replacement
Wet insulation left in place increases the risk of mold formation and structural deterioration.
For a fuller material-specific breakdown, see how to dry insulation after water damage.
Monitoring Moisture Levels During Drying
Drying progress should be monitored carefully. Surfaces that feel dry may still contain hidden moisture inside materials.
Effective monitoring methods include:
- Checking wall firmness and paint condition daily
- Watching for new stains spreading below the window corners
- Monitoring musty odors near trim, sill corners, and baseboards
- Using a moisture meter if you have one, especially along drywall edges and below the window
If drying slows, moisture readings stay elevated, or dampness keeps returning below the window, the wall may still be receiving water. The guide on how to detect window leaks inside walls explains how to confirm whether the leak path is still active.
How Long It Takes Walls to Dry After Window Leaks
Drying time after a window leak depends on how much water entered, how long the wall stayed wet, and whether insulation or framing became damp. Surface dryness alone does not prove the wall cavity is dry.
Typical Drying Time Ranges
While each situation is different, most drying timelines fall into predictable ranges based on moisture severity.
- Light moisture exposure: 24–48 hours
- Moderate moisture exposure: 2–5 days
- Heavy moisture saturation: 5–14 days
- Wall cavity moisture: Often takes the longest to dry
These ranges assume active drying using fans and dehumidifiers. Without proper airflow, drying may take significantly longer.
If moisture remains beyond expected timeframes, further investigation may be necessary. Recurring moisture conditions often relate to underlying issues explained in why window flashing failures cause leaks, especially when leaks repeat after rain.
Factors That Affect Drying Speed
Several conditions influence how quickly walls dry after window leaks.
The most important factors include:
- Amount of water entering the wall
- Type of insulation inside the cavity
- Indoor humidity levels
- Temperature conditions
- Quality of airflow around the wall
High humidity slows evaporation, while strong airflow accelerates drying. Wet insulation and framing materials also extend drying time significantly.
Signs Walls Are Not Drying Properly
Drying problems often occur when hidden moisture remains trapped inside wall assemblies. Recognizing warning signs early helps prevent mold development and structural deterioration.
If any of the following symptoms appear around the sill, lower window corners, trim edges, or wall below the window, drying may not be working or the leak may still be active.
Persistent Damp Odors
A musty or damp odor is one of the strongest indicators that moisture remains inside wall materials. These odors often develop before visible mold appears.
Odor-related warning signs include:
- Musty smells near window areas
- Odors that worsen during humid weather
- Smells returning after initial drying
- Persistent odor despite ventilation
Musty odors often indicate conditions that support mold growth. If odors continue, reviewing signs of mold growth around windows helps determine whether mold development may already be occurring.
Soft or Weak Drywall Surfaces
Drywall that feels soft or weakened usually contains internal moisture. Even if surfaces appear dry, structural strength decreases when moisture remains trapped.
Warning signs include:
- Soft spots when pressing on drywall
- Surface sagging or bulging
- Cracking near window edges
- Uneven wall surfaces
These symptoms indicate moisture damage that may require additional drying or material replacement.
Stains That Continue to Spread
Water stains that grow or darken over time indicate ongoing moisture movement. This often suggests hidden moisture remains inside the wall.
Expanding stains frequently signal:
- Active leaks still present
- Moisture trapped within insulation
- Incomplete drying conditions
- Water continuing to travel through materials
If stains persist after drying begins, additional investigation may be necessary to locate hidden moisture sources.
Preventing Mold During the Drying Process
Mold prevention during drying depends on keeping the area open, dry, and monitored until hidden moisture is gone. Do not paint, caulk, reinstall trim, or close the wall until the materials have dried fully.
- Keep air moving across the affected wall until drying is complete
- Run a dehumidifier if the room feels humid or drying slows
- Check lower window corners, trim edges, and the wall below the sill daily
- Do not seal the window area permanently until the leak source has been corrected
- Remove materials that stay soft, swollen, musty, or visibly moldy
When Drywall Must Be Removed Instead of Dried
Not all wet drywall can be saved. In some situations, removing damaged materials is the safest way to prevent mold and restore structural integrity.
If the drywall is only lightly damp, it may still be salvageable. For a more detailed decision guide, see when wet drywall can be saved.
Drywall removal becomes necessary when moisture damage exceeds recovery limits.
Severely Saturated Drywall
Drywall that has absorbed large amounts of water often loses structural strength. This material may not recover even after drying attempts.
Indicators of severe saturation include:
- Visible swelling or sagging
- Surface cracking
- Paper backing separating from the core
- Extensive staining
Severely saturated drywall typically requires removal to prevent mold development.
Wet Insulation Behind Walls
If insulation becomes heavily soaked, it often holds moisture for extended periods. Removing wet insulation may be necessary to allow surrounding materials to dry.
Signs insulation removal may be required include:
- Persistent moisture inside wall cavities
- Strong musty odors
- Slow drying despite airflow
- Repeated moisture detection
Wet insulation left inside walls increases the likelihood of mold growth.
When to Call a Professional for Water-Damaged Walls
While many window leak situations can be handled with prompt drying, some cases require professional evaluation. Moisture that spreads deep into structural materials or remains trapped after several days often exceeds the limits of standard household drying methods.
Restoration contractors use moisture meters, air movers, dehumidifiers, and cavity-drying methods that are stronger than standard household equipment. In severe cases, this helps prevent long-term structural damage and mold contamination.
Situations That Require Professional Drying
Professional help is recommended when:
- Walls remain wet after several days of active drying
- Insulation inside the wall becomes saturated
- Water entered during heavy rain or flooding
- Mold begins forming during the drying process
- Structural materials such as wood framing show signs of damage
These conditions often indicate that moisture has penetrated deeply into building materials, especially around insulation, framing, or enclosed cavities near the window opening.
If leaks continue despite drying efforts, long-term repair may be necessary. In those cases, reviewing how to fix persistent window leak problems helps identify structural issues that allow repeated water intrusion.
How to Prevent Future Wall Damage After Window Leaks
Drying walls successfully is only part of recovery. If the leak source is not corrected, the same wall can become wet again during the next storm.
For a fuller prevention-focused guide, see how to prevent window water intrusion.
Inspect Window Seals and Caulking
Seal failure is one of the most common causes of repeated window leaks. Inspecting caulking and sealant lines helps identify early damage before leaks become severe.
Inspection steps include:
- Checking for cracks or separation along caulking lines
- Inspecting frame edges for visible gaps
- Replacing damaged sealant promptly
- Monitoring areas exposed to direct rainfall
If seal failure continues to cause water intrusion, understanding why window flashing failures cause leaks helps identify structural weaknesses that allow moisture entry.
Control Humidity While the Wall Recovers
Humidity control reduces condensation risk around windows. Maintaining stable indoor conditions helps prevent repeated moisture buildup.
Helpful humidity control practices include:
- Using ventilation fans during cooking and bathing
- Operating dehumidifiers in humid conditions
- Allowing airflow around window areas
- Monitoring indoor humidity regularly
Controlling humidity reduces long-term moisture stress on window assemblies.
Frequently Asked Questions About Drying Walls After Window Leaks
How long does it take drywall to dry after a window leak?
Drywall typically dries within 24 to 48 hours after minor leaks when proper airflow and humidity control are used. Larger moisture events may require several days or longer depending on insulation conditions and drying equipment.
Can wet drywall dry without removal?
Yes, lightly damp drywall can often dry without removal if drying begins quickly. However, severely saturated drywall usually requires replacement to prevent mold growth.
Should insulation be replaced after a window leak?
Insulation may need replacement if it becomes heavily saturated. Wet insulation holds moisture for long periods and slows drying of surrounding materials.
How do I know if water reached inside the wall?
Signs include musty odors near the window, soft drywall edges, spreading stains below the sill, bubbling paint near trim, or dampness that returns after rain. These signs suggest water may have moved behind the trim or into the wall cavity.
Can mold grow while walls are drying?
Yes. Mold can begin forming within 24 to 48 hours if moisture remains present. Continuous airflow and humidity control reduce this risk significantly.
What equipment helps dry wet walls fastest?
Fans and dehumidifiers are usually the most useful tools. Aim fans across the damp wall surface and run a dehumidifier in the same room so moisture evaporating from the drywall is removed from the air.
When is professional drying required?
Professional drying is usually needed when the wall cavity is wet, insulation is saturated, drywall stays soft after active drying, electrical areas may be affected, or the leak keeps returning during rain.
Conclusion: Dry the Wall, Then Confirm the Leak Is Fixed
Walls affected by window leaks need more than surface drying. Remove visible water, create airflow, control humidity, and monitor the drywall, trim edges, lower window corners, and wall cavity until moisture is gone.
If the wall stays soft, smells musty, shows spreading stains, or gets wet again during rain, drying alone is not enough. The leak source must be corrected before trim, paint, or drywall repairs are closed back up.

2 Comments
Comments are closed.