How Windows and Doors Cause Hidden Moisture Problems
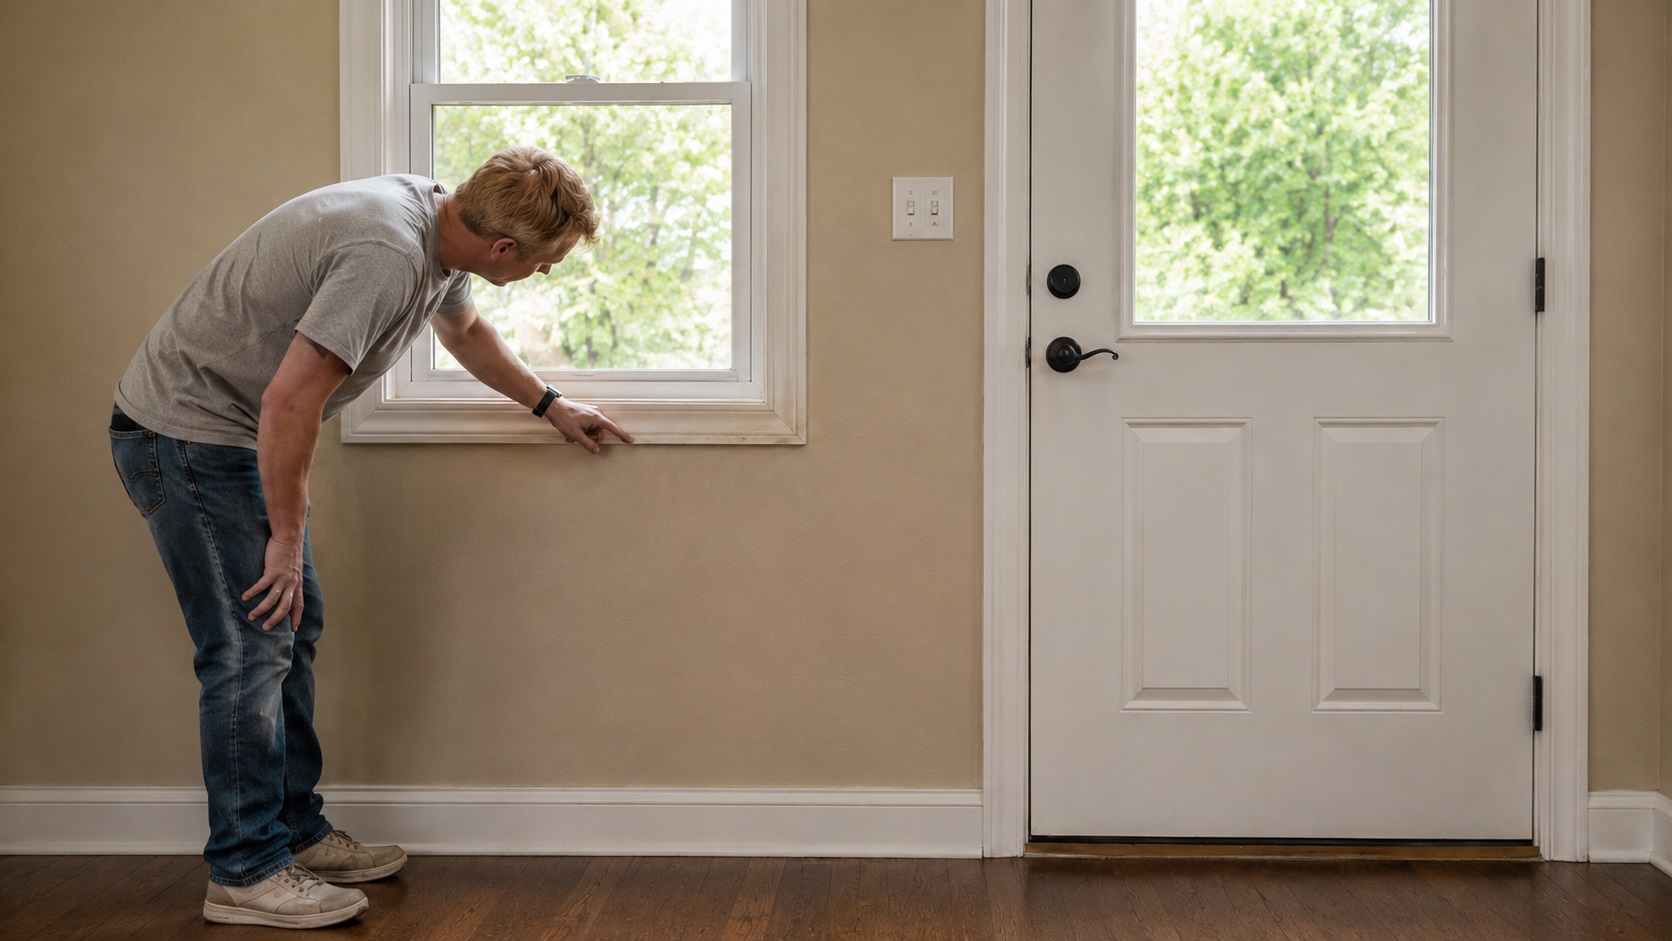
Windows and exterior doors are some of the most common places for hidden moisture problems to start because they interrupt the wall system. A solid wall can shed water in broad layers, but every window and door opening creates joints, corners, trim, flashing, sealant lines, thresholds, and frame connections where water can collect or slip behind finished materials.
That does not mean every stain near a window or door is a major structural problem. Sometimes the issue is condensation. Sometimes it is a small sealant gap. Sometimes it is worn weatherstripping, a flat sill, wind-driven rain, or a door threshold that is no longer shedding water correctly. In more serious cases, water may be moving behind trim, soaking framing, softening drywall, or feeding mold before the leak looks obvious from inside the room.
Windows and doors need to be read as systems, not isolated parts. This page sits under the broader guide to structural moisture problems in homes. If you are looking at moisture as part of the whole house, you can also start with the main guide on how to find, fix, and prevent moisture problems in homes.
You do not need to become a window installer or door specialist to read the early clues. You need to know where moisture usually starts, what different patterns mean, and when a repeated window or door problem is likely deeper than surface caulk.
Why Windows and Doors Are Common Hidden Moisture Entry Points
A window or exterior door is not just a hole filled with glass or a door slab. It is a transition between the exterior wall, interior wall, framing, drainage layers, trim, sealants, and finish materials. Moisture problems often start when one of those transition points stops working.
That is why window and door leaks can be confusing. The visible stain may show up on drywall, but the actual entry point may be outside at the trim. Mold may appear on an interior corner, but the trigger may be condensation from cold glass and high indoor humidity. A door may leak at the bottom corner, but the cause may be a worn sweep, compressed weather seal, poor threshold slope, or water being driven sideways by wind.
The most common moisture paths around windows and doors include:
- Failed exterior sealant around window or door trim
- Improper or aging flashing around the opening
- Flat or poorly sloped window sills that hold water
- Wind-driven rain forced into weak joints
- Condensation on cold glass, frames, corners, or trim
- Door thresholds that do not drain water away
- Weather seals that no longer compress tightly
- Old frames, trim, or jambs that absorb moisture
- Hidden water behind interior casing or drywall
Because these problems happen at layered assemblies, the first visible symptom is not always the true source. A homeowner may see peeling paint inside, but the water may be entering through exterior trim. A window may look dry during light rain but leak during windy storms. A door may only show moisture at the lower corners because that is where water pressure, slope, and seal failure concentrate.
How Moisture Moves Around Windows and Exterior Doors
Most window and door moisture problems follow one of five patterns: outside water enters, wind pushes rain past weak points, indoor humidity condenses on cold surfaces, water sits where it should drain, or aging materials stop resisting moisture.
Rainwater Can Enter Through Small Exterior Gaps
Rain does not need a large opening to cause hidden moisture damage. Small gaps in exterior trim, cracked sealant, open miters, loose casing, or unprotected joints can let water reach the wall opening. Once water gets behind trim, it may travel along framing, sheathing, insulation, or drywall before it becomes visible indoors.
This is why a leak may appear several inches away from the actual entry point. Water often follows gravity, framing edges, fasteners, and material seams. Around windows, it may show up below the sill, at lower corners, or along the side casing. Around exterior doors, it may show up near the threshold, lower jambs, adjacent baseboards, or flooring.
Wind-Driven Rain Can Push Water Past Weak Seals
Some windows and doors do not leak during ordinary rain but fail during wind-driven rain. Wind changes the behavior of water. Instead of falling straight down, rain can be pushed sideways against trim, siding edges, door seals, window joints, and lower corners. Pressure can force water into small openings that would not leak under calm conditions.
Exposed walls, upper stories, coastal homes, short roof overhangs, and storm-facing openings are more vulnerable. If moisture appears only after windy rain from one direction, pressure-driven water entry is more likely than everyday condensation.
Window-specific storm leaks are covered more directly in the guide on how wind-driven rain causes window leaks. Door-specific storm leaks are covered in the guide on how wind-driven rain causes door leaks.
Condensation Can Look Like a Window Leak
Not all moisture around windows comes from outside. Condensation forms when humid indoor air contacts a cold surface. Window glass, metal frames, cold corners, and poorly insulated areas around openings can all collect condensation when indoor humidity is high and outdoor temperatures are low.
That is why condensation can look like a leak. Water beads on the glass, runs onto the sill, soaks trim, stains paint, and may support mold if the area stays damp.
The timing matters. Moisture that appears during cold mornings, winter weather, high indoor humidity, or poor room ventilation may point toward condensation. Moisture that appears after rain, especially windy rain, is more likely to involve exterior water entry. The guide on why windows develop condensation and mold covers that pattern in more detail.
Poor Drainage Lets Water Sit Where It Should Shed Away
Windows and doors are supposed to shed water away from the wall opening. Window sills should direct water outward. Exterior trim should not trap water behind edges. Door thresholds should move water away from the interior side of the opening. When slope, drainage, or water-shedding details fail, moisture can sit in places that were never meant to stay wet.
Standing water is a problem because it gives moisture more time to find weak joints. A small sealant gap may not leak during a quick splash, but it may leak if water repeatedly sits against it. Flat surfaces, reverse slopes, clogged drainage paths, and poorly designed thresholds all increase the chance of hidden moisture movement.
For windows, this is why sill slope matters. A sill or lower trim detail that holds water can eventually allow water intrusion even if the rest of the window looks intact. For doors, threshold design matters because the bottom of the door assembly receives splashback, foot traffic, weather exposure, and repeated wetting.
Aging Materials Lose Their Ability to Block Moisture
Windows and doors become more vulnerable as materials age. Sealant dries, cracks, separates, or loses adhesion. Weatherstripping compresses and stops sealing tightly. Wood trim absorbs moisture and begins to soften. Paint breaks down. Frames move slightly with temperature, humidity, settling, or repeated use.
Older windows and doors may still look acceptable from a distance while hidden moisture problems are developing at the edges. Repeated staining, soft trim, swelling, musty odor, or recurring mold often means the assembly is no longer managing moisture the way it should.
Age alone does not mean replacement is required. But age plus repeated moisture is a warning pattern. If the same area keeps getting wet after maintenance, the issue may involve more than a visible bead of caulk.
Common Window Moisture Problems
Window moisture problems usually fall into a few main categories: sealant failure, flashing failure, poor sill slope, wind-driven rain, condensation, aging materials, and hidden frame or trim moisture. Each problem can create similar indoor symptoms, so the key is to look at timing, location, and recurrence.
For a broader breakdown of the main failure patterns, see the guide on why windows develop water leak problems.
Failed Window Sealant
Exterior sealant is one of the most visible parts of the window moisture system, but it is also one of the easiest to misunderstand. Sealant helps close exposed joints around trim and frames, but it is not the only water-control layer. If sealant fails, water may enter exposed gaps. If deeper flashing or drainage details are wrong, fresh caulk may not solve the problem.
Sealant commonly fails because of sunlight, temperature movement, poor surface preparation, age, shrinkage, or separation from the materials it was supposed to bond to. Cracked or missing sealant around window trim can allow water to move behind the exterior casing and into the wall opening.
Typical signs of sealant-related moisture include gaps around exterior trim, cracks at joints, peeling paint near the window edge, staining below corners, or leaks that appear after rain hits the wall. The dedicated guide on why window sealant fails over time explains this failure pattern more specifically.
Do not assume that adding more caulk over old sealant is always the right fix. If water is trapped behind trim or entering through flashing failure, surface caulk can hide the problem instead of correcting it.
Window Flashing Failure
Flashing is supposed to direct water away from the window opening and back out of the wall system. When flashing is missing, damaged, poorly lapped, or incorrectly integrated with the surrounding wall, water can move behind the exterior finish and enter around the window frame.
Flashing problems are often harder to see than failed caulk because the failure may be behind trim, siding, housewrap, or the window flange. The indoor symptom may be a stain below the window, damp drywall, swollen trim, or recurring moisture that returns even after surface sealing.
One clue is recurrence. If the same window keeps leaking after caulking or minor exterior maintenance, the problem may be deeper than the visible joint. The guide on why window flashing failures cause leaks covers this in more detail.
Flashing problems often need careful inspection because the visible stain is not always directly below the failed layer. Water can enter high, travel sideways or downward behind materials, and show up where the interior finish is weakest.
Poor Window Slope
A window sill or lower trim detail should not hold water against the opening. If the sill is flat, back-sloped, damaged, or blocked by poor detailing, water may sit long enough to seep into joints. Over time, that can lead to staining, trim swelling, sill rot, paint failure, and moisture behind the frame.
Poor slope can also make other small defects worse. A hairline sealant gap may not matter much if water drains away quickly. But if water sits against that same joint after every rain, the chance of hidden moisture increases.
Common warning signs include water sitting on the sill after rain, dark staining at lower corners, peeling paint on the sill or lower trim, softness in wood, or moisture that appears below the window after storms. The article on how poor window slope causes water intrusion explains this drainage problem more fully.
Wind-Driven Rain Around Windows
Wind-driven rain can expose problems that are invisible during normal weather. A window may handle vertical rainfall but leak when wind pushes water sideways into trim joints, sash edges, frame gaps, or weak exterior sealant lines.
This is why some homeowners only see moisture after storms from one direction. The window may not be “leaking all the time.” It may be vulnerable under pressure. That distinction matters because the fix may involve exterior exposure, seal integrity, flashing, trim joints, or storm-facing wall conditions rather than only interior cleanup.
If the leak appears only after windy rain, note which wall the window is on, which direction the wind came from, where the stain appeared, and whether nearby windows show the same pattern. These details can help separate a random stain from a recurring storm-exposure problem.
Older Windows and Repeated Moisture
Older windows are more likely to develop moisture problems because the materials around them have gone through years of expansion, contraction, wetting, drying, sunlight exposure, and maintenance cycles. Sealants may separate. Wood may soften. Paint may fail. Drainage paths may clog. Frames may no longer sit as tightly as they once did.
That does not mean every older window needs replacement. Some problems are maintenance issues. But when an older window repeatedly causes stains, mold, soft trim, wet sills, or hidden frame moisture, the issue may be more than cosmetic.
The guide on why older windows develop moisture problems explains the age-related pattern in more detail. If the concern is whether the window is reaching replacement territory, the articles on signs windows need replacement due to moisture and when to replace windows due to water damage are better next steps.
Common Exterior Door Moisture Problems
Exterior doors can leak for many of the same reasons windows leak, but door openings have their own moisture risks. A door is used every day, exposed to foot traffic, movement, weather, threshold wear, and repeated opening and closing. The lower part of the assembly is especially vulnerable because water can collect near the threshold, splash against the bottom corners, or enter where the weather seals no longer compress tightly.
Door moisture problems often show up as swelling, staining, soft trim, wet flooring, musty odor, peeling paint, or dampness near the bottom corners. The visible symptom may be inside, but the cause may be outside at the threshold, sweep, weather seal, frame, or installation joint.
For a broader explanation of the main door failure patterns, see the guide on why exterior doors develop water leak problems.
Water Entry Around Exterior Doors
Exterior doors have several possible water-entry paths. Water may enter below the threshold, around the lower jambs, behind exterior trim, through failed caulk, past a worn sweep, or around a door frame that no longer sits tightly in the opening. Once water gets inside the assembly, it can move into flooring, subflooring, baseboards, drywall, or framing.
The lower corners of exterior doors are especially important. They are where vertical jambs meet the threshold, where water can collect, and where seal failure often becomes visible first. A small gap in this area can let water enter during heavy rain or wind-driven rain even if the rest of the door looks dry.
For a deeper look at the main entry paths, use the guide on how water enters around exterior doors. If you are still trying to identify the visible warning signs, start with signs of water damage around doors.
Improper Door Installation
A door can leak even when the door slab itself is in good condition. Installation details matter because the door unit must sit square, drain correctly, seal evenly, and connect properly with the surrounding wall. If the frame is out of square, the threshold is not supported correctly, the flashing is missing, or the exterior trim is poorly sealed, water may find a path into the opening.
Improper installation can cause repeated leaks that are hard to solve with surface maintenance. A new sweep or fresh caulk may help if the problem is minor, but it will not correct a poorly integrated door assembly. This is one reason some door leaks return after several attempted quick fixes.
The article on how improper door installation causes leaks explains the installation-related patterns in more detail.
Door Threshold Design Problems
The threshold is one of the most important moisture-control parts of an exterior door. It receives rain, splashback, foot traffic, and pressure from the door sweep. It must help shed water outward while keeping water from moving under the door or into the subfloor.
When a threshold is damaged, flat, poorly supported, incorrectly sloped, or no longer aligned with the door sweep, water can collect where it should drain away. Over time, that can lead to soft flooring, rot near the lower jambs, swelling trim, staining, or hidden subfloor moisture.
Threshold problems are often mistaken for simple weatherstripping problems. The difference is that a failed weather seal lets water or air pass the seal, while a threshold design or drainage problem can allow water to sit in the wrong place even if the seal looks acceptable. The guide on how door threshold design affects water intrusion is the better place for that detailed explanation.
Failed Exterior Door Weather Seals
Weather seals are designed to close the gaps between the door slab and the frame. Over time, they can compress, tear, pull loose, harden, shrink, or stop making even contact. When that happens, wind and rain can reach areas that should be protected.
A failed weather seal may cause drafts before it causes obvious water damage. But during storms, especially wind-driven rain, a weak seal can allow water to reach the interior side of the door. The problem often appears near the bottom corners, along the latch side, or below the sweep.
Warning signs include daylight around the door edge, drafts, worn or flattened weatherstripping, dampness after storms, staining at the threshold, or recurring water near one side of the door. The guide on why exterior door weather seals fail explains this failure pattern more directly.
Wind-Driven Rain Around Doors
Wind-driven rain can force water into a door assembly that stays dry during ordinary rain. This is common when a door faces the direction of storms, has little roof protection, sits at the top of exterior steps, or has weak lower-corner seals.
When wind pushes rain against the door, water may be driven past the sweep, around the weatherstripping, into the threshold area, or behind exterior trim. The leak may only appear during certain storms, which can make it seem random.
If the same exterior door only leaks when rain hits it from a certain direction, the problem may involve exposure and pressure, not just a visible gap. The guide on how wind-driven rain causes door leaks covers this storm-specific pattern.
Exterior Door Frame Moisture Problems
The door frame can absorb and hold moisture when water repeatedly reaches the jambs, lower corners, or trim. Wood frames may swell, soften, split, or rot. Painted surfaces may bubble or peel. The door may begin to stick because the frame or slab is swelling. In more advanced cases, the damage can extend into the surrounding wall or subfloor.
Door frame moisture is important because it often indicates repeated wetting, not a one-time splash. If the frame dries quickly and the cause is corrected, damage may stay limited. If the frame continues to get wet, the problem can become structural and may eventually require repair or replacement.
The guide on how exterior door frames develop moisture problems explains how this pattern develops over time.
Signs Moisture Is Hiding Around Windows or Doors
Hidden moisture around windows and doors usually reveals itself through small changes before major damage appears. The signs may be visual, physical, or odor-based. A stain may appear before the trim feels soft. Paint may bubble before drywall becomes visibly damaged. A musty smell may show up before mold is obvious.
The key is to look for patterns, not just isolated marks. One small stain after a single storm may be minor. A stain that returns after every wind-driven rain, grows over time, or appears with swelling, softness, mold, or musty odor is more concerning.
Window Warning Signs
Window moisture warning signs often appear around the sill, lower corners, side trim, wall below the window, or interior casing. Common signs include peeling paint, dark staining, swollen trim, soft wood, damp drywall, bubbling paint, recurring condensation, or mold near the corners.
Moisture may appear on the glass, but the glass is not always the source. Water on glass can come from condensation. Water below the sill after rain may point more toward drainage, sealant, flashing, or exterior water entry.
If you are trying to identify early visible symptoms, use the guide on signs of water damage around windows. If the concern is frame-level moisture, use the guide on how to detect moisture around window frames.
Door Warning Signs
Door moisture warning signs usually appear near the threshold, lower corners, jambs, casing, nearby flooring, or adjacent baseboards. You may see swelling, staining, loose paint, soft trim, warped flooring, musty odor, or water marks after rain.
Exterior door leaks can also show up as performance problems. The door may begin to stick. The sweep may drag unevenly. The threshold may look stained or deteriorated. The lower jamb may feel soft. If the area keeps getting wet, it is no longer just a cosmetic issue.
For door-specific symptoms, use the guide on signs of water damage around doors. If the issue appears after storms, the guide on signs of water leaks around exterior doors may be the better match.
Trim and Casing Warning Signs
Trim often shows moisture problems before the wall cavity does. This happens because trim sits at the edge of the opening, covers seams, and often absorbs water before the leak spreads into the visible wall surface. Around windows, trim may cup, swell, separate, stain, or grow mold. Around doors, casing may pull away, soften at the lower ends, or show dark staining near the threshold.
Trim problems are easy to dismiss as paint or cosmetic damage, but recurring trim deterioration can mean water is entering behind the casing. If the same piece of trim keeps failing after repainting, the moisture source has not been corrected.
For window-specific trim problems, use the guide on signs window trim is allowing water entry.
Mold Patterns Around Windows and Doors
Mold around windows and doors usually means moisture is recurring. The source may be condensation, a rain leak, poor airflow, damp trim, or moisture trapped behind casing. Mold does not always prove there is a major structural leak, but it does mean the area has stayed damp long enough for growth to appear.
Location matters. Mold on glass edges or cold corners often points toward condensation. Mold on swollen trim points more toward repeated wetting. Mold that returns after cleaning usually means the moisture source was never corrected.
Mold Around Window Trim
Window trim can support mold when it repeatedly absorbs moisture from condensation, leaks, or damp wall conditions. Painted wood, caulk lines, and dust on trim surfaces can all hold enough moisture and organic material for mold to appear.
Mold around trim should not be treated as only a cleaning issue if the area keeps getting wet. Cleaning the surface may remove visible growth temporarily, but the mold can return if condensation, leaking, or trapped moisture continues.
The guide on signs of mold around window trim explains how to recognize trim-specific mold patterns without confusing them with other window problems.
Hidden Mold Around Window Frames
Hidden mold around window frames is more concerning than light surface mildew because it may involve moisture behind trim, around the frame, or inside concealed edges of the wall opening. Warning signs can include musty odor, recurring discoloration, soft trim, damp drywall, or mold that comes back after cleaning.
Hidden mold is not always visible without removing materials, and not every homeowner should start opening walls or trim without understanding the risk. If the area is repeatedly wet, smells musty, or shows spreading damage, a more careful inspection may be needed.
The article on signs of hidden mold around window frames is the better place for frame-specific mold warning signs.
Mold Around Window Corners
Mold often appears at window corners because corners can be colder, less ventilated, and more prone to condensation. Airflow is usually weaker in corners, and temperature differences can make moisture collect there before it appears on broader wall surfaces.
Corner mold may come from condensation, but it can also appear when a leak or flashing problem keeps the corner damp. Timing helps. Mold that appears with winter condensation may point toward humidity and cold surfaces. Mold that appears after rain or spreads below the corner may point toward water entry.
The guide on why mold forms around window corners covers that specific pattern.
Mold on Window Sills
Window sills are vulnerable because condensation runs down onto them, rainwater may reach them from leaks, and dust can collect on the surface. If the sill stays damp, mold can appear even when the rest of the wall looks dry.
Preventing mold on window sills usually starts with controlling the moisture source. That may mean reducing condensation, improving airflow, drying water quickly, repairing exterior leaks, or addressing a sill that holds water. The guide on how to prevent mold on window sills covers the sill-specific prevention steps.
How to Tell Whether the Moisture Is From a Leak or Condensation
One of the most important distinctions around windows and doors is whether moisture is coming from outside water entry or indoor condensation. The symptoms can overlap, but the timing and location often tell you which direction to investigate first.
Moisture That Appears After Rain
Moisture that appears after rain, especially on the wall below a window, near exterior door thresholds, or at trim edges, is more likely to involve exterior water entry. The cause may be sealant, flashing, slope, trim, threshold, weather seals, or wind-driven rain.
If the moisture appears only after heavy rain from one direction, pay attention to wind exposure. If it appears after almost every rain, the opening may have a more consistent drainage or sealing problem.
Moisture That Appears During Cold Weather
Moisture that appears during cold weather, especially on glass, metal frames, or window corners, may be condensation. This is more likely when indoor humidity is high, curtains block airflow, furniture is close to the wall, or the window surface gets cold enough for moisture to form.
Condensation still matters because repeated wetting can damage sills, trim, paint, and drywall. But the solution is different from a rain leak. Instead of looking only outside, you may need to reduce indoor humidity, improve airflow, or address cold surface conditions.
Moisture That Returns After Caulking
If moisture returns after exterior caulking, the original problem may not have been the visible sealant line. The leak may involve flashing, poor slope, trapped water, frame deterioration, wind-driven rain, or an installation problem.
This is common around both windows and doors. Surface sealing may reduce water entry for a short time, but it cannot correct a hidden drainage failure or a poorly integrated opening. Repeated moisture after maintenance is a sign that the assembly needs a closer look.
Moisture at Door Lower Corners
Moisture at the lower corners of an exterior door often points toward threshold, sweep, weather seal, or jamb problems. Wind-driven rain can also push water into these areas. If the flooring, baseboard, or lower casing is wet near one side of the door, the water may be entering at the corner rather than through the center of the door.
Door lower-corner leaks should not be ignored because water can move into subflooring and framing before the surface damage looks severe.
How to Inspect Window and Door Moisture Without Over-Demolishing
You usually do not need to start by tearing open walls or removing large sections of trim. The best first step is to inspect the most likely moisture points carefully and connect what you find to the timing of the problem. A leak that appears after wind-driven rain, a damp sill that appears during cold weather, and a soft lower door jamb after every storm are different clues.
Start with the visible surfaces, then move toward more concealed areas only if the symptoms justify it. Look for staining, swollen trim, peeling paint, soft wood, musty odor, cracked sealant, loose casing, darkened corners, damp drywall, and flooring changes near exterior doors.
Check Window Frames and Lower Corners
Window frames and lower corners are common places for hidden moisture to appear. Water may collect below the sill, at the side casing, or where the frame meets trim. Condensation may also run downward and collect at the lowest part of the window assembly.
Look for dark staining, softened wood, bubbling paint, swelling, separation between trim and drywall, or recurring mold near the frame. If you use a moisture meter, compare readings around the suspicious area with nearby dry areas so you are not relying on one isolated number.
For a more focused inspection process, use the guide on how to detect moisture around window frames.
Inspect Window Sills for Moisture Damage
Window sills are important because they receive water from both directions. Condensation can run down from the glass onto the sill, while exterior leaks or poor sill slope can allow rainwater to wet the sill from outside or underneath. A sill that repeatedly stays wet can develop stains, peeling paint, softness, cracking, mold, or rot.
After rain, check whether water sits on the sill or lower trim. During cold weather, check whether condensation is running down and pooling on the sill. If the sill is soft, dark, swollen, or repeatedly moldy, the problem is more than a one-time wet surface.
The guide on how to inspect window sills for moisture damage covers sill-specific warning signs in more detail.
Check Exterior Door Thresholds and Lower Jambs
For exterior doors, the threshold and lower jambs are the first places to check. These areas receive rain exposure, splashback, foot traffic, and repeated movement from the door. If water is entering around the bottom of the door, the damage may show up in flooring, baseboards, casing, or the lower corners of the frame.
Look for soft wood, swelling, discoloration, loose trim, daylight under the door, a worn door sweep, cracked caulk, threshold gaps, or water stains on nearby flooring. If the door sticks after rain, that can also be a sign that moisture is affecting the frame or slab.
Do not focus only on the center of the threshold. Many exterior door leaks happen at the lower corners where the vertical jambs meet the threshold and where seals are most likely to fail.
Compare Interior Clues With Exterior Conditions
Interior symptoms are easier to see, but exterior conditions often explain why they happen. If you see staining below a window, inspect the exterior trim, sealant, sill slope, siding connection, and any visible gaps above or beside the window. If you see moisture near a door threshold, inspect the exterior landing, slope, weather seals, sweep, threshold condition, and lower jambs.
Also compare symptoms with weather. Did the moisture appear after ordinary rain, wind-driven rain, cold weather, or high indoor humidity? Did it happen after one storm or many storms? Does it appear only on one side of the house? These details help separate condensation, storm exposure, and structural water entry.
Know When Not to Keep Opening Materials
Removing trim can reveal hidden moisture, but it can also damage finishes or expose mold, rot, or insulation problems. If the area smells musty, feels soft, shows spreading stains, or has recurring moisture after repairs, it may be better to document the symptoms and get a professional inspection instead of continuing to open materials without a plan.
This is especially true when the suspected problem involves flashing, structural framing, subfloor damage, or repeated door threshold leaks. Those issues often require more than surface-level inspection.
What to Do When Moisture Is Found
When you find moisture around a window or door, the first priority is to identify whether the source is active, recurring, or already corrected. Cleaning, repainting, or replacing trim before the source is understood can hide the damage without solving the problem.
The right next step depends on the pattern. Condensation needs humidity and airflow control. A failed weather seal may need replacement. A wet sill may need drying and a drainage fix. A recurring leak after caulking may need flashing or installation evaluation. A soft frame or threshold may need repair or replacement planning.
Dry Wet Window Areas Before Covering Them
Wet window areas should be dried before they are repainted, recaulked, or covered with new trim. Trapping moisture behind paint, caulk, casing, or patching materials can allow staining, odor, mold, or deterioration to return.
Drying may be simple when the wetting is minor and the materials are still sound. But if drywall, insulation, trim, or framing has stayed wet, the process may require more careful evaluation. The guide on how to dry window areas after water intrusion covers this recovery step more directly.
Prevent Mold Around Windows
Mold prevention around windows starts with controlling the moisture pattern. If the issue is condensation, reduce indoor humidity and improve airflow. If the issue is exterior water entry, repair the leak source. If the sill or trim is repeatedly wet, address why water is collecting there.
Cleaning mold without correcting moisture usually leads to recurrence. That is especially true around window corners, trim, and sills because these areas can stay cooler, collect condensation, or absorb moisture repeatedly.
For a focused prevention guide, use how to prevent mold around windows.
Do Not Rely on Surface Caulk Alone
Caulk can help when the problem is a small exposed joint, but it is not a complete moisture-control system. Windows and doors also depend on flashing, slope, drainage, weather seals, thresholds, frame condition, and wall integration.
If moisture keeps coming back after caulking, do not keep adding more layers over the same area. Repeated caulking can trap water, hide failed materials, and delay the correct repair. Recurring moisture usually means the source needs to be identified more carefully.
Track Whether the Problem Returns
After drying or maintenance, track what happens during the next few rain events, cold mornings, or humid days. Write down when moisture appears, where it appears, and what the weather was like. This can help separate a condensation pattern from a leak pattern.
If the moisture returns in the same place, the source has probably not been corrected. If it returns only during wind-driven rain, storm exposure may be the key clue. If it returns during cold weather without rain, condensation may be the more likely issue.
When Moisture Around Windows or Doors Becomes a Repair or Replacement Issue
Not every wet window sill or damp door threshold means replacement is needed. Many issues can be corrected with maintenance, humidity control, drying, seal replacement, or localized repair. But some patterns suggest the assembly is no longer managing moisture properly.
Replacement or major repair becomes more likely when moisture is persistent, materials are soft or rotted, the same leak returns after reasonable maintenance, the frame has lost shape, the threshold is deteriorated, or water has reached surrounding structure.
Persistent Moisture Around Windows
Persistent moisture around windows is different from an isolated stain. If the same area keeps getting wet after caulking, drying, cleaning, or repainting, the problem may involve flashing, sill slope, hidden frame moisture, deteriorated trim, or a deeper installation issue.
Repeated moisture is also more likely to cause secondary damage. Trim can soften, drywall can stain, paint can fail, and mold can return. The guide on how to fix persistent moisture around windows is the better place to evaluate that recurring pattern.
When Window Moisture Points Toward Replacement
Window replacement may become part of the discussion when the unit or surrounding assembly is repeatedly failing. Warning signs include soft or rotted frames, recurring leaks, failed seals, severe sill deterioration, repeated moisture after repairs, mold that keeps returning because the opening stays wet, or damage that extends into nearby wall materials.
Replacement should not be the first assumption, but it should not be ignored when the window can no longer shed water or stay dry. To evaluate the warning signs, use the guide on signs windows need replacement due to moisture. For the decision stage, use when to replace windows due to water damage.
If the main question is whether a leak has crossed the line from repairable to replacement-level, use the guide on how to tell if window leaks require replacement.
When Exterior Door Moisture Points Toward Replacement
Exterior door replacement may be needed when the door slab, frame, threshold, or surrounding structure is too damaged to manage water properly. Common warning signs include repeated lower-corner leaks, soft jambs, threshold rot, swelling that affects door operation, water-damaged flooring, failed weather seals that no longer align, or moisture that keeps returning after maintenance.
Door replacement decisions should account for the full assembly, not just the visible door slab. A door can look acceptable from inside while the lower jamb, threshold, or subfloor is deteriorating from repeated moisture.
To evaluate visible failure signs, use signs exterior doors are failing from moisture. For the replacement decision, use when to replace exterior doors due to water damage. If the issue is whether an active leak has reached replacement territory, use the guide on whether door leaks require replacement.
How This Hub Connects to Other Moisture Systems
Window and door moisture problems do not exist in isolation. They are part of the larger water-management system of the home. A window leak may connect to exterior wall drainage. A door threshold leak may affect flooring or subflooring. Condensation around windows may connect to indoor humidity. Mold around trim may connect to recurring moisture that was never fully corrected.
If the issue appears to involve broader wall water entry, the guide on how exterior walls allow moisture into homes may help place the window or door problem in the larger wall system. If the concern is about gaps, penetrations, flashing, and exterior openings more generally, use the guide on how water enters homes through structural gaps.
If you are still trying to locate hidden moisture in different rooms or materials, the broader guide on how to find hidden moisture in different areas of your home may be more useful. If the same problem keeps coming back after cleaning or repair, the guide on how to prevent recurring moisture damage explains how to think about repeated moisture patterns.
When mold is already part of the problem, this hub can help explain why the area got damp, but mold-specific cleanup and prevention belong in the mold guides. Start with how to remove mold permanently if the main issue has shifted from leak diagnosis to mold response.
FAQ: Windows, Doors, and Hidden Moisture Problems
Can windows leak even if the glass looks dry?
Yes. A window can leak around the trim, flashing, sill, frame, or exterior sealant even when the glass itself looks dry. Water may enter behind the exterior finish and show up below the window, beside the frame, or behind interior casing.
Is mold around windows always caused by a leak?
No. Mold around windows can come from condensation, high indoor humidity, poor airflow, damp trim, exterior leaks, or a combination of these conditions. The timing matters. Mold that appears during cold weather may be condensation-related, while mold that worsens after rain may point toward water entry.
Why does moisture only appear around windows after windy rain?
Wind-driven rain can push water sideways into weak joints, trim gaps, sealant cracks, or flashing defects. A window may stay dry during normal rain but leak when rain is driven against the wall by wind pressure.
Can caulking stop window leaks permanently?
Caulking can help when the leak is caused by a small exposed sealant gap. It may not solve leaks caused by flashing failure, poor sill slope, trapped water, frame deterioration, or installation problems. If moisture returns after caulking, the source needs closer inspection.
Why do exterior doors leak at the bottom corners?
Bottom corners are vulnerable because the jamb, threshold, sweep, and weather seals meet there. Water can collect at these corners, especially during wind-driven rain or when the threshold does not drain correctly.
When should a wet window or door area be inspected professionally?
Professional inspection is more important when moisture keeps returning, trim or framing feels soft, mold or musty odor is present, the leak appears after multiple repairs, or water may have reached the wall cavity, subfloor, or structural materials.
When does window or door moisture mean replacement may be needed?
Replacement may be needed when the window or door assembly can no longer control water. Warning signs include rot, repeated leaks, soft frames, failed thresholds, swelling that affects operation, severe sill deterioration, or moisture that keeps returning after reasonable repair attempts.
Conclusion
Windows and exterior doors cause hidden moisture problems because they are complex openings in the exterior wall system. They rely on sealant, flashing, trim, slope, thresholds, weather seals, drainage, and frame condition to keep water out and allow moisture to dry. When one part fails, water may show up as stains, swelling, soft trim, mold, musty odor, or recurring dampness inside the home.
The most important step is to read the pattern correctly. Moisture after rain is different from condensation on cold glass. A lower-corner door leak is different from a moldy window corner. A stain that returns after caulking is different from a one-time spill or isolated wet surface.
Use this hub to identify the likely moisture path, then move into the specific guide that matches your problem: window frame moisture, door threshold leaks, failed sealant, flashing failure, condensation, mold around trim, sill damage, wind-driven rain, or replacement decisions. The more accurately you identify the path, the less likely you are to cover symptoms while the source continues behind the surface.
3 Comments
Comments are closed.