How Plumbing Leaks Cause Structural Damage
Plumbing leaks can damage more than the pipe, hose, valve, fixture, or appliance where the water first escapes. A slow drip under a sink, a leaking dishwasher line, a refrigerator water connection, a washing machine hose, or a hidden pipe leak inside a wall can move moisture into cabinets, flooring, subfloors, drywall, framing, and other building materials before the problem looks serious from the outside.
That is why plumbing leaks are one of the most common ways a small moisture problem becomes a structural moisture problem in a home. The leak may begin as a plumbing issue, but the damage often spreads into the materials around it. If you are trying to understand how plumbing leaks fit into the larger picture of structural moisture problems in homes, the key is to look at three things: where the water starts, where it travels, and which materials stay wet long enough to weaken, swell, rot, stain, or support mold growth.
This article explains where plumbing leak damage usually shows up, why it often spreads beyond the visible leak, and which next step makes sense based on the fixture, appliance, hose, valve, or pipe involved. For the broader sitewide process, see the main guide on how to find, fix, and prevent moisture problems in homes.
Why Plumbing Leaks Become Structural Moisture Problems
A plumbing leak becomes a bigger home-repair problem when water reaches materials that are not meant to stay wet. Finished flooring, subfloor panels, drywall, trim, cabinet bases, wood framing, insulation, and wall cavities all react differently. Some stain first. Some swell. Some soften. Some hide moisture behind a surface that still looks mostly normal.
The risk is not always the amount of water released at one time. A sudden hose burst can cause obvious damage, but a slow leak can be just as costly because it may continue for weeks or months before anyone notices it. A small amount of water leaking repeatedly into the same cabinet base, floor layer, or wall cavity can keep materials damp long enough for visible damage to appear.
Small leaks can stay hidden long enough to damage materials
Many plumbing leaks begin in places homeowners do not inspect every day. Under-sink valves, dishwasher supply lines, refrigerator water lines, washing machine hoses, shower valve walls, and pipes inside walls can leak slowly without creating an obvious puddle in the room. The water may soak into a cabinet base, run behind an appliance, wick into drywall, or settle under finished flooring.
This is why hidden plumbing leaks are often discovered by symptoms instead of by seeing the leak itself. A musty smell, swollen cabinet floor, cupped flooring, loose vinyl, soft subfloor, stained baseboard, bubbling paint, or mold behind an appliance may be the first sign that water has been escaping for a while.
If you suspect the leak is slow or concealed, use the guide on how to detect slow plumbing leaks before assuming the area is dry just because you cannot see active water.
Water follows paths through cabinets, walls, floors, and cavities
Water from a plumbing leak does not always stay directly below the source. It can follow seams, gaps, pipe openings, flooring edges, cabinet backs, framing, and wall cavities. It may also wick sideways through porous materials or collect in low areas with poor airflow. That is why the visible damage can show up several inches or several feet away from the failed part.
For example, a sink drain leak may first wet the cabinet floor, then spread into the toe-kick area or flooring edge. A dishwasher supply leak may run under the appliance before it appears in front of the cabinets. A refrigerator water line leak may wet the wall base and flooring behind the refrigerator long before anyone pulls the appliance out. A shower valve leak may affect the wall cavity before the finished bathroom surface looks severely damaged.
When you are not sure whether water has moved beyond the obvious area, the broader guide on how to find hidden moisture in different areas of your home can help you think through the inspection by location.
Plumbing leaks are different from exterior water intrusion
Plumbing leaks come from inside the home’s water supply, drain, fixture, or appliance systems. That makes them different from roof leaks, window leaks, siding leaks, and exterior wall leaks. A plumbing leak may happen even during dry weather, often near fixtures or appliances that use water. Exterior water intrusion usually follows rain, wind, drainage, flashing, siding, or opening failures.
This matters because the repair path is different. With a plumbing leak, the first job is usually to find and stop the plumbing source. Drying the cabinet, floor, wall, or subfloor without fixing the leak will not solve the problem. Moisture from windows, doors, siding, or roofing needs a different source investigation. For comparison, see how windows and doors cause hidden moisture problems, how exterior walls allow moisture into homes, and the most common roofing material failures.
Common Plumbing Leak Sources That Damage Homes
Most plumbing leak damage starts in a few predictable places: sinks and cabinets, fixture connections, appliances, hidden wall pipes, under-floor lines, slab plumbing, aging pipes, failing valves, and old hoses or supply lines.
Understanding the source category helps you inspect the right materials. A sink leak usually affects a cabinet first. A dishwasher leak usually threatens nearby flooring and cabinets. A washing machine hose leak can spread quickly across a laundry room. A refrigerator water line leak may stay hidden behind the appliance. A shower plumbing leak may show up as wall damage, floor damage, or moisture in an adjacent room.
Sink and cabinet plumbing leaks
Under-sink areas are common leak locations because several plumbing parts meet in a small enclosed space. Supply lines, shutoff valves, drain connections, P-traps, garbage disposal fittings, dishwasher connections, and faucet connections can all leak. Because the cabinet hides the plumbing, early water damage may be limited to the cabinet floor or back panel before it becomes visible in the room.
Common warning signs include dark staining on the cabinet floor, swelling, soft particleboard, peeling laminate, a musty smell, damp stored items, corrosion around shutoff valves, or water marks near the back wall of the cabinet. If the leak continues, water can move from the cabinet base into the flooring edge, toe-kick area, wall base, or subfloor.
For a focused symptom checklist, use the guide on signs of water damage under sink cabinets.
Slow leaks around fixtures and valves
Slow leaks around fixtures and valves are easy to underestimate because they may not produce standing water. A shutoff valve can seep slightly. A supply connection can drip only when the fixture is used. A drain connection can leak only when water is running. A faucet base can allow water to slip below the sink deck. These small leaks can still keep surrounding materials damp if they repeat often enough.
Older shutoff valves deserve special attention because they may leak at the stem, fail to close fully, corrode, or begin seeping around connections. If the shutoff valve itself is unreliable, a small repair can become harder to control during an emergency.
If you see corrosion, mineral buildup, stiffness, seeping, or a valve that no longer shuts off properly, review the guides on signs a shutoff valve is failing, how long sink shutoff valves last, and when to replace angle stop valves.
Dishwasher leaks
Dishwashers can hide leaks because the supply line, drain hose, fittings, pump area, and other connections are usually behind or beneath the appliance. Water can collect under the dishwasher and spread into flooring or nearby cabinets before it becomes obvious.
Early dishwasher leak signs may include damp flooring in front of the dishwasher, swelling at cabinet sides, staining near the toe-kick, musty odor, loose flooring, or discoloration under nearby cabinets. Because dishwashers are built into cabinets, small leaks can stay hidden longer than leaks in open areas.
For location-specific help, use the guides on signs of water leaks under dishwashers, how to detect hidden dishwasher leaks, and why dishwashers develop hidden leaks. If the concern is the hose itself, use the guide on how to inspect dishwasher hoses for leaks.
Refrigerator and ice maker water line leaks
Refrigerators with water dispensers or ice makers usually have a small supply line behind the appliance. That line can leak at the wall connection, refrigerator connection, valve, fitting, or tubing. Because the refrigerator blocks the view, water may wet the floor, wall base, or nearby cabinets before anyone sees it.
Refrigerator water line leaks are especially easy to miss when the water escapes slowly. The first clue may be a musty smell, staining along the wall base, swelling in nearby flooring, mold under the refrigerator, or dampness discovered only after the refrigerator is pulled out.
For this branch of the plumbing leak cluster, use the guides on signs of water leaks behind refrigerators, how to detect hidden refrigerator water line leaks, why refrigerators cause hidden moisture problems, and how to inspect refrigerator water connections.
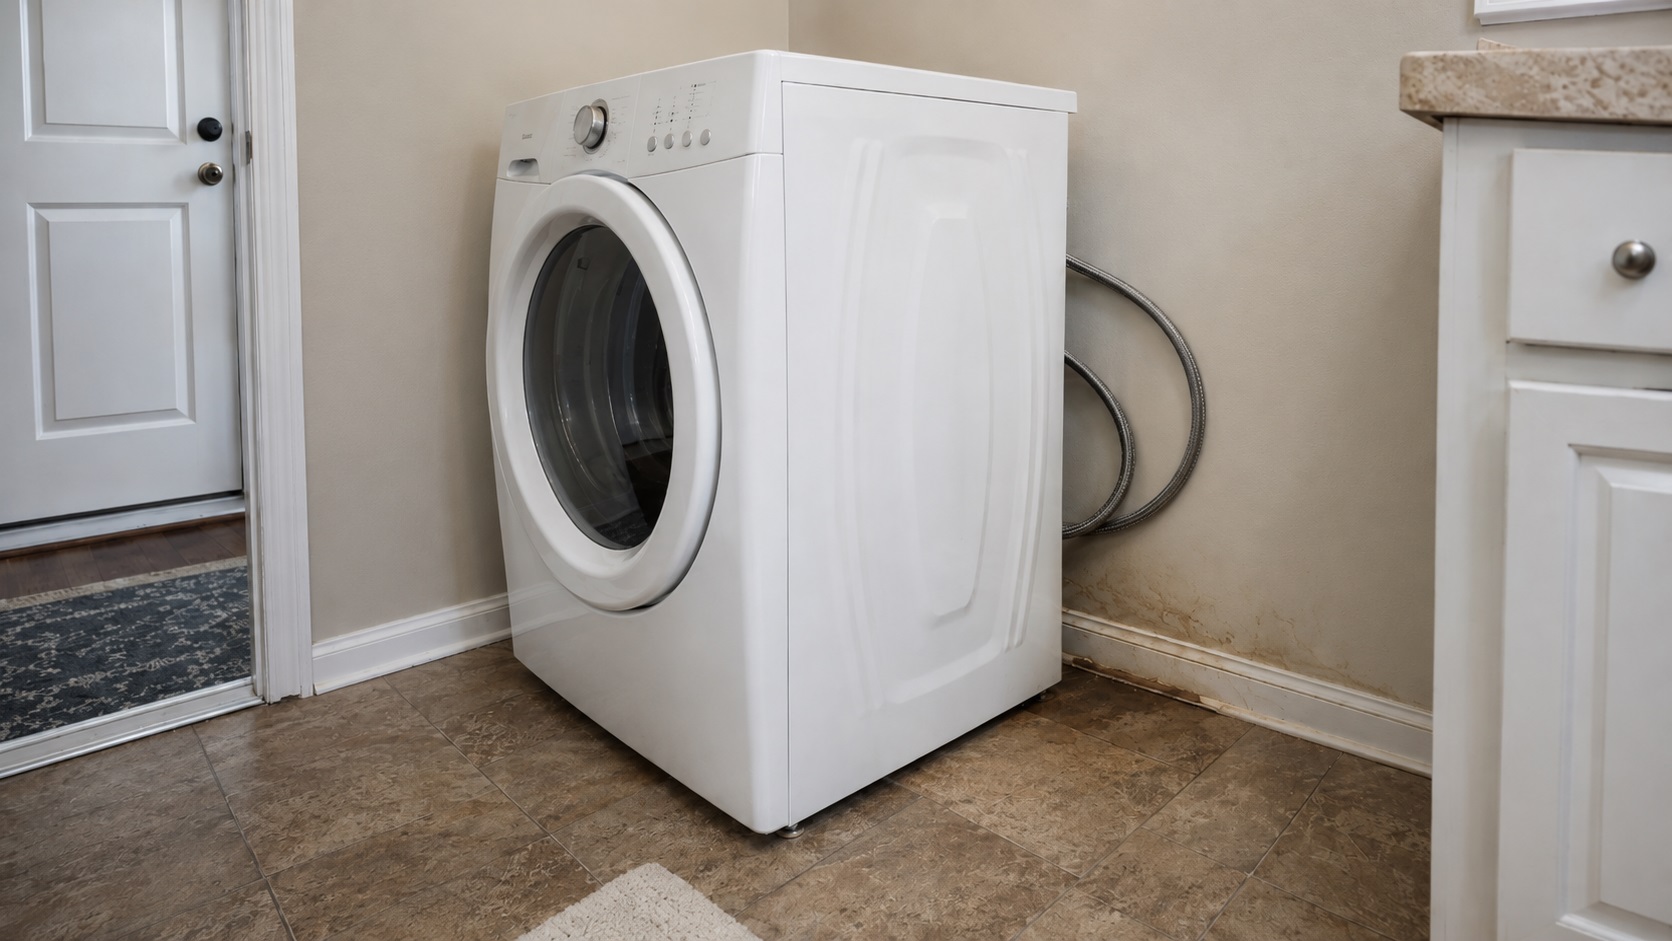
Washing machine hose and drain leaks
Washing machines can release a large amount of water quickly when a supply hose bursts, but they can also create slower problems from loose connections, worn hoses, leaking valves, drain hose issues, or small leaks behind the appliance. Laundry rooms often have finished flooring, baseboards, drywall, cabinets, or walls nearby, so water can spread beyond the machine itself.
Warning signs include damp flooring behind or beside the washer, staining near the wall, swollen baseboards, soft floor areas, rust or corrosion near hose connections, musty odor, or moisture that appears after wash cycles. If the laundry area is on an upper floor, even a small leak can affect ceiling materials below.
For a focused inspection, use the guides on signs of water damage around washing machines and how to detect hidden washing machine leaks. For prevention, see when to replace washing machine hoses and how hose burst protection devices fit into leak prevention.
Shower, bathroom wall, and hidden pipe leaks
Bathrooms contain several plumbing systems close together: supply lines, shower valves, tub and shower drains, toilet supply lines, sink plumbing, and sometimes plumbing inside shared walls. Because many of these components are hidden behind tile, drywall, vanities, or finished surfaces, bathroom plumbing leaks can damage walls and floors before the leak source is obvious.
Possible warning signs include soft drywall near a shower wall, staining on the opposite side of a bathroom wall, loose flooring near a tub or shower, recurring musty odor, peeling paint, baseboard swelling, or dampness that appears after showers. A bathroom leak may come from plumbing, but it can also come from failed caulk, grout, waterproofing, or fixture seals, so the source should be narrowed carefully.
If the concern is a shower or bathroom wall, use the guides on signs of hidden shower plumbing leaks, signs of leaks behind bathroom walls, and how to inspect for hidden bathroom leaks. If the pipe may be inside a finished wall, use the guide on how to detect plumbing leaks inside walls.
Slab and under-floor plumbing leaks
Some plumbing leaks happen below finished flooring or within/under a slab. These are harder to confirm visually because the water may not appear as a clear puddle near the source. Instead, the homeowner may notice damp flooring, warm spots, unexplained moisture, loose flooring, musty odor, staining near wall-floor edges, or water meter movement when fixtures are off.
Slab and under-floor symptoms should be handled carefully because similar signs can come from other moisture sources. A damp floor does not automatically prove there is a slab plumbing leak. But when moisture appears repeatedly, spreads without an obvious surface source, or lines up with plumbing routes, it deserves closer investigation.
For this type of concern, use the guides on signs of slab plumbing leaks and how to detect plumbing leaks under floors.
How Plumbing Leak Damage Moves Through Building Materials
The visible leak source is only one part of the problem. Structural damage happens because water reaches materials that absorb, trap, or conceal moisture. The same plumbing leak can affect several layers at once: a cabinet floor, finished flooring, underlayment, subfloor, wall base, drywall, trim, framing, or nearby insulation.
This is why plumbing leak cleanup should not stop at wiping up surface water. The source must be stopped, and the materials around the leak need to be checked for hidden moisture. If damage has already reached framing, subflooring, or wall cavities, it may require more than a simple surface repair.
Cabinet bases and vanities
Cabinet bases are often the first building materials damaged by sink and vanity leaks. Many cabinet floors are made from particleboard, MDF, plywood, or laminated panels. Some of these materials swell, soften, delaminate, or break down when repeatedly wet. Once a cabinet base absorbs moisture, the surface may look stained or warped even after the leak stops.
Under-sink cabinet damage matters because it can hide the leak from view. Stored cleaning supplies, trash bags, containers, and cabinet liners can conceal dampness. By the time the cabinet floor feels soft or smells musty, moisture may have been present for a while.
Cabinet leaks can also move outward. Water may reach the toe-kick, flooring edge, wall base, or subfloor. If the cabinet is built into a kitchen or bathroom layout, moisture can spread into adjacent cabinet boxes before the homeowner notices visible staining outside the cabinet.
Flooring and subfloor layers
Plumbing leaks often damage flooring because water naturally moves downward. Finished flooring can hide moisture beneath the surface, especially when water reaches seams, edges, underlayment, or the subfloor. Tile, vinyl, laminate, engineered wood, and other flooring systems can all conceal moisture differently.
Finished flooring may look mostly dry while moisture remains below. A floor may begin to cup, buckle, loosen, stain, or feel soft only after the subfloor or underlayment has already absorbed water. This is especially common near dishwashers, refrigerators, washing machines, toilets, tubs, showers, and sink cabinets.
If the floor feels soft, has recurring dampness, or shows damage that keeps spreading, the problem may no longer be limited to surface flooring. That is when it becomes important to determine whether the leak reached the subfloor or lower layers.
Drywall and wall cavities
Plumbing leaks inside or near walls can damage drywall from the back side before the surface looks severe. Water may run down a pipe, drip inside the cavity, wet insulation, collect near the bottom plate, or wick into the lower drywall edge. Paint bubbling, staining, soft drywall, peeling texture, musty odor, or baseboard swelling can all suggest moisture behind the finished surface.
Wall cavities are especially important because they limit airflow. Moisture trapped behind drywall may dry slowly, especially if the leak continues or if insulation holds water. A wall that feels dry on the surface may still have damp material inside.
If the leak may be inside a finished wall, the article on how to detect plumbing leaks inside walls is the better next step.
Framing and structural wood
Not every plumbing leak reaches structural framing, and not every leak causes structural failure. But prolonged or repeated moisture can affect wood framing, subfloors, plates, joists, and other structural materials if the water is not stopped and the materials do not dry properly.
Possible warning signs include soft or spongy floor areas, movement near fixtures, persistent musty odor, staining that spreads, recurring dampness, visible rot, or damage that returns after cleanup. When moisture reaches structural wood, the issue becomes bigger than a simple cosmetic stain.
For broader warning signs outside plumbing-specific causes, use the guide on signs of structural moisture problems.
Slab-adjacent and under-floor areas
Leaks below finished floors or near slab plumbing can be more difficult to evaluate because the water may not appear where the pipe failed. Moisture can show up as damp flooring, staining near wall-floor edges, loose floor coverings, musty odor, or unexplained wet areas that return after cleanup.
These signs do not automatically prove there is a slab leak. Flooring problems, condensation, exterior water entry, appliance leaks, or previous spills can sometimes create similar symptoms. But repeated moisture with no obvious surface source should be taken seriously, especially when it appears near plumbing lines or fixtures.
When under-floor plumbing is a possibility, use the guides on signs of slab plumbing leaks and how to detect plumbing leaks under floors.
Warning Signs of Plumbing-Related Structural Damage
Plumbing-related structural damage usually develops in stages. The earliest signs may look minor: a stain, odor, swollen cabinet base, or loose flooring edge. More serious signs appear when moisture reaches deeper materials or keeps returning after the surface is cleaned.
The goal is not to panic over every small stain. The goal is to recognize when a plumbing leak may have moved beyond a simple surface cleanup and into materials that need drying, repair, replacement, or professional inspection.
Surface signs
Surface signs are the visible clues that water has reached finished materials. These may include staining, discoloration, bubbling paint, peeling finish, warped laminate, swollen trim, loose flooring, soft cabinet panels, or water marks near fixtures and appliances.
Surface signs matter because they often point to a hidden source. A stain at the bottom of a cabinet may come from a slow drain leak. Swelling near a dishwasher may suggest a supply or drain issue under the appliance. Soft flooring near a toilet, tub, refrigerator, or washing machine may mean water has moved below the finished surface.
If the damage is near a specific appliance or fixture, start with the matching inspection guide rather than treating the area as a generic water damage problem.
Hidden signs
Hidden plumbing damage often shows up through indirect clues. A musty smell near a cabinet, appliance, bathroom wall, or laundry area can suggest moisture that is not drying. Mold behind or under an appliance may point to a leak that has been active long enough to keep the area damp. A wall or floor may feel slightly soft even when there is no visible puddle.
Appliance areas deserve special attention because the appliance blocks visibility. Dishwashers, refrigerators, and washing machines can hide the leak source until the moisture has already reached flooring, cabinet sides, wall bases, or nearby trim.
If mold is showing up in appliance areas, use the guides on signs of mold behind dishwashers and signs of mold under refrigerators to narrow the likely moisture source.
Escalation signs
Escalation signs suggest that the leak may have affected deeper materials. These include soft or spongy floors, recurring moisture after cleanup, expanding stains, persistent odor, visible rot, loose fixtures, swelling that spreads, or damage that appears in an adjacent room or ceiling below.
Another warning sign is repeated failure around the same plumbing component. If a valve keeps seeping, a hose shows cracking or bulging, a supply line corrodes, or an old pipe begins leaking in multiple areas, the problem may be part of a larger plumbing lifecycle issue.
For component-specific warning signs, use the guides on signs appliance water hoses are failing, signs a shutoff valve is failing, and signs it’s time to replace old plumbing pipes.
How to Think Through Plumbing Leak Detection
Plumbing leak detection should start with the most likely visible sources, then move toward hidden areas only when the symptoms justify it. The goal is to avoid two mistakes: ignoring a hidden leak because no puddle is visible, or tearing into materials before simpler checks have been done.
Start with the likely source. Identify the closest fixture, appliance, valve, hose, drain, or water line, then look at the materials around it. The pattern of damage often tells you where to inspect next.
Start with visible plumbing sources
Begin with visible connections. Look under sinks, around toilet supply lines, near shutoff valves, behind accessible appliance panels, around water heater connections, and along any visible supply or drain lines. Check for corrosion, mineral buildup, staining, dampness, swollen materials, or water marks below fittings.
Some leaks only appear when water is running. A sink drain may leak only when the sink is used. A dishwasher may leak only during part of a cycle. A shower leak may appear after the valve has been used for several minutes. Because of this, a dry area at one moment does not always rule out a plumbing leak.
For a general slow-leak process, use the guide on how to detect slow plumbing leaks.
Check appliances and hoses
Appliances with water connections should be inspected carefully because they often hide the leak source. Dishwashers, refrigerators, washing machines, ice makers, and water-connected appliances can leak from hoses, supply lines, fittings, valves, pumps, drain lines, or connection points.
Look for dampness behind or beneath the appliance, staining near wall bases, swollen flooring edges, musty odor, corrosion, hose bulging, loose connections, or water appearing after the appliance runs. If the appliance is heavy or built in, avoid forcing it out in a way that could damage the floor, water line, or connection.
For appliance-specific next steps, use the guides on how to detect hidden dishwasher leaks, how to detect hidden refrigerator water line leaks, and how to detect hidden washing machine leaks.
Watch for hidden wall and floor symptoms
If the visible plumbing looks dry but symptoms continue, the leak may be inside a wall, below flooring, behind a fixture, or in a less accessible connection. Warning signs include damp baseboards, bubbling paint, soft drywall, recurring musty odor, floor movement, staining on the opposite side of a plumbing wall, or moisture that appears after a specific fixture is used.
Hidden leaks should be narrowed carefully. A bathroom wall stain may come from a shower valve, drain, tub overflow, failed seal, roof leak, or exterior wall issue depending on the location. A damp floor may come from a plumbing line, appliance leak, previous spill, condensation, or exterior water entry. The pattern matters.
For hidden wall and floor concerns, use the guides on how to detect plumbing leaks inside walls and how to detect plumbing leaks under floors.
Know when visual inspection is not enough
Some plumbing leaks cannot be confirmed with a simple visual inspection. Slab leaks, inaccessible wall leaks, leaks under finished floors, and recurring moisture problems may require a plumber, leak detection specialist, restoration contractor, or another qualified professional depending on the source and damage.
Professional help becomes more important when the leak is active, the source is hidden, water is reaching electrical areas, the floor feels soft, damage is spreading, moisture keeps returning, or the suspected leak is below a slab or inside a finished wall.
If you are deciding whether the situation is beyond DIY inspection, use the guide on when to hire a plumbing professional for leak repairs.
How to Prevent Plumbing Leaks From Becoming Structural Damage
Preventing plumbing leak damage is not only about reacting quickly after a leak. It also means replacing vulnerable parts before they fail, keeping shutoff valves usable, inspecting appliance connections, and using protection systems where a leak would cause expensive damage.
No single device or routine prevents every plumbing leak. The strongest protection comes from regular inspection, timely replacement, working shutoff valves, leak alerts, and a quick response when moisture appears.
Inspect plumbing annually
An annual plumbing inspection helps catch slow leaks before they damage hidden materials. Homeowners can check under sinks, behind accessible appliances, around toilets, near water heaters, around shutoff valves, and along visible piping for stains, corrosion, dampness, swelling, loose fittings, or mineral buildup.
Do not skip the easy-to-forget areas: refrigerator water lines, dishwasher connections, washing machine hoses, under-sink shutoff valves, and water heater connections. These parts deal with pressure, fittings, movement, heat, vibration, age, or a combination of several of those problems.
For a broader routine, use the guide on annual plumbing maintenance tasks.
Replace aging hoses and supply lines before they fail
Appliance hoses and supply lines do not last forever. Washing machine hoses, dishwasher supply lines, refrigerator water lines, ice maker lines, toilet connectors, and other flexible water connections can wear out, crack, corrode, kink, loosen, or fail at fittings. Waiting until a hose leaks can mean the surrounding floor, wall, or cabinet is already wet.
Replacement timing depends on the material, age, installation quality, water conditions, movement, and manufacturer guidance. But the important principle is simple: aging water connections should be treated as maintenance items, not permanent parts of the house.
For specific replacement timing, use the guides on when to replace washing machine hoses, when to replace dishwasher supply lines, when to replace refrigerator water lines, and when to replace ice maker water lines. For broader hose lifespan guidance, see how long appliance water hoses last.
Keep shutoff valves reliable
Shutoff valves are easy to ignore until an emergency. A valve that is stuck, corroded, leaking, or unable to close fully can make a plumbing leak harder to control. Under-sink valves, toilet valves, appliance valves, angle stops, and main shutoff valves should remain accessible and functional.
A reliable shutoff valve can limit damage when a leak starts. An unreliable valve can allow water to keep flowing while the homeowner searches for another way to stop it. This is especially important near sinks, toilets, dishwashers, refrigerators, washing machines, and water heaters.
For valve-specific guidance, use the guides on when to replace plumbing shutoff valves, how long sink shutoff valves last, signs a shutoff valve is failing, and when to replace angle stop valves.
Understand aging pipe risk
Pipe age and material condition affect leak risk. Some plumbing materials can last many years when properly installed and protected, but age, water chemistry, pressure, movement, freezing, poor support, improper installation, corrosion, and previous repairs can all shorten service life.
Aging pipes may not fail all at once. They may begin with small leaks, repeated repairs, staining, corrosion, brittle sections, noisy operation, pressure changes, or moisture appearing in more than one area. When several symptoms appear together, the issue may be larger than one isolated fitting.
For pipe lifecycle planning, use the guides on how long PVC pipes last, how to identify aging plumbing materials, and signs it’s time to replace old plumbing pipes.
Leak Protection Systems and Emergency Control
Plumbing leak prevention is strongest when maintenance and protection systems work together. Replacing old hoses, checking valves, and inspecting appliances lowers the chance of a leak. Leak sensors, automatic shutoff systems, pans, better supply lines, and emergency repair tools can help limit damage if something still fails.
Protection products do not replace the repair. A leak sensor can warn you. A shutoff system can stop or reduce water flow. A pan can help contain limited water. A pipe repair kit can buy time in some situations. But the damaged hose, fitting, valve, pipe, or appliance connection still has to be fixed correctly.
Leak sensors vs smart shutoff systems
Leak sensors and smart shutoff systems are often confused, but they do different jobs. A leak sensor usually detects water at a specific location and sends an alert. A smart shutoff system is designed to stop water flow automatically or remotely when a leak condition is detected.
Both can be useful, but they solve different parts of the problem. A sensor near a dishwasher, washing machine, refrigerator, water heater, or sink can help you discover water sooner. A smart shutoff system can be more valuable when no one is home, when the leak is large, or when a supply line fails and keeps releasing water.
For a detailed comparison, use the guide on smart water shutoff systems vs leak sensors.
Automatic shutoff systems
Automatic shutoff systems can reduce plumbing leak damage by stopping water at the main line or at a controlled valve when a leak is detected. These systems are especially useful in homes with finished basements, second-floor laundry rooms, vacation periods, expensive flooring, older plumbing, or a history of plumbing leaks.
Some systems monitor flow patterns, while others work with sensors placed near high-risk areas. The right system depends on the home layout, plumbing access, leak risk, budget, and how much automatic control the homeowner wants.
For product and planning help, use the guides on the best smart water shutoff systems, how smart water shutoff systems work, whether smart water shutoff systems are worth it, the best automatic water shutoff valves for homes, and where to install smart water shutoff systems.
Appliance pans, better lines, and burst protection
Appliance pans and stronger water connections can reduce the damage from certain leaks, especially when the leak begins near a washing machine, dishwasher, refrigerator, toilet, or water heater. These products are not a substitute for proper plumbing repair, but they can add another layer of protection in high-risk areas.
A washing machine leak pan can help contain limited water beneath a washer if it is installed correctly and connected to a drain where appropriate. Better dishwasher supply lines and ice maker water lines can reduce the risk of old, kinked, brittle, or poor-quality lines failing. Hose burst protection devices can help reduce the chance that a washing machine hose failure releases water unchecked.
For product-specific guidance, use the guides on washing machine leak pans, dishwasher supply lines, ice maker water lines, toilet fill valves, water heater expansion tanks, and washing machine hose burst protection devices.
Temporary emergency response
When a pipe or connection begins leaking, the first priority is to stop or reduce the water source. That may mean using a fixture shutoff valve, appliance shutoff valve, main shutoff valve, or emergency valve. If water is still flowing, surface drying and cleanup will not solve the problem.
Emergency pipe repair kits and pipe repair products can sometimes help control a leak temporarily, but they should not be treated as permanent repairs unless the product and situation specifically allow it. Temporary patches are most useful for buying time, reducing damage, and helping the homeowner wait safely for proper repair.
For emergency product guidance, use the guides on emergency pipe repair kits, pipe repair kits, and emergency shutoff valves.
When Plumbing Leak Damage Needs Professional Help
Some plumbing leaks are simple enough for a homeowner to identify quickly. Others should be handled by a plumber, leak detection specialist, restoration contractor, or structural repair professional depending on the source and severity. The more hidden, active, recurring, or material-damaging the leak is, the less useful guesswork becomes.
Professional help is especially important when water is reaching wall cavities, floors, subfloors, slabs, ceilings below, electrical areas, or structural materials. It is also important when the leak source cannot be found, moisture keeps returning, or the damage spreads after cleanup.
Active or recurring leaks
An active leak should be stopped before drying or repair begins. If a supply line, valve, hose, pipe, or appliance connection is still releasing water, the surrounding materials will continue to get wet. Even a slow leak can keep a cabinet, wall cavity, or subfloor damp enough to worsen damage over time.
Recurring leaks also deserve attention. If the same area gets wet again after cleanup, the source was not fixed, the material did not dry fully, or another moisture path is involved. Repeated moisture is often more damaging than one isolated spill because it keeps materials in a damp cycle.
If you are unsure whether the source is still active, start with leak detection rather than cosmetic repair.
Hidden wall or slab leaks
Leaks inside finished walls, behind tile, below floors, or under slabs can be difficult to confirm without specialized tools or access. These leaks may show up through stains, musty odor, warm or damp floor areas, water meter movement, soft materials, or moisture that appears without an obvious surface source.
Because these symptoms can overlap with other problems, it is important not to assume the source too quickly. A wall stain near a bathroom may come from shower plumbing, a drain issue, caulk failure, roof leakage, or exterior wall moisture depending on the location. A damp slab or floor may come from plumbing, condensation, appliance leaks, groundwater, or previous water damage.
When the leak source is hidden or the suspected leak is below a slab, professional leak detection is often the safer path than opening random areas.
Soft flooring, structural movement, or widespread moisture
Soft flooring, movement near fixtures, sagging, repeated dampness, visible rot, or widespread moisture can mean the leak has moved beyond surface materials. At that point, the issue may involve subflooring, framing, joists, wall plates, or other structural components.
Not every soft spot means the structure is failing, but it does mean the area should be evaluated carefully. Plumbing leaks that reach structural materials need more than a new valve or hose. The source must be fixed, wet materials must be dried or removed when necessary, and damaged structural materials may need repair or replacement.
For broader warning signs, use the guide on signs of structural moisture problems.
Electrical, appliance, mold, or inaccessible damage risks
Plumbing leaks near appliances, outlets, wiring, finished walls, cabinets, or inaccessible spaces can create risks that are not always visible from the surface. Water near electrical components should be treated carefully. Built-in appliances should not be pulled or moved carelessly if doing so could damage a water line, electrical connection, flooring, or cabinet.
Mold is another reason to avoid guessing. A small area of surface discoloration is different from hidden mold behind appliances, under flooring, or inside wall cavities. If moisture has been present for a long time, the leak source and the affected materials both need attention.
For decision support, use the guide on when to hire a plumbing professional for leak repairs.
Related Plumbing Leak Damage Topics
Sink and cabinet leak guides
If the damage is under a sink, inside a cabinet, near a vanity, or around a shutoff valve, start with signs of water damage under sink cabinets, how to detect slow plumbing leaks, and signs a shutoff valve is failing.
Appliance leak guides
If the damage is near a dishwasher, refrigerator, ice maker, or washing machine, use the matching appliance guide. Dishwasher problems are covered in signs of water leaks under dishwashers and how to detect hidden dishwasher leaks. Refrigerator water line problems are covered in signs of water leaks behind refrigerators and how to detect hidden refrigerator water line leaks. Laundry leaks are covered in signs of water damage around washing machines and how to detect hidden washing machine leaks.
Bathroom and hidden wall leak guides
If the damage appears near a shower, bathroom wall, tub, toilet, or plumbing wall, start with how to inspect for hidden bathroom leaks, signs of hidden shower plumbing leaks, signs of leaks behind bathroom walls, and how to detect plumbing leaks inside walls.
Pipe, hose, and valve lifecycle guides
If the concern is aging plumbing rather than one obvious leak, use how long PVC pipes last, how to identify aging plumbing materials, signs it’s time to replace old plumbing pipes, how long appliance water hoses last, and signs appliance water hoses are failing.
Smart shutoff and leak protection guides
If you want to reduce future leak damage, start with smart water shutoff systems vs leak sensors, the best smart water shutoff systems, how smart water shutoff systems work, and where to install smart water shutoff systems.
Additional Plumbing Leak and Prevention Topics
Some related plumbing topics are narrower than the main sections above. Use these guides when the issue involves a specific sink, toilet, water heater, pipe material, valve, gasket, hose, leak pan, or flood-protection product.
Kitchen sink and under-cabinet leak guides
If the problem is under a kitchen sink, inside a cabinet, or near sink plumbing, start with signs of mold under kitchen sink cabinets, how to detect slow leaks under kitchen sinks, why kitchen sink plumbing develops hidden leaks, how to prevent mold under kitchen sink cabinets, how to inspect kitchen sink pipes for hidden leaks, signs of water damage under kitchen sinks, and signs of leaks under kitchen sinks.
Bathroom fixture, toilet, and cabinet leak guides
If the damage is near a bathroom sink, toilet, fixture, vanity, or cabinet, use how to detect leaks under bathroom sinks, why toilets leak around the base, signs of mold behind bathroom fixtures, why mold forms behind toilets, and signs of hidden mold behind bathroom cabinets.
HVAC drain line and water heater leak guides
Some plumbing-related moisture problems come from drain lines, water heaters, or nearby mechanical equipment. For those situations, see how to inspect HVAC drain lines for blockages, signs of water leaks around water heaters, how to detect slow water heater leaks, and why water heaters develop hidden leaks.
Plumbing repair cost and repair-or-replace guides
If you are trying to decide whether the leak points to a small repair or a larger plumbing problem, use the guides on how much plumbing leak repair costs and whether you should repair or replace plumbing pipes.
Plumbing parts replacement guides
Aging parts are one of the easiest leak risks to overlook. For replacement planning, see how often plumbing parts should be replaced, signs plumbing parts are near failure, a preventive plumbing replacement schedule for homes, and the plumbing parts most likely to fail first.
Shutoff valve, faucet, drain, and shower valve guides
If the issue involves shutoff valves, faucet parts, drains, or shower valves, use the guides on when to replace main water shutoff valves, quarter-turn vs multi-turn shutoff valves, when to replace toilet fill valves, how long faucet cartridges last, when to replace sink drain assemblies, when to replace shower valves, and signs faucet components are wearing out.
Water heater plumbing component guides
Water heater plumbing parts can also leak or fail over time. For those components, see when to replace water heater supply lines, when to replace water heater drain valves, how long water heater expansion tanks last, when to replace temperature pressure relief valves, and signs water heater plumbing components are failing.
Pipe lifespan guides
If you are evaluating aging pipes, compare common material lifespans with how long copper pipes last, how long PEX pipes last, and how long PVC pipes last.
Leak pan and containment product guides
Leak pans and containment products can help limit damage in certain appliance and water heater areas. For more detail, see the best water heater leak pans, whether washing machine leak pans really work, how to choose the right leak pan size, where leak pans should be installed, and the best drain fittings for leak pans.
Hose, gasket, and flood-protection product guides
For hose, gasket, and flood-protection decisions, use the guides on when to replace rubber gaskets in plumbing systems, the best washing machine hoses, the best refrigerator water lines, the best automatic washing machine shutoff hoses, whether burst-proof washing machine hoses are worth it, how washing machine hose burst protection works, where to install hose burst protection devices, and the best dishwasher flood protection hoses.
Key Takeaways
Plumbing leaks cause structural damage when water escapes from pipes, valves, hoses, fixtures, or appliances and reaches materials that stay wet. Cabinets, flooring, subfloors, drywall, wall cavities, and framing can all be affected depending on the leak source and how long the moisture remains.
The most important step is to stop the source first. Drying, cleaning, repainting, or replacing materials will not solve the problem if the leak continues. Once the source is controlled, the affected materials need to be checked for hidden moisture, especially when the leak occurred behind an appliance, inside a cabinet, under flooring, or inside a wall.
Prevention works best when homeowners combine regular inspection, timely hose and supply-line replacement, reliable shutoff valves, leak sensors, smart shutoff systems, and quick response when moisture appears. The earlier a plumbing leak is found, the less likely it is to become a structural moisture problem.
Frequently Asked Questions About Plumbing Leak Damage
Can a small plumbing leak cause structural damage?
Yes, a small plumbing leak can cause structural damage if it continues long enough or repeatedly wets vulnerable materials. A slow drip may not look serious at first, but it can keep cabinet bases, subfloors, drywall, wall cavities, or framing damp over time. The risk depends on where the leak is, how long it continues, what materials are affected, and whether the area dries fully after the leak is stopped.
Where do plumbing leaks usually cause hidden damage first?
Hidden plumbing damage often starts in enclosed or blocked areas. Common locations include under sink cabinets, behind dishwashers, behind refrigerators, around washing machines, behind bathroom walls, under toilets, below showers or tubs, inside wall cavities, and under finished flooring. These areas hide water long enough for staining, swelling, odor, mold, or soft materials to appear before the leak source is obvious.
How do I know if a plumbing leak reached the subfloor?
A plumbing leak may have reached the subfloor if the floor feels soft, spongy, uneven, swollen, loose, or damp after the surface has been cleaned. Other warning signs include musty odor, recurring dampness, stains near floor edges, movement around fixtures, or flooring that keeps warping. A moisture meter or professional inspection may be needed when the finished floor hides the layers below.
Are appliance leaks considered plumbing leaks?
Yes. Many appliance leaks are plumbing-related because the appliance connects to a water supply, drain, hose, valve, or water line. Dishwashers, washing machines, refrigerators with ice makers or water dispensers, and water heaters can all cause plumbing-related moisture damage. The appliance may be what you notice first, but the failure often happens at a supply line, hose, fitting, drain, valve, or connection.
Do leak sensors prevent water damage?
Leak sensors can help reduce water damage by warning you when water reaches the sensor location, but they do not always stop the water. A sensor is most useful when someone can respond quickly. A smart water shutoff system goes further by shutting off water flow automatically or remotely in certain leak situations. Sensors warn; shutoff systems can help control the source.
When should I call a plumber for a hidden leak?
Call a plumber when the leak is active, hidden inside a wall, suspected under a floor or slab, recurring after cleanup, connected to a failing valve or pipe, or difficult to access safely. You should also get professional help if water is near electrical components, the floor feels soft, the damage is spreading, or you cannot find the source after checking visible fixtures, valves, hoses, and appliances.
Conclusion
Plumbing leaks cause structural damage when water escapes the plumbing system and reaches materials that are not meant to stay wet. A leak may begin at a hose, pipe, valve, fixture, drain, appliance, or water line, but the damage often appears in cabinets, floors, walls, subfloors, trim, framing, or hidden cavities nearby.
The safest way to think about plumbing leak damage is source, path, and material. First, identify where the water is coming from. Next, consider where it could have traveled. Then check which materials may have absorbed, trapped, or concealed moisture. This prevents the common mistake of cleaning the visible surface while hidden material remains wet.
Small plumbing leaks should not be ignored, but they also should not be exaggerated. Not every leak causes structural failure. The risk rises when the leak is hidden, active, recurring, or allowed to keep wetting cabinets, drywall, subfloors, wall cavities, or framing. The sooner you stop the source and check the affected materials, the easier it is to keep a plumbing leak from becoming a larger repair.
7 Comments
Comments are closed.