How to Detect Hidden Dishwasher Leaks
To detect a hidden dishwasher leak, check for recurring dampness near the toe-kick, swollen cabinet edges, raised flooring seams, moisture that appears during or after a wash cycle, and elevated moisture readings near the dishwasher footprint. The goal is to confirm whether the dishwasher is actively releasing water before moving it, repairing parts, or drying hidden materials.
If you are still deciding whether testing is necessary, compare your symptoms with common signs of water leaks under dishwashers first. If the same damp area keeps returning, move into the detection steps below.
This guide walks through safe, practical detection steps using observation, controlled testing, and moisture confirmation before you move into hose inspection, drying, or repair decisions. For broader appliance-related moisture damage, see how plumbing leaks cause structural damage.
When You Should Start Checking for a Hidden Dishwasher Leak
Not every damp spot near a dishwasher requires full leak testing. However, repeated or predictable moisture patterns are worth checking because they may show that water is entering the area from the appliance itself.
Recurring Moisture in the Same Location
Repeated dampness in the same area is one of the strongest signals that leak detection should begin. Even small amounts of water can indicate a persistent problem when they appear consistently.
Detection becomes necessary when you notice:
- Damp flooring appearing repeatedly in the same location
- Moisture that returns after drying
- Water appearing after dishwasher operation
- Dampness with no visible spill source
These recurring patterns suggest that moisture is not random but connected to appliance activity. Confirming this connection is the primary goal of leak detection.
Flooring or Cabinet Materials Showing Early Damage
Changes in nearby materials often indicate that moisture exposure has already begun. These structural clues should not be ignored, especially when they appear near the dishwasher footprint.
Signs that detection should begin include:
- Swollen cabinet base panels
- Raised seams in laminate flooring
- Bubbling vinyl flooring
- Soft or weakened flooring areas
When these symptoms appear, moisture is often spreading beneath visible surfaces. Confirming whether the dishwasher is the source helps prevent unnecessary repairs or misdiagnosis.
Moisture That Appears After Dishwasher Cycles
Moisture linked to appliance operation strongly indicates the need for leak detection. When water appears shortly after running the dishwasher, the likelihood of appliance leakage increases significantly.
Common cycle-linked patterns include:
- Water appearing shortly after wash cycles finish
- Dampness forming during heavy dishwasher use
- Moisture increasing after multiple cycles
- Water spreading outward after repeated operation
These patterns help distinguish dishwasher leaks from accidental spills or cleaning-related moisture.
Visual Checks That Can Detect Dishwasher Leaks Without Moving the Appliance
Most hidden dishwasher leaks can be detected without immediately moving the appliance. Early detection should focus on visible areas surrounding the dishwasher where moisture typically escapes first. Performing these checks reduces the risk of damaging plumbing connections or creating unnecessary hazards.
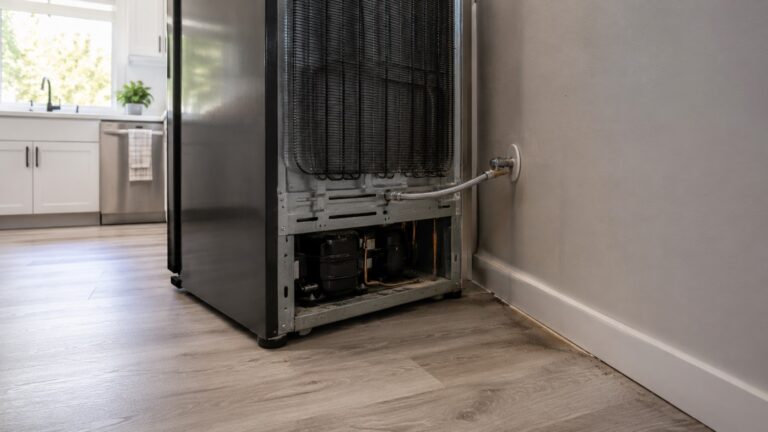
Inspect the Toe-Kick Area
The toe-kick area beneath the dishwasher provides one of the best viewing points for early leak detection. This lower panel often hides the space where water escapes from internal components.
To perform this check:
- Look beneath the dishwasher front panel
- Use a flashlight to improve visibility
- Check for damp surfaces or staining
- Observe any signs of moisture buildup
Key indicators include:
- Darkened surfaces
- Water marks or streaks
- Mineral deposits from evaporated water
- Soft or damp materials beneath the unit
These signs strongly suggest moisture is escaping from internal components and spreading outward.
Check Floor Edges Around the Dishwasher
Flooring edges surrounding the dishwasher are common moisture escape zones. Water often travels along seams or gaps before becoming visible.
Carefully inspect:
- Flooring seams near the appliance
- Gaps between flooring and cabinet edges
- Areas directly in front of the dishwasher
- Surfaces adjacent to nearby cabinets
Signs of concern include:
- Darkened flooring seams
- Moisture appearing along edges
- Raised or uneven flooring sections
- Persistent dampness near joints
If flooring changes are already visible, water may have been spreading beneath the surface for some time.
Inspect Adjacent Cabinet Bases
Cabinet base panels located beside the dishwasher are highly sensitive to moisture exposure. Because many cabinet materials absorb water easily, they often show early signs of hidden leaks.
Look for:
- Swollen cabinet edges
- Soft or crumbling materials
- Warped toe-kick panels
- Surface bubbling or discoloration
Cabinet swelling rarely occurs without repeated moisture exposure. When cabinet damage appears alongside other symptoms, leak confirmation becomes more likely.
If cabinet or flooring materials show ongoing damage, it is important to understand why leaks develop in the first place. Background information on common failure points is explained in this guide to why dishwashers develop hidden leaks.
Safe Cycle Testing to Confirm Active Dishwasher Leaks
Once visual inspection suggests possible moisture exposure, the next step is confirming whether water escapes during dishwasher operation. Cycle testing is one of the most reliable detection methods because it links moisture appearance directly to appliance use.
This process should be done carefully and with attention to safety. Avoid rushing or moving the appliance prematurely, as sudden movement can worsen leaks or damage plumbing connections.
Safety note: Do not remove panels, reach under the dishwasher, or touch wiring while the appliance is running or powered. If water is near electrical components, stop testing and turn off power to the dishwasher before further inspection.
Run a Short Wash Cycle While Monitoring Moisture Areas
Start by running a normal or short dishwasher cycle while closely watching areas where moisture was previously detected. The goal is to identify whether dampness appears during operation or shortly afterward.
During this test:
- Dry the surrounding floor first so new moisture is easier to identify
- Remain nearby while the dishwasher runs
- Observe the floor near the appliance during fill, wash, and drain portions of the cycle
- Check cabinet bases and flooring seams for new moisture
- Watch the toe-kick area carefully without reaching near wiring or moving parts
If moisture begins appearing during the wash cycle, this strongly suggests an active leak rather than leftover moisture from previous spills.
Check Moisture Immediately After the Cycle Ends
Some leaks appear only after water drains from the dishwasher. This often happens during the drain phase when internal pressure changes or connections shift slightly.
After the cycle finishes:
- Inspect the same areas checked earlier
- Look for newly formed damp spots
- Touch flooring to check for fresh moisture
- Observe whether dampness spreads outward
If moisture appears consistently after running the dishwasher, this pattern provides strong evidence that the dishwasher area has an active leak or moisture source that needs further inspection.
Repeat Testing to Confirm Consistency
Repeat testing helps confirm whether moisture appears in the same place after dishwasher use instead of coming from an unrelated spill.
Repeat testing when:
- Moisture appears intermittently
- Symptoms are unclear or inconsistent
- You want to confirm leak severity
- Moisture patterns seem to change
Reliable leak confirmation typically requires observing repeated moisture behavior linked to dishwasher use.
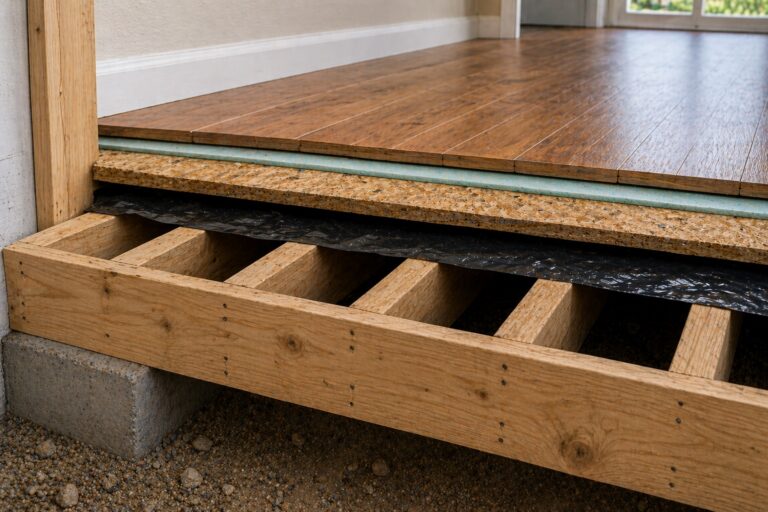
How to Check for Moisture Beneath Flooring
Hidden dishwasher leaks often spread beneath flooring layers, making direct visual confirmation difficult. Even when surface moisture is minimal, subfloor materials may already be affected.
Because you usually cannot see beneath finished flooring, look for surface changes that point to hidden water movement.
Look for Surface Changes That Suggest Subfloor Moisture
Subfloor exposure often produces visible surface changes before structural failure occurs. These changes may develop gradually and should not be ignored.
Watch for:
- Raised seams in laminate flooring
- Bubbling vinyl surfaces
- Soft spots forming near appliance edges
- Uneven flooring sections
These symptoms often signal that moisture is trapped beneath visible layers.
Check for Persistent Cool or Damp Areas
Moisture trapped beneath flooring often produces localized cool areas that remain slightly damp compared to surrounding surfaces.
To check for this:
- Touch flooring with your hand
- Compare suspected areas with dry locations
- Look for repeated cool sensations
- Observe whether dampness returns after drying
Consistent temperature differences may indicate trapped moisture below the surface.
Watch for Moisture Migration Patterns
Water rarely stays in one location. Instead, it often spreads along seams and low points, creating directional patterns that can help narrow down the likely source.
Common moisture migration patterns include:
- Dampness spreading outward from the dishwasher base
- Moisture moving toward nearby cabinets
- Water following floor seams or joints
- Damp areas forming along natural slopes
Understanding these patterns helps confirm whether the dishwasher is the most likely source of hidden moisture.
If moisture is confirmed beneath flooring, drying becomes the next critical step after leak source identification. Structured drying methods are explained in this guide to drying flooring after dishwasher leaks.
Simple Tools That Help Confirm Hidden Dishwasher Moisture
While many hidden dishwasher leaks can be detected through observation alone, simple tools can significantly improve accuracy. These tools help confirm moisture presence, identify hidden damp areas, and reduce guesswork when symptoms are unclear.
You do not need specialized equipment to begin detection. A flashlight may reveal visible moisture, while a moisture meter can confirm hidden dampness when surfaces only look slightly discolored or cool.
Use a Flashlight to Identify Hidden Moisture
A bright flashlight is one of the most useful tools for identifying hidden moisture around dishwashers. Light reflections make small amounts of water easier to detect on surfaces that might otherwise appear dry.
Use a flashlight to check:
- The toe-kick area beneath the dishwasher
- Flooring seams near the appliance
- Cabinet bases beside the unit
- Small gaps where moisture may collect
Look for:
- Shiny reflections on surfaces
- Darkened material patches
- Water streaks or residue lines
- Mineral deposits left by evaporating water
Flashlight inspection is particularly helpful in low-light areas where subtle moisture may otherwise go unnoticed.
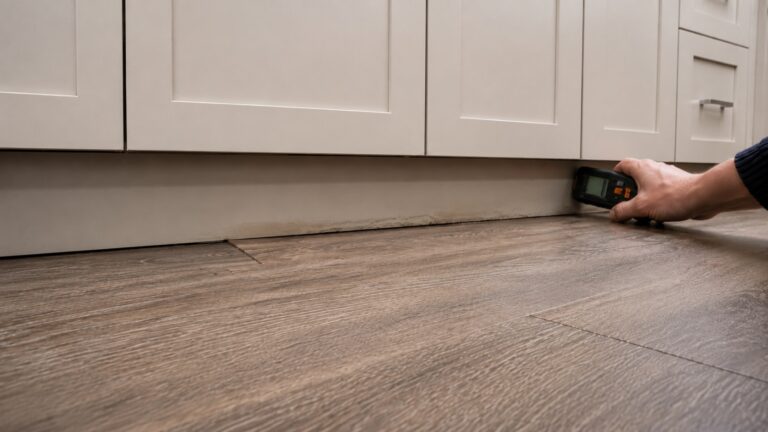
Use a Moisture Meter to Confirm Hidden Damp Areas
A moisture meter can help confirm hidden moisture beneath flooring edges, cabinet bases, and toe-kick materials. While not required, it gives you comparison readings that support visual observations.
Moisture meters are useful for:
- Comparing suspected damp areas to dry sections
- Confirming moisture beneath laminate or vinyl flooring
- Identifying wet cabinet base materials
- Tracking moisture changes over time
To use a moisture meter effectively, treat it as a comparison tool rather than a single pass/fail test:
- Test both suspected damp areas and known dry areas
- Record readings for comparison
- Look for consistent differences between locations
- Repeat testing after dishwasher cycles
Moisture meters confirm moisture presence but do not identify the exact leak source. If moisture readings remain elevated near the dishwasher footprint, further investigation is usually necessary.
Check for Water Trails and Residue Patterns
Water often leaves visible trails as it moves beneath appliances and across flooring surfaces. These trails may appear as faint lines, streaks, or residue patterns.
Signs of water movement include:
- Thin streaks extending from beneath the dishwasher
- Residue lines along flooring seams
- Mineral buildup near leak exit points
- Surface patterns showing repeated water flow
Water trails help identify direction and source location, making it easier to confirm whether the dishwasher is responsible for the moisture.
When Detection Confirms a Dishwasher Leak
Once moisture is confirmed during or after dishwasher operation, stop testing and move from detection to source identification and damage prevention.
Stop Using the Dishwasher Immediately
If moisture appears consistently during or after dishwasher operation, stop using the appliance until the source is identified and corrected.
Continuing to run a leaking dishwasher can lead to:
- Rapid subfloor deterioration
- Cabinet base damage
- Flooring failure
- Increased risk of mold development
Stopping appliance use limits additional water exposure and prevents the leak from worsening.
Do not reinstall trim, cover swollen flooring, or seal stained materials until the source is fixed and the affected area has been checked for remaining moisture.
Narrow Down the Most Likely Leak Source
After confirming a leak, the next step is identifying the likely source without turning detection into a full repair project. Common source areas include the supply connection, drain hose, door seal, pump area, or internal components, but physical hose inspection belongs in a separate troubleshooting step.
To continue troubleshooting without turning this detection guide into a repair tutorial, use this dishwasher hose leak inspection guide to narrow down whether the supply line, drain hose, or connection area may be involved.
Prepare for Drying and Moisture Recovery
After the leak source is confirmed and repaired, drying the affected area becomes critical. Moisture left behind can continue damaging materials even after the leak stops.
At this stage, the main concern is confirming how far moisture has spread before deciding whether simple surface drying is enough or whether flooring, cabinet bases, or subfloor materials need closer evaluation.
If moisture has already spread beneath flooring, following structured drying methods such as those described in this dishwasher drying guide helps restore affected materials safely.
When to Call a Professional to Confirm or Repair a Hidden Dishwasher Leak
Many dishwasher leaks can be detected using careful observation and simple tools, but some situations require professional evaluation. Knowing when to seek expert help can prevent worsening damage and reduce long-term repair costs.
If leak detection confirms ongoing moisture but the exact source remains unclear, professional inspection may be the safest next step. Technicians have tools and experience that allow them to safely inspect plumbing components and evaluate structural damage without causing additional problems.
Call a Professional If the Leak Source Cannot Be Identified
Sometimes moisture is clearly present, but the exact location of the leak remains hidden. In these situations, guessing or attempting unnecessary repairs can make the problem worse.
Professional help may be necessary when:
- Moisture appears repeatedly but no visible source is found
- Water spreads into multiple nearby areas
- Flooring damage continues to worsen
- Moisture persists even after stopping dishwasher use
Professionals can perform controlled inspections and determine whether plumbing connections, internal components, or surrounding structures are responsible for the leak.
Seek Help If Structural Materials Are Affected
When leaks spread into structural materials such as subflooring or cabinet bases, the risk of long-term damage increases significantly. Early professional intervention may prevent more extensive repairs.
Signs that structural materials may be affected include:
- Soft or unstable flooring
- Significant cabinet swelling
- Persistent dampness that does not dry
- Visible mold-like staining
If mold-like staining or musty odor appears behind or beneath the dishwasher, compare the warning patterns with signs of mold behind dishwashers before attempting cleanup or covering the area.
Consider Professional Evaluation After Major Leak Events
Even if a leak appears to stop temporarily, large water releases can saturate hidden materials beneath the surface. Professional evaluation helps confirm whether moisture remains trapped in areas that cannot be easily inspected.
This is especially important when:
- Large amounts of water were released suddenly
- Moisture spread across wide floor areas
- Cabinet materials absorbed water
- Flooring shows extensive distortion
Professional inspection helps determine whether additional drying or repairs are necessary.
What to Do After Detecting a Hidden Dishwasher Leak
After detecting a hidden dishwasher leak, stop using the appliance, document where moisture appears, and identify whether the next step is hose inspection, appliance repair, or drying affected flooring and cabinet materials. Do not cover swollen, stained, or damp materials until the leak source is corrected and hidden moisture has been addressed.
FAQ — How to Detect Hidden Dishwasher Leaks
How do I know if my dishwasher is leaking underneath?
The most reliable confirmation comes from repeated moisture patterns that appear near the dishwasher footprint during or after operation. Running controlled test cycles and observing nearby surfaces helps confirm whether water escapes during use.
Can I detect a dishwasher leak without moving the appliance?
Yes. Many leaks can be detected through visual inspection of surrounding areas such as toe-kick panels, flooring seams, and cabinet bases. Moving the dishwasher is usually unnecessary during early detection stages.
Do I need special tools to detect hidden dishwasher leaks?
No special tools are required to begin detection. A flashlight and careful observation are often sufficient. However, moisture meters can provide additional confirmation when moisture is difficult to see.
How long does it take for leak damage to appear?
Damage timelines vary depending on leak severity and material type. Small leaks may take weeks or months to produce visible damage, while larger leaks can cause noticeable problems within days.
What should I do after detecting a dishwasher leak?
After confirming a leak, stop using the dishwasher, document where moisture appears, and identify the most likely source. Dishwasher hose leak inspection can help determine whether a supply or drain connection is involved. Once repairs are complete, drying affected materials becomes the next priority.
Key Takeaways
- Hidden dishwasher leaks can often be confirmed without moving the appliance.
- Recurring moisture linked to wash cycles is one of the strongest confirmation signals.
- Visual inspection of toe-kick areas and flooring seams provides early detection clues.
- Moisture meters help confirm hidden damp areas when visual evidence is unclear.
- Stopping dishwasher use after leak confirmation prevents additional damage.
- Professional evaluation may be necessary if the leak source remains unclear.
- Early detection reduces repair costs and limits structural damage.
5 Comments
Comments are closed.