How Water Enters Homes Through Structural Gaps
Water does not need a large opening to enter a home. Many moisture problems begin with small exterior gaps, failed transitions, loose flashing, cracked mortar, poorly sealed penetrations, damaged siding edges, or roof-to-wall details that no longer shed water correctly. Once water gets past the outer surface, it can travel behind siding, down sheathing, around framing, into attic areas, through insulation, and eventually show up as stains, damp drywall, swollen trim, musty smells, or hidden mold risk.
That is why structural water entry can be confusing for homeowners. The visible stain is often not where the water entered. A ceiling mark near a chimney may come from flashing, crown damage, or porous masonry. Damp drywall near a window may come from exterior trim, failed flashing, siding gaps, or water running behind the wall. A recurring stain after rain may not be a plumbing leak at all. It may be exterior water entering through a gap that was never found.
This guide explains how water enters homes through structural gaps and exterior entry points. It focuses on the major pathways: chimneys, flashing, siding, roof-to-wall transitions, windows, doors, gutters, vents, cable entries, outdoor faucets, and wall penetrations. The goal is not to turn every homeowner into a roofer, mason, siding contractor, or restoration professional. The useful question is not just “Where is the stain?” but “What exterior detail could be feeding that area after rain?”
Structural gaps are one part of the larger moisture-control picture. If you are trying to understand how moisture problems connect across the whole house, start with how to find, fix, and prevent moisture problems in homes. If the same damp area keeps returning after repairs, structural water entry may also connect to repeated moisture problems that were never fully traced back to the source.
Why Structural Gaps Let Water Into Homes
A home’s exterior is supposed to manage water before it reaches the structure. Roof surfaces, siding, trim, flashing, windows, doors, gutters, masonry, housewrap, and sealants all work together to move rainwater away from vulnerable materials. When those layers are intact, water sheds outward and drains away. When one part of the system fails, water can slip behind the visible surface and begin moving through hidden spaces.
The important point is that exterior materials do not all work the same way. Some surfaces are meant to shed most of the water. Some are meant to redirect water at joints and transitions. Some are backup layers that manage the water that gets behind the first surface. Some materials, such as brick, mortar, wood, drywall, and insulation, can absorb or hold moisture if they are repeatedly wetted. When the system stops draining and drying correctly, small entry points can create long-term moisture problems.
Water follows weak points, not always straight lines
Homeowners often expect water to travel straight down from the leak source to the visible stain. Sometimes it does. But exterior water often follows framing, sheathing, rafters, trim, insulation, and hidden cavities before it becomes visible indoors. Water can enter at a chimney, travel along roof framing, and show up as a ceiling stain several feet away. It can enter behind siding, follow sheathing downward, and appear near a baseboard. It can enter around a cable penetration and spread inside the wall before the drywall shows any damage.
This is why structural leaks are often misdiagnosed. The wet drywall is only the evidence. The actual water entry point may be above it, outside it, beside it, or hidden behind exterior materials. A good diagnosis starts by asking what exterior feature is connected to the wet area, not just what interior surface is damaged.
Exterior water can enter during specific weather conditions
Some structural gaps only leak during certain storms. A gap may stay dry during light rain but leak during wind-driven rain. A roof-to-wall transition may only fail when rain hits from one direction. A gutter may only overflow during heavy rain. A chimney may only leak when masonry becomes saturated. A vent, cable entry, or hose bib penetration may only leak when water runs directly across that wall surface.
This pattern matters because intermittent leaks are easy to dismiss. A wall may look dry the next day, but that does not mean the cavity behind it dried fully. Repeated wetting and drying can slowly damage trim, sheathing, insulation, framing, and drywall before the problem becomes obvious.
Small exterior gaps can create hidden moisture
A small opening can be enough to create hidden water damage if it is exposed repeatedly. Exterior water entry does not always begin as a stream of water. It may begin as dampness around a flashing joint, moisture behind siding, wet masonry, a small drip around a vent, or water trapped at a trim seam. Over time, that moisture can soften materials, stain surfaces, feed musty odors, and create conditions where mold may grow if the area stays damp.
This is especially common around structural transitions. Water is more likely to enter where materials meet, change direction, or interrupt the exterior surface. Chimneys interrupt the roof. Windows and doors interrupt walls. Vents, cables, pipes, and outdoor faucets penetrate the exterior. Flashing is supposed to protect these interruptions, but once flashing fails or sealants age, those areas become common leak paths.
The Most Common Exterior Water Entry Points
Most structural water entry problems fall into a few major categories. Each one has its own warning signs and repair approach, but the basic principle is the same: water finds a weak transition, gets behind the exterior surface, and travels until it reaches a material that absorbs it or an interior surface where it becomes visible.
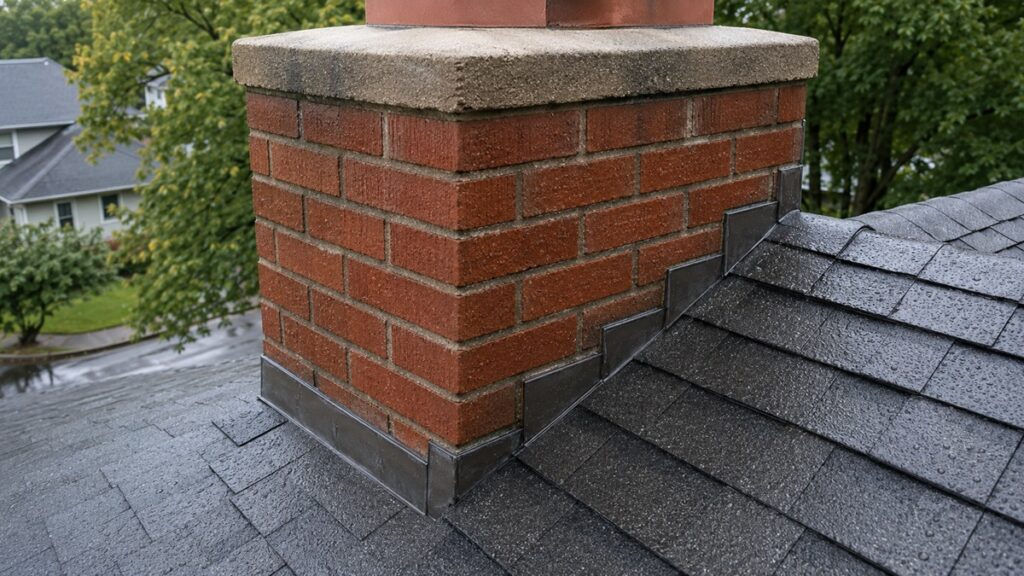
Chimneys and masonry openings
Chimneys are one of the most common structural water entry points because they combine several vulnerable systems in one place. A chimney may have roof flashing at the base, counterflashing in the masonry, a crown at the top, mortar joints between bricks, a cap, a chase, attic framing around it, and nearby ceiling surfaces below it. Any one of those areas can allow water in when it cracks, separates, deteriorates, or stops shedding water correctly.
A chimney leak is not always a simple roof leak. Water may enter through failed chimney flashing, cracked chimney crowns, deteriorated mortar, absorbent brick, missing caps, or gaps where the chimney passes through the roof. The result may show up as ceiling staining, attic moisture, musty odor, damp framing, or recurring stains after rain.
If you see staining, dampness, or odor near a chimney, start with the broader warning signs in signs of water leaks around chimneys. If the issue appears near the roofline or chimney base, signs of chimney flashing failure and signs water is entering around the chimney base are more specific next steps.
Chimney water can also enter from above. A cracked crown can let water soak into the chimney from the top, while deteriorated mortar can allow moisture into the masonry itself. If the top or masonry face appears damaged, look at signs of chimney crown damage and signs chimney mortar is allowing water in.
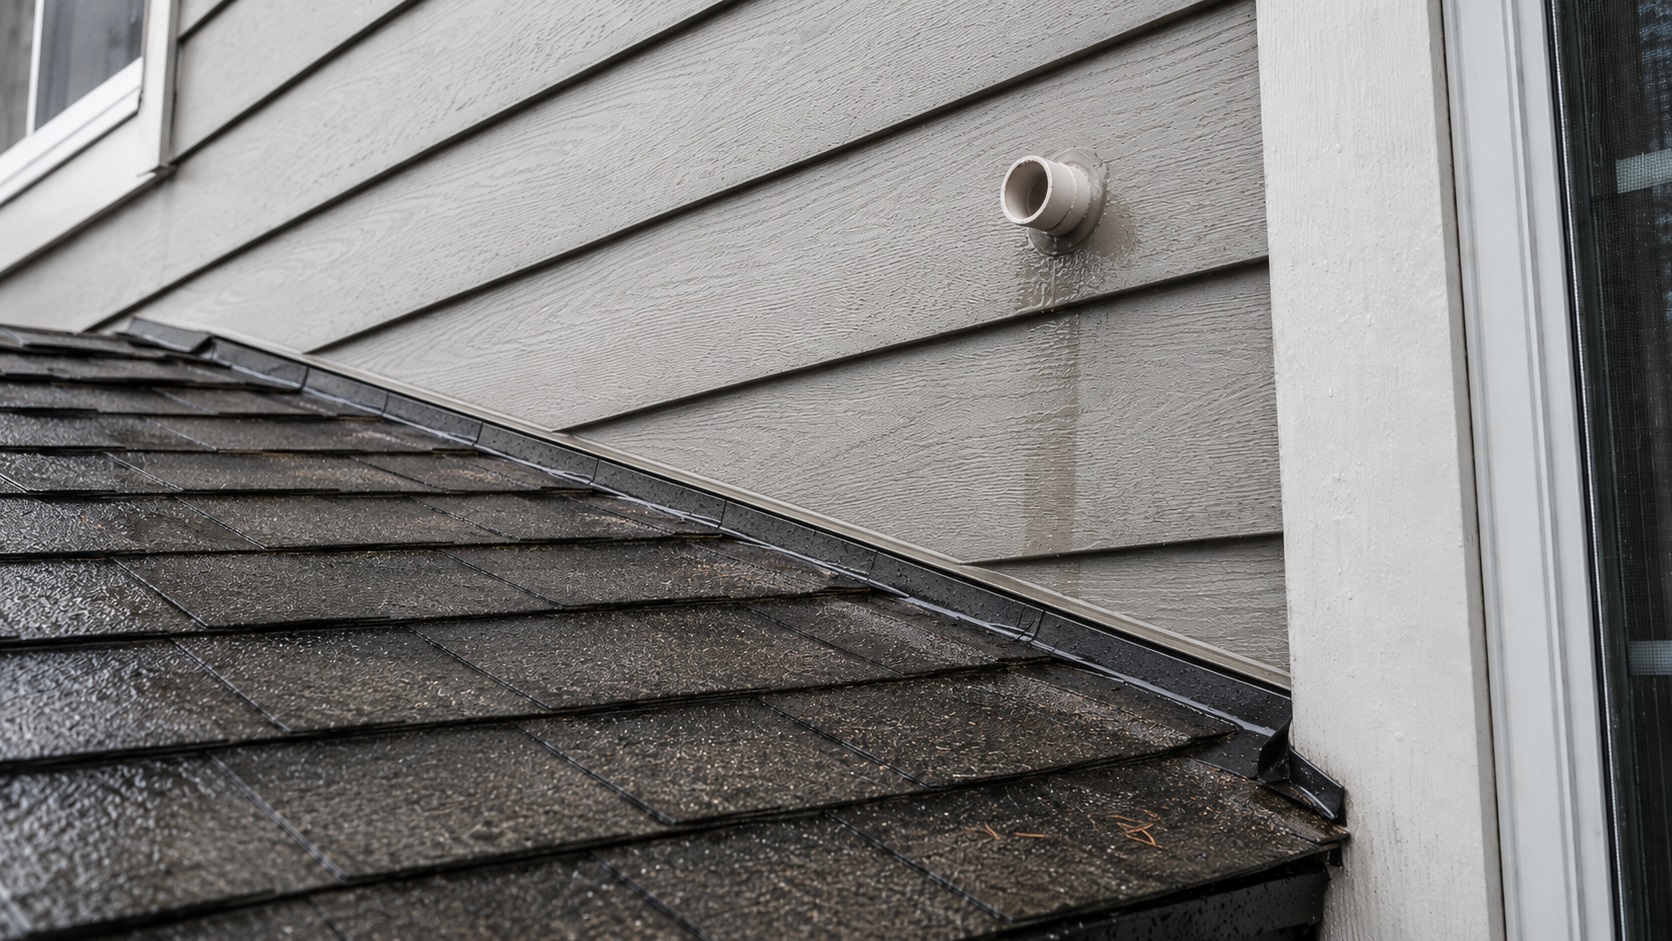
Roof-to-wall and flashing transitions
Flashing is one of the most important water-control details on a home. It is used where water needs to be redirected away from a joint, edge, opening, or transition. Flashing is common around chimneys, roof valleys, roof-to-wall intersections, windows, doors, siding edges, deck connections, and other exterior breaks in the building envelope.
When flashing is missing, damaged, corroded, poorly installed, poorly lapped, or separated from the materials around it, water can move behind the surface instead of being directed outward. This is why flashing failures often cause leaks that are hard to trace. The outside may not show a large hole, but water may be slipping behind the wall or roof transition every time rain hits that area.
Common signs include stains after rain, damp walls near rooflines, peeling paint near exterior transitions, moisture around trim, or recurring dampness that seems to appear only during storms. If flashing is the suspected issue, start with signs of failed exterior flashing. For a deeper explanation of why these failures happen, see why exterior flashing develops leaks and why improper flashing installation causes leaks.
Siding, trim, and exterior wall gaps
Siding is designed to shed water, but siding alone is not always the complete waterproofing system. Many exterior wall assemblies rely on proper laps, flashing, drainage planes, housewrap, trim details, and drying space behind the visible cladding. If water gets behind siding and cannot drain or dry, moisture can affect sheathing, framing, insulation, and interior drywall.
Water can get behind siding through cracked panels, loose boards, failed caulk joints, missing flashing, damaged trim, poor clearance from hard surfaces, wind-driven rain, or gaps around penetrations. The damage may not be obvious from the outside. Inside, the homeowner may notice musty odor, damp drywall, paint bubbling, swollen trim, stains near baseboards, or mold around exterior-facing walls.
When the damp area lines up with an exterior-facing wall rather than a plumbing fixture, determining why exterior walls develop moisture problems is the next step. If siding is the suspected pathway, why exterior siding develops moisture problems explains that system. When moisture stays trapped behind cladding, why mold forms behind siding can help explain the mold risk side of the problem.
For a broader exterior wall system guide, use how exterior walls allow moisture into homes. That topic goes deeper into siding failures, exterior wall behavior, and long-term wall moisture problems, while this article stays focused on structural gaps and entry paths.
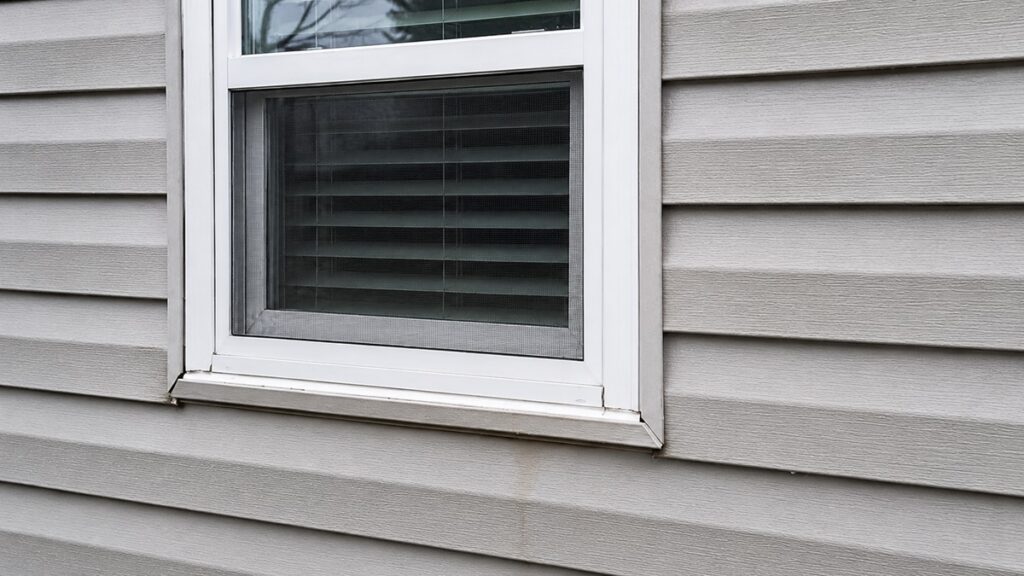
Windows and doors as structural openings
Windows and doors are necessary openings in the exterior wall, but every opening creates a weak point if it is not flashed, sealed, drained, and maintained correctly. Water can enter around trim, behind casing, under thresholds, through failed exterior sealant, behind siding near the frame, or through poorly managed flashing around the opening.
Window and door leaks can be misleading because the visible moisture may appear around the frame, on the sill, under the trim, near the baseboard, or inside the wall rather than at the exact exterior gap. Mold near a frame does not always mean the glass or window unit itself is the only problem. It may point to exterior water entry, condensation, poor flashing, trim leakage, or a wall cavity that has stayed damp.
If the issue is specifically mold around a window frame, see why mold forms around window frames. If the moisture pattern appears around a door opening, why mold forms around door frames is the more targeted page.
For the larger window and door moisture system, use how windows and doors cause hidden moisture problems. That guide covers the broader frame, trim, seal, sill, threshold, and opening-related moisture system in more detail.
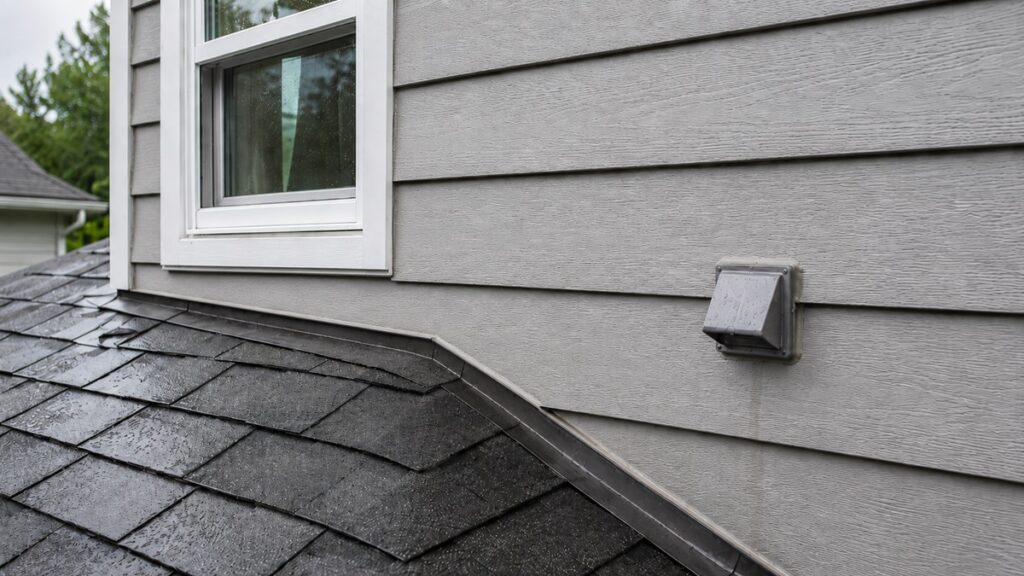
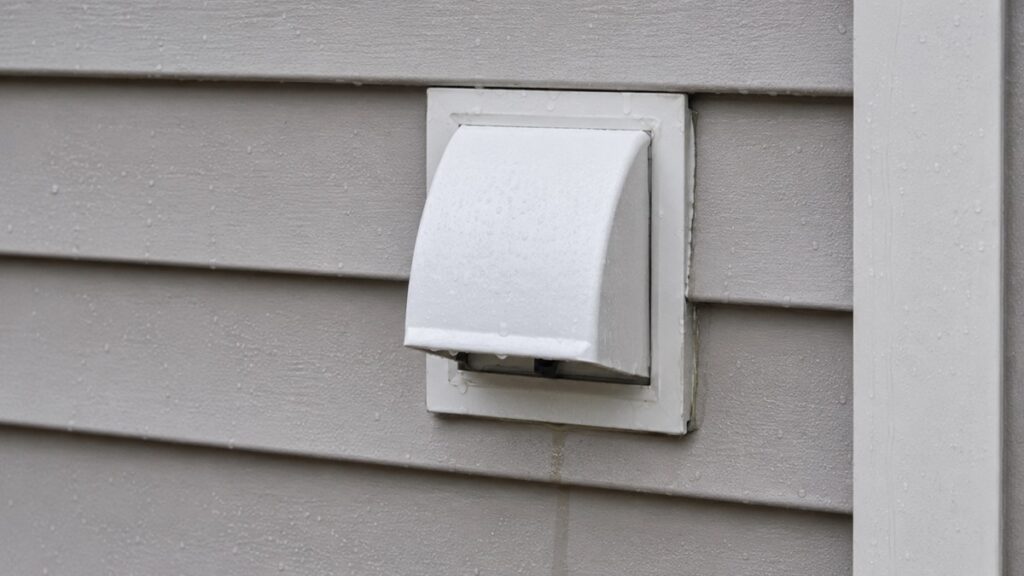
Wall penetrations, vents, cables, and outdoor faucets
Some of the smallest exterior openings can become persistent water-entry points. Cable lines, utility penetrations, exhaust vents, hose bibs, outdoor faucets, electrical boxes, and other wall penetrations all interrupt the exterior surface. If the opening is not flashed, sealed, sloped, or maintained correctly, rainwater can follow the penetration into the wall instead of staying outside.
This type of leak is often overlooked because the opening may look minor from the exterior. A small cable hole, vent hood, or faucet connection may not seem serious, but water does not need much space to enter a wall cavity. If water repeatedly runs across that area during rain, the opening can allow moisture into sheathing, insulation, framing, or drywall.
Outdoor faucets and hose bibs deserve special attention because they combine exterior wall penetrations with plumbing connections. A leak may come from the fixture, the pipe connection, the siding penetration, or water running behind the fixture plate. If the wet area is near an exterior faucet, read how hose bib leaks cause wall moisture and signs water is entering around outdoor faucets.
Cable and utility entries create a similar risk. A poorly sealed cable entry can let water follow the line into the wall, especially when the cable slopes toward the house or enters through a poorly protected hole. For that situation, see how cable entry points allow moisture inside.
Exhaust vents, dryer vents, bathroom vents, and other exterior vent openings can also leak when the hood, trim, flashing, or surrounding seal fails. Moisture below or beside an exterior vent should be traced through how exterior vent openings cause moisture and signs moisture is entering around exhaust vents.
When the exact penetration is unclear, start with the broader guides on signs water is entering through wall penetrations, why wall penetrations become leak points, and how to inspect exterior penetrations for moisture.
Gutters and concentrated runoff
Gutters do not usually create a hole in the wall by themselves, but they can concentrate water against vulnerable areas. When gutters overflow, clog, sag, leak at seams, or discharge too close to the house, they can soak siding, trim, fascia, roof edges, wall penetrations, windows, doors, and foundation-adjacent areas. The problem is not just that water is present. The problem is that too much water is being directed onto surfaces that were not designed to stay saturated.
If the moisture problem appears after heavy rain or near a roof edge, gutter overflow should be part of the investigation. Start with why gutters cause water problems around homes and signs your gutters are overflowing.
How Water Moves After It Gets Through the Gap
The entry point is only the beginning of the problem. Once water gets behind the exterior surface, it may move through hidden spaces before it becomes visible. This is why the inside symptom often does not match the outside source perfectly. The water may enter high, travel sideways or downward, soak materials along the way, and finally appear at the first weak interior surface.
Behind siding and exterior cladding
When water gets behind siding, it may drain out if the wall assembly is working properly. But if the water is trapped, blocked, or repeatedly introduced, it can wet sheathing, housewrap, trim edges, wall framing, and insulation. Moisture behind siding can also remain hidden because the exterior surface may still look mostly normal.
Some siding-related moisture problems come from obvious damage, such as cracks, loose panels, missing trim, or storm damage. Others come from poor transitions: missing flashing above windows, poor clearance near decks or roofs, gaps around utility penetrations, or places where water is directed behind the siding instead of out and away from the wall.
When siding is involved, the key question is not only whether water got behind the siding. The bigger question is whether the wall can drain and dry. If moisture stays trapped long enough, it can contribute to sheathing damage, musty odor, hidden mold, or interior staining. For a more focused explanation, read why mold forms inside exterior walls.
Into wall cavities and insulation
Wall cavities can hide moisture for a long time. Drywall may not stain immediately. Paint may not bubble right away. Trim may look normal until it swells or separates. Insulation can hold moisture inside the cavity, especially when the leak is small but repeated. By the time the interior surface shows damage, the water may have been entering for weeks or months.
This does not mean every exterior leak has caused hidden mold or structural damage. It means the visible surface alone cannot always confirm the full moisture pattern. If water has entered the wall repeatedly, the source should be corrected first, and the affected materials should be evaluated for moisture before cosmetic repairs are made.
Along framing and trim
Water often follows wood framing, sheathing edges, trim joints, and lower wall areas. This can cause symptoms that appear far from the original gap. For example, water entering around a window or siding seam may show up as swollen baseboard trim below. Water entering near a chimney may follow framing before staining a ceiling. Water entering through a wall penetration may spread inside the wall before a small stain appears around the nearest trim edge.
This is why repeated staining around trim, baseboards, corners, and exterior-facing walls should not be treated as only a surface problem. The trim may be showing the symptom, but the source may be above or outside that area.
Into attic and ceiling areas
Attics often reveal structural water entry before living spaces do. Water from roof penetrations, chimney leaks, flashing failure, or roof-edge problems may stain rafters, roof decking, insulation, ceiling joists, or the top side of drywall. If the leak is slow or intermittent, the first clue may be a musty attic odor, dark staining, damp insulation, or a ceiling mark that appears after storms.
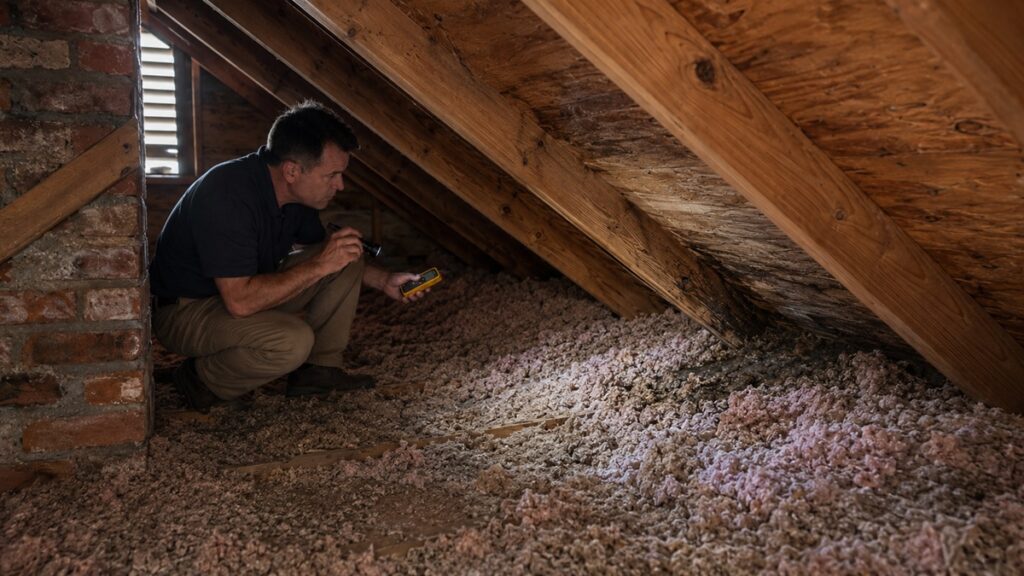
Roof-related moisture and chimney-related moisture can be especially confusing because water may enter through one upper-level detail and appear several feet away. If the issue seems roof-related but no obvious active drip is visible, start with signs of hidden roof moisture. If the goal is to catch a roof leak before mold becomes part of the problem, use how to find roof leaks before mold forms.
Warning Signs That Water Is Entering Through Structural Gaps
Structural water entry can produce many different symptoms depending on where the water enters, how far it travels, and which materials absorb it. Some signs are obvious after rain. Others develop slowly and look like ordinary wear until the pattern becomes recurring.
Interior symptoms after rain
Interior warning signs often appear after rain, wind-driven rain, snowmelt, or gutter overflow. The most common include:
- Ceiling stains that appear or darken after storms
- Damp drywall on exterior-facing walls
- Peeling paint or bubbling paint near exterior walls
- Swollen baseboards, trim, or window casing
- Musty odor near a wall, attic, chimney, window, or door
- Mold growth near frames, corners, trim, or ceiling edges
- Soft drywall or discolored wall patches
- Water marks that return after cosmetic repairs
The timing is often the most useful clue. If the symptom appears after rain instead of after plumbing use, showers, appliance cycles, or indoor humidity spikes, an exterior entry path becomes more likely.
Exterior symptoms near entry points
Exterior signs can be subtle. You may not see water actively entering the house. Instead, you may notice clues that a water-control detail has failed or is aging:
- Cracked or missing sealant around penetrations
- Loose, lifted, or damaged flashing
- Cracked chimney crown surfaces
- Deteriorated chimney mortar
- Dark staining on masonry or siding
- Siding gaps, cracks, warping, or missing pieces
- Trim separation around windows or doors
- Gutters overflowing, sagging, or leaking at seams
- Water marks below vents, cables, or outdoor faucets
- Paint failure near exterior joints or openings
These signs do not always prove the exact source, but they help narrow the investigation. If an exterior weakness lines up with an interior moisture pattern, that area deserves closer attention.
Pattern clues that point to exterior water entry
Patterns often reveal more than one-time symptoms. Exterior water entry is more likely when the moisture:
- Appears after rain or storms
- Gets worse during wind-driven rain
- Shows up near an exterior wall rather than an interior partition
- Appears near a chimney, roofline, window, door, vent, or exterior penetration
- Returns after the surface was cleaned, painted, or patched
- Appears near a gutter overflow area or downspout discharge point
- Shows up in an attic near a roof penetration or chimney chase
- Does not match nearby plumbing fixture use
A single clue may not identify the source. But when several clues line up, the likely entry point becomes clearer.
How to Narrow Down the Likely Entry Point
You do not need to guess randomly when water appears indoors. A better approach is to connect the interior symptom to the exterior systems around it. Structural water entry is easiest to understand when you work from the symptom outward and upward.
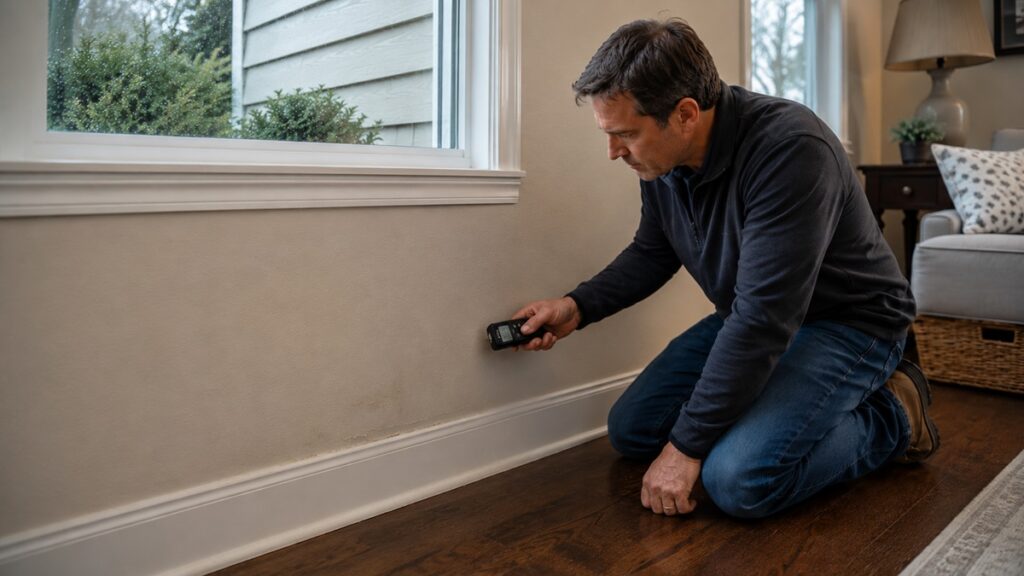
Start with the interior symptom
Begin by noting exactly where the moisture appears. Is it on a ceiling, upper wall, lower wall, corner, baseboard, window frame, door frame, attic surface, or chimney-adjacent area? Does it appear as a stain, damp spot, odor, mold, soft drywall, peeling paint, or swollen trim?
Then note when it appears. If the area becomes damp after rain, storms, wind, snowmelt, or gutter overflow, the source is more likely to be exterior. If it appears after showering, laundry, appliance use, or plumbing activity, plumbing or indoor humidity may need to be considered instead.
Check what is outside, above, or uphill from the symptom
Once the symptom is mapped, look at what is outside or above that area. Structural water often enters from a higher or exterior-facing point and travels before it becomes visible. Important features to check include:
- Chimneys above or near the stain
- Roof-to-wall intersections
- Flashing near the affected area
- Windows or doors above the damp spot
- Siding seams, trim, and corners
- Gutters or downspouts nearby
- Exterior vents or wall penetrations
- Cable, pipe, or utility entry points
- Outdoor faucets on the same wall
- Attic areas above ceiling stains
The entry point is not always directly behind the stain. Look slightly above, to the sides, and along any path water could follow by gravity, wind, or framing.
Some exterior water-entry problems also affect crawl spaces, especially when runoff, grading, vents, foundation-adjacent openings, or drainage paths allow water to collect below the home. If the moisture pattern involves the crawl space, start with why crawl spaces develop moisture problems, signs of standing water in crawl spaces, and how to detect water intrusion in crawl spaces.
Match the symptom to the right next article
If the symptom is near a chimney, use the chimney leak articles first. If the problem is near a vent, cable, faucet, or utility opening, use the exterior penetration articles. If moisture appears near siding or exterior walls, use the siding and exterior wall articles. If the symptom is near a window or door frame, use the window and door moisture articles. If the issue appears in the attic or ceiling after rain, roof and chimney sources should be investigated before assuming it is only a ceiling problem.
This is the purpose of a structural-gap hub: it helps you choose the right path. The detailed child articles can then handle the narrower question without forcing one article to cover every inspection, cause, and repair scenario.
Know when the inspection is beyond safe DIY limits
Some exterior water-entry problems can be observed safely from the ground, inside the attic, or from accessible interior areas. Others should not be treated as casual DIY inspections. Roof surfaces, high walls, steep slopes, chimney crowns, upper-story flashing, and attic areas with unsafe footing can create real safety risks.
A homeowner can often document symptoms, compare timing after rain, check accessible exterior areas, look for obvious staining, and take photos. But roof climbing, chimney work, flashing removal, siding removal, and structural opening repairs usually require the right equipment and experience. If the moisture is recurring, spreading, near electrical components, associated with soft framing, or appearing after every storm, the safest next step is usually a qualified inspection.
Why Caulk Alone Often Does Not Fix Exterior Water Entry
Caulk and exterior sealant can be useful in the right place, but they are often misused as a quick fix for water-entry problems that are actually caused by failed flashing, poor drainage, material movement, or a missing water-shedding detail. Sealing a visible crack may slow water temporarily, but it does not always correct the reason water is reaching that joint in the first place.
This matters because exterior water control depends on layers. A home should not rely on one bead of caulk to stop all water at a vulnerable transition. Flashing, laps, slopes, drainage paths, trim details, and proper material overlap should direct water outward. Sealant is usually a supporting detail, not the entire water-control system.
Sealant can fail when flashing or drainage is wrong
If water is being driven behind siding, spilling over a gutter, running into a roof-to-wall joint, or entering at a poorly flashed chimney, adding more caulk may only cover the surface symptom. The water may still get behind the exterior layer from another edge or may reopen the joint as materials move.
This is especially common around windows, doors, vents, and wall penetrations. The visible exterior bead may look like the obvious problem, but the deeper issue may be missing flashing, poor slope, trapped water, or an opening that was never integrated correctly with the wall’s drainage plane.
Movement, UV exposure, and weather can reopen gaps
Exterior joints move. Wood expands and contracts. Siding shifts with temperature changes. Masonry absorbs and releases moisture. Metal flashing expands, contracts, corrodes, or loosens. Sealants age in sunlight and weather. A joint that looks sealed one season may crack, separate, or pull away later.
That is why recurring moisture near the same exterior detail should not be dismissed as a simple cosmetic crack. If the same area keeps getting damp, the building assembly may be allowing water to reach the joint repeatedly. The long-term fix may require correcting flashing, redirecting water, repairing deteriorated material, or improving the way the exterior system drains.
The real fix depends on the failed system
Different water-entry points need different solutions. A cracked chimney crown is not the same problem as a leaking cable penetration. Failed step flashing is not the same problem as siding pressed too tightly against a roof surface. Overflowing gutters are not the same problem as deteriorated mortar. Treating all of them as “just seal the gap” can lead to repeated repairs that never solve the real source.
If the problem is related to exterior sealant failure, how improper sealing causes exterior leaks explains why sealing details fail. If the broader issue is that the exterior entry point is aging, shifting, or deteriorating over time, read why exterior entry points fail over time.
How Structural Gaps Lead to Mold, Rot, and Recurring Moisture
Exterior water entry becomes more serious when moisture is repeated, hidden, or slow to dry. A one-time wet surface that dries quickly is different from a wall cavity, chimney chase, attic corner, or siding area that gets damp after every storm. Persistent moisture gives materials less time to recover and makes damage harder to see until symptoms become obvious.
Persistent dampness creates risk over time
Water intrusion does not need to be dramatic to cause problems. A small leak that wets the same area repeatedly can slowly affect drywall, insulation, sheathing, framing, trim, paint, and masonry. The first signs may be mild staining, a faint musty smell, or slight trim swelling. Later, the same area may show peeling paint, visible mold, softened drywall, or recurring damage after every repair.
This does not mean every structural gap automatically causes mold or rot. The risk depends on how often the area gets wet, how long it stays wet, what materials are affected, and whether air movement allows drying. The problem is that hidden areas often dry slowly, especially when moisture is trapped behind siding, inside insulation, around trim, or near attic cavities.
Hidden water can damage materials before symptoms are obvious
Some materials show water damage quickly. Others hide it. Drywall may stain or soften, but framing may stay concealed. Insulation may hold moisture without being visible. Sheathing can be damp behind siding while the room side of the wall still looks normal. Masonry can absorb moisture before interior symptoms appear. Trim can swell only after repeated wetting.
This hidden behavior is why exterior water entry should be addressed at the source before repainting, patching drywall, or replacing trim. Cosmetic repair may improve the appearance, but if the entry point remains open, the same moisture pattern can return.
Repeated leaks can look like unrelated moisture problems
Recurring moisture often gets misread as separate problems. A homeowner may clean mold near a window, repaint a ceiling stain, replace swollen trim, or patch a wall, only to see the issue return after the next storm. In many cases, the visible repair failed because the exterior source was never corrected.
If a damp area keeps returning after cleanup or repair, it may help to step back and review why moisture problems keep returning. If the goal is to prevent the same damage from coming back after the entry point is fixed, use how to prevent recurring moisture damage.
Prevention: How to Reduce Water Entry Risk Around Structural Gaps
Preventing exterior water entry is mostly about keeping water-control details working before they fail. That does not mean every homeowner must inspect every inch of a roof, wall, chimney, and siding system constantly. It means paying attention to the areas where water is most likely to enter and responding early when those areas show signs of deterioration.
Maintain water-shedding details
The most important prevention principle is simple: water should be directed out and away from the structure. That depends on details such as flashing, gutters, downspouts, chimney crowns, mortar, siding edges, trim, vents, penetrations, windows, doors, and exterior sealant joints.
Areas that deserve regular attention include:
- Chimney crowns, caps, mortar joints, and flashing
- Roof-to-wall transitions and visible flashing edges
- Gutters, downspouts, and overflow areas
- Exterior vents, cable entries, and utility penetrations
- Outdoor faucets and hose bib penetrations
- Window and door trim
- Siding seams, corners, and lower wall areas
- Painted or caulked exterior joints that are exposed to heavy weather
The goal is not to seal every joint blindly. The goal is to make sure water is shedding correctly and not being directed behind exterior materials.
Watch vulnerable areas after storms
Some of the best clues appear after heavy rain, wind-driven rain, or long wet periods. After a storm, check the areas where water is most likely to concentrate: chimney areas, ceiling edges, exterior-facing walls, attic corners, window and door frames, lower siding, gutter overflow zones, and wall penetrations.
Look for new staining, damp odor, paint changes, trim swelling, or visible exterior water marks. If the same area changes after storms, that pattern is more important than a one-time mark. Repeated storm-related symptoms usually point to a source that needs to be traced and corrected.
Fix the source before drying or cosmetic repair
Drying, cleaning, painting, and patching are not enough if water is still entering. The source must be corrected first. Otherwise, the repaired surface may fail again, and hidden materials may remain damp behind the finished surface.
A practical sequence is:
- Identify when and where the moisture appears.
- Trace the likely exterior entry point.
- Correct the failed water-entry detail.
- Verify the affected area is drying.
- Repair damaged interior or exterior materials only after the source is controlled.
If structural materials may be damaged, or if the leak involves a roof, chimney, high wall, active water entry, electrical penetration, or repeated hidden moisture, professional evaluation is usually the safer path.
Related Topic Navigation
Use the sections below to choose the most relevant next article based on where the moisture appears or what exterior system seems involved.
If the problem is near a chimney
Chimney-related leaks can come from the base, flashing, crown, mortar, brick, attic chase, or roof transition. Start with signs of water leaks around chimneys if you are still identifying the warning signs.
If the leak appears near the roofline or chimney base, read signs of chimney flashing failure and signs water is entering around the chimney base. If the top or masonry is suspect, use signs of chimney crown damage and signs chimney mortar is allowing water in.
For cause-focused chimney guidance, continue with why chimneys leak during rain, how chimney flashing fails over time, how chimney crowns crack and allow water in, how brick chimneys absorb moisture, and why chimney mortar deteriorates over time.
If the next step is inspection, use how to inspect chimney flashing for leaks, how to inspect chimney mortar for moisture damage, and how to inspect chimney crowns for cracks. For prevention and repair-readiness, continue with how to prevent water leaks around chimneys, how to maintain chimney flashing, when chimney flashing needs replacement, and how to waterproof brick chimneys.
If the problem is near siding or exterior walls
If the moisture appears on an exterior-facing wall, behind trim, near siding, or inside a wall that faces the outdoors, the issue may involve the exterior wall system. Read why exterior walls develop moisture problems and why exterior siding develops moisture problems.
If mold is appearing in or behind exterior wall areas, continue with why mold forms inside exterior walls and why mold forms behind siding. For the broader wall-system explanation, use how exterior walls allow moisture into homes.
If the problem is near flashing
Flashing problems often appear around rooflines, chimneys, walls, windows, doors, siding transitions, and other points where water needs to be redirected. If you suspect flashing, start with signs of failed exterior flashing. Then read why exterior flashing develops leaks and why improper flashing installation causes leaks.
If the problem is near vents, cables, faucets, or wall penetrations
If moisture appears around a small exterior opening, wall penetration, utility entry, vent, or faucet, use the penetration-specific articles. Start with signs water is entering through wall penetrations and why wall penetrations become leak points.
For more specific entry points, read how cable entry points allow moisture inside, how exterior vent openings cause moisture, signs moisture is entering around exhaust vents, how hose bib leaks cause wall moisture, and signs water is entering around outdoor faucets.
If the problem appears in the attic or ceiling
Attic and ceiling moisture often points to an upper-level water-entry path. The source may be a roof penetration, chimney leak, roof-to-wall transition, failed flashing detail, gutter overflow near a roof edge, or water traveling along framing before it reaches the ceiling surface.
If the issue appears to be roof-related, start with signs of hidden roof moisture and how to find roof leaks before mold forms. If the moisture is near a chimney or chimney chase, also review how to check for chimney water intrusion in attics.
Chimney leaks can also create damage that appears as a ceiling problem rather than an obvious chimney problem. If the stain, odor, or dampness is near the chimney area, read hidden chimney leaks that cause ceiling damage, how chimney leaks lead to mold growth, how chimney leaks damage attic structures, and why chimney leaks often go undetected.
If the problem appears after gutter overflow
If the moisture appears after heavy rain, check whether gutters are overflowing, leaking at seams, sagging, clogged, or dumping water against the home. Gutter problems can soak fascia, siding, trim, foundation-adjacent walls, roof edges, and exterior openings. The leak may look like a wall problem even though the water source begins with poor drainage at the roof edge.
For gutter-related moisture patterns, use why gutters cause water problems around homes and signs your gutters are overflowing.
When Professional Help Is Needed
Not every structural water-entry issue requires a major repair, but some should not be handled with guesswork. Exterior water entry can involve roofing, flashing, siding, masonry, vents, electrical penetrations, exterior plumbing penetrations, attic spaces, and hidden structural materials. When the source is unclear or the damaged area is not safely accessible, professional evaluation is usually the better path.
Roof, chimney, flashing, and high-wall risks
Roof and chimney areas can be dangerous to inspect without proper equipment. Steep roofs, wet surfaces, upper-story walls, chimney crowns, and high flashing details are not safe places for casual inspection. A ground-level view, attic observation, photos, and symptom tracking can help you describe the problem, but climbing onto roofs or removing exterior materials can create safety risks and may cause more damage if done incorrectly.
If the problem appears to involve chimney flashing, chimney crowns, roof-to-wall flashing, hidden roof moisture, upper-story siding, or high vents, consider a qualified roofer, mason, siding contractor, chimney professional, or water intrusion specialist depending on the suspected source.
Signs of hidden structural damage
Professional help becomes more important when moisture may have reached structural materials. Warning signs include:
- Soft or crumbling wood
- Sagging ceiling areas
- Repeated staining after every storm
- Persistent musty odor
- Visible mold growth near a leak path
- Damp insulation in an attic or wall cavity
- Swollen trim that keeps returning after repair
- Water near electrical components or wall penetrations
- Moisture that spreads instead of staying localized
When these signs appear, the issue may no longer be only an exterior gap. It may involve hidden moisture, damaged materials, or structural repair decisions. For broader repair-level context, read structural moisture problems in homes.
When drying is not enough
Drying the visible area does not solve a structural water-entry problem if rain can still get in. The same is true for painting, cleaning mold, replacing trim, patching drywall, or adding more sealant to a visible crack. Those repairs may be necessary after the source is fixed, but they should not replace source correction.
The correct order is source first, moisture verification second, material repair third. If the source is not corrected, the same area may fail again after the next storm.
Key Takeaways
- Water can enter a home through small exterior gaps, not only through obvious holes.
- The visible stain or damp area is often not the exact entry point.
- Common structural entry paths include chimneys, flashing, siding gaps, windows, doors, vents, cables, outdoor faucets, gutters, and roof-to-wall transitions.
- Water may travel behind siding, through wall cavities, along framing, into attic areas, or down trim before it becomes visible indoors.
- Caulk alone often fails when the real issue is flashing, drainage, material movement, or a poorly integrated exterior detail.
- Recurring moisture after rain usually means the source has not been fully found or corrected.
- The best next step is to match the symptom to the likely exterior system, then use the more specific guide for that entry point.
- Roof, chimney, flashing, high-wall, electrical, and structural moisture problems often require professional evaluation.
Frequently Asked Questions About How Water Enters Homes Through Structural Gaps
Can rain get into a house through small exterior gaps?
Yes. Rainwater can enter through small exterior gaps when wind, gravity, poor drainage, failed flashing, or repeated runoff pushes water behind the exterior surface. Small gaps around vents, cables, siding joints, windows, doors, chimneys, and flashing can create hidden moisture if they are exposed repeatedly.
Why does water damage appear far from the leak source?
Water can travel along framing, sheathing, insulation, trim, rafters, or wall cavities before it appears indoors. A leak may enter near a chimney, roofline, siding gap, or wall penetration and show up several feet away as a ceiling stain, damp wall, swollen trim, or musty odor.
Are chimney leaks always roof leaks?
No. A chimney leak may involve roof flashing, but it can also come from a cracked chimney crown, deteriorated mortar, absorbent brick, missing cap, chimney base opening, or water entering the attic near the chimney chase. The chimney system should be evaluated as more than just a roof surface problem.
Can siding cause hidden wall moisture?
Yes. If water gets behind siding and cannot drain or dry properly, it can affect sheathing, insulation, framing, trim, and interior drywall. Siding moisture problems often come from damaged siding, poor flashing, trim gaps, wall penetrations, wind-driven rain, or poor exterior drainage details.
Can gutters cause water inside walls?
Gutters can contribute to interior wall moisture when they overflow, leak, sag, clog, or discharge water against vulnerable areas. Overflowing gutters can soak siding, trim, fascia, wall openings, and foundation-adjacent areas, making existing gaps more likely to leak.
Why does water only enter during wind-driven rain?
Wind-driven rain can push water sideways into gaps that do not leak during gentle rain. It can drive moisture behind siding, under flashing edges, around vents, through trim gaps, and into openings that normally shed water during calm weather.
Is caulk enough to stop exterior water leaks?
Sometimes caulk can help at appropriate joints, but it is not enough when the real problem is failed flashing, poor drainage, missing laps, deteriorated materials, or water being directed behind the exterior surface. If the same area keeps leaking, the full water-control detail needs to be evaluated.
When should I call a professional for exterior water entry?
Call a professional when the source is on a roof, chimney, upper wall, flashing system, electrical penetration, or hidden structural area; when the moisture keeps returning; when materials feel soft or damaged; when mold is visible; or when the area cannot be inspected safely from the ground or accessible interior spaces.
Conclusion
Water enters homes through structural gaps when exterior water-control details stop doing their job. A small opening around a chimney, flashing joint, siding seam, vent, cable, outdoor faucet, window, door, or gutter-exposed area can let moisture move behind the visible surface and into hidden materials. Once water is inside the assembly, the symptom may appear far from the source.
The most important step is to stop treating the visible stain as the whole problem. Look at what is outside, above, and around the damaged area. Match the timing to rain, wind, gutter overflow, or snowmelt. Then follow the likely water path to the correct exterior system.
The mistake is usually not missing the stain. The mistake is repairing the stain before finding why rain reached that area in the first place. Once the likely entry point is narrowed down, the next step becomes clearer: chimney, flashing, siding, wall penetration, gutter, roof, window, door, or structural repair evaluation.

5 Comments
Comments are closed.