How to Inspect Chimney Flashing for Leaks
Chimney flashing protects one of the most vulnerable water-entry points on a roof: the joint where the chimney passes through the roofing system. When this transition is sealed and layered correctly, rainwater is directed around the chimney and back onto the roof surface. When the flashing is loose, corroded, cracked, patched, or poorly integrated with the roof, water can enter beside the chimney and show up as stains, damp attic sheathing, or leaks inside the home.
Inspecting chimney flashing is not the same as repairing it. The goal is to look for evidence of water entry, identify likely failure points, and decide whether professional evaluation is needed. This matters because chimney flashing leaks are part of the broader group of structural gaps where water enters homes, but they can look similar to leaks from chimney crowns, caps, mortar joints, or roof damage above the chimney.
A good inspection starts from safe areas. You do not need to climb onto a steep or wet roof to begin. Many chimney flashing leaks leave clues inside the attic, on ceiling surfaces, around the chimney masonry, or in visible flashing details that can be checked from the ground with binoculars or a zoomed photo.
What Chimney Flashing Does
Chimney flashing is the metal water-control system installed where the chimney meets the roof. Because a vertical chimney interrupts a sloped roof, that joint has to be layered correctly so rain moves around the chimney instead of behind the roofing materials.
Most chimney flashing systems include more than one visible part. The lower side of the chimney usually has apron flashing. The sides often rely on step flashing woven with the shingles. Counterflashing covers or overlaps the upper edges of the base flashing and is often set into the chimney masonry or sealed against it. The uphill side of the chimney may have back flashing, and wider chimneys may need a cricket or saddle to divert water around the obstruction.
These parts work as a layered system. If one part is missing, loose, corroded, or patched incorrectly, water can move behind the system instead of over it. That is why a flashing inspection should look at the entire roof-to-chimney transition, not just one bead of caulk or one visible metal edge.
Chimney flashing is different from the chimney crown and chimney cap. The cap protects the flue opening. The crown covers the top of the masonry chimney. Flashing protects the roofline joint. A chimney can have a good cap and still leak at the flashing if the metal at the roofline has failed.
Safety Rules Before Inspecting Chimney Flashing
Chimney flashing leaks are important, but roof access can be dangerous. A safe inspection should begin from the ground, from inside the attic, from an upper window, or from another stable location where the chimney base can be viewed without climbing onto unsafe roof surfaces.
Do not climb onto a roof that is steep, wet, icy, mossy, damaged, unusually high, or difficult to access. Do not walk near loose shingles, soft decking, or unstable chimney masonry. Do not pry up shingles or pull at flashing to “see what is underneath.” That can worsen the leak and create new damage.
A homeowner-level inspection is mainly visual. You are looking for clues: stains, gaps, lifted metal, old patches, rust, cracked sealant, damp attic materials, and repeated leak patterns. If the inspection requires lifting roofing materials, accessing a steep roof, or testing the flashing with water, it is time for a qualified roofer or chimney professional.
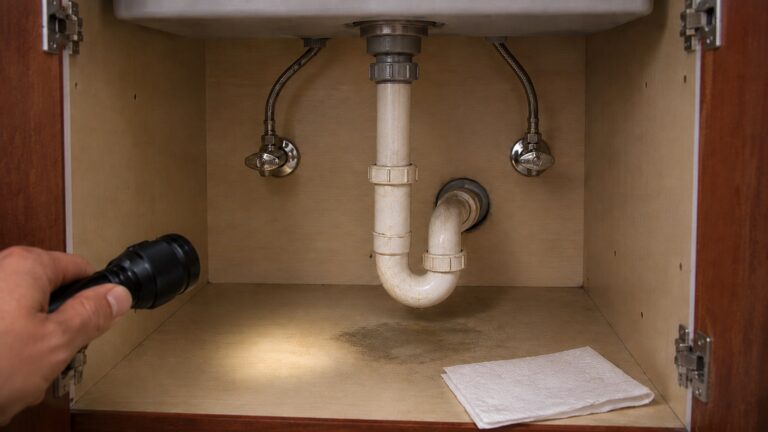
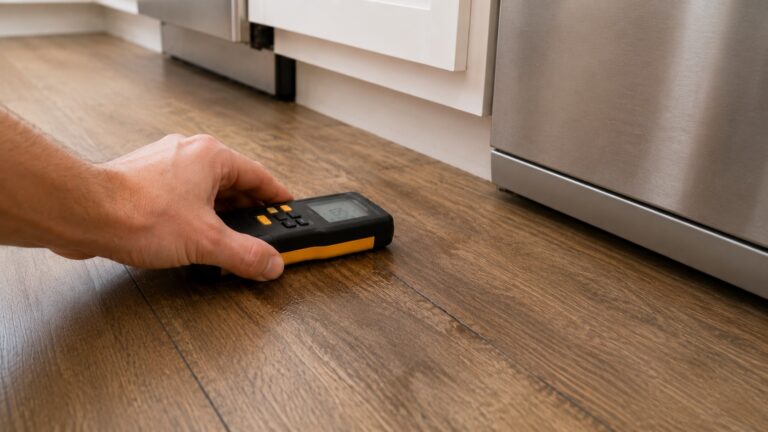
Safe tools can include a flashlight, binoculars, a phone camera with zoom, a moisture meter for interior surfaces, and photos taken from accessible areas. If you inspect the attic, step only on safe framing or designated walking areas. Avoid stepping on ceiling drywall or insulation, and do not touch wet wiring, electrical boxes, or fixtures near a suspected leak.
Start with Interior and Attic Leak Clues
Interior and attic clues are often easier and safer to inspect than the exterior flashing itself. A flashing leak may leave water stains near the chimney long before the exterior failure point is obvious from the ground.
Begin by checking where the chimney passes through the attic or where ceiling stains appear near the chimney chase. Look for water marks, damp wood, stained masonry, wet insulation, rusted nails, or darkened roof sheathing around the chimney opening.
Ceiling Stains Near the Chimney
Brown or yellow ceiling stains near a chimney can indicate water entering at the roofline. The stain may appear on the ceiling beside the chimney, near a fireplace wall, or near a boxed-in chimney chase. These stains often become more noticeable after heavy rain or wind-driven storms.
The location of the stain matters, but it does not prove flashing failure by itself. Water can travel along framing before it appears indoors. A stain near the chimney may come from flashing, but it can also come from the crown, masonry, roof damage above the chimney, or condensation in an attic. For broader symptom comparison, review the signs of water leaks around chimneys.
Damp Roof Sheathing Around the Chimney
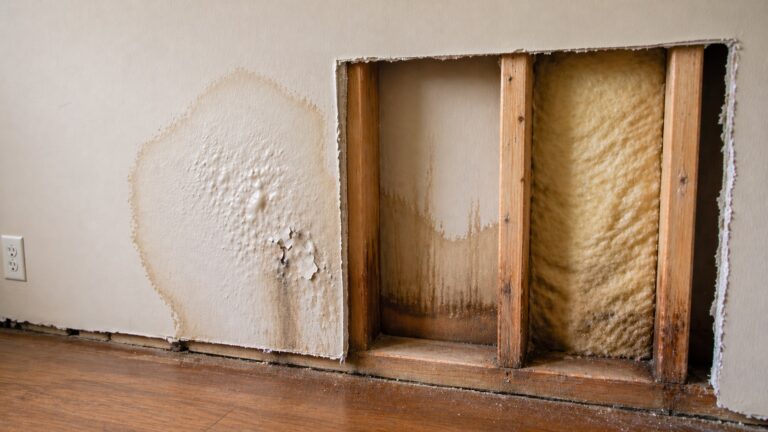
In the attic, inspect the roof sheathing around the chimney penetration if it is safely accessible. Damp, darkened, stained, or softened sheathing near the chimney can point toward water entering at the roofline. Look especially at the uphill side of the chimney and the sidewalls where flashing is supposed to direct water away.
Fresh dampness after rain is more urgent than old dry staining. Old stains show that water entered at some point. Damp wood, wet insulation, or active dripping shows that the leak may still be present. If you can safely take photos of the area, they can help a professional compare interior evidence with exterior flashing conditions.
Water Trails on Masonry or Framing
Water trails can help you trace a suspected chimney flashing leak. In the attic, look for dark vertical marks on the chimney masonry, streaks on nearby framing, or stain patterns that begin near the roof deck and move downward. These clues can show where water is entering before it spreads to ceiling drywall.
Pay close attention to whether the stain starts at the roofline or higher on the chimney. A stain that begins where the chimney meets the roof may point toward flashing. A stain that appears to come from higher up on the chimney may suggest water entering through the crown, cap, brick, or mortar instead.
Take photos before materials dry if you can do so safely. Fresh wet patterns are often easier to interpret than old stains after the water has spread or evaporated.
If attic staining is widespread or confusing, a more specific guide to how to check for chimney water intrusion in attics can help separate roofline leaks from top-down chimney moisture.
Wet Insulation or Rusted Nails
Wet insulation near the chimney is another warning sign. Insulation can hold moisture and hide the extent of a leak, so a small ceiling stain may represent a larger wet area above. Do not compress or disturb wet insulation more than necessary, especially if mold growth or electrical components may be present.
Rusted roofing nails near the chimney can also support the suspicion of repeated moisture. A few rusty nail tips do not prove flashing failure by themselves, but rust near stained sheathing, damp insulation, or water trails strengthens the case that moisture has been entering near the roof penetration.
Inspect the Visible Flashing Around the Chimney
After checking interior and attic clues, inspect the visible exterior flashing from a safe location. Use binoculars, a phone camera with zoom, or photos from a safe vantage point. Do not step onto unsafe roof areas or lift shingles to expose hidden flashing.
Look for metal that is bent, lifted, rusted, missing, separated from the chimney, or buried under old roof cement. Also look for dark staining below flashing lines, shingle damage beside the chimney, and gaps where the flashing should be tight against the masonry.
If you can only see part of the chimney base from the ground, inspect what is visible and document it with photos. A professional can use those photos along with attic clues to decide where the leak is most likely entering.
When documenting the inspection, note the date, recent weather, which side of the chimney appears wet or stained, and whether the leak happens during light rain, heavy rain, or wind-driven storms. Those details can help separate flashing leaks from crown, cap, mortar, or roof-surface problems.
Apron Flashing at the Lower Side
Apron flashing is usually located on the lower, downhill side of the chimney. It helps direct water from the front of the chimney onto the roof surface. During inspection, look for loose edges, rust, cracks, missing sections, or water stains below the apron.
Old roofing cement or tar around the apron can be a warning sign. It may mean someone tried to patch a leak in the past. The patch may be cracked, shrinking, or separating from the metal. Roofing cement can temporarily slow water in some situations, but it should not be mistaken for a properly functioning flashing system.
Step Flashing Along the Chimney Sides
Step flashing is used along the sides of the chimney where shingles meet the masonry. It is usually layered with the shingles so water is directed outward and downward. Because some of it may be hidden under shingles, homeowners often cannot inspect every piece without disturbing the roof.
From a safe viewing location, look for shingles that are lifted, buckled, damaged, or out of line beside the chimney. Also look for metal pieces that appear displaced or missing. If water stains appear inside the attic along one side of the chimney, sidewall step flashing may be one of the areas a professional needs to evaluate.
Counterflashing Against the Masonry
Counterflashing is the metal that covers the upper edge of the base flashing and helps keep water from getting behind it. It may be inserted into a mortar joint or attached against the chimney masonry. If counterflashing pulls loose, opens at the top edge, or separates from the brick or mortar, water can enter behind the flashing.
Look for gaps along the top edge of the counterflashing, cracked sealant, loose metal, missing fasteners, rust, or sections that no longer lie flat. If the mortar around the counterflashing is cracked or missing, water may be entering at the masonry joint rather than through the metal itself.
Back Flashing or Cricket Area on the Uphill Side
The uphill side of the chimney receives water flowing down the roof plane. This area is especially important because water can collect behind the chimney if it is not diverted properly. Wider chimneys may have a cricket or saddle that splits water around the chimney instead of allowing it to pond behind it.
From a safe location, look for debris buildup, dark staining, damaged shingles, ponding patterns, or visible gaps on the uphill side. If the attic shows stains on the uphill side of the chimney, that area deserves special attention. Water concentrated behind the chimney can overwhelm weak flashing details and create repeated leaks during heavy rain.
Check the Most Common Chimney Flashing Failure Points
Once you understand the main flashing parts, inspect for the failure clues that most often allow water behind the system. Some problems are obvious, such as missing metal or large gaps. Others are more subtle, such as old patches, hairline separation, or stains that appear only after wind-driven rain.
The purpose of this inspection is not to remove materials or repair the flashing yourself. It is to identify whether the flashing system may no longer be directing water away from the chimney. If several warning signs appear together, the likelihood of a flashing leak increases.
Rusted, Bent, or Lifted Flashing
Flashing metal should lie flat enough to direct water over the roof surface. Rusted, bent, lifted, or displaced flashing can create openings where water moves behind the metal instead of over it. Rust can also weaken the flashing and eventually create holes or thin areas.
Lifted flashing is especially important around the sidewalls and counterflashing. Even a small gap can become a water-entry point during wind-driven rain. If the metal moves, rattles, or appears pulled away from the chimney, it should be evaluated professionally.
Cracked Sealant or Old Roof Cement
Cracked sealant around chimney flashing is a common warning sign. Sealant can shrink, split, harden, or separate from metal and masonry over time. Once that happens, water may enter behind the patched area.
Old roof cement or tar patches deserve careful attention. These patches often indicate that a leak was suspected before. If the patch is cracked, raised, brittle, or peeling away, it may no longer be stopping water. In some cases, old patches hide improper flashing details underneath.
Caulk and roof cement should not be treated as the main flashing system. Proper flashing should direct water through overlapping materials and roof integration. Sealant may be part of a detail, but it is not a reliable substitute for missing, poorly layered, or displaced flashing.
Gaps Where Metal Meets Masonry
Look closely at the area where metal flashing meets the brick or mortar. Gaps, cracks, loose counterflashing, or missing mortar can allow water to enter behind the flashing. This is especially common where counterflashing is inserted into a mortar joint or sealed against the chimney face.
If mortar around the flashing is deteriorated, the leak may involve both flashing and masonry. Water may enter through the open joint, behind the flashing, or through the chimney wall itself. That is why chimney flashing inspection should include the masonry immediately around the flashing, not just the metal.
Exposed Nail Heads and Damaged Shingles
Exposed nail heads near chimney flashing can become leak points if they are not properly sealed or if the surrounding materials have shifted. Damaged shingles beside the chimney can also affect how water reaches the flashing. Curling, cracking, missing granules, or lifted shingles may send water toward weak flashing details.
Do not lift shingles to look for hidden step flashing. Step flashing is often covered by shingles, and disturbing the layers can create new damage. If shingles beside the chimney are visibly damaged or water stains appear inside along the chimney sidewall, a professional inspection is the safer next step.
How to Tell Flashing Leaks Apart from Other Chimney Leaks
Chimney flashing leaks can look similar to other chimney moisture problems. A ceiling stain near a chimney does not automatically prove flashing failure. The location, timing, and pattern of moisture clues help narrow the source.
A flashing leak usually starts at the roofline where the chimney meets the roof. It often shows up as attic staining near the chimney penetration, damp sheathing beside the chimney, water trails at the roof deck, or ceiling stains near the chimney chase. The symptoms may be worse during heavy rain, wind-driven rain, or storms that push water against one side of the chimney.
A crown leak starts higher, at the top of the chimney. If water is entering from cracked or poorly sloped crown surfaces, it may move down through the chimney structure before showing symptoms elsewhere. To inspect that area separately, compare your roofline clues with a guide on how to inspect chimney crowns for cracks.
Mortar leaks involve open or deteriorated joints in the chimney masonry. If the brick and mortar above the roofline show cracks, missing joints, or repeated dampness, water may be entering through the chimney wall rather than only at the roofline. For a closer masonry-specific inspection, use a separate guide to inspect chimney mortar for moisture damage.
A cap problem is different again. A chimney cap protects the flue opening from direct rain entry. A missing or damaged cap can allow water into the flue area, but it usually does not explain stains that clearly begin at the roof-to-chimney joint. If your strongest clues are at the roofline, flashing remains one of the first areas to evaluate.
If you want to understand why flashing problems develop in the first place, a cause-focused guide to how chimney flashing fails over time can help. This inspection article focuses on what to look for when you suspect the flashing may already be leaking.
When to Stop Inspecting and Call a Professional
Professional inspection is appropriate when the leak is active, the roof is unsafe to access, or the visible clues suggest flashing failure. Many flashing details are hidden under shingles, counterflashing, or roofing materials, so a homeowner can often identify warning signs but may not be able to confirm the exact failure point safely.
Call for professional evaluation if you see lifted or missing flashing, rusted metal, gaps between flashing and masonry, cracked roof cement, water-stained attic sheathing, wet insulation, or repeated ceiling stains after rain. These signs suggest water may already be getting behind the roof-to-chimney transition.
Professional inspection is also important if the same area has been patched before. Repeated caulking or roofing cement around the chimney often means the underlying flashing problem was not corrected. Temporary patching can delay leaks for a while, but it may fail again when the roof moves, sealant cracks, or water finds another edge.
If multiple chimney moisture sources are possible, the inspection should not stop at the flashing. Crown cracks, deteriorated mortar, saturated brick, missing caps, and roof damage above the chimney can all contribute to water intrusion. A full moisture-control approach should identify the entry path, correct the source, and then monitor the area as part of a plan to find, fix, and prevent moisture problems in homes.
Do not climb onto a dangerous roof to confirm a suspected flashing problem. If the roof is steep, high, wet, icy, soft, or difficult to access, stop at safe visual inspection. Photos, attic observations, and leak timing notes can still provide useful information for a roofer or chimney professional.
FAQ About Inspecting Chimney Flashing for Leaks
How do I know if chimney flashing is leaking?
Chimney flashing may be leaking if you see water stains near the chimney, damp attic sheathing around the chimney penetration, rusted nails, wet insulation, lifted flashing, cracked sealant, or gaps where metal meets masonry. The strongest clue is moisture that appears near the roof-to-chimney joint after rain.
Can I inspect chimney flashing from the ground?
Yes, you can inspect some chimney flashing clues from the ground using binoculars or a phone camera with zoom. Look for lifted metal, rust, old roof cement, gaps, missing pieces, and damaged shingles near the chimney. Ground inspection cannot reveal every hidden flashing detail, but it can show obvious warning signs.
What does bad chimney flashing look like?
Bad chimney flashing may look rusted, bent, loose, lifted, patched with old roof cement, separated from the masonry, or surrounded by cracked sealant. You may also see damaged shingles, water staining below the flashing line, or gaps along the counterflashing where it meets the chimney.
Can chimney flashing leak only during heavy rain?
Yes. Some chimney flashing leaks appear only during heavy rain or wind-driven storms. Wind can push water under lifted metal, behind counterflashing, or into small gaps that do not leak during light rain. This is why leak timing and storm direction can help identify flashing problems.
Is cracked sealant around chimney flashing a leak risk?
Yes, cracked sealant around chimney flashing can be a leak risk, especially if it is covering a joint where water can enter behind the metal. Sealant can shrink, split, or pull away from brick and flashing. Cracked sealant does not always prove an active leak, but it should be inspected.
Should I caulk chimney flashing myself?
Caulking chimney flashing may temporarily slow a minor leak, but it is not a reliable long-term repair for failed flashing. If the flashing is loose, missing, rusted, poorly layered, or separating from the chimney, caulk will not correct the underlying problem. Professional evaluation is safer when flashing failure is suspected.
If the flashing appears displaced, repeatedly patched, or integrated poorly with the roof, review when chimney flashing needs replacement before treating the issue as a simple sealant repair.
What should I write down before calling a roofer about chimney flashing?
Write down when the leak appears, which side of the chimney shows staining, whether the attic sheathing is damp near the roofline, and whether the problem happens during heavy rain or wind-driven storms. Photos of the ceiling stain, attic area, and visible flashing can make the professional inspection more accurate.
What to Do After a Chimney Flashing Inspection
After inspecting chimney flashing, compare the clues instead of relying on one sign. Damp sheathing near the roofline, water trails beside the chimney, lifted metal, cracked sealant, old roof cement, gaps along the masonry, and damaged shingles near the chimney all strengthen the case for flashing failure.
If the evidence points to failed flashing, avoid unsafe roof access and avoid treating caulk as a permanent fix. Chimney flashing is a layered water-control system. A qualified roofer or chimney professional can confirm whether the problem is loose counterflashing, missing step flashing, failed sealant, deteriorated mortar around the flashing, or another chimney leak source.