How to Inspect Chimney Mortar for Moisture Damage
Chimney mortar inspection helps you determine whether moisture has started damaging the joints between the bricks. The mortar joints are not just filler. They help hold the chimney masonry together and close the spaces where water could otherwise enter between bricks. When those joints crack, recede, soften, or go missing, the chimney becomes more vulnerable to leaks and long-term masonry damage.
Moisture-damaged mortar can show up in several ways. Some signs are subtle, such as joints that stay dark after rain. Others are more serious, such as sandy mortar, open gaps, missing joint material, or loose bricks. A careful inspection can help you separate normal weathering from conditions that may be turning into active water-entry paths.
Damaged chimney mortar can become one of the structural gaps where water enters homes. Once water gets between the bricks, it may move deeper into the chimney wall, reach attic or ceiling areas, or contribute to freeze-thaw damage during cold weather.
What Moisture-Damaged Chimney Mortar Looks Like
Moisture-damaged chimney mortar does not always look dramatic at first. Early damage may look like slight discoloration, shallow cracks, or joints that appear lower than the brick face. More advanced damage may include crumbling, missing mortar, repeated white staining, or gaps between bricks.
The key is to look for changes in both color and structure. A joint that darkens briefly during rain may simply be wet. A joint that stays dark, feels soft, has a sandy texture, or is recessed behind the brick face deserves closer attention.
Common inspection clues include:
- Mortar joints that remain dark long after rain stops
- White powdery staining on or near the joints
- Cracks running through the mortar lines
- Recessed joints that sit back from the brick face
- Sandy, powdery, or loose mortar texture
- Missing mortar between bricks
- Small gaps where water can enter the masonry wall
- Loose bricks or brick edges that appear unsupported
During inspection, separate surface clues from structural clues. Staining and dark joints show moisture movement. Cracks, recession, missing mortar, and loose brick show that the joint system itself may be weakening.
These clues do not all mean the same thing. Dark mortar after rain may be an early moisture pattern. Missing mortar is a more serious water-entry concern. Loose brick is a structural warning sign. Focus on severity, spread, and whether the same areas keep getting wet after storms.
If you need the cause-based explanation behind these joint changes, see why chimney mortar deteriorates over time. This article focuses on how to inspect the mortar once moisture damage is suspected.
Safety First: Where to Inspect From
Before inspecting chimney mortar, think about access and safety. Chimneys are often high, roof surfaces can be steep, and damaged masonry may be unstable. A useful inspection does not always require climbing onto the roof. Many important clues can be seen from the ground, attic, upper windows, porches, or other safe viewing areas.
Start with the safest inspection points first. From the ground, use binoculars or a phone camera with zoom to look for missing mortar, dark joints, white staining, cracks, or loose brick. If the chimney is visible from an upper window, deck, or nearby safe area, take photos so you can compare different sides of the chimney.
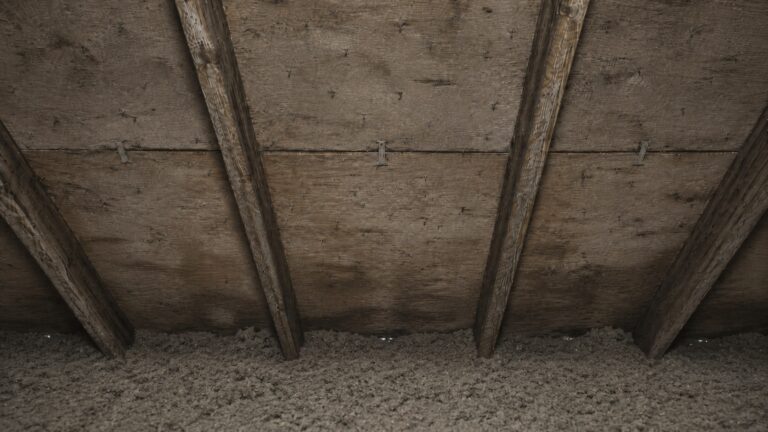
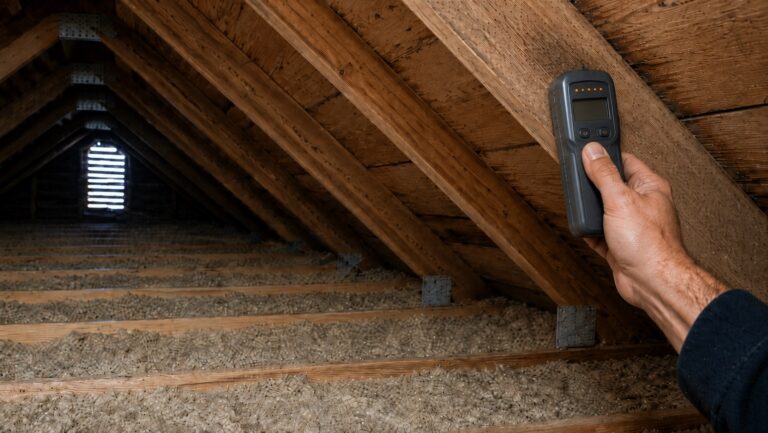
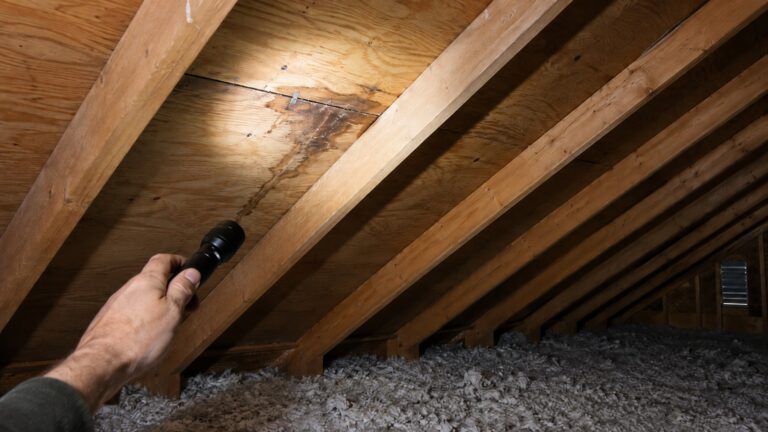
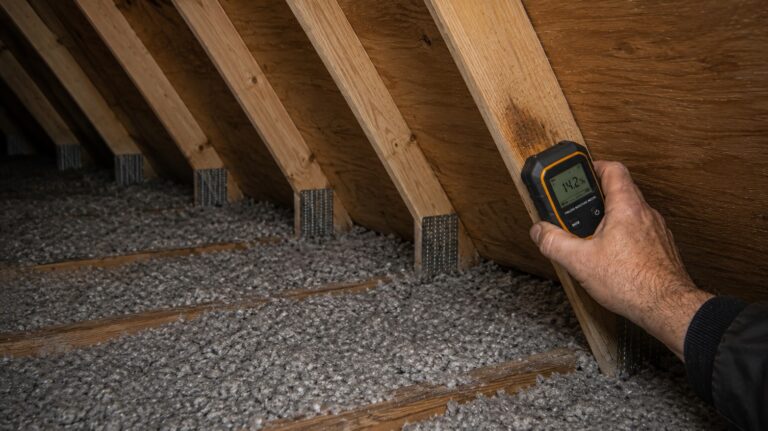
If you inspect from the attic or interior, look for moisture clues near the chimney path. Damp masonry, stained framing, wet insulation, or ceiling stains near the chimney may suggest that exterior mortar damage is allowing water deeper into the structure. Interior clues do not prove mortar failure by themselves, but they help show whether the chimney moisture problem has moved beyond the exterior face.
Avoid unsafe roof access. Do not climb onto steep, wet, icy, mossy, damaged, or high roof surfaces to inspect mortar. Do not lean ladders against unstable masonry. Do not scrape, pry, or dig into mortar joints aggressively. Removing weak material without proper repair can make the joint more vulnerable to water and may loosen already unstable masonry.
The goal of a homeowner inspection is observation. You are looking for patterns, not performing masonry repair. If the only way to inspect the mortar is by walking on a risky roof or reaching unstable chimney sections, stop and call a qualified professional.
Inspect Chimney Mortar After Rain
One of the best times to inspect chimney mortar for moisture damage is after rain, once conditions are safe. Rain makes moisture patterns more visible. Joints that absorb water may darken. Recessed areas may stay wet longer. Water trails, efflorescence, and repeated damp spots may become easier to identify.
Do not inspect during a storm or while the roof is wet. Instead, observe from safe locations after the rain has stopped. Compare the chimney sides, the upper and lower sections, and the areas near the crown, flashing, and exposed weather-facing walls.
Look for Joints That Stay Dark
Mortar can darken when it gets wet. That alone does not prove serious damage. The more important question is whether the joints dry at a normal pace or stay dark longer than surrounding masonry.
If one section of mortar remains dark while nearby joints and brick surfaces dry, that area may be holding moisture. The cause could be joint recession, porous mortar, runoff from the crown, wind-driven rain, or water entering through nearby defects. Repeated darkening in the same area after each storm is more meaningful than a one-time wet appearance.
Pay attention to dark joints directly below the chimney crown. If the upper chimney stays wetter than the lower chimney, water may be entering from above or being directed down the masonry face. In that case, mortar inspection should be paired with a look at how chimney crowns crack and allow water in.
Watch for Repeated Dampness in the Same Areas
Repeated dampness is more concerning than one wet appearance after a storm. If the same mortar joints darken after every rain and dry slower than surrounding areas, the chimney may be absorbing water through a consistent pathway.
Take photos from the same safe location after different storms. Compare the same chimney face over time. If one section keeps showing dark joints, white staining, or slow drying, that area should be inspected more closely. Repeated patterns are often more useful than a single snapshot.
For each photo, note the date, storm direction if you know it, and how long the joint stayed dark afterward. That simple record helps distinguish normal wetting from a recurring moisture pattern.
Also consider storm direction. If moisture appears only after wind-driven rain from one side, the weather-facing chimney wall may be taking on water through exposed joints. If moisture appears after ordinary rain and begins near the roofline, flashing or roof-to-chimney details may also need to be checked.
Compare Upper and Lower Chimney Sections
Comparing upper and lower chimney sections can help narrow the moisture source. If the upper chimney mortar is more stained, recessed, or damp than the lower sections, water may be entering from the top of the chimney, running down from a crown defect, or hitting the exposed upper masonry more heavily.
If the mortar damage is concentrated near the roofline, the issue may involve flashing, roof runoff, or water collecting where the chimney meets the roof. If damage appears across one entire face, wind-driven rain and exposed masonry absorption may be contributing factors.
Brick and mortar often show moisture together. If the brick face is dark and the joints are also damp, the chimney may be taking in moisture through both the brick surface and the mortar lines. For the masonry-unit side of that behavior, see how brick chimneys absorb moisture.
Check for Recessed, Cracked, or Missing Mortar
After looking at moisture patterns, inspect the physical condition of the joints. Mortar that is recessed, cracked, or missing is more serious than simple darkening after rain. These defects can let water sit in the joint or enter behind the brick face.
From a safe viewing location, look at the depth and shape of the joints. Sound mortar should not be deeply hollowed out, falling away, or separated from the brick edges. If the joints look uneven, washed out, or open, moisture may already be affecting the joint system.
Recessed Joints
Recessed mortar sits back from the face of the brick. This can happen as the joint erodes from weather, age, and repeated wetting. A slightly recessed joint may not be an emergency, but deeper recession creates grooves where water can collect during rain.
Those grooves matter because they keep the joint wetter for longer. Instead of water flowing over a relatively even chimney face, it settles between brick edges. If freezing temperatures occur while the joint is wet, the risk of freeze-thaw damage increases.
Recessed joints are especially concerning when they appear with dark staining, white residue, or loose material. That combination suggests both moisture movement and physical deterioration.
Cracked Mortar
Cracked mortar can let water enter the joint more easily. Some cracks are thin and shallow. Others extend deeper into the joint or run along the edge where mortar meets brick. The wider or deeper the crack, the more likely it is to act as a water-entry point.
Look for cracks that repeat across many joints, cracks near already damp areas, or cracks that appear around the roofline or below the crown. A single small crack may only need monitoring, but widespread cracking suggests the mortar system is weakening.
Cracks along the edges of the joint can be easy to miss. From a distance, they may look like shadow lines. Photos taken in good daylight can help reveal separation between mortar and brick.
Missing Mortar or Gaps Between Bricks
Missing mortar is one of the clearest warning signs. When the joint material is gone, water can enter directly between bricks instead of only through surface pores. This is no longer just moisture absorption; it is an open pathway into the chimney wall.
Gaps between bricks should be evaluated promptly, especially if they are widespread or located near the top of the chimney. Missing mortar can reduce water resistance and may also affect how well the surrounding brickwork is supported.
If you see open joints, do not try to fill them with random caulk, roofing cement, or surface patching. Damaged chimney mortar usually needs proper masonry evaluation. Temporary filling may hide the gap without restoring the joint correctly or allowing trapped moisture to dry.
Look for Efflorescence and Moisture Staining
Efflorescence is white, powdery mineral staining that can appear on brick or mortar after moisture moves through masonry and evaporates. It is a useful inspection clue because it shows that water has been traveling through the chimney material.
Efflorescence is often mistaken for mold, but exterior white powdery residue on chimney masonry is usually mineral staining, not mold growth. That does not mean it should be ignored. It means moisture is moving through the masonry often enough to leave deposits behind.
Look for white staining that appears near mortar joints, below the crown, around damaged brick, or in repeated streaks down the chimney face. If the staining returns after cleaning or appears after storms, the moisture source is still active.
Dark brown or black staining can also matter, especially if it follows a water path. Stains that run downward from specific joints, flashing edges, or crown areas may help show where water is collecting or entering. The pattern is often more useful than the color alone.
Test Mortar Texture Without Damaging the Chimney
Mortar texture can tell you a lot about moisture damage, but it should be checked carefully. The goal is not to scrape out joint material or test how much mortar you can remove. The goal is to identify whether the surface is firm, sandy, powdery, loose, or already falling apart.
If a mortar joint is safely accessible from the ground or another stable location, you may be able to touch the surface gently. Sound mortar should not easily turn to sand under light contact. If the surface sheds grains, crumbles at the edges, or leaves powder on your finger, the joint may be losing strength.
Do not dig into the joint with a screwdriver, knife, chisel, or other tool. Aggressive probing can enlarge weak spots and create a deeper opening for water. If the joint is already missing material or crumbling, the safest conclusion is that it needs professional evaluation rather than homeowner testing.
Also look for loose mortar pieces on the roof, in gutters, near the chimney base, or on the ground below the chimney. Falling material suggests that the deterioration is no longer limited to slight surface wear. If mortar is actively falling out, the joint system may be allowing water into the chimney wall.
Separate Mortar Moisture Damage from Other Chimney Leaks
Mortar moisture damage is one possible chimney leak source, but it is not the only one. A good inspection should compare mortar clues with crown, flashing, brick, cap, and roofline conditions. This helps avoid blaming the wrong part of the chimney.
Mortar damage usually shows up in the joints between bricks. Look for recessed lines, missing material, dark damp joints, white staining near mortar, and gaps between brick edges. If these signs appear across exposed chimney faces, moisture may be entering through the joint system.
Brick absorption looks different. The brick face itself may darken after rain, especially on the storm-facing side. The mortar may also be damp, but the main pattern is often surface wetting across brick units. Mortar damage is more focused on joint recession, cracking, and gaps.
Crown damage usually begins at the top of the chimney. If upper chimney joints are especially wet or damaged below the crown, the mortar may be suffering because water is entering from above. Crown defects can send runoff down the masonry and accelerate joint deterioration.
Flashing leaks usually begin around the roof-to-chimney joint. If stains appear in the attic near the roofline, or if moisture is concentrated where the chimney meets the roof, the next step may be to inspect chimney flashing for leaks. Flashing problems and mortar damage can also happen together, especially near the roofline.
Cap or flue problems are different from mortar joint damage. A missing or damaged cap can allow rain to enter the flue area directly, creating fireplace or flue moisture symptoms without widespread damaged mortar joints on the exterior face.
If you see obvious mortar deterioration and water-related symptoms, compare them with the signs chimney mortar is allowing water in. That kind of symptom-focused comparison can help confirm whether the joint system is likely part of the leak path.
When Damaged Chimney Mortar Needs Professional Evaluation
Damaged chimney mortar needs professional evaluation when the joints are open, missing, loose, widespread, or connected to active water symptoms. Minor surface wear may be monitored, but clear water-entry paths should not be ignored.
Call for evaluation if you see missing mortar between bricks, deep gaps, widespread recessed joints, loose bricks, falling mortar pieces, or cracks that extend through many joints. These conditions suggest that the joint system may no longer be protecting the chimney from water.
Professional evaluation is also important when mortar damage appears with interior symptoms. Ceiling stains near the chimney, damp attic framing, wet insulation, fireplace odors, or repeated water marks after rain suggest that moisture may have moved beyond the exterior surface.
Previous patching is another warning sign. If mortar joints were smeared over, caulked, or patched but the same areas keep staining or crumbling, the underlying joint problem may not have been corrected. Surface patches can fail quickly if water is still entering from the crown, flashing, brick face, or open masonry joints.
Repair may involve more than filling visible cracks. The damaged joint material may need proper masonry work, and any water source that caused the damage must also be addressed before the chimney is sealed or repointed.
Chimney mortar should be evaluated with the surrounding brick, crown, flashing, cap, and roofline because any of those areas can keep feeding water into the same damaged joints. A complete approach should identify the water source, evaluate affected materials, correct the defect, and monitor the area as part of a plan to find, fix, and prevent moisture problems in homes.
FAQ About Inspecting Chimney Mortar for Moisture Damage
What does moisture-damaged chimney mortar look like?
Moisture-damaged chimney mortar may look dark after rain, recessed behind the brick face, cracked, sandy, powdery, stained, or missing in places. White mineral staining near the joints can also suggest moisture movement through the masonry. More serious signs include open gaps, loose bricks, and mortar falling out.
Should chimney mortar stay dark after rain?
Chimney mortar may darken during rain, but it should not stay dark much longer than nearby masonry. If the same joints remain damp for days, darken after every storm, or dry much slower than the surrounding brick, moisture may be staying inside the joint system.
Is white staining on chimney mortar mold?
White staining on exterior chimney mortar is often efflorescence, not mold. Efflorescence is mineral residue left behind when moisture moves through masonry and evaporates. It is still an important moisture clue, especially if it keeps returning after rain or cleaning.
Can crumbling mortar let water into a chimney?
Yes. Crumbling mortar can let water enter between chimney bricks. Once the joint material is missing or loose, rainwater has a more direct path into the chimney wall. This can lead to deeper moisture movement, freeze-thaw damage, stains, and recurring leaks.
Can I inspect chimney mortar from the ground?
Yes, many chimney mortar problems can be inspected from the ground using binoculars or a phone camera with zoom. Look for missing mortar, dark joints, white staining, cracks, gaps, and loose brick. Ground inspection may not show every detail, but it can reveal major warning signs.
When should damaged chimney mortar be repaired?
Damaged chimney mortar should be evaluated for repair when joints are missing, deeply recessed, cracked, sandy, loose, or connected to interior moisture symptoms. Falling mortar pieces, loose bricks, damp attic areas, or repeated stains near the chimney are stronger warning signs than minor surface discoloration.
Chimney Mortar Inspection Checklist
- Check mortar joints from safe viewing points before climbing or touching the chimney.
- Early clues include dark joints after rain, white staining, shallow cracks, and slight recession.
- More serious clues include sandy mortar, missing joint material, open gaps, loose bricks, and falling mortar pieces.
- Efflorescence is usually mineral staining from moisture movement, not mold.
- Recessed mortar joints can hold water longer and speed up future deterioration.
- Photograph the same chimney face after different storms to confirm whether damp joints are recurring.
- Professional evaluation is needed when mortar damage is widespread, connected to leaks, or unsafe to inspect closely.
What to Do After Inspecting Chimney Mortar
After inspecting chimney mortar, separate minor moisture patterns from actual joint failure. Dark joints after rain and white staining may call for monitoring, but cracks, recession, sandy texture, missing mortar, open gaps, or loose brick point to a more serious problem.
Document recurring damp areas, compare photos after different storms, and check whether exterior joint damage lines up with attic, ceiling, or fireplace moisture symptoms. That pattern is often more useful than one damp-looking joint after a single rain.
If the mortar is open, loose, missing, falling out, or connected to interior leak symptoms, stop at documentation and get the chimney evaluated. The repair may involve repointing, masonry repair, or correction of another water source such as crown, flashing, or cap failure.