
How to Maintain Chimney Flashing
Chimney flashing is one of the most important water-control details on a roof. It protects the joint where the chimney meets the roofing system, helping rainwater move around the chimney instead of entering the attic, roof decking, insulation, or ceiling materials below.
This article focuses on maintaining chimney flashing that is still basically intact. If the flashing is missing, badly rusted, loose, or repeatedly leaking, the issue may have moved beyond maintenance and into replacement or professional repair.
Good chimney flashing maintenance is not just a matter of adding more sealant. It means keeping the flashing area clean and visible, clearing debris before it traps moisture, watching for rust, lifting, gaps, cracked sealant, and old patching, and checking the attic after storms to confirm that water is not getting past the roof-to-chimney joint.
Why Chimney Flashing Maintenance Matters
A chimney interrupts the roof surface. That interruption creates a vulnerable transition where water must be redirected away from the opening. If the flashing at that transition fails, rainwater can enter beside the chimney and move into hidden areas before anyone sees damage inside the home.
Flashing leaks are often hard to spot early because the first signs may appear in the attic rather than in the living space. Water can wet roof sheathing, rust nail tips, dampen insulation, or follow rafters before it becomes a visible ceiling stain. Routine flashing maintenance helps catch weak points before the leak spreads.
Chimney flashing also matters because it is exposed to harsh conditions. Rain, snow, wind, sun, temperature swings, roof movement, debris buildup, and freeze-thaw cycles can all affect flashing over time. Even properly installed flashing can need periodic inspection as materials age.
Chimney flashing is one part of exterior water-entry control. Understanding how water enters homes through structural gaps helps explain why the roof-to-chimney joint should be checked before leaks become obvious indoors.
If the home has had previous chimney leaks, monitor the repaired area after storms. Returning stains, cracking roof cement, or damp attic insulation may mean the flashing is still not controlling water properly.
What Chimney Flashing Is Supposed to Do
Chimney flashing is designed to direct water away from the joint between the chimney and the roof. It does not work like one simple bead of caulk. It usually works through overlapping metal pieces that shed water in layers.
Step flashing is commonly installed along the sides of the chimney where the roof covering meets the masonry. Each piece overlaps with the roofing material so water flows down the roof without entering behind the chimney. Counterflashing is installed into or against the chimney masonry and covers the upper edge of the step flashing. Together, these pieces help keep water from entering the roof-to-chimney joint.
On the uphill side of the chimney, flashing must also handle water flowing down the roof toward the chimney. Depending on the chimney size and roof design, this area may need careful drainage so water does not collect behind the chimney. If water sits against flashing or debris blocks drainage, the risk of leakage increases.
Good flashing should look secure, properly layered, and free from obvious gaps. It should not be loose, heavily rusted, buried under thick roof cement, pulled away from masonry, or surrounded by trapped debris. The goal is for water to flow over the flashing and roofing materials without finding a path underneath.
Sealant may be present in some flashing details, but sealant is not the main water-control system. If the flashing depends entirely on exposed caulk or roof cement to keep water out, it may be vulnerable. Maintenance should focus on whether the flashing still appears properly seated, layered, and able to shed water.
Flashing maintenance should also fit into a broader chimney leak prevention routine. The flashing protects the roof-to-chimney joint, while the crown, cap, masonry, and roof surface protect other water-entry areas. A complete plan to prevent water leaks around chimneys should include all of these components.
How Often to Check Chimney Flashing
Chimney flashing should be checked at least once a year as part of routine roof and exterior moisture maintenance. Annual inspection helps catch rust, lifting, cracked sealant, debris buildup, or loose metal before water reaches the attic.
It is also smart to check flashing after major weather events. Wind-driven rain, hail, heavy snow, ice, falling branches, and freeze-thaw cycles can expose weak flashing details. Even if the flashing looked fine before the storm, a shifted edge, cracked patch, or loosened counterflashing can allow water to enter during the next rain.
Good times to inspect chimney flashing include:
- Before the rainy season
- After winter freeze-thaw weather
- After major storms or high winds
- After roof work near the chimney
- After noticing ceiling stains near the chimney
- After finding damp insulation or staining in the attic
- During annual gutter, roof, or chimney maintenance
Do not assume flashing is fine just because there is no ceiling stain. Water may wet roof sheathing, insulation, framing, or the top side of ceiling drywall before the damage becomes visible indoors.
If the chimney has leaked before, increase the inspection frequency. A previously repaired flashing area should be checked after several storms to confirm that moisture is not returning. This is especially important if the repair involved surface patching rather than proper flashing correction.
Keep Debris Away From the Flashing Area
Debris control is one of the simplest chimney flashing maintenance tasks. Leaves, pine needles, moss, sticks, seed pods, and roof grit can collect around the chimney and hold moisture against flashing and roofing materials. When debris stays wet, it can speed up corrosion, hide gaps, and slow drainage around the roof-to-chimney joint.
The uphill side of the chimney deserves special attention because water flows down the roof toward that area. If debris builds up behind the chimney, water may pond or back up against flashing. Over time, this can increase the risk of leaks, especially if the flashing is already aging or poorly sealed.
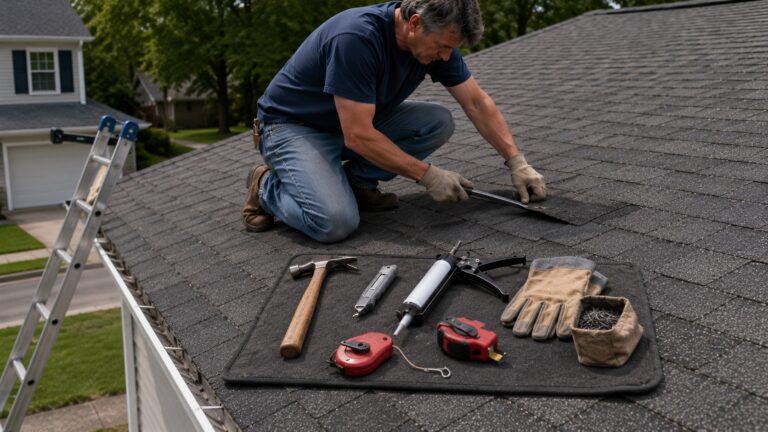
From the ground, look for visible debris piles, dark damp areas, moss growth, or branches touching the chimney. If the roof is safe and accessible, debris may be cleared carefully during routine maintenance. If the roof is steep, wet, icy, high, or difficult to access, have debris removed by a professional instead.
Debris should not be allowed to cover flashing edges. If flashing is hidden under leaves, moss, roof cement, or accumulated grit, you cannot properly inspect it. Do not scrape aggressively under flashing edges or pry metal loose while cleaning; the goal is to expose the area for inspection, not disturb the water-shedding layers. A clean, visible flashing area makes it easier to notice rust, lifted metal, cracked sealant, or gaps before they become water-entry paths.
Tree cover affects how often debris control is needed. Homes with overhanging branches may need flashing and gutter areas checked more often than homes with open rooflines. If debris returns quickly after cleaning, trimming branches back from the roof may help reduce future buildup.
Look for Rust, Lifting, Gaps, and Failed Sealant
Once the flashing area is visible, look for signs that the metal or surrounding joints are no longer shedding water properly. You do not need to diagnose every roofing detail during routine maintenance, but you should know which visual clues suggest that the flashing needs attention. For a more detailed step-by-step check, use a separate guide to inspect chimney flashing for leaks.
Rust or Corrosion
Rust can indicate that metal flashing has been exposed to repeated moisture or that protective coatings have worn away. Light surface rust may not mean an immediate leak, but it should be monitored. Heavy rust, holes, flaking metal, or staining running down from flashing are more serious warning signs.
If rust appears in the same area as attic moisture or ceiling staining, the flashing should be inspected professionally. Corrosion can weaken metal and may create openings that are difficult to see from the ground.
Lifted or Loose Metal
Flashing should sit securely against the roof and chimney details. If metal edges are lifted, bent, curled, or pulled away from masonry, wind-driven rain may enter behind them. Loose flashing is especially concerning on the uphill side of the chimney or where counterflashing meets the masonry.
Do not try to force loose flashing back into place without understanding how it is layered. Flashing works by overlap and water direction. Bending or sealing the wrong area can trap water instead of shedding it.
Visible Gaps
Gaps around the chimney flashing may appear as dark openings, separations at mortar joints, cracks where metal meets masonry, or spaces under flashing edges. Any gap that can collect or admit wind-driven rain deserves attention.
Some small joints may be part of the flashing design, while others are failure points. If you are unsure, photograph the area and compare it after storms, or have it evaluated during routine roof maintenance.
Cracked or Missing Sealant
Sealant can fail as it ages. It may crack, shrink, pull away, harden, or separate from metal and masonry. Failed sealant does not always mean the flashing itself has failed, but it can expose vulnerable joints that should be checked.
Sealant should not be the only thing keeping water out. If the flashing appears to depend entirely on caulk, tar, or roof cement, the system may not be properly shedding water. That is a maintenance warning sign, not just a cosmetic issue.
Watch for Old Patching and Roof Cement Buildup
Old roof cement around chimney flashing deserves careful attention. A small amount of compatible sealant may be part of a maintenance detail, but thick black patches, uneven smears, cracked tar, or multiple layers of roof cement often suggest that the chimney area has leaked before.
Heavy patching can create several problems. It can hide loose flashing, cover rusted metal, trap moisture, make water flow unpredictably, and make future leak diagnosis harder. It may also crack as it ages, allowing water to enter through the same area again.
Repeated patching is especially concerning. If the same chimney flashing area has been sealed again and again, the flashing may not be properly integrated with the roof or masonry. In that case, maintenance may no longer be enough. The underlying flashing detail may need professional evaluation.
Do not assume that more roof cement creates better protection. Flashing is supposed to shed water through proper layering and overlap. If roof cement is acting as the main water barrier, the system may be vulnerable during heavy rain, heat, cold, or roof movement. Avoid smearing new roof cement over wet, loose, rusted, or poorly layered flashing as a routine maintenance step; that can hide the defect and delay the repair that actually stops the leak.
Check the Attic After Heavy Rain
Exterior flashing maintenance should be confirmed from inside the attic when possible. The flashing may look acceptable from the ground, but attic staining can reveal whether water is still entering around the chimney.
After heavy rain or wind-driven rain, safely inspect the attic area around the chimney. Look for dark stains on roof sheathing, damp insulation, rusted nail tips, water trails on rafters, musty odors, or wet ceiling drywall below the chimney area. These clues may appear before water reaches the visible ceiling below.
Attic inspection is especially important after flashing maintenance or repair. If sealant was refreshed, debris was cleared, or a professional repaired a flashing detail, the attic should be checked after the next few storms. The goal is to confirm that moisture is not returning.
If you find attic stains near the chimney, do not assume the flashing is the only source. Crown cracks, masonry absorption, nearby roof defects, and condensation can also create attic moisture. A more complete process to check for chimney water intrusion in attics can help separate flashing-related clues from other moisture sources.
Maintain the Chimney Crown and Masonry Too
Chimney flashing maintenance works best when the rest of the chimney is also maintained. Flashing protects the roof-to-chimney joint, but it does not protect the top of the chimney, the flue opening, or deteriorated masonry surfaces.
If the chimney crown is cracked, flat, crumbling, or separated around the flue, water may enter from above even if the flashing is in good condition. Crown problems can send moisture down into masonry or nearby attic areas and may be mistaken for flashing leaks. As part of seasonal chimney maintenance, it is wise to inspect chimney crowns for cracks along with the flashing.
Brick and mortar condition should also be watched. Missing mortar, spalling brick, white staining, soft masonry, or dark damp areas can suggest that water is soaking into the chimney itself. If masonry is absorbing water, flashing maintenance alone will not solve the full moisture problem.
The chimney cap matters too. A missing or damaged cap can allow rain into the flue opening and may contribute to rust, odors, or damp chimney conditions. A cap does not replace flashing, but it helps reduce direct water exposure at the top of the chimney.
Think of chimney maintenance as a system. If the crown, cap, masonry, or nearby roof surface is neglected, water may still find another path into the home even when the flashing looks acceptable.
When Maintenance Is No Longer Enough
Maintenance is appropriate when the flashing is still basically intact and only needs monitoring, cleaning, or minor attention. It is not enough when the flashing is missing, badly rusted, visibly loose, poorly layered, separated from the chimney, or repeatedly leaking.
Some flashing problems require replacement or professional repair because the water-shedding system itself has failed. Holes in the metal, counterflashing pulled out of the masonry, an open roof-to-chimney joint, or old patching that keeps cracking are signs that another maintenance pass may only delay the leak.
Maintenance is also no longer enough when interior symptoms appear. Damp attic insulation, stained roof decking, wet ceiling drywall, musty odors, or recurring stains after rain suggest that water may already be entering. At that point, the flashing should be evaluated along with the crown, masonry, cap, and nearby roof surface.
If you are unsure whether the flashing can still be maintained or should be replaced, use a decision-focused guide on when chimney flashing needs replacement. Replacement decisions should be based on condition, leak history, installation quality, safety, and whether water is still reaching hidden materials.
Seasonal Chimney Flashing Maintenance Checklist
A seasonal checklist helps keep chimney flashing from being ignored until water damage appears. The checklist does not replace professional roof or chimney service, but it gives homeowners a practical way to spot early warning signs.
Use this checklist at least once a year, after major storms, and any time attic moisture appears near the chimney:
- Inspect the flashing area from the ground with binoculars or a camera zoom lens.
- Look for leaves, moss, branches, pine needles, or roof debris trapped around the chimney.
- Check for rust stains, lifted metal, bent edges, or loose flashing sections.
- Look for cracks, gaps, or missing mortar where counterflashing meets the chimney.
- Watch for cracked, shrinking, or missing sealant at vulnerable joints.
- Look for thick roof cement, old tar patches, or repeated patching around the flashing.
- Check the attic after heavy rain for stains, damp insulation, or rusted nail tips near the chimney.
- Inspect the chimney crown, cap, and masonry so flashing is not blamed for every chimney leak.
- Photograph questionable areas so you can compare them after future storms.
- Call a professional if flashing is loose, corroded, repeatedly patched, or associated with interior moisture.
Maintenance is most effective when it is repeated. A flashing area that looks acceptable in spring may look different after a summer storm season or winter freeze-thaw cycle. Regular checks help prevent small weaknesses from becoming recurring water problems.
FAQ About Maintaining Chimney Flashing
How often should chimney flashing be maintained?
Chimney flashing should be checked at least once a year and after major storms. Homes with older roofs, overhanging trees, past chimney leaks, or freeze-thaw exposure may need more frequent checks.
Can I maintain chimney flashing myself?
You can visually inspect flashing from the ground, keep debris away when access is safe, photograph changes, and check the attic after storms. Do not climb onto steep, wet, icy, high, or fragile roofs, and do not attempt complex flashing repairs without proper skill and safety equipment.
Should I seal chimney flashing every year?
No. Flashing should not need yearly sealing as a substitute for proper water shedding. Sealant may be used in some maintenance situations, but repeated sealing often means the flashing needs closer inspection or repair.
What should I check first during chimney flashing maintenance?
Start with visibility and drainage. Make sure debris is not covering the flashing, then look for lifted metal, rust, cracked sealant, old roof cement, and attic stains after rain.
Is rust on chimney flashing serious?
Light surface rust may be a warning sign to monitor, but heavy rust, holes, flaking metal, rust stains, or rust combined with attic moisture is more serious. Corroded flashing may need professional evaluation.
Does roof cement stop chimney flashing leaks?
Roof cement may temporarily cover some leak paths, but it is not a reliable substitute for properly installed flashing. Heavy or repeated roof cement patches can hide failed flashing and make leaks harder to diagnose.
When does chimney flashing need replacement instead of maintenance?
Replacement may be needed when flashing is missing, loose, badly rusted, poorly layered, separated from masonry, full of failed patching, or still leaking after maintenance. Interior stains or damp attic insulation also raise the urgency.
Final Maintenance Advice for Chimney Flashing
Maintaining chimney flashing is a practical way to reduce the risk of roof and chimney leaks. The flashing protects a vulnerable transition where the chimney passes through the roof, and small defects can allow water into hidden attic materials before the damage becomes visible indoors.
Keep the flashing area clean, watch for rust and lifted metal, do not rely on heavy roof cement, and check the attic after storms. Maintain the chimney crown, cap, and masonry at the same time so the entire chimney water-control system keeps working together.
Flashing maintenance should also be part of a broader effort to prevent recurring moisture damage. For homeowners building a full prevention routine, chimney flashing checks belong alongside regular roof, attic, wall, and moisture inspections that help find, fix, and prevent moisture problems in homes.

2 Comments
Comments are closed.