How to Evaluate Hidden Water Damage
Hidden water damage is moisture or material damage that extends beyond the visible wet spot. It may be behind drywall, under flooring, inside cabinets, above ceilings, behind baseboards, inside insulation, or around structural materials. A surface may look dry while moisture remains trapped inside absorbent materials or enclosed spaces.
Evaluating hidden water damage means working in order: identify the water source, follow the likely travel path, check absorbent materials, compare visible symptoms, use moisture tools when needed, and decide whether the area needs professional inspection. The goal is not to tear open every wall or floor immediately. The goal is to decide what can be monitored, what needs closer inspection, and what should not be covered back up yet.
This guide explains how to evaluate hidden water damage in a practical, whole-home way. It covers walls, flooring, ceilings, cabinets, fixtures, appliances, tools, documentation, and when professional inspection is needed. For a broader location-based inspection system, see this guide to find hidden moisture in different areas of your home.
If this evaluation is part of a larger moisture problem, see how to find, fix, and prevent moisture problems in homes for the broader sitewide moisture-control framework.
What Hidden Water Damage Means
Hidden water damage does not always mean severe structural damage. It simply means water reached an area that cannot be fully evaluated from the surface. That area may dry without major repair if the leak was small, clean, and addressed quickly. But it may also stay damp long enough to damage materials, create odors, loosen finishes, or support mold growth.
Common hidden water damage areas include:
- Behind drywall near plumbing, windows, doors, or exterior walls
- Under finished flooring and carpet padding
- Inside ceiling cavities below roof or plumbing leaks
- Behind baseboards and floor trim
- Inside sink cabinets, vanities, and cabinet toe-kicks
- Inside insulation above ceilings or inside walls
- Around subfloors, joists, bottom plates, and framing
- Behind appliances with water lines or drain connections
The challenge is that hidden damage often appears indirectly. A homeowner may not see wet framing or damp insulation, but they may notice musty odor, swelling, staining, soft materials, loose trim, warped flooring, or repeated dampness in the same area.
Surface cleanup can create false confidence. A floor may be dry on top while padding, underlayment, or subflooring remains damp. A wall may look normal while the lower drywall edge behind the baseboard stays wet. A ceiling stain may stop dripping while wet insulation above it still holds moisture.
That is why evaluating hidden damage starts with water movement, not just visible staining. Water follows gravity, gaps, seams, absorbent materials, and enclosed spaces. If you understand where water likely traveled, you can inspect the highest-risk areas first.
Start With the Water Source and Direction of Travel
The first step is to identify the likely water source. Hidden damage cannot be evaluated well until you know where the water entered or where it was released. A leak from a supply line behaves differently than water from a roof leak, overflowing toilet, dishwasher failure, window leak, or basement seepage.
Start by asking:
- Where did the water first appear?
- What was directly above, below, or beside that area?
- Was the water source clean, dirty, exterior, plumbing-related, or unknown?
- How long was the area wet before it was discovered?
- Did water run under flooring, behind trim, into cabinets, or through ceiling openings?
- Did the stain, odor, or dampness grow after cleanup?
Mark the suspected source and the farthest visible sign of moisture. Then inspect the space between those two points, including seams, floor edges, wall bases, cabinet backs, ceiling openings, and the room on the opposite side of the wall.
Then follow the likely path of water. Water usually moves downward, but it can also spread sideways through seams, under flooring, along framing, behind baseboards, and across low spots before showing up somewhere else. The first visible stain is not always the source. It may only be the place where water finally escaped.
For example, a ceiling stain below an upstairs bathroom may come from a toilet seal, shower drain, supply line, tub overflow, or wall cavity leak. A stain along a baseboard may come from water under flooring rather than a leak inside the wall. A wet cabinet floor may come from a sink drain, supply valve, dishwasher line, or water that entered from behind the cabinet.
If the suspected source is plumbing inside a wall, a dedicated leak-tracing process may be needed. This article focuses on evaluating the damage pattern, but this guide to detect plumbing leaks inside walls is a better fit when the main question is where the active plumbing leak is located.
Check the Most Vulnerable Materials First
Some building materials handle brief water exposure better than others. Hard nonporous surfaces may clean up quickly if water is removed fast. Absorbent, layered, enclosed, or wood-based materials are more likely to hide moisture and suffer damage.
Prioritize these materials during a hidden damage evaluation:
- Drywall: The face may look dry while the lower edge or back side remains damp.
- Insulation: Fiberglass, cellulose, and other insulation materials can hold moisture inside walls, ceilings, and attics.
- Baseboards and trim: Trim can swell, separate, or trap moisture against drywall.
- Cabinets: Particleboard, MDF, plywood, and cabinet backs can swell or delaminate after leaks.
- Carpet padding: Padding can stay wet even when the carpet surface feels dry.
- Laminate and engineered flooring: Seams and cores can swell when water gets below the surface.
- Hardwood flooring: Wood can cup, crown, gap, or hold moisture below the finish.
- Subflooring: Plywood or OSB subfloors can swell, soften, or remain damp beneath finished flooring.
- Ceiling drywall: Water above a ceiling can weaken the panel and create collapse risk.
- Framing: Bottom plates, joists, studs, and sheathing can remain damp after repeated or prolonged exposure.
The more absorbent or enclosed the material is, the more carefully it should be evaluated. A puddle on tile may be simple if cleaned quickly and the edges stayed dry. The same amount of water under cabinets, behind baseboards, or beneath laminate flooring may create a hidden moisture problem.
If the leak affected a larger area, think in layers. Surface water is only the first layer. The next layers may include flooring, underlayment, subfloor, wall base, trim, drywall, insulation, and framing. Hidden damage is often found one layer below what the homeowner can see.
Warning Signs That Water Spread Behind or Under Surfaces
Hidden water damage usually leaves clues. These clues may be subtle at first, especially after the visible water has been wiped up. The goal is to look for changes in materials, odors, and moisture patterns that suggest water moved beyond the original wet spot.
Warning signs that water may have spread behind or under surfaces include:
- Musty odor after cleanup
- Stains that keep spreading or returning
- Soft drywall near the floor, ceiling, or plumbing areas
- Swollen baseboards or trim
- Paint bubbling, peeling, or blistering
- Warped, cupped, lifted, or buckled flooring
- Flooring that feels soft, uneven, or spongy
- Cabinet swelling, delamination, or dark staining
- Loose caulk around fixtures, tubs, showers, sinks, or backsplashes
- Condensation or dampness in nearby enclosed spaces
- Higher humidity in one room compared with nearby rooms
- Mold-like odor without visible mold
- Moisture readings that remain elevated after drying efforts
One sign alone does not always prove serious hidden damage. A small stain may be old, and a slight odor may come from wet contents instead of building materials. Several signs together deserve closer inspection, especially near an active leak, recent water event, or area that stayed wet for more than a short time.
Pay attention to symptoms that appear after cleanup. A room that smells musty the next day, flooring that starts to lift, or baseboards that swell several inches away from the original leak may indicate that water traveled into concealed materials.
Recurring symptoms are especially important. If staining returns after repainting, a cabinet keeps smelling damp, or a floor stays soft after drying, the hidden moisture source may not be resolved. In that case, the problem is no longer just cleanup. It is an evaluation issue.
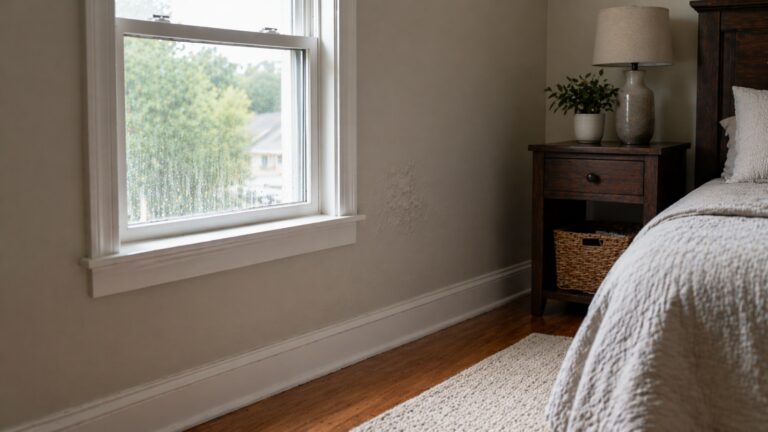
How to Evaluate Walls and Baseboards
Walls and baseboards often hide water damage because water collects at the lower wall edge, behind trim, and inside small gaps. Even when the visible wall surface looks normal, the back of the drywall or the lower edge behind the baseboard may still be damp.
Start by inspecting the area below and beside the visible water damage. Look for discoloration, paint bubbles, soft drywall, loose trim, swollen baseboards, or gaps where trim has pulled away from the wall. Use a flashlight along the baseboard line to reveal shadows, swelling, or uneven edges.
Check both sides of the wall if possible. Water inside a wall cavity may show symptoms in an adjacent room, closet, hallway, or cabinet. A leak behind a bathroom wall may appear as a stain in a neighboring bedroom. A kitchen sink leak may show up along the wall behind the cabinet or under flooring at the wall base.
Baseboards deserve special attention because they can hide moisture at the floor-wall joint. MDF trim can swell quickly, painted wood can cup or separate, and caulk lines can split when moisture pushes behind the trim. If the baseboard looks swollen or the wall above it feels soft, hidden moisture may be present.
For a more focused symptom guide, see these signs of water damage behind baseboards. This article uses baseboards as part of a whole-home hidden damage evaluation, but baseboard-specific problems may need their own closer inspection.
If you suspect moisture inside a wall but do not want to start demolition, non-invasive methods can help. A moisture meter, thermal imaging scan, careful comparison readings, or inspection around penetrations may reveal whether the wall needs further evaluation. For more detail, see how to detect moisture without opening walls.
How to Evaluate Flooring and Subfloors
Flooring is one of the most common places hidden water damage develops. Water can move under finished floors, into seams, beneath appliances, below cabinets, and into underlayment or subflooring. A surface may feel dry while the layers below remain damp.
Start by identifying where the water touched the floor and how far it could have spread. Look at low spots, seams, transitions, room edges, and areas under cabinets or appliances. Water often travels under flooring farther than expected, especially on smooth surfaces or beneath floating floors.
Different flooring materials show hidden moisture in different ways:
- Laminate flooring may swell at seams, bubble, lift, or feel hollow.
- Hardwood flooring may cup, crown, gap, darken, or feel uneven.
- Vinyl flooring may trap moisture below the surface, especially near seams and edges.
- Carpet may feel dry on top while the padding underneath remains wet.
- Tile floors may hide moisture in grout lines, underlayment, or subflooring if water entered around edges or cracks.
Walk carefully around the affected area and feel for soft spots, raised seams, sponginess, or unusual movement. Look for staining at floor edges and transitions. Check around toilets, dishwashers, washing machines, refrigerators, tubs, showers, water heaters, and sink cabinets because these are common places where water spreads beneath flooring.
Do not assume flooring is safe just because the top surface is dry. Carpet padding, underlayment, and subflooring can hold moisture after the visible water is gone. If flooring was wet for an extended period or if the floor feels soft, a deeper inspection may be needed.
Because flooring problems can become highly material-specific, this broader evaluation should link into a dedicated guide when the floor is the main concern. If water may have reached beneath finished surfaces, see how to inspect flooring for hidden moisture.
How to Evaluate Ceilings and Attic Areas
Ceilings can hide water damage because the visible stain is often only the exit point. Water may have entered from a roof leak, plumbing leak, bathroom fixture, HVAC drain, attic condensation problem, or wet insulation above the ceiling. By the time the ceiling shows staining, water may already have traveled through layers above it.
Start by looking at the size, shape, and behavior of the ceiling stain. A small dry stain that is not changing may be a lower-risk sign after the source is fixed. A stain that grows, darkens, drips, bulges, or causes the ceiling to sag should be treated more seriously.
Warning signs around ceilings include:
- Brown, yellow, or gray stains that spread
- Paint bubbling or peeling below the leak
- Sagging, bowing, or bulging drywall
- Water dripping through seams, vents, or fixtures
- Soft or crumbling ceiling material
- Loose drywall tape or cracked seams
- Musty odor near the ceiling or attic access
- Damp insulation above the stained area
If the ceiling is sagging, bulging, actively dripping, or near electrical fixtures, do not stand under it. Ceiling damage can become a safety issue when wet drywall, plaster, insulation, or trapped water adds weight above the room. For safety-focused warning signs, see this guide on ceiling collapse risk after water damage.
If the ceiling is below an attic, the attic may need to be evaluated after the immediate safety risk is addressed. Look for wet insulation, darkened sheathing, water trails on rafters, damp ductwork, staining around roof penetrations, or moisture near vents. Do not walk through an attic if the ceiling below may be unstable or if electrical hazards are present.
Ceiling stains can also come from plumbing or bathroom leaks above the room. In that case, the ceiling stain may not line up exactly with the source because water can travel along framing before it appears below. Inspect the fixture, plumbing wall, floor area, and surrounding rooms above the stain.
If the ceiling shows early symptoms but not collapse risk, this guide on signs of ceiling water damage can help separate general ceiling moisture symptoms from more serious hidden damage concerns.
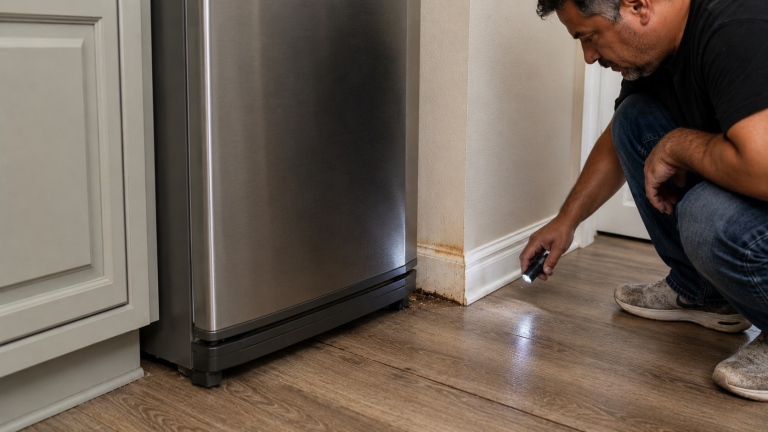
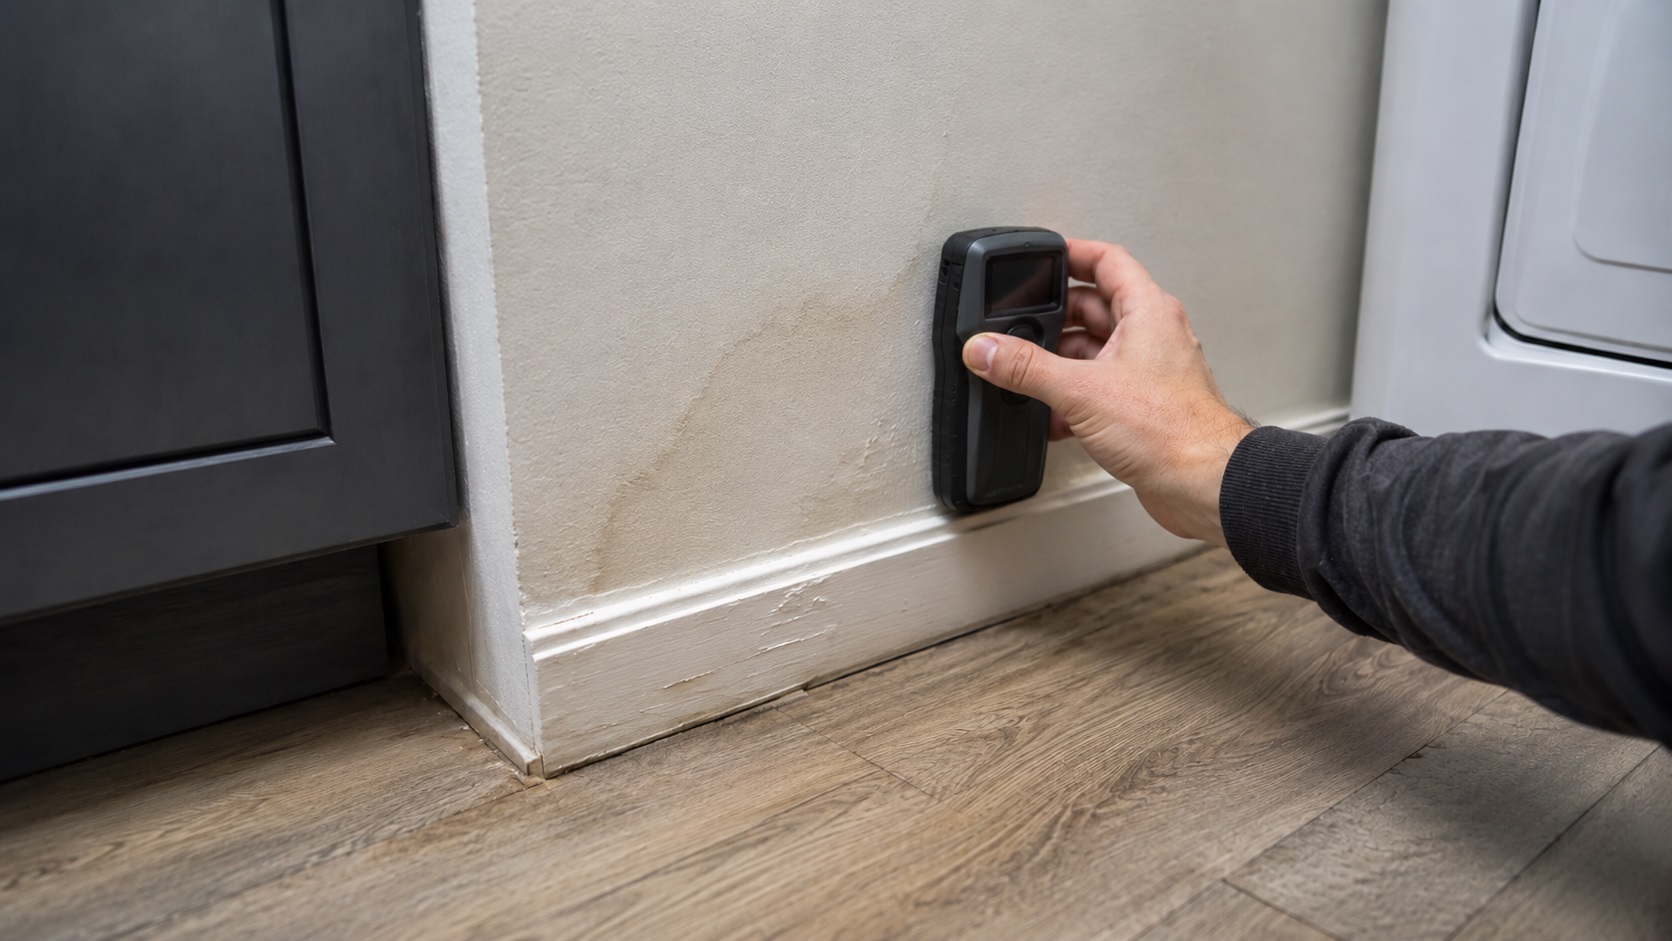
How to Evaluate Cabinets, Fixtures, and Appliances
Cabinets, fixtures, and appliances often hide water damage because leaks occur in enclosed spaces. A sink cabinet, vanity, dishwasher opening, refrigerator water line area, or washing machine wall may look mostly normal from the outside while the back, base, toe-kick, or nearby floor is damp.
Start with the area closest to the fixture or appliance. Use a flashlight to inspect cabinet floors, side panels, backs, toe-kicks, wall penetrations, shutoff valves, supply lines, drain connections, and nearby flooring. Look for swelling, dark staining, peeling laminate, soft particleboard, musty odor, loose caulk, rusted hardware, or warped panels.
Common hidden-damage areas include:
- Under kitchen and bathroom sink cabinets
- Behind dishwasher openings
- Below refrigerator water lines
- Behind washing machines
- Around toilet bases and bathroom vanities
- Inside cabinet toe-kicks
- Behind backsplashes and wall bases
- Under appliance edges where water could run out of sight
Cabinet materials can be especially vulnerable because many cabinet boxes use particleboard, MDF, plywood, or laminated panels. These materials may swell, delaminate, soften, or hold odor after water exposure. A cabinet floor that looks slightly rippled or smells damp may indicate more than surface moisture.
If the problem is under a sink, the damage pattern may include the cabinet base, the wall behind the cabinet, nearby flooring, and the lower wall outside the cabinet. For more location-specific symptoms, see these signs of water damage under sink cabinets.
Appliance leaks require extra attention because water can run behind or below the appliance before appearing in front. A dishwasher leak may damage subflooring under the appliance. A refrigerator water line leak may soak the wall and floor behind the unit. A washing machine leak may enter the wall cavity behind the supply box or spread under nearby flooring.
A cabinet or appliance area may still need evaluation after the visible puddle is gone. Musty odor, swollen toe-kicks, lifting flooring, or soft wall material behind the fixture can all point to hidden moisture.
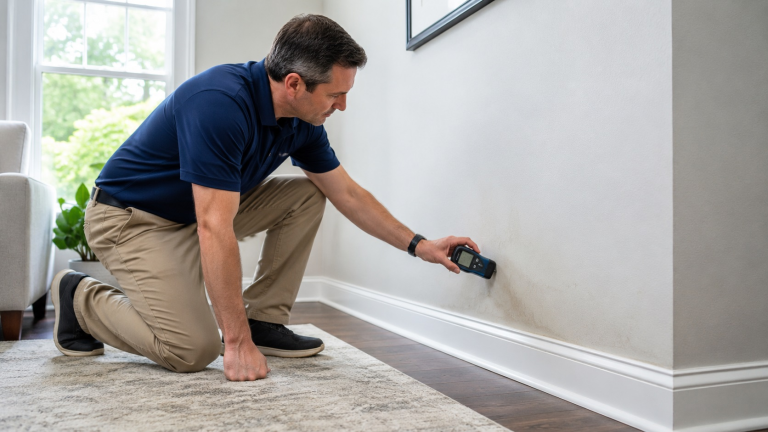
Tools That Help Find Hidden Moisture
Visual inspection is important, but tools can help when hidden water damage is uncertain. Tools do not replace judgment, and they do not always identify the exact source of the problem, but they can help determine whether materials are still damp or whether further inspection is needed.
Common tools include:
- Moisture meters: These can help screen drywall, wood, trim, flooring, and other materials for elevated moisture.
- Thermal imaging cameras: These may show temperature differences that suggest damp areas, air leaks, or hidden moisture patterns.
- Hygrometers: These measure indoor humidity and can help show whether one room remains more humid than nearby spaces.
- Borescopes: These can inspect small cavities through existing openings or small access points when appropriate.
- Flashlights: A strong light can reveal shadows, swelling, stains, separation, and texture changes along edges and seams.
A moisture meter is often the most practical homeowner tool, but readings need context. Different materials have different normal moisture levels, and paint, finishes, salts, metal fasteners, dense materials, and surface contamination can affect readings. Compare the suspicious area with a similar unaffected area nearby instead of relying on one isolated number.
Thermal imaging can be helpful, but it does not directly “see water.” It shows surface temperature differences. A cool area may suggest evaporation from damp material, but it may also be caused by air leaks, insulation gaps, HVAC airflow, or exterior temperature differences. Thermal images are most useful when combined with moisture meter readings and a clear understanding of the water path.
Hygrometers can help identify rooms that stay unusually humid after a leak, especially in closed rooms, closets, basements, bathrooms, or areas with poor ventilation. A high humidity reading does not prove hidden water damage by itself, but it can support further inspection when paired with odor, staining, or material changes.
Use tools as screening aids, not final proof. If readings remain elevated, the damaged area smells musty, or multiple materials show symptoms, professional inspection may be needed before the area is closed, painted, or repaired.
When Hidden Damage Needs Professional Inspection
Some hidden water damage can be evaluated with careful observation, documentation, and basic moisture tools. Other situations need professional inspection because the damage may involve structural materials, electrical hazards, insulation, widespread moisture, or areas that cannot be safely accessed without opening building materials.
Call a professional when you notice:
- Water near electrical fixtures, outlets, switches, or panels
- Any area where you cannot inspect safely without standing under sagging material, disturbing wet electrical components, or entering contaminated water
- Sagging ceilings, soft subfloors, or structural movement
- Moisture readings that remain elevated after drying
- Musty odor that continues after cleanup
- Wet insulation inside walls, ceilings, attics, or crawl spaces
- Warped flooring across a wide area
- Cabinets, trim, or drywall that continue swelling
- Water damage from a sewage backup, floodwater, or contaminated source
- Repeated leaks in the same area
- Damage that affects multiple rooms or building assemblies
The right professional depends on the source and location. A plumber may be needed for hidden pipe leaks. A roofer may be needed for attic or ceiling leaks after rain. A restoration contractor may be needed for drying, moisture mapping, and material removal. A flooring contractor may be needed when water spreads below finished flooring. An electrician may be needed if water reached fixtures or wiring.
Professional inspection is especially important before closing walls, reinstalling trim, replacing flooring, or painting over damaged areas. If hidden moisture remains sealed inside materials, the problem may return as odor, staining, swelling, mold growth, or structural deterioration.
What to Document During the Evaluation
Documentation matters because hidden water damage can change quickly. Materials may dry, stains may fade, demolition may remove evidence, or repairs may cover the original damage. Good documentation helps you compare conditions over time and explain what happened to contractors, inspectors, or insurance representatives.
During the evaluation, document:
- The date and time the water was discovered
- The likely water source
- Photos and videos of visible damage before cleanup
- Photos of adjacent rooms, wall bases, flooring, cabinets, and ceilings
- Areas that smelled musty or felt damp
- Moisture meter readings, including comparison readings from dry areas
- Invoices or notes from plumbers, roofers, restoration contractors, or appliance repair technicians
- Temporary repairs made to stop the water source
- Materials removed during emergency drying
- Symptoms that returned after initial cleanup
If an insurance claim is involved, documentation becomes even more important. An adjuster may need to understand what the damage looked like before cleanup, what materials were affected, and whether additional hidden damage was found later. For claim inspection preparation, see what insurance adjusters look for during water damage inspections.
When taking notes, focus on facts rather than assumptions. Instead of writing “mold inside the wall,” write “musty odor near lower wall and soft drywall beside baseboard.” Instead of writing “subfloor ruined,” write “floor feels soft near dishwasher and laminate seams are lifting.” Clear observations help professionals evaluate the damage more accurately.
What to Do When Hidden Water Damage Is Confirmed
Once hidden water damage is found, the next step is to control the source and prevent the damage from spreading. Do not focus only on drying the visible surface. If the water source is still active, the same area can become wet again after repairs.
Start with these priorities:
- Stop the water source. Shut off a supply line, repair the leak, stop using the fixture, or call the right trade professional.
- Protect safety first. Stay away from wet electrical areas, unstable ceilings, contaminated water, and soft structural surfaces.
- Document before removal. Take photos and notes before damaged materials are removed when it is safe to do so.
- Dry or remove affected materials. Some materials can dry; others may need removal if they are saturated, swollen, contaminated, moldy, or structurally weakened.
- Monitor the area after drying. Watch for returning stains, odor, swelling, or elevated moisture readings.
- Correct the condition that allowed the moisture. Repair leaks, improve drainage, fix ventilation, seal water entry points, or replace failed materials as needed.
The correct response depends on the material. Wet drywall may need drying or removal depending on saturation and condition. Carpet padding often holds water even when the carpet surface feels dry. Cabinet particleboard may swell permanently. Ceiling drywall may become unsafe if it sags or traps water. Subflooring may need deeper evaluation if it feels soft after drying.
If multiple repairs are needed, separate the evaluation step from the repair sequence. Hidden damage evaluation identifies what may be affected; repair prioritization decides what should be fixed first.
If walls were affected, this guide on how to dry walls after water damage can help with the next phase after the hidden moisture evaluation. If the problem is part of a recurring pattern, focus on how to prevent recurring moisture damage before closing the area back up.
FAQ About Evaluating Hidden Water Damage
Can water damage be hidden after the surface looks dry?
Yes. A dry surface does not prove that drywall cores, insulation, subflooring, carpet padding, cabinet bases, or wall cavities are dry. Persistent odor, swelling, softness, or elevated moisture readings are signs that deeper evaluation may be needed.
How do I know if water got behind drywall?
Look for soft drywall, bubbling paint, stains near seams, swollen baseboards, musty odor, or moisture readings that remain elevated compared with dry areas. Water may also appear on the opposite side of the wall or near lower edges. If the wall stays damp or smells musty, professional inspection may be needed.
How do I know if water got under flooring?
Signs include lifted seams, cupping, buckling, soft spots, spongy movement, musty odor, staining at floor edges, or moisture readings that remain high. Carpet padding, underlayment, and subflooring can stay wet after the surface dries. Flooring-specific inspection may be needed if the water spread widely.
Does a musty smell mean hidden water damage?
A musty smell can indicate hidden moisture, but it does not identify the exact source by itself. The odor may come from wet drywall, cabinets, carpet padding, insulation, contents, or enclosed cavities. If the smell continues after cleanup and ventilation, look for damp materials or call a professional.
Can a moisture meter find hidden water damage?
A moisture meter can help screen materials for elevated moisture, but it does not provide a complete answer by itself. Readings should be compared with dry areas and interpreted by material type, location, recent cleaning, and the likely water path. High readings may justify further inspection.
When should I call a professional for hidden water damage?
Call a professional if damage is widespread, moisture remains after drying, ceilings are sagging, floors feel soft, electrical areas are involved, insulation is wet, odors persist, or the source is unclear. Professional inspection is also wise before closing walls or reinstalling flooring over areas that were wet.
Should I open walls to check for water damage?
Do not open walls as the default first step for every small leak. Start with source control, visible clues, moisture readings, and non-invasive inspection when possible. Opening walls may be necessary if moisture remains hidden, materials are saturated, or professional evaluation shows that concealed damage is likely.
Key Takeaways
- Hidden water damage can remain behind walls, under flooring, above ceilings, inside cabinets, and inside insulation after the surface looks dry.
- Start evaluation by identifying the water source and following the likely path of travel.
- Absorbent and enclosed materials are the highest-risk areas for hidden moisture.
- Musty odor, swelling, soft materials, warped flooring, bubbling paint, and recurring stains are important warning signs.
- Moisture meters and other tools can help, but they do not replace professional inspection in high-risk situations.
- Do not close, paint, or cover damaged areas until hidden moisture risk has been addressed.
Final Check Before Closing the Area Back Up
Evaluating hidden water damage starts with the path water may have taken. Water can move behind trim, under flooring, into cabinets, above ceilings, and inside wall cavities before the homeowner realizes how far it traveled.
Before closing the area back up, confirm that the source is controlled, the likely water path has been checked, vulnerable materials have been evaluated, and remaining warning signs have been addressed.
Once hidden damage is found, stop the source, document the condition, dry or remove affected materials as needed, and monitor the area before closing it back up. The goal is not just to clean up visible water. The goal is to confirm that moisture is no longer trapped where it can cause damage again.