What Insurance Adjusters Look For During Water Damage Inspections
During a water damage inspection, an insurance adjuster usually looks for the cause of the water, the timing of the loss, the materials affected, how far the water spread, and the documentation that supports the claim. The inspection is an evidence-gathering step, not just a quick look at a stain, wet floor, or damaged cabinet.
The best way to prepare is to be organized and accurate. Show what happened before cleanup or repairs changed the scene, explain the timeline clearly, and avoid guessing about a cause you cannot confirm.
This guide explains what insurance adjusters typically look for during water damage inspections, how to prepare before the visit, and what mistakes can make the inspection harder. It focuses on inspection awareness, not photo strategy or the full filing process. If you still need to open the claim, start with this guide on how to file a water damage insurance claim.
What the Adjuster Is Trying to Confirm
An insurance adjuster is usually looking for more than visible water damage. The adjuster needs to understand whether the physical evidence matches the reported loss, including the water source, timing, damaged materials, water path, and likely repair scope.
In simple terms, the adjuster is usually trying to answer these questions:
- What caused the water damage?
- When did the damage happen or when was it discovered?
- Was the damage sudden, gradual, recurring, or long-term?
- Which rooms, surfaces, and materials were affected?
- Did the water spread beyond the obvious visible area?
- What emergency repairs or drying work were already performed?
- What documentation supports the claim?
- What repair work appears necessary based on the visible damage and available evidence?
This is why preparation matters. A homeowner who can explain when the leak was discovered, what was done to stop it, which areas got wet, and what photos or invoices are available gives the adjuster a clearer claim file to review.
The inspection does not always decide everything on the spot. The adjuster may inspect the home, take measurements, photograph damage, prepare an estimate, and send information for further review. Coverage decisions, payments, supplements, and final claim closure may happen later. If you are trying to understand the overall timeline, see this guide on how long water damage insurance claims take.
The Source and Cause of the Water Damage
One of the first things an adjuster looks for is the source of the water. The source matters because water damage claims often depend on what caused the damage, how suddenly it happened, and whether the source fits the policy language.
The adjuster may look for clues near:
- Plumbing supply lines
- Drain pipes and traps
- Toilets, tubs, showers, and sinks
- Water heaters
- Washing machines and dishwasher connections
- Refrigerator water lines
- HVAC condensate drain lines
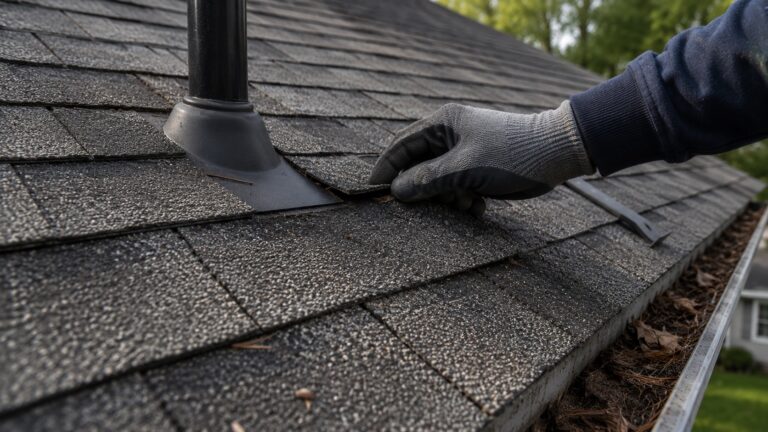
- Roof penetrations and attic areas
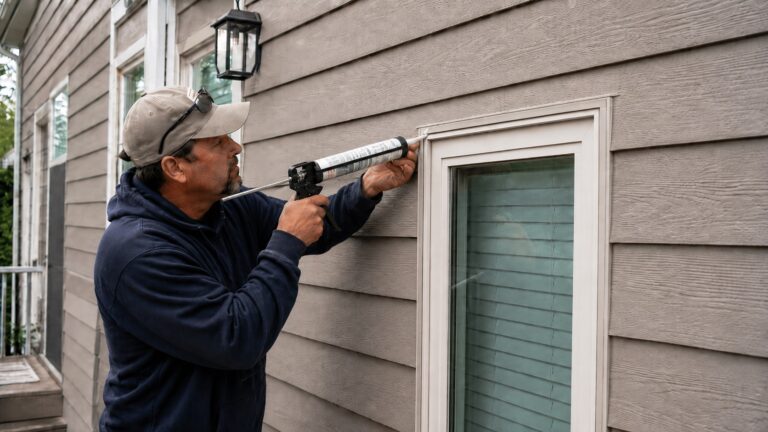
- Windows, exterior doors, siding, and flashing
- Basements, crawl spaces, or foundation entry points
The adjuster may also compare the reported cause with the pattern of damage. For example, water staining directly below an upstairs bathroom may support a plumbing or fixture leak. Wet flooring near a dishwasher may point toward an appliance leak. Ceiling stains after a storm may raise questions about roof, flashing, or exterior water entry. Dampness along a basement wall may suggest seepage or drainage problems instead of a sudden indoor leak.
Homeowners should be careful not to guess with too much certainty if they do not know the cause. It is better to say, “We found water on the floor near the dishwasher and shut off the supply line,” than to state a cause that later turns out to be wrong. If a plumber, roofer, HVAC technician, or restoration contractor has inspected the problem, save that report or invoice for the claim file.
Coverage questions can become more complicated when the source is a leak. A sudden supply line failure may be treated differently than a long-term drip, repeated seepage, or unresolved maintenance issue. If the source of water is unclear, this guide on whether insurance covers water damage from leaks can help explain why the cause matters so much.
Whether the Damage Looks Sudden or Long-Term
Adjusters often look for clues that help distinguish sudden water damage from damage that may have developed slowly over time. This does not mean an adjuster can always know the full history from appearance alone. But material condition, staining patterns, odor, deterioration, and previous repair marks can raise questions about how long the moisture was present.
Sudden water damage may involve fresh wet materials, recent staining, clean water from a known source, new swelling, or damage connected to a specific event. Long-term moisture may involve repeated stains, old discoloration, soft or deteriorated wood, chronic musty odor, rusted fasteners, microbial growth, or signs that the area has been wet more than once.
This distinction matters because policies often treat sudden and accidental damage differently from gradual deterioration or repeated leakage. The adjuster may ask when the homeowner first noticed the damage, whether the water source was stopped, whether repairs were attempted before, and whether similar damage appeared in the same area in the past.
Homeowners should answer these questions honestly and clearly. If the damage was discovered on a specific day but may have been hidden before that, say so. Hidden leaks can exist behind cabinets, under flooring, or inside walls before obvious symptoms appear. Clear communication is better than trying to force the damage into a timeline that may not match the evidence.
If you are unsure what the policy may treat as covered water damage, review what water damage insurance typically covers. The adjuster inspection helps collect facts, but the insurance company still applies the policy terms during the claim review.
Visible Damage to Walls, Ceilings, Floors, Cabinets, and Trim
Visible damage is usually the easiest part of the inspection to understand, but it is still important. The adjuster may look at the damaged materials, measure affected areas, photograph surfaces, and note whether the visible damage appears connected to the reported water source.
Common visible signs the adjuster may inspect include:
- Ceiling stains or water rings
- Soft, sagging, or cracked ceiling drywall
- Discoloration on walls or baseboards
- Peeling, bubbling, or blistered paint
- Swollen trim or separated baseboards
- Warped, cupped, or buckled flooring
- Soft spots in flooring or subflooring
- Swollen cabinet panels or toe-kicks
- Wet insulation or exposed damp materials
- Musty odors near the damaged area
The adjuster may also look at whether the damage is limited to finishes or whether it may involve deeper materials. A small stain on drywall may be a surface repair if the wall cavity is dry. But if the drywall is soft, insulation is wet, baseboards are swollen, or the floor feels spongy, the repair scope may be larger.
Ceilings deserve special attention because water can collect above the drywall before visible staining appears below. A ceiling stain may look minor at first, but sagging, cracking, bulging, or dripping can suggest trapped water or weakened material. Avoid standing directly under the damaged area, poking the ceiling, or pulling down wet material unless the area has been evaluated safely.
Flooring can also complicate the inspection. Finished flooring may hide wet underlayment, adhesive failure, or subfloor damage. Laminate may swell at seams, hardwood may cup or crown, vinyl may trap moisture below the surface, and carpet padding may hold water even when the top feels dry. If the adjuster only sees the finished surface, contractor notes or moisture readings may help show whether the problem extends below it.
Cabinets and trim are also important because they often absorb water at edges and lower sections. A sink base, dishwasher opening, refrigerator water line area, bathroom vanity, or baseboard near a leak may show swelling, delamination, staining, or odor. These details help show how far the water reached.
Signs Water May Have Spread Beyond the Obvious Area
Water rarely stays exactly where it first appears. It can travel along framing, under flooring, behind trim, into insulation, through ceiling cavities, and across low spots in subfloors. During a water damage inspection, the adjuster may look for signs that the damaged area is larger than the most visible stain.
For example, a leak under a kitchen sink may damage the cabinet floor, but it may also run behind the cabinet, under nearby flooring, or along the wall base. A dishwasher leak may show up at the front of the appliance, but the subfloor under the unit may have been wet longer than the visible floor edge. A ceiling stain may mark where water exited, not necessarily where it entered.
Clues that water may have spread beyond the obvious area include:
- Baseboards swelling several feet away from the source
- Floor seams opening or lifting outside the visible wet spot
- Musty odor in nearby rooms or cabinets
- Paint bubbling below or beside the main stain
- Moisture readings that extend beyond the visible mark
- Wet insulation behind drywall or above ceilings
- Cabinet panels swelling near the floor
- Trim separating from the wall
- Recurring dampness after surface cleanup
This is one reason homeowners should show the adjuster every area that changed after the water damage, not just the most obvious stain. If the floor feels different, a cabinet smells musty, a nearby wall feels soft, or trim has started to swell, point it out during the inspection.
Hidden moisture can also affect the long-term outcome of the repair. If water remains trapped after the claim is handled, the home may develop odors, mold concerns, swollen materials, or recurring stains. A broader approach to finding, fixing, and preventing moisture problems helps homeowners think beyond the visible surface damage.
Documentation the Adjuster May Review
Documentation helps the adjuster understand what happened before the inspection, especially if emergency drying, cleanup, or temporary repairs have already changed the damaged area. Clear records make it easier to connect the original damage to the claim.
An adjuster may review:
- Photos and videos from before cleanup
- Photos showing the water source or damaged component
- Plumber, roofer, appliance, or HVAC repair invoices
- Mitigation company invoices
- Drying logs and moisture readings
- Contractor repair estimates
- Receipts for temporary repairs
- Notes showing when the damage was discovered
- Lists of damaged personal property if contents were affected
Photos are especially useful, but this article is not a full photo checklist. For detailed photo guidance, use this guide on how to photograph water damage for insurance. For this inspection, the key point is simple: photos should show what the adjuster may not be able to see anymore.
Invoices and service notes can matter because they help identify the source and timeline. A plumber invoice may show that a supply line failed. A roofer’s report may explain a flashing leak. A restoration company’s drying log may show which rooms were wet and how moisture levels changed over time.
Homeowners should keep these records organized and easy to share. A folder, email chain, or claim portal upload can help prevent repeated requests for the same information. If the adjuster asks for a specific document, write it down and confirm how it should be submitted.
Emergency Repairs and Drying Work
Water damage inspections often happen after emergency work has already started. If water was actively spreading, materials were saturated, or the home was at risk of further damage, the homeowner may have needed to stop the water source, remove standing water, open wet materials, or bring in a restoration company before the adjuster arrived.
The adjuster may look at what emergency work was done and whether that work was connected to the reported damage. This can include water extraction, demolition of saturated materials, drying equipment, moisture monitoring, temporary plumbing repairs, roof tarping, or other steps taken to protect the home.
Emergency work can support a claim when it is documented clearly. It can also create questions if damaged materials were removed without photos, receipts, or contractor notes. If drywall, flooring, insulation, baseboards, cabinets, or ceiling materials were removed before the inspection, the adjuster may need documentation showing why removal was necessary.
Useful mitigation records may include:
- Photos before wet materials were removed
- Photos during demolition or drying
- Moisture readings from affected materials
- Drying equipment logs
- Restoration company invoices
- Notes identifying which rooms and materials were wet
- Plumber, roofer, HVAC, or appliance repair records
- Receipts for temporary repairs or materials
Homeowners should not delay urgent drying just to preserve the scene exactly as it was. Wet materials can deteriorate, and some damage can spread if the home is left untreated. The better approach is to document the damage before cleanup whenever it is safe, then keep records of what was removed, dried, repaired, or temporarily protected.
If you are still in the first stage after a loss, this guide on what to do immediately after water damage for insurance can help keep emergency actions and claim documentation aligned.
How to Prepare Before the Adjuster Arrives
Preparing for a water damage adjuster inspection does not mean staging the home or trying to influence the outcome unfairly. It means making the damage accessible, organizing documentation, and being ready to explain what happened clearly.
Before the adjuster arrives, try to make the affected areas easy to inspect. Move stored items away from damaged walls, cabinets, appliances, baseboards, or flooring if it is safe to do so. Do not block access to the water source, damaged materials, attic entry, basement area, crawl space access, or mechanical equipment related to the claim.
Prepare a short timeline of the event. This does not need to be complicated. Write it in plain order: when the damage was discovered, what you saw first, what you did to stop the water, who you called, when cleanup or drying began, which contractors visited, what repairs have already been made, and any new damage noticed afterward. A simple timeline helps the adjuster connect the physical evidence to the reported loss.
It is also helpful to gather documents before the visit. These may include photos, videos, service invoices, repair estimates, drying records, receipts, and notes from emergency calls. If the insurer has already given you a claim number, keep it available.
During the inspection, show the adjuster all areas that may be related to the water damage. Do not assume the adjuster will automatically notice a swollen cabinet side, a damp closet wall, a soft floor section, or a faint stain in an adjacent room. Point out what changed after the water event and explain what you know about it.
If you suspect hidden damage, say so clearly and explain why. For example, you might mention that the floor still feels soft after drying, a cabinet smells musty, a baseboard has continued to swell, or a ceiling stain grew after the leak was stopped. The adjuster may not open walls or floors during the visit, but those observations can help shape the repair scope or prompt additional review.
After the inspection, ask what happens next. Useful questions include:
- Will you prepare the repair estimate?
- Do you need additional photos, invoices, or reports?
- Is the damage still under coverage review?
- How should I submit contractor estimates?
- How should hidden damage be reported if repairs reveal more?
- Can damaged materials be discarded now, or should they be kept longer?
- Will the payment be initial, partial, or final, and how should supplements be handled if hidden damage is found later?
What Not to Do Before the Inspection
Some mistakes can make a water damage inspection harder than it needs to be. The biggest mistake is removing or repairing damaged materials without any documentation. If wet drywall, flooring, trim, cabinets, or insulation must be removed quickly, photograph the materials first and keep invoices or notes explaining the reason for removal.
Another mistake is throwing away damaged items too soon. If soaked baseboards, flooring samples, appliance parts, supply lines, or cabinet pieces are safe to keep temporarily, ask the insurer or adjuster whether they need to inspect them before disposal. Do not keep unsafe, contaminated, or hazardous materials in the home, but do document them before they are removed.
Homeowners should also avoid permanent cosmetic repairs before the damage has been documented. Painting over a stain, replacing flooring, patching drywall, or reinstalling trim may make the home look better, but it can also make the original damage harder to evaluate. Temporary repairs that stop water or protect the home are different from permanent finish repairs that erase evidence.
Do not exaggerate the damage. The adjuster’s job is to compare the reported loss with the physical evidence and documentation. If the homeowner overstates the damage, guesses at causes, or claims unrelated old damage as new, it can create credibility problems and slow the claim down.
It is also unhelpful to hide prior damage. If an area had older staining or a previous repair, be honest about it. The current claim may still involve new damage, but the adjuster needs to separate what happened in the current event from what already existed. These kinds of documentation gaps and timeline problems are also among the common reasons water damage claims are denied.
Do not ignore signs that the home is still wet. If odors, soft materials, swelling, or dampness remain after surface cleanup, point those areas out during the inspection. Visible dryness does not prove that hidden materials are dry.
FAQ About Water Damage Adjuster Inspections
Should I clean up before the water damage adjuster comes?
You should take reasonable steps to stop the water and prevent further damage, but document the damaged area before major cleanup when it is safe. Photos, videos, invoices, and notes help show the original condition after drying, demolition, or temporary repairs have changed the scene.
What should I show the insurance adjuster?
Show the adjuster the water source if known, every visibly damaged area, nearby materials that changed after the leak, photos from before cleanup, repair invoices, mitigation records, contractor estimates, and any areas where you suspect hidden moisture. Do not limit the inspection to the most obvious stain or wet spot.
Does the adjuster check for hidden water damage?
The adjuster may look for signs that water spread beyond the visible damage, such as swollen trim, soft flooring, musty odor, bubbling paint, wet insulation, or moisture readings from a contractor. The adjuster may not open walls or floors during the visit, but hidden damage concerns can affect the repair scope and follow-up review.
Will the adjuster use a moisture meter?
Some adjusters use moisture meters, and some rely on restoration contractors, inspectors, or mitigation records for moisture readings. A moisture meter can help identify damp materials that are not visibly wet, but readings usually need to be interpreted with the material type, damage pattern, and drying history in mind.
Should I keep damaged materials for the adjuster?
If it is safe and practical, keep damaged materials until the adjuster or insurance company says they can be discarded. This may include flooring samples, damaged trim, appliance parts, supply lines, or cabinet pieces. If materials are unsafe or must be removed quickly, photograph them first and keep removal records.
Can a contractor be present during the adjuster inspection?
In many cases, a contractor or restoration professional can be present to explain observed damage, drying work, moisture readings, or repair scope. The homeowner should still provide honest information and avoid turning the inspection into an argument. The goal is to make the damage and documentation clear.
What if the adjuster misses some damage?
If you believe damage was missed, document the area clearly and ask the insurer how to submit additional information. Contractor photos, revised estimates, moisture readings, and notes from repairs may support a supplement if the damage is related to the same water event. Do not cover up or repair the area before documenting it.
Water Damage Adjuster Inspection Checklist
- Insurance adjusters look at the cause, timing, visible damage, moisture spread, documentation, and repair scope.
- The inspection is an evidence-gathering step, not always the final claim decision.
- Visible stains are only part of the inspection; hidden moisture and surrounding materials may also matter.
- Photos, invoices, drying records, and contractor notes can help explain what happened before cleanup changed the scene.
- Homeowners should document damage before major cleanup whenever safe, but they should not delay emergency mitigation that protects the home.
- Accuracy matters. Exaggerating, guessing, or hiding prior damage can create problems during claim review.
How to Make the Inspection Easier to Review
Insurance adjusters look for more than the most obvious water stain. They evaluate the source of the water, the timing of the loss, the materials affected, the way water moved through the home, and the documentation that supports the claim. A clear inspection helps the insurer understand what happened and what repair scope may be connected to the water damage.
The best way to prepare is to stay organized. Document the damage before cleanup when possible, keep invoices and repair records, make the damaged areas accessible, and be ready to explain the timeline honestly. Point out every area that changed after the water event, including nearby rooms, cabinets, trim, flooring, ceilings, and spaces where hidden moisture may be present.
After the inspection, ask what happens next, what documents are still needed, and how to report additional damage if repairs reveal more. A water damage inspection is only one part of the claim process, but good preparation can help prevent confusion, missed damage, and avoidable delays.