How to File a Water Damage Insurance Claim Step by Step
Filing a water damage insurance claim works best when you follow the right order. The first priority is safety. The second is stopping more water from spreading, if you can do that safely. The third is documenting the damage before cleanup, demolition, or repairs remove important evidence.
Water damage claims can become confusing because the damage may keep changing after the first few hours. Wet drywall can soften, flooring can swell, cabinets can absorb water, and hidden moisture can remain behind finished surfaces. If the response is rushed or poorly documented, it can be harder to show what happened, where the water came from, and how much damage occurred.
This guide walks through the water damage claim process step by step, from the first safety check to documentation, insurer contact, adjuster inspection, repair records, and long-term prevention of recurring moisture damage. It does not guarantee coverage because insurance policies vary by company, state, endorsement, and type of water damage. Your policy language and your insurer’s instructions control your specific claim.
Step 1: Make Sure the Area Is Safe
Before thinking about forms, adjusters, estimates, or repairs, make sure the damaged area is safe to enter. Water damage can create electrical hazards, structural hazards, contamination risks, and slip hazards.
If the water is near electrical outlets, extension cords, appliances, an electrical panel, or powered equipment, do not walk into the area until the power risk has been addressed. If a ceiling is sagging or dripping heavily, stay away from the area until it can be inspected. If the water may contain sewage, avoid contact and keep children and pets away.
Avoid electrical hazards
Standing water and electricity are a dangerous combination. Do not enter a flooded room if outlets, appliances, cords, or electrical equipment may be energized. Do not touch a wet electrical panel, wet switches, or plugged-in devices while standing on a wet floor.
If you are unsure whether the power is safely off, contact a qualified electrician, utility provider, emergency service, or restoration professional. This is especially important in basements, utility rooms, laundry rooms, kitchens, and areas with mechanical equipment.
Avoid sewage or contaminated water
Not all water damage is clean water. Water from a broken supply pipe is different from water that backs up through a sewer line, floor drain, toilet, or contaminated basement drain. Sewage and drain backup water can contain harmful contaminants and should not be handled like ordinary household water.
If the water smells like sewage, contains debris, backs up through a drain, or may have come from outside floodwater, avoid direct contact and keep children and pets away. Call qualified cleanup help when contamination is possible.
Watch for structural warning signs
Water can weaken ceilings, drywall, flooring, cabinets, insulation, and trim. A ceiling stain may look minor at first, but if the drywall is sagging, bulging, or actively dripping, it may collapse. Flooring may also become slippery, soft, or unstable after water moves underneath it.
Stay out of areas where materials look unstable. Take photos from a safe distance if possible, but do not risk injury just to document damage.
Step 2: Stop the Water Source If It Is Safe
Once the area is safe, stop the water source if you can. Insurance claims usually expect homeowners to take reasonable steps to prevent further damage, but that does not mean you should perform dangerous repairs yourself.
If the water is coming from plumbing, shut off the nearest supply valve or the main water shutoff. If an appliance is leaking, turn it off and shut off its water supply if you can reach the valve safely. If the leak is from the roof, move belongings out of the wet area if safe and consider temporary protection, such as professional tarping, if needed.
Shut off plumbing leaks quickly
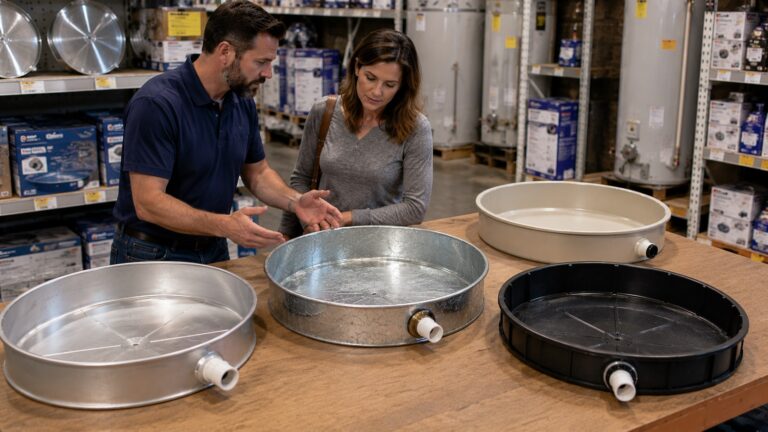
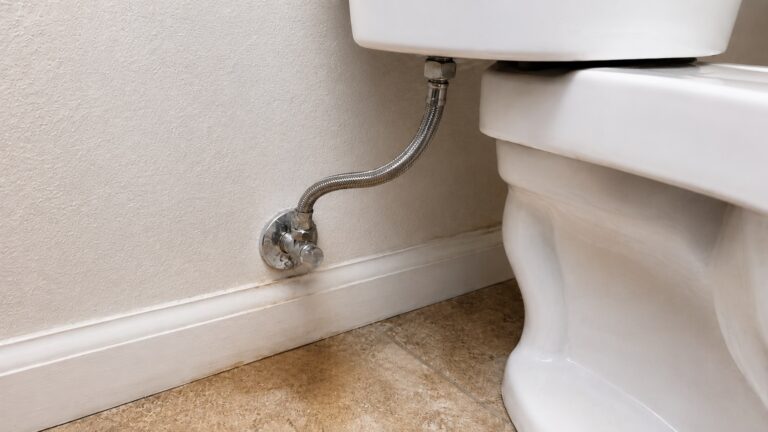
For burst pipes, leaking fixtures, failed supply lines, or appliance leaks, turning off the water can prevent the damage from spreading into floors, walls, ceilings, and cabinets. Common shutoff points include valves under sinks, behind toilets, behind washing machines, near water heaters, or at the home’s main shutoff valve.
If you cannot find the shutoff or the leak is beyond your ability to control, call a plumber or emergency service. A plumber’s report can also become useful later because it may help explain what failed and whether the leak was sudden or long-term.
Do not confuse stopping water with full repair
Stopping the water source is not the same as completing the repair. You may need to make temporary emergency repairs to prevent more damage, but major reconstruction should usually wait until the damage is documented and the insurer has explained the next steps.
For example, shutting off a burst pipe is reasonable. Removing every damaged material before taking photos may create claim problems. Tarping a storm-damaged roof may be reasonable. Replacing the entire roof before the insurer sees the damage may complicate the claim.
Separate emergency response from coverage questions
You may not know yet whether the water damage is covered. A leak, basement flood, roof leak, sewer backup, and appliance failure can all follow different coverage rules. Still, you should prevent additional damage when safe.
If the water came from a leak and you are unsure whether the source is covered, compare the situation with whether insurance covers water damage from leaks. If the water came from a basement flood, seepage, sump failure, or outside water, the claim may need to be evaluated under basement flood damage insurance coverage.
Step 3: Document the Damage Before Cleanup
Documentation is one of the most important parts of a water damage insurance claim. Before you remove materials, throw away belongings, or begin major cleanup, document what happened as clearly as possible.
Good documentation helps show the extent of damage, the likely water source, the affected materials, and the timeline of the event. It can also help if hidden damage is discovered later or if the insurer needs more information before approving part of the claim.
Take wide photos and videos
Start with wide photos and videos of each affected room. Show the full area, not only close-up damage. Capture where the water is located, how far it spread, and what parts of the home were affected.
Take photos from multiple angles. Include walls, floors, ceilings, cabinets, baseboards, doors, windows, appliances, utility equipment, and nearby belongings. If water traveled from one room to another, document the path.
Capture close-up damage
After wide photos, take close-up photos of damaged materials. Focus on wet drywall, swollen trim, warped flooring, stained ceilings, soaked carpet, damaged cabinets, wet insulation, peeling paint, waterline marks, and damaged belongings.
If the source is visible, photograph it. This may include a broken pipe, appliance hose, water heater, toilet connection, roof opening, floor drain, sump pit, foundation crack, or ceiling stain. Source photos can help connect the damage to the event.
For a more detailed photo workflow, use how to photograph water damage for insurance claims as the dedicated documentation guide.
Create a list of damaged property
Write down the damaged materials and belongings while the details are still fresh. Include rooms affected, visible damage, suspected water source, and major items that were wet or ruined.
Your list may include flooring, drywall, baseboards, cabinets, insulation, rugs, furniture, electronics, stored boxes, appliances, tools, clothing, or personal items. If possible, note approximate age, condition, and value for damaged belongings.
Record dates and the timeline
Dates matter in water damage claims. Write down when you first noticed the water, when the water source was stopped, when photos were taken, when you called the insurer, when professionals arrived, and when emergency drying began.
This timeline can help distinguish sudden damage from long-term moisture. It also helps you keep the claim organized as calls, inspections, estimates, and repairs begin to overlap.
Do not throw away evidence too soon
Some damaged materials may need to be removed quickly for drying or safety. However, do not discard key evidence before documenting it. If a failed hose, pipe, valve, fitting, appliance part, or damaged material helps explain the claim, photograph it and ask the insurer whether it should be saved.
If materials must be removed before the adjuster arrives, take clear photos first. Keep receipts, disposal records, and contractor notes explaining why removal was necessary.
Step 4: Contact Your Insurance Company or Agent
After you have handled immediate safety issues, stopped the water if possible, and documented the damage, contact your insurance company or agent promptly. The goal of the first call is to report the loss, get a claim number, understand the next steps, and ask what emergency mitigation is allowed.
You do not need to know every detail before calling. It is normal to still be investigating the source of the water. Be clear about what you know, what you suspect, and what still needs to be inspected.
Have basic information ready
Before the call, gather the information you already have. This may include:
- Your policy number, if available
- The address of the damaged property
- The date and time the damage was discovered
- The suspected water source
- The rooms or areas affected
- Whether water is still active
- Whether emergency repairs have already been made
- Whether any professionals have inspected the damage
- Whether there are safety concerns, sewage, mold, or electrical hazards
If you do not know the exact cause yet, say that. For example, you might say, “We found water under the kitchen flooring and suspect a dishwasher supply line, but a plumber has not inspected it yet.” Avoid guessing with certainty, blaming a source you have not confirmed, or describing the damage as long-term unless a professional has verified that.
Get a claim number and next-step instructions
Ask for the claim number and write it down immediately. You will use this number when sending photos, estimates, invoices, contractor reports, and follow-up questions.
Also ask who will contact you next, whether an adjuster will inspect the property, how to submit documentation, and whether the insurer has a preferred portal, email address, or app for uploading photos and records.
If the water damage involves a leak, basement water, floodwater, sewer backup, mold, or roof damage, ask which policy section or endorsement may apply. For broader coverage context, you can compare your situation with what water damage insurance typically covers, but your insurer’s answer and policy language control your specific claim.
Ask before major demolition or repairs
During the first call, ask whether the insurer needs to inspect the damage before major demolition, material removal, or reconstruction. You may still need emergency mitigation, but the insurer may want photos, samples, or an adjuster inspection before certain repairs are completed.
A good question to ask is: “What can I do now to prevent further damage without hurting the claim documentation?”
This helps balance two important duties: preventing the damage from getting worse and preserving enough evidence for the claim review.
Step 5: Ask the Right Questions During the First Call
The first insurance call should do more than simply open a claim. It should help you understand what the insurer expects from you next. Write down the date, time, name of the person you spoke with, and any instructions they gave.
Ask what emergency mitigation is allowed
Emergency mitigation means taking reasonable steps to keep the damage from getting worse. This may include water extraction, drying equipment, temporary plumbing repair, roof tarping, moving belongings, removing saturated carpet padding, or opening wet materials when necessary.
Ask whether you may call a restoration company, whether the insurer has preferred vendors, whether you can choose your own contractor, and what documentation the insurer wants before materials are removed.
If the damage is active or spreading, do not wait passively while materials stay wet. Follow the insurer’s instructions and document everything. For a more immediate response checklist, use what to do immediately after water damage for insurance as the emergency-focused guide.
Ask what documentation they need
Different insurers may request different documentation. Common requests include photos, videos, repair invoices, plumber reports, restoration estimates, drying logs, damaged property lists, receipts, and proof of emergency mitigation.
Ask how to submit the documentation and whether they want original receipts, digital copies, itemized estimates, or contractor reports. If belongings are damaged, ask whether they need photos of each item, model numbers, purchase receipts, or replacement estimates.
Ask whether the water source affects coverage
Water source matters. A burst pipe, roof opening, appliance leak, sewer backup, sump pump overflow, floodwater, and groundwater seepage may all follow different coverage rules, but this article focuses on the claim process rather than deciding coverage.
Ask whether your policy includes any relevant endorsements, such as water backup, sewer backup, sump pump overflow, service line, flood, or mold coverage. Do not assume that every water event is covered under the same part of the policy.
Ask about deductibles and limits
Ask what deductible applies and whether any special limits may affect the claim. Water damage, mold, sewer backup, sump pump overflow, flood coverage, personal property, and temporary living expenses may each have different rules or limits.
This does not mean you should decide everything during the first call. It simply helps you understand whether the claim is likely to exceed your deductible and what costs may remain out of pocket.
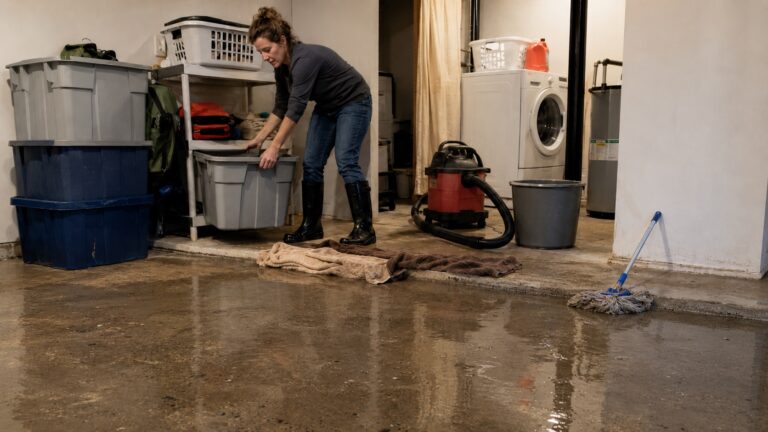
Step 6: Prevent Further Damage Without Destroying Evidence
After the claim is opened, you still need to prevent additional damage. Wet materials can worsen quickly, but mitigation should be documented so the insurer can understand the original loss. The safest approach is to document first when possible, then mitigate in a controlled and well-recorded way.
Begin reasonable emergency mitigation
Reasonable emergency mitigation may include extracting standing water, running drying equipment, moving dry belongings away from wet areas, removing wet contents from saturated flooring, shutting off damaged plumbing, or making temporary repairs to prevent more water from entering.
If a restoration company is involved, ask them to document moisture readings, affected materials, removed materials, equipment used, and drying progress. These records can help support the claim and reduce disputes about whether the home was dried properly.
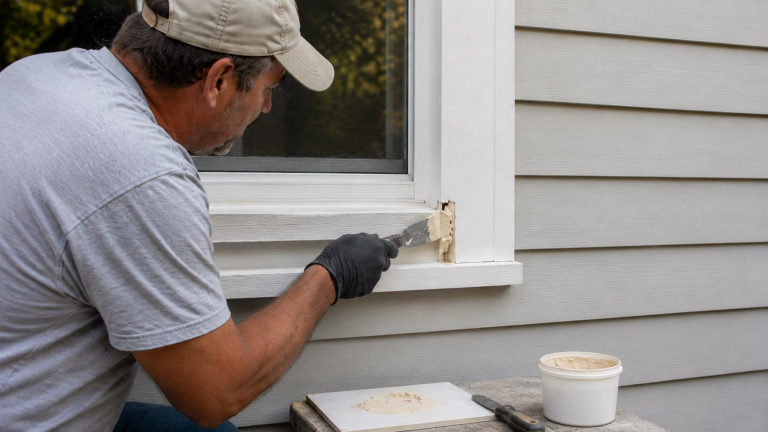
Use temporary repairs when needed
Temporary repairs may be appropriate when they prevent more damage. Examples include shutting off a broken water line, placing a temporary roof tarp after storm damage, boarding a damaged opening, or stopping an appliance leak.
Keep receipts and photos of temporary repairs. If possible, photograph the damage before and after the temporary repair so the insurer can see why it was necessary.
Do not hide or erase the cause
Emergency cleanup should not erase the evidence of what happened. Before removing damaged materials, photograph the source, water path, damaged surfaces, and affected belongings. If a failed part caused the leak, keep it when practical.
For example, if a washing machine hose failed, photograph the hose, connection, surrounding floor, and water path before disposal. If a ceiling was opened because of a pipe leak, photograph the ceiling stain, the opened cavity, the pipe, and any wet insulation or framing.
Do not rebuild over wet materials
One of the biggest mistakes after water damage is rebuilding too soon. New drywall, flooring, trim, or paint should not be installed over materials that are still damp. Trapping moisture inside walls or floors can lead to mold, odor, swelling, and recurring damage.
Before reconstruction begins, make sure the affected area is dry enough for repair. If mold is already visible or suspected, the process may need to include mold-specific documentation and cleanup. A separate guide on how to document mold damage for insurance claims can help if mold becomes part of the loss.
Step 7: Identify the Water Source
The water source is one of the most important facts in a water damage claim. You do not need to solve every technical detail yourself, but you should collect evidence and professional reports that help classify whether the damage came from plumbing, an appliance, a roof opening, sewer backup, sump overflow, floodwater, foundation seepage, or another source that may require a specific policy section or endorsement.
Pipe or appliance leak
If the damage appears to come from plumbing or an appliance, document the exact location. Photograph the pipe, valve, hose, fixture, water heater, washing machine, dishwasher, refrigerator water line, toilet connection, or other suspected source.
A plumber can help determine whether the leak was sudden, gradual, caused by a failed part, or related to long-term deterioration. Ask for a written explanation when possible, because the insurer may rely on that information during claim review.
Roof leak
If water entered through the roof, attic, ceiling, chimney, vent, skylight, or exterior wall, document both the inside and outside evidence. A ceiling stain alone may not prove the source.
The insurer may need to know whether the roof leak came from storm damage, wind damage, flashing failure, missing shingles, old materials, or long-term maintenance problems. A roofer’s inspection report can help connect the interior water damage to the exterior cause.
Basement water
Basement water damage needs careful source classification. Water from a burst pipe in a basement is different from groundwater seepage, water through floor cracks, window well flooding, sump pump overflow, sewer backup, or outside floodwater.
Photograph where the water appeared, including foundation walls, floor cracks, cove joints, drains, sump pits, window wells, exterior doors, water heaters, and nearby appliances. If water entered from outside or through the foundation, the claim may follow a different path than an indoor plumbing leak.
Sewer or drain backup
If water backed up through a drain, toilet, shower, utility sink, or sewer line, document the drain location and avoid direct contact. Sewer or drain backup may require specific endorsement coverage and may involve contaminated water.
Do not treat sewage-contaminated water like clean water from a supply pipe. Professional cleanup is usually safer and may be necessary for proper documentation.
Step 8: Work With the Insurance Adjuster
After the claim is opened, the insurance company may assign an adjuster to inspect the damage, review documentation, estimate covered repairs, and determine how the policy applies. The adjuster’s inspection is a key part of the claim process.
Your job is to provide clear information, show the affected areas, share documentation, and ask questions when you do not understand something. You do not need to argue every point during the first inspection, but you should be organized.
Show the full damage path
Walk the adjuster through the affected areas in a logical order. Start at the suspected source, then show where the water traveled and what materials were affected.
For example, if a pipe leaked upstairs and stained the ceiling below, show the plumbing area, the ceiling stain, the wall or floor path, wet insulation if exposed, and any damaged flooring or belongings below. If water spread across multiple rooms, show each affected area.
If the damage path is hard to see, use your dated photos and videos from the first day to show what changed before drying, cleanup, or demolition began.
Provide documentation
Give the adjuster copies of relevant documents. These may include photos, videos, plumber reports, roofer reports, restoration estimates, drying logs, receipts, damaged property lists, and emergency repair invoices.
Keep your own copies. Do not rely on one contractor, adjuster, or app upload as your only record. A simple folder with dated photos, notes, receipts, and reports can prevent confusion later.
Ask what is included and excluded
During or after the inspection, ask what parts of the damage appear included in the estimate and what parts may be excluded or still under review. This is especially important when the claim involves hidden moisture, mold, floodwater, sewer backup, roof leaks, or long-term damage questions.
If the adjuster says something is not covered, ask which policy language or exclusion applies. Stay factual and keep notes. You may need that explanation later when reviewing the estimate or deciding whether to provide more information.
Use contractor reports carefully
Contractor reports can support the claim, but they do not automatically control the insurance decision. A plumber, roofer, restoration company, or mold professional may explain the damage source and repair scope, while the insurer reviews whether the policy covers that source and scope.
If a contractor finds additional damage after the adjuster inspection, document it immediately and notify the insurer before covering it back up. Hidden damage is common in water claims, especially behind walls, under floors, above ceilings, and inside cabinets.
Step 9: Keep Receipts, Records, and Communication Notes
A water damage claim can involve many moving parts: emergency repairs, inspections, mitigation, drying, demolition, estimates, contents lists, adjuster calls, and final reconstruction. Keeping records from the beginning helps prevent missed details.
Do not rely on memory. Write down what happened, when it happened, who you spoke with, and what each professional said.
Save mitigation and repair receipts
Keep receipts and invoices for water extraction, drying equipment, emergency plumbing, temporary roof repairs, restoration work, electrical inspections, demolition, mold inspections, and any approved temporary repairs.
If you buy materials for emergency protection, such as tarps, fans, plastic sheeting, storage bins, or cleaning supplies, keep those receipts too. Whether they are reimbursable depends on the policy and claim, but they should still be documented.
Keep professional reports
Save reports from plumbers, roofers, restoration companies, mold professionals, electricians, HVAC contractors, and structural specialists. These reports can help explain the source, severity, and repair scope.
Professional reports are especially useful when the water source is disputed. A clear report may help show whether the loss came from a sudden pipe failure, roof opening, appliance discharge, drain backup, or long-term seepage.
Create a claim communication log
Keep a simple communication log with dates, times, names, phone numbers, email addresses, and summaries of conversations. Include adjuster calls, insurer instructions, contractor recommendations, and claim status updates.
This does not need to be complicated. A notebook, spreadsheet, or document can work. The important thing is that you can later answer basic questions about what was reported, when it was reported, and what instructions you received.
Track damaged belongings separately
If personal property was damaged, keep a separate list. Include the item, location, approximate age, estimated value, visible damage, and whether you have photos or receipts.
Do not throw away damaged belongings before documenting them unless they create a safety or sanitation issue. If disposal is necessary, photograph the items first and keep disposal records when possible.
Step 10: Review the Estimate and Settlement
After the adjuster reviews the damage, the insurance company may provide an estimate, coverage explanation, or payment. Review these documents carefully before assuming the claim is finished.
A water damage estimate should match the actual damage scope as closely as possible. If the estimate misses a room, material, hidden cavity, damaged belonging, drying charge, or required repair step, ask questions before finalizing repairs.
Compare the insurer estimate with contractor scopes
Compare the insurance estimate with reports from restoration companies, plumbers, roofers, flooring contractors, mold professionals, or other repair specialists. Look for differences in affected areas, material quantities, labor steps, drying needs, demolition, and reconstruction.
For example, the insurer may estimate drywall patching while a contractor sees wet insulation behind the wall. The insurer may include surface flooring while the restoration company identifies saturated carpet padding or subfloor moisture. These differences should be clarified before repairs cover the damage.
Ask questions about excluded or limited items
If part of the damage is not included, ask why. The answer may involve the deductible, coverage limits, policy exclusions, depreciation, flood exclusions, mold limits, sewer backup limits, or a dispute over whether the damage was sudden or long-term.
Ask for the explanation in writing when possible. This helps you understand whether the issue is missing documentation, policy language, pricing, or a genuine coverage limitation.
Understand that payments may happen in stages
Some water damage claims are paid in stages. The first payment may not be the final payment. There may be an initial payment for covered damage, additional payment after contractor invoices, or supplemental review if hidden damage is discovered during repairs.
If your contractor opens a wall, floor, ceiling, or cabinet and finds more damage, document it immediately and contact the insurer before closing it back up. Hidden water damage is common, and the claim may need an updated estimate or supplemental review.
Do not start final reconstruction over wet materials
Before reconstruction begins, make sure affected materials are dry enough for repair. Replacing drywall, flooring, insulation, cabinets, or trim over damp materials can trap moisture and create mold, odor, swelling, or recurring damage.
If drying has not been confirmed, ask the restoration company or contractor how they verified moisture levels. Water damage repair should not only make the surface look normal; it should correct the moisture condition behind the surface.
Step 11: Complete Repairs and Prevent Recurrence
A water damage claim should not end with cosmetic repair alone. If the water source is not corrected, the same area may become damaged again. Repeated moisture can also make future claims harder because the damage may appear gradual or preventable.
Final repairs should include source correction, full drying, material replacement where needed, and monitoring after the work is complete.
Correct the water source
Make sure the cause of the water damage has been repaired. That may mean fixing a pipe, replacing a failed appliance hose, repairing a roof opening, correcting a drain backup problem, improving basement drainage, or addressing a recurring moisture source.
If the source is not fixed, new drywall, flooring, paint, or trim may only hide the problem temporarily. A repeated leak can lead to mold, structural deterioration, and more difficult insurance questions later.
Monitor the repaired area
After repairs are complete, check the affected area regularly. Watch for musty odor, new staining, soft drywall, warped flooring, swelling trim, condensation, or moisture returning after rain or appliance use.
Water damage does not always announce itself immediately. Hidden moisture can return behind cabinets, under floors, inside wall cavities, or around basement walls. If symptoms come back, investigate quickly instead of repainting or cleaning the same area repeatedly.
Keep final repair records
Save final invoices, permits if applicable, contractor reports, drying records, warranty documents, photos, and correspondence with the insurer. These records can help if additional damage appears later or if you need to show that repairs were completed properly.
They can also help with future home maintenance. If another leak happens in the same area, you will have a clearer history of what was repaired, when it was repaired, and who performed the work.
Common Mistakes to Avoid During a Water Damage Claim
Most claim mistakes come from acting before documenting, delaying the report, or rebuilding before the damage source and moisture condition are clear.
Cleaning before documentation
Emergency cleanup may be necessary, but cleaning everything before photos and videos can weaken the claim. Document first when it is safe. If materials must be removed quickly, photograph them before removal and keep receipts or contractor notes explaining why removal was necessary.
Waiting too long to report the damage
Delays can create problems, especially when wet materials remain in place. Waiting too long may allow mold to develop, damage to spread, or evidence to become unclear. Contact your insurer or agent promptly after discovering significant water damage.
Throwing away damaged items too soon
Do not discard damaged flooring, furniture, appliance parts, hoses, valves, or personal property before documenting them. If disposal is necessary for safety or sanitation, photograph everything first and keep a list of what was removed.
Ignoring hidden moisture
Water can remain under flooring, behind drywall, inside cabinets, above ceilings, and in insulation after the surface looks dry. Ignoring hidden moisture can lead to mold and recurring damage. If the water reached porous or enclosed materials, consider professional moisture inspection and drying.
Assuming all water damage is covered
Filing a claim does not guarantee coverage. A burst pipe, roof leak, basement flood, sewer backup, appliance leak, and mold issue may all follow different policy rules. If mold becomes part of the claim, compare the situation with whether home insurance covers mold damage so you understand why the original water source still matters.
Frequently Asked Questions
Should I call insurance or a plumber first?
If water is actively leaking and you need help stopping it, call a plumber or emergency service right away. Once the immediate source is controlled or while help is on the way, contact your insurer promptly. For many claims, you may need both: the plumber to stop and document the source, and the insurer to open the claim.
Can I clean up water damage before the adjuster arrives?
You can usually take reasonable steps to prevent further damage, such as extracting water, moving belongings, or setting up drying equipment. However, document the damage first when safe. Take photos and videos, save receipts, and ask your insurer what mitigation is allowed before major demolition or reconstruction.
What photos should I take for a water damage claim?
Take wide photos of each affected room, close-up photos of damaged materials, photos of the suspected water source, and photos of damaged belongings. Include floors, walls, ceilings, cabinets, baseboards, appliances, plumbing, drains, and any visible water path.
How long do I have to file a water damage claim?
Time limits vary by policy and state, so check your policy and contact your insurer quickly after discovering the damage. Even if the formal deadline is unclear, waiting can allow wet materials to worsen, mold to develop, and the original water source to become harder to prove.
Will insurance pay for emergency water removal?
Emergency water removal may be covered if the water damage itself is covered and the mitigation was reasonable. Coverage depends on the water source, policy language, deductible, limits, and insurer instructions. Keep receipts and drying records.
What should I say when filing a water damage claim?
Describe what happened clearly and factually. Explain when you discovered the damage, what areas are affected, what water source you suspect, what steps you took to stop further damage, and whether professionals have inspected the home. Avoid guessing beyond what you know.
What if more damage is found after the adjuster inspection?
Document the additional damage immediately with photos, contractor notes, and moisture readings if available. Contact the insurer before closing the area back up. The claim may need supplemental review or an updated estimate.
Can a water damage claim be denied?
Yes. A claim may be denied if the water source is excluded, the damage appears gradual, the policy lacks the needed endorsement, documentation is weak, or the damage resulted from neglected maintenance. If you receive a denial, ask for the specific policy reason in writing and compare it with the common reasons water damage claims are denied.
Final Claim Checklist
Use this checklist to keep the claim organized from the first emergency response through final repairs:
- Safety comes before documentation, cleanup, or claim paperwork.
- Stop active water if you can do so safely.
- Take photos and videos before cleanup or demolition whenever possible.
- Contact your insurer or agent promptly and get a claim number.
- Ask what emergency mitigation is allowed before major repairs.
- Document the water source, damage path, affected materials, and damaged belongings.
- Keep receipts, contractor reports, drying records, and communication notes.
- Review the estimate carefully before assuming the claim is complete.
- Correct the moisture source before rebuilding.
- Monitor repaired areas for returning moisture, odor, mold, or new staining.
3 Comments
Comments are closed.