How to Photograph Water Damage for Insurance Claims
Photographing water damage for an insurance claim is not about taking perfect pictures. It is about preserving clear evidence before the scene changes. Water can be extracted, flooring can be removed, drywall can be cut open, belongings can be moved, and damaged materials can be thrown away before the adjuster sees the original condition. Good photos help show what happened, where the water came from, how far it spread, and what was damaged.
The most important rule is to take photos as soon as it is safe, before cleanup changes the area. At the same time, do not leave an active leak running, enter standing water near electrical hazards, or delay emergency action just to take more pictures. Protect people first, stop the water if safe, take quick photos and videos, then continue documenting as cleanup and drying move forward.
Start with wide photos of each affected room, then photograph the water source, the path of water, close-up material damage, damaged belongings, cleanup progress, and any repair work. If you are still trying to understand which parts of the loss may be covered, review what water damage insurance typically covers before assuming every damaged area will be handled the same way.
Start With Safety Before Taking Photos
Photos are important, but safety comes first. Do not walk into standing water if there may be electrical contact, sewage contamination, structural collapse, sagging ceilings, or unsafe flooring. If the water is near outlets, electrical panels, appliances, or light fixtures, stay back until the area is safe.
Before taking detailed photos, ask a few quick safety questions:
- Is there standing water near electricity?
- Is the ceiling sagging or actively dripping?
- Is the water from a clean source, sewage source, or unknown source?
- Is the floor soft, unstable, or slippery?
- Can the water source be shut off safely?
- Is there visible mold, strong odor, or contaminated debris?
If the area is unsafe, take photos from a doorway, hallway, stair landing, or other safe location. You can still document the damage without entering a hazardous area. If necessary, wait for a plumber, restoration company, electrician, or emergency responder before getting closer.
When conditions are safe, your first goal is to capture the original scene before it changes. That means photographing the source, the affected rooms, the visible water, damaged materials, and any belongings that were wet or moved.
Photograph the Damage Before Cleanup Changes the Scene
Water damage can look very different after even one hour of cleanup. Standing water may be extracted, wet carpet may be pulled back, baseboards may be removed, cabinets may be emptied, and restoration crews may cut drywall or move belongings. Those steps may be necessary, but they can erase the visual evidence of the original damage.
That is why the first set of photos should show the area before major cleanup, demolition, or repairs begin. If the water is still active, take a few fast photos or videos first if it is safe, then stop the water or call for emergency help.
Take photos before moving items
Photograph furniture, rugs, boxes, appliances, stored belongings, and personal items in place before moving them. These photos help show where items were located and how they were affected by the water.
If you need to move belongings quickly to prevent more damage, take a wide photo first, then move the items, then photograph them individually or in groups after they are in a safer location. Keep a simple written note of what was moved and why.
Capture the original water level and spread
If there is visible standing water, photograph how deep it is and how far it spread. Use a tape measure, ruler, boot, baseboard, threshold, or other visual reference to show scale. Take one photo close enough to show the depth and one wider photo that shows where that measurement was taken. If water reached multiple rooms, photograph each doorway and transition where the water crossed from one space to another.
Good water-spread photos may include:
- Standing water on floors
- Water lines on walls, cabinets, or baseboards
- Wet carpet edges
- Water under appliances
- Wet areas under cabinets
- Water trails between rooms
- Ceiling drips or stains below an upstairs leak
Do not delay emergency mitigation when damage is active
Documentation matters, but it should not make the damage worse. If a pipe is still leaking, a toilet is overflowing, or water is actively entering the home, stop the water if it is safe. Shut off the supply valve, turn off the main water line if needed, move belongings out of danger, or call emergency help.
The best approach is to take fast initial photos, begin reasonable mitigation, and keep photographing as conditions change. For the broader emergency sequence, use this guide on what to do immediately after water damage for insurance.
Take Wide Photos of Every Affected Area
Wide photos show the full context of the damage. Close-ups are useful, but they do not show the adjuster how large the affected area is, how rooms connect, or how water traveled. Start each room with wide photos before taking detail shots.
Photograph each room from multiple angles
Stand in each corner, doorway, or safe viewing point and take wide photos of the entire room. Include floors, walls, ceilings, windows, doors, cabinets, appliances, and furniture when relevant. If the room is small, take photos from the doorway and from the opposite side if safe.
For each affected room, try to capture:
- The full room layout
- The visible wet area
- The water source if visible
- Damaged flooring or walls
- Ceiling stains or drips
- Nearby furniture and belongings
- Transitions into adjacent rooms
These photos establish the scope of the loss before cleanup, drying, or demolition changes the space.
Show how water moved between rooms
Water often travels farther than the first visible stain. It can move under flooring, through doorways, along baseboards, under cabinets, down wall cavities, and through ceilings into rooms below. Photograph the path of water, not just the worst-looking spot.
For example, if a dishwasher leaked into the kitchen and water moved into the dining room, photograph the dishwasher, the kitchen floor, the threshold between rooms, and the damaged area in the dining room. If an upstairs bathroom leak stained a downstairs ceiling, photograph both the bathroom source area and the ceiling below.
Include nearby unaffected areas for context
It may seem unnecessary to photograph areas that look dry, but context can help. Photos of nearby unaffected rooms, dry transitions, or undamaged sections can help show where the water stopped and which areas were actually affected.
This can be useful when the adjuster evaluates the scope of drying, flooring replacement, cabinet damage, or wall repairs. It also helps separate new damage from pre-existing conditions.
Take Close-Up Photos of Visible Damage
After wide photos show the full affected area, take close-up photos of the actual damage. These pictures help document the material condition before drying, demolition, or repairs begin. They also make it easier to show details that may not be obvious in room-level photos.
Close-up photos should be clear, steady, and taken with enough light. If possible, take one close-up photo and one slightly wider photo of the same damage so the adjuster can see both the detail and where it is located.
Stains, swelling, and peeling paint
Photograph water stains, bubbling paint, peeling paint, swollen drywall, discolored trim, and soft-looking wall areas. These symptoms can help show where water touched the surface and how far moisture spread.
If the stain has a clear edge, take a photo of the full stain and then a closer photo of the darkest or most damaged area. A ruler or tape measure can help show the size of the stain, especially on ceilings and walls.
Warped flooring and damaged trim
Flooring and trim often show water damage through swelling, cupping, buckling, separation, discoloration, or gaps. Take photos at floor level to show warped boards, lifted seams, swollen baseboards, wet thresholds, and damaged transitions between rooms.
For flooring damage, take photos from several angles. A low side angle can show buckling or raised edges better than a straight-down photo. If baseboards are swollen or pulling away from the wall, photograph the full wall section and then the damaged trim up close.
Wet drywall, insulation, or ceiling materials
If drywall, insulation, or ceiling materials are visibly wet, sagging, stained, or damaged, photograph them before they are cut out or removed. If a restoration company opens a wall or ceiling, continue taking photos of the exposed cavity, wet insulation, damaged framing, or visible moisture path.
Do not poke, cut, or open building materials just to take photos unless a qualified professional says it is safe and necessary. Sagging ceilings, wet insulation, and electrical areas can be hazardous. Take photos from a safe distance if the area looks unstable.
Photograph the Water Source
Source photos are some of the most important pictures in a water damage claim. They help show where the water came from and whether the event appears sudden, gradual, interior, exterior, or related to an excluded source. A claim with good room photos but no source photos may leave important questions unanswered.
The source does not always need to be obvious. If you do not know exactly where the water came from, photograph the strongest clues: wet plumbing areas, appliance connections, ceiling stains, basement entry points, wall openings, water trails, or damaged exterior areas.
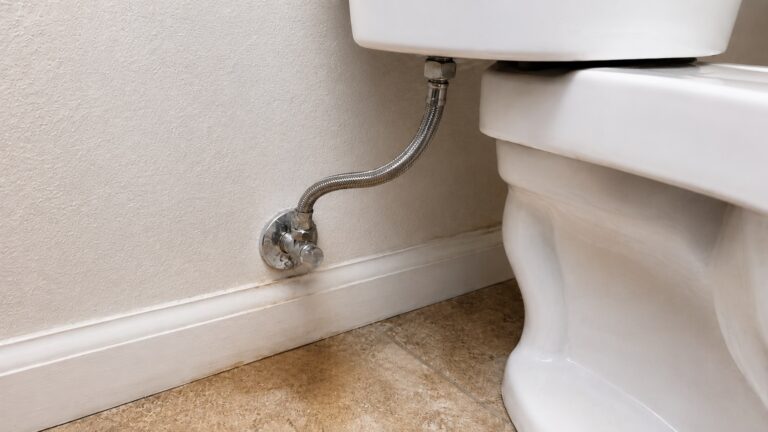
Plumbing leaks
If the water came from a pipe, valve, fixture, toilet, sink, shower, tub, or supply line, photograph the plumbing area from several distances. Start with a wide photo showing the fixture or room, then take mid-range photos of the plumbing, then close-ups of the leak point if visible.
Useful plumbing leak photos may include:
- The broken pipe, valve, connector, or hose
- Water on the floor below the fixture
- Wet cabinet bases or vanities
- Ceiling stains below upstairs plumbing
- Access panels or wall openings created by a plumber
- Repair parts removed by the plumber, if available
Appliance leaks
Appliance leaks often damage more than the area directly under the appliance. Photograph the appliance, the water connection, the floor around it, the wall behind it if visible, and any nearby cabinets or flooring affected by the leak.
For a washing machine, photograph the supply hoses, drain hose, wall box, floor, and adjacent walls. For a dishwasher, photograph the front toe-kick area, nearby cabinets, flooring, and any exposed supply or drain connections. For a refrigerator, photograph the water line, wall behind the unit, flooring, and any wet baseboards or nearby cabinets.
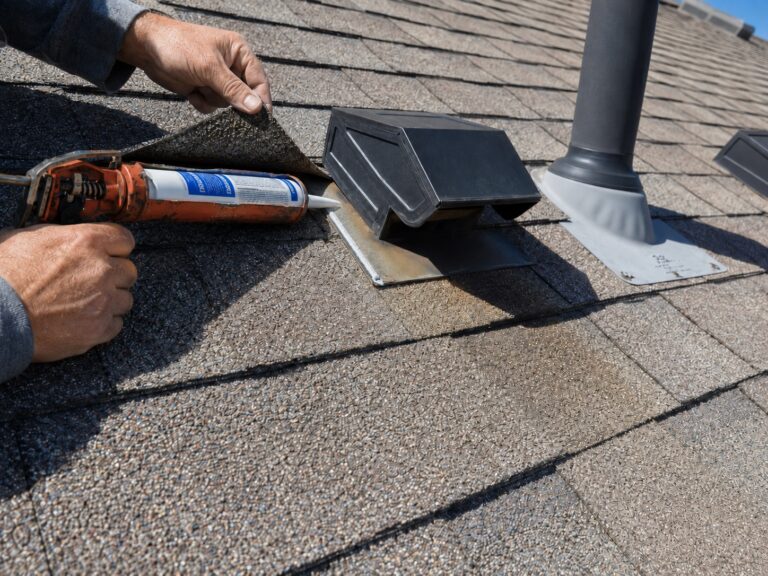
Roof or ceiling leaks
If water entered from above, photograph both the interior damage and the likely entry area if safe. Interior photos may include ceiling stains, active drips, wet insulation, attic moisture, or damaged drywall. Exterior roof photos should only be taken from the ground or another safe location unless a qualified professional is inspecting the roof.
Do not climb onto a wet, damaged, steep, or storm-affected roof to take claim photos. Instead, photograph visible storm damage from the ground, take pictures of fallen shingles or debris, and ask a roofing contractor or adjuster to document unsafe roof areas.
Basement or exterior water entry
Basement and exterior water entry photos should show where water entered, how far it spread, and whether there are visible exterior conditions that may explain the source. Photograph basement walls, floor joints, foundation cracks, window wells, floor drains, sump pump areas, exterior grading, downspouts, and water marks.
This is especially important because insurance may treat interior plumbing water differently from groundwater, seepage, runoff, or floodwater. Photos cannot guarantee coverage, but they can help clarify the source and support the claim review. Save detailed coverage questions for the policy review and claim process; your photos should focus on preserving the visual evidence.
Use Video to Show the Full Damage Path
Video can show context that still photos may miss. A slow video walkthrough can show how water moved through the home, where the source appears to be, which rooms were affected, and whether water was actively dripping or spreading.
Start the video outside the affected room, then move slowly through the damage path. Narrate the date, time, room, suspected source, and what you are seeing. Pause briefly on the source, the deepest water, the worst material damage, and each room transition. Keep the camera steady and avoid moving too fast. A shaky video can be harder to review later.
A useful water damage video may show:
- The suspected source of water
- Standing water or active dripping
- Water movement from one room to another
- Damaged flooring, walls, ceilings, and cabinets
- Wet belongings before they are moved
- Any immediate steps taken to stop the water
Video should support your photo record, not replace it. Still photos are easier to label, organize, send, print, and compare by room or item. The best documentation uses both.
Photograph Damaged Belongings Separately
Building damage is only one part of a water damage claim. Personal belongings may also need to be documented, especially if water reached furniture, rugs, clothing, electronics, tools, stored boxes, appliances, books, documents, or household items.
Start with wide photos of belongings in place before moving them. Then take individual photos of higher-value items, electronics, furniture, or anything that may need to be cleaned, repaired, or replaced. If items are in wet boxes or storage bins, photograph the containers before unpacking them if it is safe.
For damaged belongings, try to capture:
- The item in the affected room before it is moved
- The visible water damage on the item
- Brand names, labels, model numbers, or serial numbers
- Receipts, manuals, or purchase records if available
- Grouped photos of lower-value items
- Separate photos of higher-value items
If an item is contaminated, moldy, sewage-soaked, or unsafe to keep indoors, photograph it clearly before disposal when possible. Follow the insurer’s guidance and any professional cleanup instructions, and keep disposal receipts or contractor notes when available. Do not keep hazardous items in living areas just to preserve evidence.
Keep Photographing During Cleanup and Drying
Water damage documentation should not stop after the first set of photos. Cleanup, drying, and demolition can reveal hidden damage that was not visible at first. Continue taking photos as the work progresses so there is a clear record of what changed.
Photograph water extraction, wet material removal, exposed wall cavities, removed flooring, pulled carpet padding, cut drywall, wet insulation, damaged subflooring, and drying equipment. If a restoration company places air movers or dehumidifiers, take photos of the equipment in place and keep any drying logs or moisture readings they provide.
Progress photos can help show that you took reasonable steps to reduce further damage. They can also help explain why certain materials had to be removed. For example, a wall may only show a small stain before demolition, but once opened, the cavity may reveal wet insulation or hidden moisture. Photos of that process can be useful.
After documentation and immediate mitigation, the long-term goal is to dry the home correctly and prevent the same moisture problem from returning. For broader prevention planning, see how to prevent recurring moisture damage after the claim.
How to Organize Water Damage Photos for the Adjuster
Good photos also need to be easy to understand. If you send hundreds of random images with no order, the adjuster may have a harder time following the source, scope, and timeline of the damage.
Organize photos by date, room, and category. Keep the original files on your phone or computer, then make a separate folder or album for copies you plan to send. Avoid editing, cropping, compressing, or renaming the only original copies, because original files may preserve useful date, time, and file information. Do not delete blurry or duplicate photos until the claim is finished, because even imperfect images may still show useful timing or context.
A simple folder structure might look like this:
- Kitchen – Wide Photos
- Kitchen – Close-Ups
- Kitchen – Appliance Source
- Living Room – Flooring Damage
- Basement – Water Entry
- Belongings – Furniture
- Belongings – Electronics
- Cleanup and Drying
- Repairs
- Receipts and Invoices
It also helps to create a short written log that matches the photos. Record the date and time the damage was discovered, the suspected source, which rooms were affected, what actions you took, who you called, and when cleanup or drying began. This log does not need to be complicated. It simply gives the photos a timeline.
If you want to prepare for the inspection itself, review what insurance adjusters look for during water damage inspections so your photos, notes, invoices, and damaged-material records are easier to connect.
Once your photos are organized, they can support the broader claim process. The step-by-step filing process belongs in the guide on how to file a water damage insurance claim.
Water Damage Photo Mistakes That Can Hurt a Claim
Most water damage photo mistakes happen because the homeowner is overwhelmed and starts cleaning before documenting. That is understandable, especially during an active leak. But a few simple habits can protect the claim record before the scene changes.
- Only taking close-ups: Close-ups show detail, but they do not show the full room, water path, or damage scope.
- Forgetting source photos: The insurer needs to understand where the water came from, not just what it damaged.
- Taking blurry photos: Wipe the camera lens, use good lighting, and take extra shots from steady positions.
- Not using scale: A tape measure, ruler, or common object can help show the size of stains, water depth, or damaged areas.
- Cleaning before photographing: Once water is removed and items are moved, the original damage pattern may be harder to prove.
- Throwing away materials too soon: Photograph damaged drywall, flooring, carpet pad, belongings, and debris before disposal.
- Deleting originals: Keep original photo and video files because they may preserve date, time, and file information.
- Stopping after the first day: Keep documenting drying, demolition, hidden damage, and repairs as the situation develops.
If mold appears during or after the water damage, photograph it separately and avoid disturbing it unnecessarily. Mold-related claim documentation has its own considerations, so use the separate guide to document mold damage for insurance claims if visible mold becomes part of the loss.
FAQ
Should I photograph water damage before calling insurance?
Yes, if it is safe. Take quick photos and videos before cleanup changes the scene, then contact your insurer promptly. Do not delay stopping an active leak, shutting off water, or addressing unsafe conditions just to take more photos.
How many photos should I take for a water damage claim?
Take enough photos to show the source, scope, spread, and timeline of the damage. For each affected room, include wide room photos, mid-range photos, close-ups, source photos, water depth or spread, damaged belongings, cleanup progress, drying equipment, and repair work.
Should I take video of water damage?
Yes. Video is useful for showing the full damage path, active dripping, standing water, and how affected rooms connect. Move slowly, narrate the date and suspected source, and show the water path clearly. Still photos are also important because they are easier to organize and review.
Should I photograph damaged belongings separately?
Yes. Photograph damaged belongings in place first, then take separate photos of higher-value items, labels, model numbers, serial numbers, and visible damage. Group lower-value items when appropriate, but document expensive or important items individually.
Should I keep taking photos after cleanup starts?
Yes. Cleanup and drying can reveal hidden damage. Photograph removed materials, wet insulation, cut drywall, exposed cavities, drying equipment, moisture readings, contractor work, and repairs. Progress photos help show what was found and what steps were taken to reduce further damage.
Do I need timestamps on water damage photos?
Timestamps can be helpful, but they are not the only way to document timing. Keep original photo files when possible, organize images by date, and write a simple timeline of when the damage was discovered, when photos were taken, when cleanup began, and who was contacted.
What if I already cleaned up before taking photos?
Photograph what remains. Take pictures of damaged materials, repair areas, receipts, equipment, removed item piles, contractor work, and any remaining stains or moisture. Write down what was cleaned, when it was cleaned, who did the work, and why cleanup had to begin before photos were taken.
Water Damage Photo Checklist for Insurance Claims
- Photograph water damage as soon as it is safe, before cleanup changes the scene.
- Start with wide room photos, then take mid-range photos and close-ups.
- Photograph the water source, not just the damaged materials.
- Use video to show the full path of water through the home.
- Document damaged belongings separately, especially higher-value items.
- Keep taking photos during cleanup, drying, demolition, and repairs.
- Organize photos by room, date, and category so the adjuster can follow the claim clearly.
- Keep original photo and video files when possible, and pair them with a simple written timeline.
- Do not enter unsafe areas, delay emergency mitigation, or keep hazardous items indoors just to preserve evidence.