How to Prioritize Repairs After Water Damage Without Missing Critical Risks
After water damage, the hardest decision is often not whether repairs are needed. It is deciding what should be repaired first. A stained ceiling, warped floor, swollen baseboard, wet cabinet, and damaged drywall may all look urgent at the same time. But water damage repairs should not be prioritized by what looks worst on the surface. They should be prioritized by safety, active water movement, structural risk, hidden moisture, and the chance of the problem returning.
The right repair order can prevent wasted money. The wrong order can hide moisture, trap damp materials behind new finishes, allow mold to develop, or force you to tear out repairs that were completed too soon. This is why water damage repair planning should start with risk control before cosmetic restoration.
If your goal is to prevent the same moisture problem from coming back, the repair sequence matters as much as the repair itself. A good repair plan fits into a larger recurring moisture damage prevention strategy instead of treating each damaged surface as an isolated problem.
Why Water Damage Repairs Must Be Prioritized in the Right Order
Water damage does not affect every material the same way. Drywall may stain quickly. Flooring may hide moisture underneath. Insulation may stay wet long after the room looks dry. Structural wood may weaken slowly. A ceiling may look stable until trapped water or soaked drywall causes it to sag. Because of this, the most visible damage is not always the most important damage.
For example, a brown ceiling stain may look worse than a damp subfloor under vinyl flooring, but the subfloor could be the bigger long-term concern if moisture is trapped underneath. A swollen baseboard may seem minor, but it can indicate water sitting at the wall-floor joint. A wet cabinet bottom may appear cosmetic, but it can hide moisture against drywall, flooring, or plumbing penetrations.
The purpose of prioritizing repairs is to answer four questions:
- What could make the home unsafe?
- What is still allowing water to enter or remain trapped?
- What damage will get worse if delayed?
- What repairs can wait until the area is dry and stable?
This is different from simply making a list of visible damage. A useful repair order usually follows this sequence: make the area safe, stop the water, document damage when needed, remove water, dry affected materials, check hidden spaces, stabilize structural materials, repair the cause, and only then replace finishes. That order helps prevent repairs from covering moisture that still needs attention.
Priority 1: Address Immediate Safety Hazards
Safety comes before drying, demolition, repairs, insurance paperwork, or cleanup. If water damage has created a dangerous condition, that issue becomes the first priority even if other repairs look more expensive or more visible.
Immediate safety risks can include electrical exposure, sagging ceilings, unstable flooring, contaminated water, active flooding, structural movement, or water-damaged materials overhead. These conditions should not be treated as ordinary repair tasks. They may require shutting off power, avoiding the affected area, using proper protective equipment, or calling a qualified professional before anyone begins cleanup.
Ceilings deserve special attention because water-damaged drywall or plaster can hold moisture above the finished surface. If a ceiling is bulging, sagging, cracking, dripping continuously, or feels soft, it should be treated as a potential safety issue rather than a cosmetic stain. For ceiling-specific warning signs, see signs of ceiling collapse risk after water damage.
Electrical hazards should also move to the top of the priority list. Water near outlets, light fixtures, breaker panels, appliances, extension cords, or HVAC equipment can create serious risk. This is not an area for trial-and-error repairs. If water has reached electrical components, the safest repair priority is to keep people away from the affected area and have the electrical risk evaluated before cleanup continues.
Repairs that should not wait
The following conditions usually belong in the highest-priority category:
- Water near electrical fixtures, outlets, or panels
- Sagging, bulging, or cracking ceilings
- Soft or unstable floors
- Standing water that continues to spread
- Sewage, stormwater, floodwater, or other potentially contaminated water
- Visible structural movement or damaged framing
- Water entering from an active roof, plumbing, appliance, window, or basement leak
These issues should be handled before paint, trim, flooring finishes, cabinet repairs, or cosmetic drywall patches. A home can look messy for a while and still be recoverable. But unsafe conditions and active water sources can quickly turn a manageable repair into a larger structural or mold problem.
Priority 2: Stop the Water Source Before Repairing the Damage
After immediate safety risks are addressed, the next priority is stopping the water source. No repair plan works if water is still entering the home. Replacing drywall, repainting a ceiling, installing new flooring, or repairing trim before the source is controlled usually leads to repeat damage.
The source may be obvious, such as a burst pipe or overflowing appliance. In other cases, it may be less obvious. Water may be entering through a roof leak, failed flashing, exterior wall opening, window frame, door threshold, foundation seepage, sump pump failure, HVAC drain line, or hidden plumbing leak.
The key question is simple: is the moisture event finished, or is the building still being exposed to water?
If the source is active, source control comes before finish repair. That might mean shutting off a water supply, stopping an appliance leak, arranging roof repair, correcting drainage, clearing a clogged HVAC condensate line, or preventing more rainwater from entering through a vulnerable opening. Until the source is corrected, surface repairs are temporary.
Why cosmetic repairs fail when the source is not fixed
Cosmetic repairs can make water damage look better while the real problem continues behind the surface. Paint can cover stains, new trim can hide swelling, fresh drywall can conceal a damp cavity, and new flooring can cover a wet subfloor. None of those repairs stop moisture movement.
This is one reason water damage often becomes a recurring problem. The damaged surface gets repaired, but the leak path, drainage issue, condensation problem, or hidden moisture source remains. A better approach is to connect the visible damage to the larger moisture system inside the home. For a broader view of how moisture problems start, spread, and return, the sitewide guide on how to find, fix, and prevent moisture problems in homes can help place the repair decision in context.
Once the source is stopped, the repair plan can move from emergency control to documentation, drying, evaluation, and rebuilding. Skipping that order is where many water damage repairs go wrong.
Priority 3: Document the Damage Before Removing Materials
Once immediate safety risks are controlled and the water source is stopped or contained, documentation becomes the next priority if insurance may be involved. This does not mean delaying urgent drying in a dangerous situation. It means taking clear photos and notes before damaged materials are removed whenever it is safe to do so.
Water damage can change quickly during cleanup. Standing water may be extracted. Wet carpet may be removed. Damaged drywall may be cut out. Cabinets may be pulled away from walls. Those steps may be necessary, but they can also erase evidence of where the water traveled, how high it reached, and which materials were affected.
Before removing materials, document:
- The water source, if visible
- Stains, swelling, bubbling, warping, or sagging
- Wet flooring, carpet, padding, drywall, trim, ceilings, and cabinets
- Standing water or water lines on walls and furniture
- Damaged belongings, if they relate to the claim
- Moisture readings, if a contractor or restorer takes them
For insurance-related situations, the documentation stage should be tied to the repair order. You want enough evidence to show the original damage, but you do not want to leave wet materials in place so long that damage worsens. If you are dealing with a claim, review what to do immediately after water damage for insurance before removing major materials when conditions are safe. This article, however, stays focused on repair priorities rather than the full insurance process.
Priority 4: Remove Standing Water and Start Drying
After safety, source control, and basic documentation, drying becomes one of the most important repair priorities. Water damage does not stop progressing just because the leak has stopped. Materials can continue absorbing moisture, hidden cavities can stay damp, and mold risk can increase when wet materials are left in place.
Standing water should be removed as soon as it is safe. Then the focus shifts to airflow, dehumidification, material removal decisions, and moisture monitoring. The exact drying method depends on what got wet. A concrete basement floor, wood subfloor, carpet pad, drywall cavity, ceiling, cabinet base, and insulation layer all behave differently.
Drying should usually come before rebuilding. Installing new drywall, flooring, trim, or paint over damp materials can trap moisture and create a hidden problem. This is one of the most common mistakes after water damage: the room looks repaired, but the materials behind the repair were never fully dried.
Which wet materials should move up the priority list?
Not every damp surface carries the same risk. Some materials dry more easily. Others hold moisture or conceal it. In general, the following materials deserve early attention:
- Drywall: It can wick water upward, soften, stain, and lose strength.
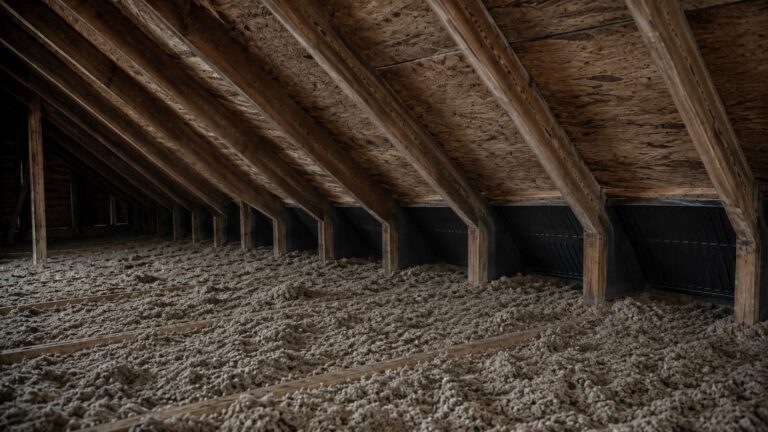
- Insulation: It can hold moisture inside wall or ceiling cavities and slow drying.
- Carpet padding: It can stay wet underneath carpet even when the top feels dry.
- Subflooring: It can swell, soften, delaminate, or support mold growth if moisture remains trapped.
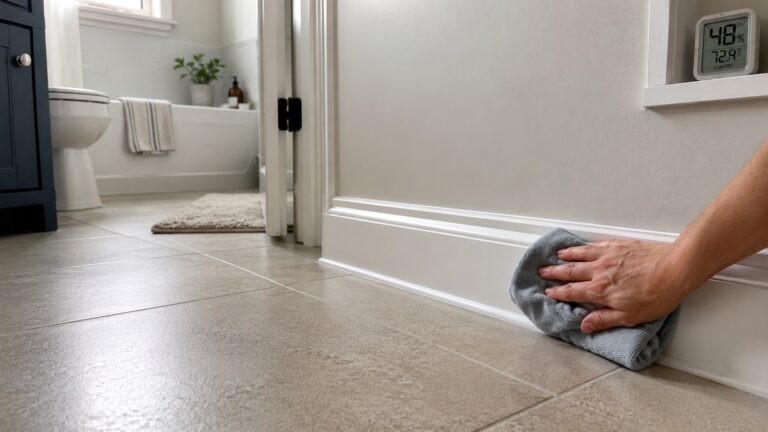
- Baseboards and trim: They can hide moisture at the wall-floor joint.
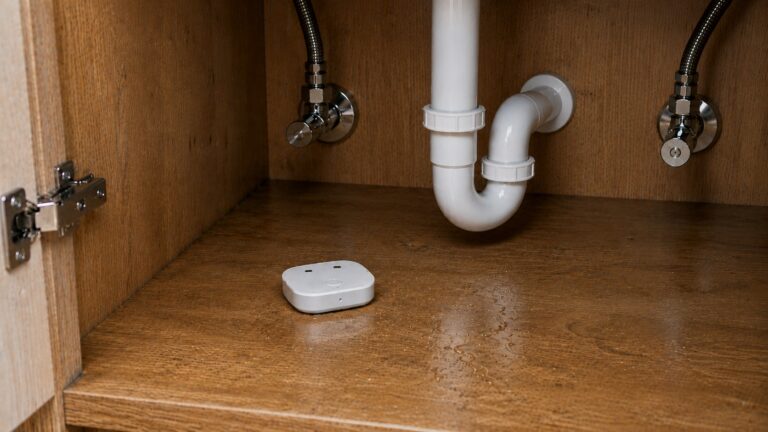
- Cabinet bases: They can trap moisture against walls and flooring.
- Ceiling materials: They can weaken when water collects overhead.
Walls are a common priority because moisture can move behind paint, drywall paper, insulation, and framing. If wall materials are wet, follow a focused drying process rather than simply waiting for the surface to feel dry. For wall-specific guidance, see how to dry walls after water damage.
Floors require similar caution. A floor may feel dry on top while moisture remains under vinyl, laminate, carpet padding, wood flooring, or subfloor panels. If the water reached below the finished flooring, the subfloor may need separate attention. For that situation, see how to dry subfloors after water damage.
Priority 5: Check for Hidden Moisture Before Rebuilding
Hidden moisture can completely change the repair order. A room may look ready for repairs while moisture remains behind walls, under flooring, inside ceiling cavities, behind baseboards, under cabinets, or around framing. If rebuilding begins before hidden moisture is found, new materials may cover the problem and make it harder to detect later.
This is where homeowners often confuse visual cleanup with moisture recovery. Removing stains, wiping surfaces, running fans, or replacing damaged trim does not prove the structure is dry. Moisture can remain in places that are not visible during a normal walk-through.
Before rebuilding, check whether water may have moved into concealed areas such as:
- Wall cavities behind wet drywall
- Insulation inside exterior or interior walls
- Subflooring under finished floors
- Ceiling cavities below roof or plumbing leaks
- Baseboard and trim gaps
- Cabinet backs and toe-kick areas
- Framing around windows, doors, and plumbing openings
The goal is not to open every wall or remove every floor automatically. The goal is to identify where moisture likely traveled and confirm that the area is dry enough before repairs close it back in. If you need a deeper inspection framework, use how to evaluate hidden water damage before finalizing the repair order.
Why hidden moisture should be handled before cosmetic repairs
Hidden moisture evaluation belongs before finish replacement because new materials can cover the warning signs. Once paint, flooring, baseboards, or cabinets are installed, moisture may continue affecting the structure without obvious symptoms. Checking likely hidden areas first protects the repair budget and reduces the chance that the same room will need to be opened again later.
Priority 6: Stabilize Structural Materials Before Finish Repairs
Once active water is controlled and hidden moisture has been considered, structural materials should be prioritized before finish materials. This does not mean every water-damaged home has structural failure. It means that load-bearing or support-related materials deserve attention before paint, trim, flooring finishes, or cosmetic patching.
Structural concerns may involve subfloors, joists, wall framing, roof framing, ceiling supports, stair structures, or load-bearing wall areas. These materials may not always look dramatic at first. Some types of structural moisture damage develop quietly as wood absorbs water, fasteners loosen, panels swell, adhesives weaken, or repeated moisture exposure causes softening and decay.
Repairs should move structural materials up the priority list when you notice:
- Soft, spongy, or uneven floors
- Ceiling sagging or separation
- Cracked drywall near a wet structural area
- Doors or windows that suddenly stick after water exposure
- Visible rot, darkened wood, or damp framing
- Loose railings, stair movement, or weakened landings
- Subfloor swelling under kitchens, bathrooms, laundry rooms, or basements
Structural stabilization comes before cosmetic restoration because finishes depend on the materials underneath them. New flooring cannot perform correctly over a weakened subfloor. New drywall should not cover framing that is still wet. Paint cannot solve movement, swelling, or decay. If the supporting material is compromised, finish repairs are only temporary.
Why structural repairs often outrank visible cosmetic damage
Cosmetic damage is often easier to see, but structural damage affects safety, repair durability, and long-term cost. A stained wall may be unpleasant, but a wet subfloor can affect flooring stability. A ceiling stain may be minor, but a sagging ceiling panel can become an overhead hazard. A warped baseboard may be cosmetic, but moisture behind it may be affecting lower wall framing.
The repair order should always ask what the damaged material does. If it supports weight, holds the building envelope together, protects against water entry, or affects safety, it usually outranks appearance-based repairs.
Priority 7: Complete Permanent Source Repairs Before Replacing Finishes
After damaged materials are dried, removed, or stabilized, the next priority is completing the permanent repair that prevents the same area from getting wet again. This is different from emergency source control. Turning off a valve, tarping a roof, or stopping an appliance leak may stabilize the situation, but the underlying failure still has to be repaired before finishes are replaced.
Common causes include plumbing leaks, roof leaks, failed flashing, appliance hose failures, basement seepage, poor drainage, window leaks, door threshold failures, HVAC condensation issues, high indoor humidity, or exterior wall openings. If the cause is not repaired, the same area may become wet again after the next rainstorm, appliance cycle, plumbing use, humidity spike, or drainage failure.
This is especially important when water damage appears after recurring events. For example, a basement wall that gets wet after every heavy rain should not be treated as a drywall or paint problem. A window area that stains after storms should not be treated only with interior trim repair. A ceiling stain below a roof leak should not be repainted until the roof issue is resolved.
Source repairs protect every later repair
Think of source repair as the foundation for every later step. Drying protects the current materials. Structural stabilization protects safety and support. Source repair protects the future repair. Without it, new materials are exposed to the same moisture pattern that damaged the old ones.
This is where repair prioritization connects directly to prevention. If the source is a roof leak, flashing problem, pipe leak, drainage issue, appliance failure, or humidity problem, the repair plan should allocate time and budget to that cause before spending heavily on cosmetic finish work.
For homeowners trying to understand how source correction fits into the whole-house moisture system, how to prevent recurring moisture damage is the parent guide that connects repair decisions to long-term moisture control.
Priority 8: Replace Finishes Only After the Area Is Dry and Stable
Finish repairs should come after safety, source control, drying, hidden moisture checks, structural stabilization, and cause repair. This includes repainting, installing new trim, replacing drywall, laying new flooring, refinishing cabinets, or closing wall cavities.
This does not mean finish repairs are unimportant. They restore the room, protect surfaces, and make the home usable again. But they should not be used to rush the recovery process. If finishes are installed too soon, they can hide damp materials and make future repairs harder.
Before replacing finishes, confirm each of the following rather than relying only on how the surface looks:
- The water source has been stopped or repaired.
- Wet materials have been dried, removed, or replaced as needed.
- Hidden moisture has been evaluated in likely affected areas.
- Structural materials are stable enough to support finish repairs.
- The area is not showing signs of recurring dampness.
- Moisture readings or professional drying records support the decision to close the area, when readings are available.
- The repair will not trap moisture behind new materials.
In many cases, damaged drywall, flooring, trim, or cabinets should wait until the deeper moisture questions are answered. Rebuilding too early may feel productive, but it can create a second repair cycle if moisture was missed.
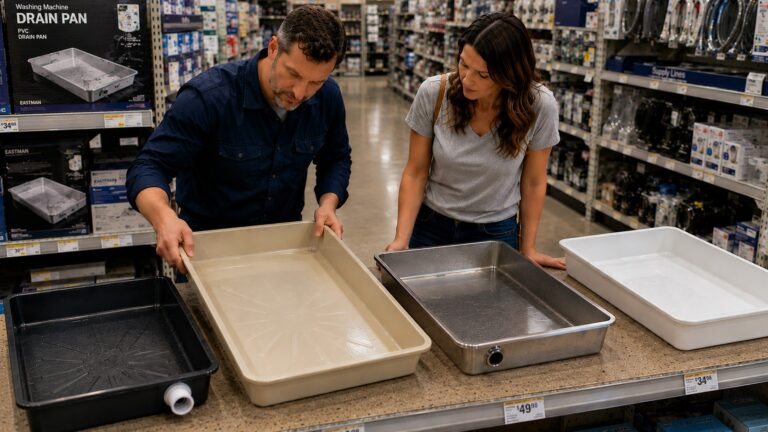
How to Allocate Budget When You Cannot Fix Everything at Once
Water damage repairs can become expensive quickly, especially when several rooms, materials, or systems are involved. If you cannot fix everything at once, prioritize the repairs that reduce risk and prevent the damage from spreading.
A practical budget order is:
- First: safety hazards and active water sources
- Second: water removal, drying, and moisture control
- Third: structural stabilization and material removal where needed
- Fourth: source repairs that prevent the damage from returning
- Fifth: replacement of damaged functional materials
- Last: cosmetic repairs and appearance upgrades
This approach helps protect limited funds from being spent on repairs that may have to be removed later. For example, replacing flooring before drying the subfloor can waste money. Painting over a wall before the leak is fixed can hide damage temporarily. Installing new trim before the wall-floor joint is dry can trap moisture behind it.
When costs are a major concern, it helps to separate emergency stabilization, drying, source repair, and finish restoration into different budget categories. For broader cost planning, see how much water damage restoration costs.
What can usually wait?
Repairs that are mostly cosmetic can often wait as long as the area is dry, safe, and not getting worse. These may include repainting stained surfaces, replacing decorative trim, refinishing cabinets, cosmetic drywall texture work, or upgrading flooring finishes after the underlying structure has been handled.
The key is not to ignore cosmetic damage forever. The key is to avoid letting cosmetic work consume the budget before the home is safe, dry, stable, and protected from repeat water exposure.
When to Call a Professional
Some water damage repairs can be handled by a careful homeowner, especially when the water source was small, clean, stopped quickly, and limited to surface materials. But other situations should move professional evaluation near the top of the priority list.
Call a professional when water damage involves electrical systems, structural materials, ceilings that are sagging, sewage or contaminated water, large areas of wet drywall or flooring, repeated moisture after previous repairs, or uncertainty about whether hidden cavities are dry. A professional inspection may also be necessary when the repair order is unclear because several systems may be involved at once.
Professional help is especially important when water damage affects:
- Ceilings with visible sagging or bulging
- Subfloors that feel soft, swollen, or uneven
- Wall cavities with wet insulation
- Framing, joists, rafters, or load-bearing areas
- Electrical fixtures, panels, or outlets
- Basement or crawl space drainage systems
- Roof leaks, flashing failures, or exterior water entry points
- Rooms that keep becoming damp after previous repairs
The purpose of calling a professional is not always to replace every damaged material immediately. Sometimes the most valuable step is getting a clear repair sequence: what must be stabilized now, what must be dried, what must be opened, what source must be corrected, and what finish repairs can safely wait.
How to Turn Repair Priorities Into a Recovery Plan
Prioritizing repairs gives you the order of importance. A recovery plan turns that order into a schedule, budget, and communication plan. After the urgent decisions are made, the next step is to organize drying, inspections, contractor scheduling, insurance documentation, material replacement, and follow-up monitoring.
A basic water damage recovery plan should include:
- The known or suspected water source
- Immediate safety risks
- Materials that are wet, removed, or still under evaluation
- Areas that need hidden moisture inspection
- Structural concerns that need professional review
- Repairs that prevent recurrence
- Finish repairs that should wait until drying is confirmed
- Budget limits and contractor scheduling needs
This keeps the project from becoming a random set of repairs. It also helps you communicate clearly with contractors, insurance adjusters, restoration companies, or anyone helping with the work. For the broader planning stage after priorities are set, use how to create a water damage recovery plan.
FAQs About Prioritizing Repairs After Water Damage
What should I repair first after water damage?
Start with immediate safety hazards and active water sources. Electrical risks, sagging ceilings, contaminated water, unstable floors, and ongoing leaks should be handled before cosmetic repairs. After that, prioritize water removal, drying, hidden moisture checks, structural stabilization, and source repair before replacing finishes.
Should I replace drywall or flooring first after water damage?
Neither should be replaced until the affected area is dry and the water source has been corrected. If both drywall and flooring are wet, the priority is to determine where moisture traveled, remove or dry materials as needed, and confirm that subfloors, wall cavities, and framing are not still damp before rebuilding.
Can cosmetic water damage repairs wait?
Cosmetic repairs can often wait if the area is safe, dry, stable, and no longer exposed to water. Paint, trim, texture, and decorative finish work should usually come after source repair, drying, and hidden moisture checks. Cosmetic work done too early can hide damage that still needs attention.
Is hidden moisture more important than visible stains?
Often, yes. A visible stain shows where water appeared, but hidden moisture may show where the repair risk still remains. Moisture behind walls, under flooring, above ceilings, or inside insulation should be checked before finishes are replaced.
How do I know which water damage repairs can wait?
Repairs can usually wait when they are cosmetic, the water source has stopped, the area is dry, and no structural or safety risk is present. Repairs should not wait when water is still entering, materials are still wet, floors or ceilings are unstable, or hidden moisture is suspected.
What is the biggest mistake when prioritizing water damage repairs?
The biggest mistake is spending money on finish repairs before the source, drying, hidden moisture, and structural risks are handled. Paint, trim, cabinets, and flooring can make a room look finished while moisture remains trapped behind or underneath the repair.
When is water damage too serious for DIY repairs?
Water damage is usually beyond simple DIY repair when it involves electrical exposure, sewage or contaminated water, sagging ceilings, structural framing, large wet areas, recurring leaks, or moisture hidden inside wall and floor assemblies. In those cases, professional evaluation can prevent unsafe or incomplete repairs.
Final Repair Order to Follow
The safest repair order is: safety first, active water second, documentation when needed, water removal and drying next, hidden moisture checks before rebuilding, structural stabilization before finishes, permanent source repair before cosmetic work, and final restoration only after the area is dry and stable.
If two repairs compete for the same budget, choose the one that prevents injury, stops water movement, exposes hidden moisture, protects structural materials, or prevents recurrence. Appearance-based repairs can usually wait until those risks are controlled.
Water Damage Repair Priority Checklist
- Prioritize water damage repairs by risk, not by appearance.
- Safety hazards and active water sources come before cosmetic repairs.
- Document damage before removing materials when insurance may be involved and conditions are safe.
- Drying and hidden moisture checks should happen before rebuilding.
- Structural materials should be stabilized before finish materials are replaced.
- Repair the source of the water damage before repairing the visible damage.
- Cosmetic repairs can usually wait until the area is dry, stable, and protected from recurrence.