How to Create a Water Damage Recovery Plan That Prevents Repeat Problems
A water damage recovery plan is a written sequence for moving from the first leak or flood response to safe drying, repair, rebuilding, and follow-up monitoring that helps prevent repeat problems. It should answer six practical questions: is the home safe, where did the water come from, what materials were affected, how will drying be verified, what must be repaired before rebuilding, and how will the area be monitored afterward?
This matters because the most visible damage is not always the full problem. After a roof leak, appliance failure, plumbing leak, basement seepage, or flood, water may move behind finishes or into materials that still look normal from the surface. A good recovery plan keeps cleanup, documentation, drying, repair order, contractor coordination, and prevention connected instead of treating them as disconnected tasks.
A simple recovery plan can be built as a room-by-room list with five columns: source, affected materials, drying status, repair needed, and follow-up check. That format is often enough to keep the project organized without turning the recovery into a formal inspection document.
This planning approach fits into a larger recurring moisture damage prevention strategy. If the recovery process skips source control, hidden moisture checks, or follow-up monitoring, the same area may become damp again after the next rainstorm, plumbing use, appliance cycle, or humidity change.
Why You Need a Water Damage Recovery Plan
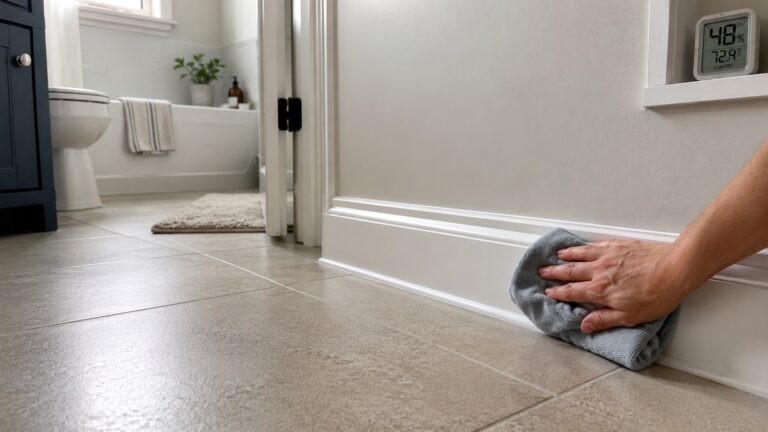
Water damage often affects more than the surface where it first appears. Water can move under flooring, behind baseboards, inside drywall, above ceilings, below cabinets, around framing, and into insulation. If the recovery process only addresses the visible stain or wet surface, hidden moisture may remain behind the repair.
A written recovery plan helps you avoid that mistake. It gives you a way to track what happened, what was affected, what has been dried, what still needs inspection, what repairs are urgent, and what can wait. It also helps when you need to talk with contractors, restoration companies, insurance adjusters, plumbers, roofers, or other professionals.
Without a plan, homeowners often run into the same problems:
- Cosmetic repairs are completed before the source is fixed.
- Drywall or flooring is replaced before hidden moisture is checked.
- Insurance documentation is forgotten before materials are removed.
- Contractors are called in the wrong order.
- Drying equipment is removed before moisture is verified.
- The room looks repaired but moisture returns later.
A recovery plan does not need to be complicated. It simply needs to show what must happen now, what must wait, who is responsible, and what evidence proves the area is ready for the next step.
Step 1: Confirm the Water Source Is Stopped
The first part of any water damage recovery plan is source control. Before you plan rebuilding, painting, flooring, or finish repairs, confirm that the water source has stopped or has been temporarily contained. If water is still entering the home, every later repair is at risk.
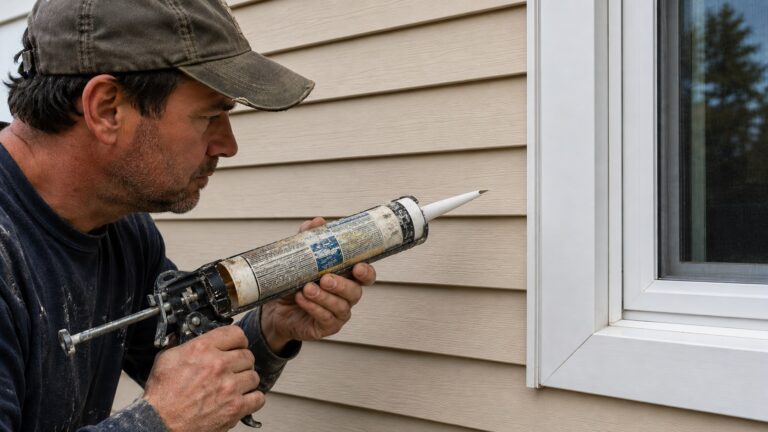
The source may be obvious, such as a leaking supply line, overflowing toilet, failed appliance hose, or burst pipe. It may also be less obvious, such as roof flashing failure, window intrusion, door threshold leaks, clogged HVAC condensate drainage, basement seepage, poor exterior drainage, or water entering through a structural gap.
Your recovery plan should identify the source as clearly as possible:
- What caused the water damage?
- Is the source fully repaired or only temporarily controlled?
- Could water return during the next rain, plumbing use, or appliance cycle?
- Does the source require a plumber, roofer, electrician, restoration company, or structural contractor?
- What areas could become wet again if the source is not corrected?
If the source is not fully fixed, note that in the plan. You may still need emergency drying or temporary protection, but permanent finish repairs should wait until the source is handled. Replacing drywall, trim, flooring, or paint before source control can create repeat damage and wasted repair costs.
Examples of source-control priorities
A roof leak may require temporary covering first, then roof or flashing repair before the ceiling is rebuilt. A basement water problem may require drainage correction before new wall finishes or flooring are installed. A dishwasher leak may require hose, valve, or appliance repair before flooring repairs are completed. A window leak may require exterior sealing, flashing correction, or frame repair before interior trim is replaced.
The recovery plan should make this connection visible: the damaged material is one part of the problem, but the water source controls whether the repair will last.
Step 2: Separate Emergency Actions From Recovery Planning
Emergency response and recovery planning overlap, but they are not the same thing. Emergency actions reduce immediate danger and limit new damage. Recovery planning begins once the situation is stable enough to organize documentation, drying, repairs, rebuilding, and monitoring.
In your plan, mark emergency items separately from recovery items. Shutting off water, avoiding unsafe areas, controlling electrical risk, removing standing water when conditions are safe, or calling emergency restoration help may need to happen before the full recovery sequence is written.
If water is near electrical components, sewage is involved, ceilings are sagging, floors feel unstable, or floodwater may be contaminated, do not treat the area as a normal DIY cleanup. Make the area safe first and bring in qualified help before continuing the recovery plan.
Once the area is stable, the plan should organize:
- Damage documentation
- Water removal and drying
- Hidden moisture inspection
- Repair prioritization
- Contractor coordination
- Insurance communication, when relevant
- Material replacement
- Follow-up monitoring
- Prevention of repeat damage
This distinction matters because homeowners sometimes jump from emergency cleanup straight into cosmetic repair. A better plan creates a bridge between the emergency phase and the rebuild phase. It makes sure that drying, documentation, hidden moisture, and source repair are handled before the room is closed back up.
If you are not sure which repairs should come before others, use how to prioritize repairs after water damage as the repair-order guide within your larger recovery plan.
Step 3: Document the Damage Before Conditions Change
Documentation should be built into the recovery plan before major cleanup, demolition, or material removal changes the scene. This is especially important when insurance may be involved, but it is also useful for your own repair tracking. Water damage can change quickly once drying begins, and details that seem obvious on the first day may be harder to prove or remember later.
Your documentation does not need to be complicated. The goal is to create a clear record of what happened, where the water traveled, what materials were affected, and what was done during recovery.
Include these items in your recovery file:
- Photos and videos of affected rooms before cleanup
- Close-up photos of stains, swelling, warping, cracks, soft materials, and standing water
- The date and approximate time the water damage was discovered
- The suspected source of the water
- A list of affected rooms, surfaces, and belongings
- Notes from plumbers, roofers, restoration companies, or inspectors
- Moisture readings, if they are taken
- Receipts for emergency services, temporary repairs, equipment, and materials
- Photos of materials before and after removal
If you are dealing with insurance, documentation should happen as early as safety allows. For a more detailed insurance-focused response sequence, see what to do immediately after water damage for insurance. For photo-specific guidance, use how to photograph water damage for insurance claims.
Step 4: Map Every Area the Water Could Have Reached
A strong recovery plan does not only list the areas that look damaged. It also maps where water may have traveled. Water can move sideways, downward, behind finishes, into absorbent materials, and along hidden building components. This is why the visible stain is not always the full boundary of the problem.
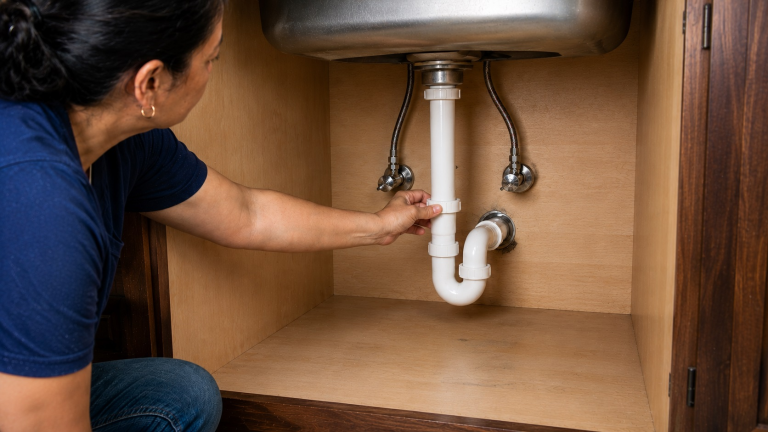
Start with the source and trace the likely path. If a roof leaked, water may have affected attic insulation, ceiling drywall, wall cavities, trim, and flooring below. If a dishwasher leaked, water may have moved under the appliance, beneath finished flooring, into cabinet edges, and into the subfloor. If a basement wall leaked, water may have affected wall finishes, floor edges, stored items, baseboards, and nearby framing.
Your recovery map should include:
- The original water source
- The visible wet or stained area
- Nearby rooms or materials that may have absorbed moisture
- Flooring edges, wall-floor joints, and baseboards
- Ceilings below bathrooms, roofs, or plumbing runs
- Cabinets, toe kicks, and enclosed spaces
- Insulation and wall cavities when water entered behind finished surfaces
- Basement, crawl space, attic, or exterior wall areas connected to the source
This mapping step helps prevent incomplete recovery. If the plan only covers the obvious stain or puddle, it may miss damp materials nearby. If the plan includes the likely water path, you can decide where drying, inspection, or professional evaluation is needed.
Visible damage is not the full damage map
Water often leaves visible evidence in one place while causing hidden problems somewhere else. A ceiling stain may be below wet insulation. A swollen floor plank may be above damp subflooring. A musty cabinet may be next to wet drywall. A dry-looking wall may still contain moisture behind the baseboard.
Before closing walls, replacing flooring, or reinstalling trim, the recovery plan should include a hidden moisture checkpoint. If the affected area is larger than it first appears, use how to evaluate hidden water damage to guide that inspection stage.
Step 5: Build a Drying and Moisture Verification Plan
Drying is not just a matter of waiting a few days. A recovery plan should define what needs to be dried, how drying will be supported, and how you will confirm that the area is ready for repair. This is one of the most important steps because rebuilding over damp materials can trap moisture and restart the problem after the room looks finished.
The drying portion of the plan should identify:
- Which materials became wet
- Which materials were removed
- Which materials are being dried in place
- Where fans, air movement, or dehumidification are being used
- Whether wall cavities, floors, ceilings, or insulation need special attention
- How moisture will be checked before rebuilding
For each affected area, write down one verification method before repair begins. That may be a moisture meter reading, a professional drying log, a visual cavity inspection, or a follow-up check after equipment has run long enough to affect the hidden materials.
Different materials dry differently. Drywall can wick moisture upward and may need partial removal if saturated. Carpet padding can remain wet even when the carpet surface feels dry. Subfloor panels can hold moisture under finished flooring. Insulation may slow drying inside wall or ceiling cavities. Cabinets and trim can trap moisture against surfaces that are hard to see.
Because of those differences, the recovery plan should avoid one-size-fits-all drying assumptions. Walls and subfloors often need separate attention. For wall-specific drying, see how to dry walls after water damage. If water reached below the finished flooring, review how to dry subfloors after water damage.
Do not rebuild based only on surface dryness
A surface can feel dry while moisture remains underneath or behind it. This is especially common with flooring, wall cavities, insulation, trim, and cabinets. Your recovery plan should include a decision point before rebuilding: has the area been checked well enough to confirm that moisture is not being sealed in?
That does not always require opening every surface. But it does mean the plan should include moisture verification, professional readings when needed, and careful inspection of materials that commonly hide water. Rebuilding should happen after the area is dry enough to support repairs, not simply after visible surfaces appear dry.
Step 6: Prioritize Repairs by Risk
Once the source, damage map, and drying plan are clear, the recovery plan should rank repairs by risk. This keeps the project from being driven only by appearance. The most visible damage is not always the most urgent repair, and the most expensive-looking surface may not be the first thing that needs attention.
A practical recovery plan should rank repairs in this order:
- Safety hazards: electrical exposure, sagging ceilings, unstable floors, contaminated water, or structural movement
- Active water sources: leaks, seepage, roof intrusion, appliance failures, or drainage problems that could continue
- Drying needs: wet drywall, flooring, subfloors, insulation, ceilings, cabinets, and hidden cavities
- Structural concerns: framing, joists, rafters, subfloors, or load-bearing areas affected by moisture
- Source repairs: plumbing, roof, flashing, window, drainage, HVAC, or basement corrections
- Functional repairs: damaged flooring, drywall, cabinets, fixtures, or materials needed for normal use
- Cosmetic restoration: paint, texture, trim, finish details, and appearance upgrades
This risk-based order prevents premature repairs. Replacing flooring before checking the subfloor, painting a ceiling before the roof leak is fixed, or reinstalling baseboards before the wall-floor joint is dry can all hide unfinished recovery work.
The recovery plan only needs to assign each task to the right risk category and show what must happen before that task is safe to complete. For the full repair-order framework, use how to prioritize repairs after water damage.
Step 7: Decide What Requires Professional Help
A water damage recovery plan should clearly separate DIY tasks from situations that need professional evaluation. Some cleanup and monitoring tasks may be manageable for a homeowner when the water was clean, the area was small, the source was stopped quickly, and no structural or electrical systems were involved. But larger or more complex damage needs professional input.
Professional help may be needed when the plan involves:
- Electrical fixtures, outlets, breaker panels, or wiring exposed to water
- Sewage, stormwater, or other contaminated water
- Sagging ceilings or overhead water-damaged materials
- Soft, uneven, or unstable floors
- Large areas of wet drywall, flooring, or insulation
- Water inside wall cavities, ceilings, or structural assemblies
- Roof leaks, flashing failures, foundation seepage, or drainage failures
- Visible mold growth or strong musty odors after water damage
- Repeated moisture after previous repairs
The recovery plan should also identify which type of professional fits the problem. A plumber may be needed for supply or drain leaks. A roofer may be needed for roof water entry. An electrician may be needed when water reaches electrical components. A restoration company may be needed for drying and material removal. A structural contractor may be needed when floors, ceilings, framing, or load-bearing areas are affected.
Do not assume one contractor will automatically handle every part of the recovery. Water damage often crosses trades. A good plan lists who is responsible for source repair, drying, structural evaluation, material replacement, and follow-up checks.
Step 8: Create a Realistic Recovery Timeline
A recovery timeline helps prevent two common mistakes: rushing into rebuilding too soon or leaving the project disorganized for too long. The timeline does not need exact dates for every step at the beginning, because drying time, contractor availability, and insurance response can vary. But it should define the major phases of recovery.
A realistic water damage recovery timeline usually includes these phases:
- Emergency phase: control safety risks, stop or contain water, protect the area, and prevent additional damage.
- Documentation phase: photograph damage, list affected materials, save receipts, and record professional findings.
- Drying phase: remove standing water, set up drying conditions, remove unsalvageable wet materials, and monitor progress.
- Inspection phase: check hidden moisture, structural materials, insulation, subfloors, ceilings, and adjacent areas.
- Source repair phase: correct the plumbing, roof, appliance, drainage, HVAC, window, door, or exterior issue that caused the damage.
- Rebuild phase: replace drywall, flooring, trim, cabinets, paint, and other finishes after the area is dry and stable.
- Monitoring phase: recheck the area after rain, plumbing use, appliance use, or humidity changes.
The important point is that these phases should not be treated as interchangeable. Some can overlap, but they should not be reversed in a way that traps moisture or hides an unfinished source repair. Rebuilding belongs near the end of the timeline because the materials behind the finish work must be dry and stable first.
How to avoid rushing the rebuild phase
The rebuild phase should begin only after the plan answers four questions: is the source fixed, are affected materials dry enough for repair, has hidden moisture been considered, and are structural materials stable?
If those questions are unanswered, new materials may cover the same moisture problem that caused the damage.
Step 9: Plan the Budget and Keep the Paper Trail Organized
Budget planning is part of recovery planning because water damage repairs can expand as hidden moisture, material removal, and source repairs are discovered. A written plan helps separate essential work from work that can wait. This is especially helpful when you are comparing estimates, waiting for insurance decisions, or trying to decide how much of the work can be handled in phases.
Divide the budget into categories:
- Emergency control: temporary protection, water shutoff work, extraction, safety measures, or urgent service calls
- Drying and removal: drying equipment, material removal, dehumidification, disposal, and moisture checks
- Source repair: plumbing, roofing, appliance, drainage, HVAC, exterior, or basement repairs
- Structural repair: subfloor, framing, ceiling, joist, or support-related repairs
- Finish repair: drywall, flooring, trim, cabinets, paint, texture, and finish materials
- Prevention and monitoring: leak sensors, humidity monitoring, drainage improvements, maintenance, or follow-up inspections
This makes it easier to see which costs protect the home and which costs restore appearance. Finish repairs matter, but they should not consume the budget before safety, drying, source repair, and recurrence prevention are handled.
Keep receipts, estimates, invoices, inspection notes, photos, and drying records in one place. If the recovery involves insurance, this paper trail can support the claim. If it does not involve insurance, the records still help you understand what was done and what may need follow-up later.
For general cost planning, see how much water damage restoration costs. Use cost information as planning support, not as a substitute for a room-by-room recovery plan.
Step 10: Add Recurrence Prevention and Follow-Up Monitoring
A water damage recovery plan is not complete when the room looks normal again. The final part of the plan should explain how the repaired area will be monitored and how the same moisture problem will be prevented from returning, especially after roof leaks, basement seepage, appliance leaks, window leaks, plumbing repairs, HVAC condensation, or water inside hidden cavities.
Follow-up monitoring should focus on the conditions that caused the damage in the first place. If the problem happened during rain, recheck the area after the next heavy rain. If it came from plumbing, inspect the area after normal fixture use. If it involved an appliance, check behind or under the appliance after several cycles. If humidity or condensation played a role, monitor indoor humidity and surface dampness over time.
Your monitoring plan may include:
- Checking for new stains, swelling, odors, or dampness
- Rechecking repaired areas after rain or plumbing use
- Monitoring humidity in moisture-prone rooms
- Inspecting under sinks, around appliances, and near exterior openings
- Watching for baseboard swelling, flooring changes, or musty smells
- Scheduling follow-up inspections for roofs, basements, crawl spaces, or drainage systems
For repaired leak areas, how to monitor areas after leak repairs can help you build a focused follow-up routine. If you notice warning signs again, compare them with signs of moisture returning after repairs so the problem can be caught before it becomes another major repair cycle.
Recurring moisture often happens when cleanup is completed but the underlying condition remains. If moisture keeps coming back after the home appears repaired, review why moisture returns after cleanup to identify whether the problem is source repair, drying, ventilation, humidity, drainage, or hidden moisture.
Water Damage Recovery Plan Checklist
Use this checklist to organize the recovery process. Not every item applies to every water damage event, but each one should be considered before the project is treated as complete.
- Confirm the home is safe to enter and work in.
- Identify the water source and whether it is stopped, repaired, or only temporarily controlled.
- Document the damage with photos, videos, notes, and dates.
- List every affected room, surface, material, and hidden area that may need inspection.
- Remove standing water when conditions are safe.
- Create a drying plan for walls, floors, ceilings, insulation, cabinets, and structural materials.
- Verify moisture conditions before rebuilding.
- Check for hidden moisture in likely water paths.
- Prioritize repairs by safety, source control, drying, structure, function, and appearance.
- Identify which professionals are needed and what each one is responsible for.
- Separate emergency costs, source repairs, drying costs, structural repairs, finish repairs, and prevention costs.
- Keep receipts, estimates, invoices, photos, and inspection notes organized.
- Repair the cause of the water damage before final finish restoration.
- Rebuild only after the affected materials are dry and stable.
- Create a follow-up monitoring plan after repairs are complete.
Common Mistakes to Avoid During Water Damage Recovery
A recovery plan is most useful when it prevents rushed decisions that hide moisture, skip source repair, or make the same damage return.
Rebuilding before the area is dry
One of the most common mistakes is replacing drywall, flooring, trim, or cabinets before the affected area is fully dry. This can trap moisture inside assemblies and make the damage harder to detect later.
Fixing the visible damage but not the source
A stained ceiling, swollen baseboard, or warped floor is usually a symptom. If the roof leak, plumbing leak, drainage issue, appliance failure, or condensation source remains, the visible repair may fail again.
Skipping hidden moisture checks
Water can travel behind surfaces. A recovery plan that only covers visible damage may miss damp insulation, subflooring, framing, or wall cavities.
Letting cosmetic work control the schedule
Paint, trim, texture, and finish flooring should not drive the recovery timeline. They belong after source control, drying, moisture verification, and structural review.
Assuming one contractor covers the entire recovery
Water damage may involve several systems. A plumber may fix the leak, but not dry the wall. A restoration company may dry materials, but not repair the roof. A flooring installer may replace finishes, but not evaluate hidden moisture. The plan should define who handles each part.
FAQs About Creating a Water Damage Recovery Plan
What should a water damage recovery plan include?
A water damage recovery plan should include source control, safety concerns, documentation, affected areas, drying steps, hidden moisture checks, repair priorities, professional help, budget categories, rebuild timing, and follow-up monitoring. The goal is to make sure the home is dry, stable, repaired, and protected from repeat damage.
Do I need a recovery plan for a small leak?
Small leaks do not always require a complex plan, but they still need basic organization. If water reached drywall, flooring, cabinets, insulation, ceilings, or hidden cavities, you should track the source, affected materials, drying status, and follow-up checks. Small leaks can still cause hidden moisture if they are ignored.
How long should I wait before rebuilding after water damage?
You should wait until the water source is corrected, affected materials are dry enough for repair, hidden moisture has been considered, and structural materials are stable. Do not rely only on surface dryness or a fixed number of days. The right timing depends on the materials involved, the amount of water, and drying conditions.
Who should be involved in a water damage recovery plan?
Depending on the damage, the plan may involve a homeowner, restoration company, plumber, roofer, electrician, mold remediation professional, structural contractor, flooring installer, drywall contractor, or insurance adjuster. The right people depend on the source of the water and which materials or systems were affected.
How do I know when water damage recovery is complete?
Recovery is complete when the source is fixed, affected materials are dry or properly replaced, hidden moisture concerns have been addressed, structural materials are stable, finish repairs are complete, and follow-up monitoring shows no signs of recurring moisture. A room looking normal is not enough by itself.
What is the biggest mistake homeowners make after water damage?
The biggest mistake is treating the recovery plan as finished when the room looks normal. Before rebuilding, the plan should prove three things: the source is fixed, affected materials are dry enough for repair, and hidden moisture has been checked where water may have traveled.
Final Recovery Check Before You Rebuild
A water damage recovery plan gives structure to a stressful repair process. Instead of reacting to the most visible damage first, it helps you organize safety, source control, documentation, drying, hidden moisture evaluation, repair priorities, contractor coordination, budgeting, rebuilding, and monitoring.
The most successful recovery plans do not stop at cleanup. They continue until the home is safe, dry, stable, repaired, and protected against repeat moisture problems. That is the difference between making a damaged room look better and actually solving the water damage problem.
For a broader whole-home framework, use how to find, fix, and prevent moisture problems in homes. For long-term prevention after the recovery work is complete, return to the recurring moisture damage prevention strategy.