How to Detect Inadequate Roof Ventilation
You can detect inadequate roof ventilation by checking whether air can enter through the soffits, move through open attic pathways, and exit through roof or ridge vents. The strongest clues are blocked soffit openings, missing or crushed baffles, widespread condensation, rusted nail tips, damp insulation, frost on roof decking, and attic areas that stay unusually hot or humid.
This inspection is different from simply noticing signs of poor attic ventilation. Symptoms tell you something may be wrong, but detection means tracing the airflow path from intake to exhaust and looking for the point where movement is restricted.
Quick diagnosis: Inadequate roof ventilation is more likely when moisture appears across broad attic surfaces, soffit air channels are blocked, baffles are missing or crushed, roof-deck nails are rusting, or the attic stays unusually hot or humid even though vents are present. A roof leak is more likely when moisture is concentrated below one roof penetration, flashing point, valley, seam, or damaged shingle area.
Check in this order: start at the soffits, then inspect the baffle channels, then look across the underside of the roof deck, then check exhaust vents, and only then compare moisture and temperature patterns. If intake air cannot enter, the rest of the ventilation system cannot work properly.
Why Detecting Ventilation Problems Early Matters
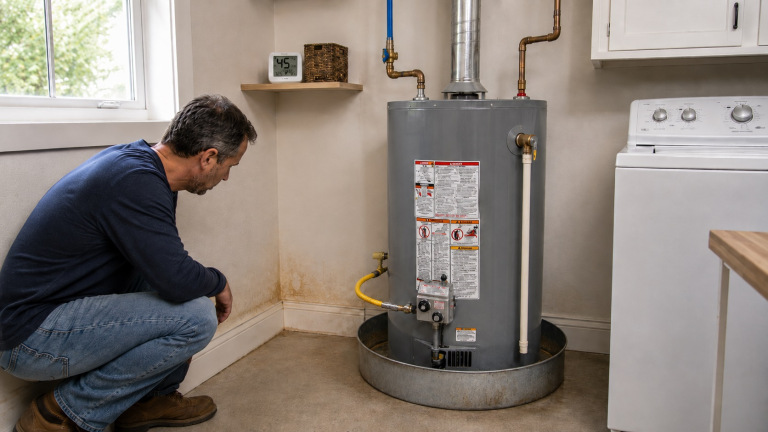
Roof ventilation removes heat and moisture from the attic. When airflow is restricted or unbalanced, moisture can remain trapped long enough to stain roof sheathing, dampen insulation, rust nail tips, and support mold growth.
In many cases, ventilation failures are mistaken for roof leaks because moisture appears in similar ways. However, moisture caused by ventilation problems usually spreads across wide areas instead of forming a single concentrated leak location. Understanding this difference helps guide proper inspection and avoids unnecessary roof repairs.
This article also fits into the broader roof moisture and failure pattern covered in common roofing material failures that affect attic airflow.
Learning why ventilation failures lead to moisture buildup can also provide useful context before beginning inspections. For a deeper explanation of airflow behavior and moisture formation, see why poor roof ventilation causes moisture problems.
Step-by-Step Process to Detect Inadequate Roof Ventilation
Detecting inadequate ventilation means following the airflow path: intake first, open attic pathways second, exhaust third, and moisture or temperature evidence last.
Step 1 — Inspect the Attic Interior
The attic interior provides the most direct evidence of ventilation performance. Begin by entering the attic with a reliable flashlight and carefully scanning visible surfaces.
Step only on framed walking surfaces or ceiling joists, not exposed drywall or insulation. If the attic is too tight, dark, hot, moldy, or difficult to move through safely, stop and use a professional inspection instead.
Look for signs that moisture may be lingering inside the attic. Dark staining on roof sheathing, damp insulation, or rust on nail tips can indicate that moisture is not being removed effectively. These visual clues often appear before severe damage develops.
Pay attention to insulation patterns as well. Insulation should appear evenly distributed and dry. If certain areas look compressed, discolored, or damp, airflow may not be circulating properly through those sections.
It is also important to examine the underside of roof decking and rafters. Uneven discoloration, streaking, or mold patches may indicate moisture accumulation linked to poor airflow rather than direct roof leaks.
If moisture indicators appear during inspection, reviewing signs of moisture in attic insulation can help confirm whether insulation damage is related to ventilation problems.
Step 2 — Verify Soffit Intake Airflow Access
Soffit vents supply fresh air into the attic and serve as the starting point for proper ventilation. Without adequate intake airflow, exhaust vents cannot function effectively.
From inside the attic, look toward the lower roof edges where soffit vents are located. In many attics, you should see daylight at vented soffit areas or a clear baffle channel between the insulation and roof decking. If insulation is packed tightly against the eaves, the baffles are missing or crushed, or the vent openings are covered, intake air may not be entering the attic as intended.
This step focuses on basic visibility rather than detailed cleaning or repairs. If soffit vents appear obstructed or difficult to see, more detailed inspection procedures are covered in how to inspect soffit vents for blockages.
Blocked intake vents are among the most common causes of inadequate ventilation. Insulation shifts over time and may gradually cover vent openings, preventing airflow from entering the attic.
Step 3 — Inspect Roof Exhaust Vent Areas
After confirming intake airflow pathways, the next step is to evaluate exhaust vents. These vents allow warm, moist air to exit the attic and are typically located near the roof ridge or upper roof sections.
Look for signs that exhaust vents may not be functioning correctly. Around ridge vents, box vents, gable vents, or other upper vents, check for heavy dust buildup, debris, crushed screening, damaged vent parts, blocked openings, or moisture staining concentrated near the vent area.
Exhaust vents should be open enough for warm, moist attic air to escape. If the upper vent areas are blocked while the lower intake vents are also weak, the attic can hold heat and moisture even though vents are technically present.
If you suspect physical blockages within roof vents, detailed inspection guidance is available in how to inspect roof vents for blockages.
Step 4 — Look for Blocked Airflow Pathways
Even when intake and exhaust vents are present, airflow may still be restricted if pathways inside the attic are blocked. Air must move freely from soffit intake vents through the attic space and toward exhaust vents. Any obstruction along this path reduces ventilation performance.
Begin by examining the area between the soffits and the upper sections of the attic. Look for insulation that has shifted or piled up against the roof decking near the eaves. This condition often blocks the natural airflow path that allows fresh air to enter the attic.
Other common obstructions include stored items placed too close to ventilation areas, damaged insulation baffles, or debris that has accumulated over time. These conditions may not completely stop airflow, but even partial blockage can reduce ventilation efficiency.
If you suspect insulation interference near soffits, it may be helpful to review signs soffit vents are blocked to better understand how intake problems develop and how they affect airflow.
Step 5 — Check Temperature Patterns in the Attic
Temperature behavior inside the attic can provide useful clues about ventilation performance. While attics normally become warm during hot weather, uneven temperature distribution may signal airflow problems.
On warm days, enter the attic during mid-afternoon and observe temperature differences between various areas. Sections that feel significantly hotter than surrounding areas may indicate trapped heat caused by restricted airflow.
One false alarm is normal attic heat on a hot afternoon. An attic can be much warmer than the living space without having a ventilation defect. The concern is uneven heat, trapped humidity, repeated condensation, frost, or moisture patterns that remain after normal weather changes.
During colder seasons, temperature changes may produce different clues. Frost forming on roof decking or nail tips can signal warm indoor air reaching cold attic surfaces without adequate ventilation to remove moisture.
Uneven temperature patterns often occur when intake and exhaust vents are not balanced. Areas near blocked airflow paths typically show higher heat buildup than well-ventilated sections.
Step 6 — Look for Moisture Patterns That Suggest Poor Ventilation
Moisture patterns are among the strongest indicators of inadequate ventilation. These patterns often develop gradually and may affect large portions of the attic rather than a single isolated location.
Look for widespread staining, damp wood surfaces, or condensation forming along multiple sections of roof sheathing. These symptoms suggest moisture is not escaping efficiently and may be condensing repeatedly on cold surfaces.
Another important indicator is frost formation during winter months. Frost buildup followed by melting cycles can saturate insulation and create long-term moisture exposure.
If you notice moisture appearing across broad surfaces rather than in a concentrated drip location, the issue may be ventilation-related rather than caused by roof damage. For comparison, reviewing signs of roof condensation in attics can help confirm whether moisture behavior matches ventilation-related condensation.
Step 7 — Evaluate Intake and Exhaust Airflow Balance
Proper roof ventilation depends on balanced airflow between intake and exhaust vents. Intake vents allow fresh air to enter, while exhaust vents remove warm, moist air. When this balance is disrupted, ventilation performance declines.
Do not judge ventilation by the number of roof vents alone. Too much exhaust with weak intake can pull air from the house instead of through the soffits, while strong intake with limited exhaust can leave warm, moist air trapped near the roof deck. The goal is a continuous path from low intake to high exhaust.
Signs of imbalance may include strong airflow at exhaust vents but limited intake airflow, or visible intake openings without corresponding exhaust movement. In some cases, homeowners install additional exhaust vents without increasing intake capacity, which reduces overall airflow efficiency.
One way to evaluate airflow balance is by observing airflow patterns during temperature changes. Warm air should rise naturally toward exhaust vents, while cooler air should enter through intake openings. If airflow movement appears weak or inconsistent, the ventilation system may not be functioning as intended.
If the attic has a powered fan, do not assume the system is working just because the fan runs. A fan can still perform poorly if intake vents are blocked, the thermostat or humidistat is misadjusted, or the fan is pulling replacement air from the living space instead of the soffits.
Understanding the relationship between intake and exhaust airflow helps confirm whether ventilation problems are caused by blockage, imbalance, or system design limitations.
Common Detection Mistakes to Avoid
A few common mistakes can make attic ventilation problems harder to detect accurately.
Assuming Visible Vents Mean Proper Ventilation
Many homeowners assume that the presence of visible vents guarantees adequate ventilation. While vents may be installed correctly, airflow can still be restricted by internal blockages or design imbalances.
For example, soffit vents may appear intact from the outside but be blocked by insulation from the inside. Similarly, roof vents may be partially clogged with debris or damaged components that limit airflow.
Because visual confirmation alone does not guarantee airflow, it is important to verify whether air can actually move through the system. If vent openings appear obstructed, further evaluation may be needed using how to inspect roof vents for blockages for additional inspection guidance.
Focusing on Only One Vent Location
Another common mistake is inspecting only one section of the attic while ignoring the rest of the ventilation system. Proper ventilation depends on airflow across the entire attic space, not just a single vent location.
Localized inspections may miss airflow restrictions in other areas. For example, one soffit section may remain clear while another is completely blocked. This uneven airflow can still create moisture buildup in isolated zones.
A complete inspection should include multiple intake and exhaust locations to confirm that airflow is consistent throughout the attic.
Confusing Roof Leaks with Ventilation Problems
Moisture in the attic is often assumed to be caused by roof leaks, but ventilation-related condensation can produce similar symptoms. The key difference lies in how moisture appears.
Roof leaks typically create localized wet areas beneath specific roof penetrations, while ventilation problems often produce widespread moisture patterns across multiple sections of roof sheathing.
If moisture appears across large surfaces without a clear entry point, ventilation problems may be responsible. Comparing leak-related symptoms can help clarify this distinction. For further comparison, review signs of roof leaks inside the house.
Ignoring Seasonal Changes
Ventilation performance can change with seasonal weather conditions. Cold temperatures may reveal frost formation inside the attic, while hot summer conditions may expose trapped heat zones.
Ignoring seasonal differences can lead to incomplete detection. An attic that appears dry in summer may develop condensation problems during winter. Inspecting the attic during multiple seasons provides more reliable detection results.
Simple Tools for Checking Attic Ventilation Problems
Basic inspection tools can improve the accuracy of ventilation detection and help identify conditions that may not be obvious during visual inspection alone. These tools do not replace professional testing but can provide valuable supporting information.
Flashlight
A reliable flashlight is one of the most important tools for attic inspection. Proper lighting allows you to detect moisture stains, mold growth, blocked vents, and airflow obstructions that may be difficult to see in low-light conditions.
When inspecting ventilation components, direct the flashlight along roof decking surfaces and toward soffit areas to reveal hidden obstructions or moisture patterns.
Hygrometer
A hygrometer measures humidity levels inside the attic. A single reading does not prove ventilation failure, but readings that stay unusually high compared with outdoor conditions or nearby indoor spaces can support other evidence of trapped moisture.
Humidity readings are most useful when paired with visible clues such as condensation, frost, rusted nail tips, damp insulation, or widespread roof-sheathing stains.
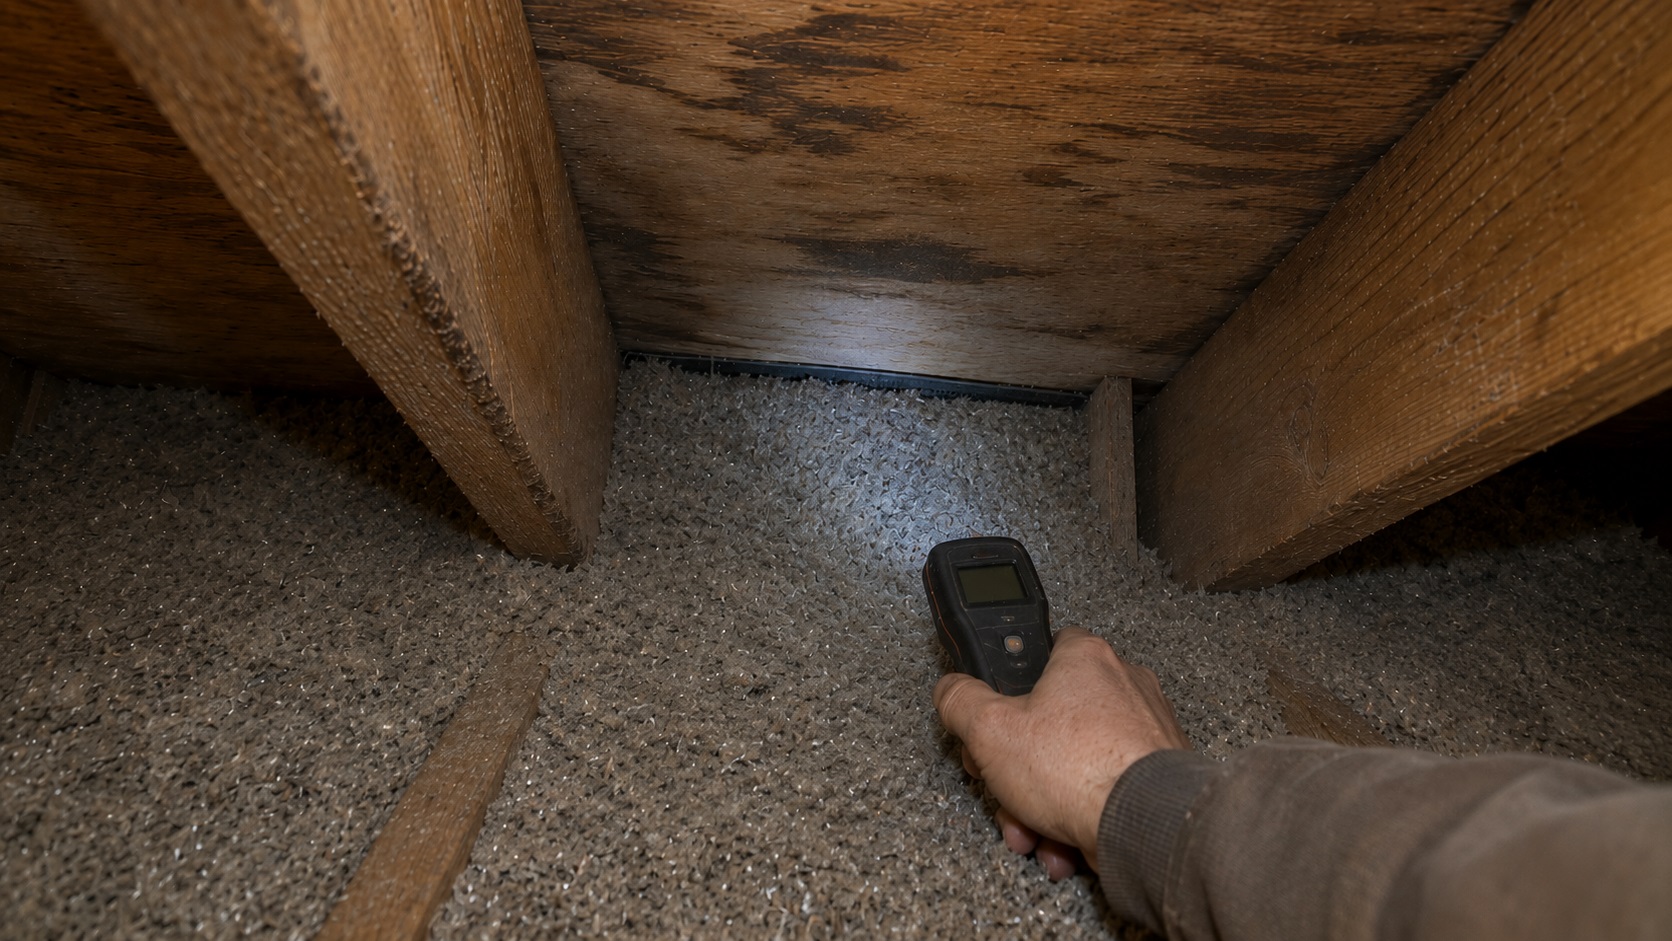
Moisture Meter
A moisture meter measures moisture content inside wood materials such as rafters and roof decking. This tool helps confirm whether materials are retaining moisture longer than expected.
Moisture readings are most useful when you compare several areas of the same attic. Elevated readings across broad sections of roof decking or rafters point more toward trapped attic moisture, while one isolated wet area may point more toward a roof leak.
When Professional Testing Is Necessary
While many ventilation issues can be detected through homeowner inspections, certain conditions require professional evaluation. Advanced testing methods allow professionals to measure airflow performance and identify hidden problems that are not visible during standard inspections.
Repeated Moisture Problems Continue
If moisture symptoms return repeatedly despite cleaning or minor adjustments, professional testing may be necessary. Recurring moisture problems often indicate deeper ventilation imbalance or system failure.
Professionals may use airflow measurement tools and inspection techniques to evaluate ventilation performance and confirm whether airflow is functioning correctly.
Large Areas Show Moisture or Mold
When mold or moisture spreads across large sections of the attic, professional involvement becomes more important. Do not disturb large moldy areas, heavily contaminated insulation, or wet materials near electrical components during a basic homeowner inspection. Extensive moisture exposure can weaken structural components and increase repair complexity.
Professional inspection helps determine whether ventilation improvements are necessary to stop ongoing moisture accumulation.
Attic Conditions Are Difficult to Access Safely
Some attics contain tight spaces, unstable surfaces, or limited access points that make safe inspection difficult. In these cases, professional assistance reduces safety risks and ensures accurate evaluation.
FAQ: How to Detect Inadequate Roof Ventilation
How do I check if attic ventilation is adequate?
You can check attic ventilation by inspecting airflow pathways, confirming that soffit intake vents are visible from inside the attic, and verifying that exhaust vents are unobstructed. Look for balanced airflow movement, moisture buildup across large surfaces, and temperature differences between attic sections.
Can insulation block attic ventilation?
Yes, insulation is one of the most common causes of restricted attic airflow. Insulation may shift over time and cover soffit openings, preventing fresh air from entering the attic. If insulation appears to block airflow near the eaves, detailed inspection steps are explained in how to inspect soffit vents for blockages.
How do I test attic airflow without special tools?
Basic airflow testing can be performed using visual inspection and temperature observation. Look for visible airflow paths, check whether soffit areas have daylight or a clear baffle channel, and observe whether warm air appears trapped in certain attic sections. Uneven moisture patterns or condensation may also indicate restricted airflow.
What attic clue usually points to poor ventilation instead of a roof leak?
Widespread moisture across several roof-decking areas usually points more toward poor ventilation or condensation than a single roof leak. A roof leak usually leaves a more localized wet area below a penetration, flashing point, or damaged roof section.
Do all homes have the same ventilation setup?
No, ventilation systems vary depending on roof design, climate conditions, and building style. Some homes use ridge and soffit ventilation, while others rely on gable or roof vents. Regardless of configuration, airflow must move freely from intake to exhaust for ventilation to function properly.
Conclusion
The clearest way to detect inadequate roof ventilation is to follow the airflow path from soffit intake to attic pathway to exhaust vent. If the intake is blocked, the baffles are missing or crushed, the exhaust vents are obstructed, or moisture appears across broad roof-decking surfaces, the attic may not be ventilating properly.
If the inspection points to restricted airflow or repeated moisture buildup, the next step is identifying the cause before mold, insulation damage, or roof-deck deterioration spreads.
Key Takeaways
- Detecting inadequate ventilation requires checking intake vents, airflow paths, and exhaust performance.
- Blocked airflow pathways are one of the most common causes of ventilation failure.
- Moisture patterns across large surfaces often indicate ventilation-related problems.
- Temperature differences between attic sections can signal restricted airflow.
- Early detection helps prevent mold growth, insulation damage, and structural deterioration when the airflow problem is corrected.
One Comment
Comments are closed.