How to Detect Moisture Behind Baseboards
To detect moisture behind baseboards, look for swelling trim, paint separation, musty odors, soft drywall above the floor line, darkened flooring edges, and elevated moisture meter readings along the lower wall. Baseboards often hide the first signs because they cover the drywall edge where water settles and airflow is limited.
Start with non-invasive checks, then use a moisture meter to compare suspected areas against a dry reference area. If readings stay elevated, odors persist, or the drywall feels soft, removing a small test section of baseboard may be the safest way to confirm what is happening behind the trim.
This guide explains how to detect moisture behind baseboards using safe inspection methods, visual signs, moisture meter readings, and limited trim removal when necessary. For broader room-by-room moisture checks, see how to find hidden moisture in different areas of your home.
Why Moisture Behind Baseboards Is Easy to Miss
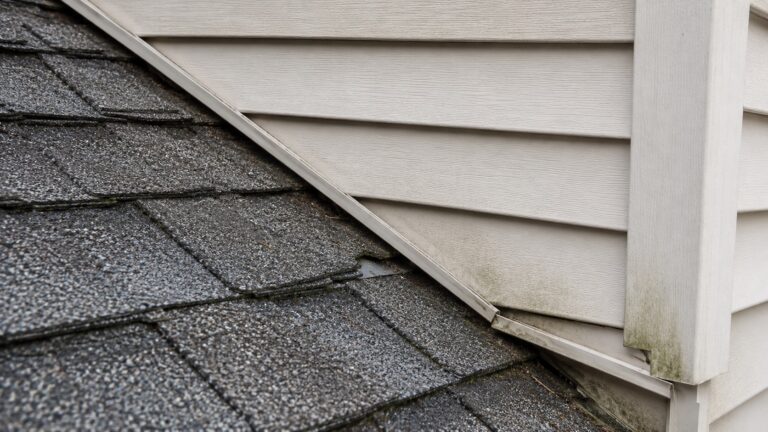
Baseboards sit at the lowest part of the wall — exactly where water naturally travels and collects. Gravity causes moisture to move downward through wall materials, making the floor-wall junction one of the first places hidden moisture accumulates.
However, baseboards also act as a barrier that hides the earliest damage. The trim covers drywall edges, conceals staining, and restricts airflow along the wall surface. This combination makes moisture difficult to detect without intentional inspection.
Several structural features make baseboard areas especially vulnerable:
- Low elevation: Water from leaks, spills, or condensation settles at the base of walls.
- Drywall absorption: The bottom edge of drywall absorbs water quickly and retains moisture longer than upper sections.
- Airflow restriction: Baseboards limit airflow, slowing evaporation and allowing moisture to persist.
- Hidden wall cavities: Moisture can collect behind the trim without becoming immediately visible.
These factors explain why baseboards frequently conceal damage that would otherwise be visible. For a deeper explanation of the material and airflow issues behind this pattern, see why baseboards trap moisture.
Moisture readings near baseboards should also be compared with nearby drywall and wood readings because lower wall areas often remain damp longer than surrounding surfaces. For number-based interpretation, see moisture levels that indicate water damage in drywall and wood.
Early Signs of Moisture Behind Baseboards
Moisture behind baseboards rarely appears suddenly. Instead, it develops gradually, producing small warning signs that are easy to overlook. Learning to recognize these early symptoms can prevent widespread damage.
Swelling or Warping Along the Trim
One of the most reliable early indicators is slight swelling or distortion in the baseboard itself. Wood and fiberboard materials absorb moisture readily, causing expansion that changes the trim’s shape.
You may notice:
- Baseboards pulling slightly away from the wall
- Edges that appear thicker or uneven
- Sections that bow outward
- Visible gaps forming at seams
Swelling usually occurs before visible staining appears. Because baseboards sit directly against drywall and flooring, even small amounts of hidden moisture can cause noticeable changes in trim shape.
Paint Separation or Bubbling Near the Floor
Moisture trapped behind baseboards often pushes upward into paint layers. As moisture accumulates, paint may lose adhesion and begin separating from the trim or wall surface.
Common signs include:
- Bubbling paint along the bottom of walls
- Peeling edges near trim joints
- Cracked paint lines at caulk seams
- Paint discoloration along the baseboard edge
These signs may appear subtle at first, but they usually indicate repeated moisture exposure rather than a single event.
Musty or Damp Odors Near Wall Edges
A persistent musty smell near baseboards is a strong indication that moisture has remained trapped long enough to affect surrounding materials. This odor develops when moisture interacts with drywall paper, wood fibers, or dust trapped behind the trim.
Unlike temporary humidity odors, baseboard-level musty smells often remain localized. You may notice the odor most strongly:
- Along exterior walls
- Behind furniture placed against walls
- Near plumbing fixtures
- Close to entry doors or windows
If musty odors appear together with visual changes, further inspection is strongly recommended. Mold development is possible when damp materials stay hidden behind trim, so compare these moisture signs with signs of mold behind baseboards if odor, staining, or dark growth appears.
Soft Drywall Just Above the Baseboard
Drywall becomes soft when moisture penetrates its internal gypsum core. This often happens slightly above the baseboard, where absorbed moisture spreads upward.
You may notice:
- Soft or spongy wall surfaces
- Indentations when pressed lightly
- Crumbling drywall edges
- Localized discoloration
Soft drywall usually indicates prolonged exposure to moisture. Even if the baseboard itself looks intact, underlying wall materials may already be compromised.
When multiple symptoms appear together — such as swelling trim, odors, and soft drywall — moisture behind baseboards is highly likely. In these situations, more detailed inspection methods become necessary.
How to Check Baseboards Without Removing Them First
Before removing any trim, it’s often possible to detect moisture behind baseboards using non-invasive inspection methods. These techniques help confirm whether moisture is likely present and whether further investigation is necessary.
Feel for Temperature Differences Along the Wall
Moist areas often feel cooler than surrounding dry materials. This temperature difference occurs because moisture evaporates slowly, drawing heat away from the wall surface.
To perform this check:
- Place your hand along the baseboard and lower wall
- Move slowly across the surface
- Compare suspected areas to dry sections of the wall
- Look for localized cool or damp-feeling spots
Temperature differences alone do not confirm moisture, but they provide valuable clues when combined with other signs.
Check for Gaps Between Baseboards and Walls
Moisture exposure often causes materials to shift slightly. When baseboards absorb water, they may expand or distort, pulling away from the wall or floor.
Inspect the trim carefully for:
- Small openings between trim and wall
- Uneven seams along baseboard joints
- Caulk lines that appear stretched or separated
- Changes in alignment along long wall sections
These gaps may appear minor, but they often indicate ongoing moisture stress behind the trim.
Look for Discoloration Along Flooring Edges
Water that accumulates behind baseboards frequently spreads into adjacent flooring materials. Carpet edges, laminate seams, or wood planks near walls may show visible changes.
Watch for:
- Darkened edges along flooring seams
- Carpet backing discoloration
- Warped laminate boards near walls
- Raised or uneven flooring edges
Flooring changes often appear before severe wall damage develops, making them useful early indicators.
Use a Flashlight to Inspect Trim Edges
Shining a bright flashlight along the baseboard surface can reveal subtle imperfections that are difficult to see under normal lighting.
Hold the flashlight at a shallow angle and inspect:
- Shadow lines caused by swelling
- Fine cracks along trim joints
- Slight warping or uneven surfaces
- Areas where paint texture appears distorted
This technique highlights irregularities that often indicate moisture-related expansion beneath the surface.
These non-invasive checks work best when combined with structured detection methods described in how to detect moisture without opening walls. Together, they help determine whether removing trim is necessary.
How to Use a Moisture Meter Near Baseboards
Moisture meters provide one of the most reliable ways to detect hidden moisture behind baseboards without immediate removal. These tools measure moisture levels inside materials such as drywall and wood.
When used correctly, moisture meters allow you to identify wet areas before visible damage appears.
Choose the Correct Type of Moisture Meter
Two common types of moisture meters are used for wall inspections:
- Pin-type meters: Use small probes to measure moisture inside materials.
- Pinless meters: Scan surfaces using electromagnetic sensors.
Pinless meters are often preferred for baseboard detection because they allow quick scanning along large wall sections without leaving holes.
Test the Dry Reference Area First
Before measuring suspected areas, establish a baseline reading using a known dry section of the wall. This step improves accuracy and helps identify abnormal readings.
To create a reference reading:
- Select a wall section far from known moisture sources
- Take several readings along the baseboard
- Record typical moisture levels
- Use those readings for comparison
Without a baseline, moisture readings can be difficult to interpret correctly.
Scan Slowly Along the Baseboard Line
Move the moisture meter slowly along the baseboard from one end of the wall to the other, keeping the meter flat against the same material whenever possible. Mark each elevated spot with painter’s tape so you can compare patterns instead of relying on memory.
Focus especially on:
- Corners of rooms
- Areas near plumbing fixtures
- Exterior wall sections
- Locations beneath windows
These areas frequently collect moisture due to condensation or leakage.
If readings increase gradually across a section of wall, moisture may be spreading through adjacent materials rather than staying limited to one isolated spot.
Interpret Moisture Meter Readings Carefully
Moisture meter readings must be interpreted within context. A high reading alone does not always indicate severe damage — it indicates elevated moisture compared to surrounding materials.
Important interpretation guidelines include:
- Compare readings to nearby dry areas
- Look for clusters of elevated readings
- Monitor changes over time
- Confirm suspicious areas with visual inspection
Consistently elevated readings near the baseboard line strongly suggest moisture behind the trim, especially when the readings form a cluster rather than a single isolated spike. At this stage, removing a small section of baseboard may be necessary to confirm conditions inside the wall cavity.
When Removing the Baseboard Makes Sense
Removing baseboards is not always necessary, but in some situations it becomes the most reliable way to confirm hidden moisture. Non-invasive methods can identify suspicious areas, but they cannot always reveal the full extent of moisture damage inside the wall cavity.
Removing a small section of baseboard allows direct inspection of the drywall edge, subfloor, and wall cavity — the areas most vulnerable to long-term moisture retention.
Signs That Baseboard Removal May Be Necessary
If moisture indicators continue to appear despite non-invasive checks, removing part of the trim may be the safest next step. This is especially true when early signs suggest moisture has been present for more than a short period.
Consider removing baseboards if you notice:
- Repeatedly high moisture meter readings
- Visible swelling or distortion in trim materials
- Persistent musty odors near wall edges
- Soft drywall just above the trim
- Recent water leaks affecting nearby areas
Safety note: Do not reinstall or seal baseboards over damp, soft, crumbling, or moldy materials. Covering the area before the moisture source is corrected can trap dampness and allow damage to continue behind the trim.
How to Remove a Small Section Safely for Inspection
Careful removal minimizes wall damage and allows trim to be reinstalled later if no serious issues are found. Improper removal can crack drywall edges or split trim boards.
Follow these safe removal steps:
- Score the paint line along the top edge of the baseboard using a utility knife.
- Insert a thin pry tool behind the trim, using a small scrap of wood or putty knife to protect the drywall surface.
- Apply slow, steady pressure to loosen the board.
- Work gradually along the trim to prevent cracking.
- Remove only the section necessary for inspection.
Scoring the paint line first is especially important because paint bonds often hold trim tightly to drywall. Skipping this step can tear drywall paper, making repairs more difficult.
Once the trim is removed, the exposed drywall edge provides the clearest indication of moisture presence.
What to Look for After the Baseboard Is Removed
Direct inspection behind the baseboard allows you to evaluate the condition of materials that are normally hidden. This step often confirms whether moisture is recent, long-standing, or already causing structural changes.
Focus on identifying physical changes that indicate water exposure rather than relying on surface appearance alone.
Darkened or Stained Drywall Edges
Water typically travels downward through drywall and collects at the lowest exposed edge. When baseboards are removed, staining often appears along the bottom edge of the drywall.
Look for:
- Brown or yellow discoloration
- Gray or darkened paper backing
- Irregular stain patterns
- Localized wet spots
Staining indicates previous water contact, even if materials appear dry at the moment of inspection.
Swollen or Soft Drywall Material
Drywall that has absorbed water becomes soft and may lose structural integrity. This condition often develops before visible mold or severe deterioration occurs.
Test gently by pressing the exposed drywall edge. Signs of moisture damage include:
- Soft or spongy texture
- Crumbling gypsum material
- Flaking paper surfaces
- Deformed edges
Soft drywall usually indicates prolonged moisture exposure. Stop probing if the material crumbles, collapses, or appears structurally weakened, because further disturbance can enlarge the damaged area.
Damp or Warped Baseboard Back Surfaces
The back side of the removed baseboard often reveals moisture exposure more clearly than the visible front surface. This hidden side absorbs moisture directly from wall materials.
Inspect the back of the trim for:
- Damp surfaces
- Swelling along the bottom edge
- Dark streaks or staining
- Material distortion
Warped trim indicates repeated moisture contact rather than isolated exposure.
Moisture or Debris Along the Subfloor
The subfloor area beneath the baseboard can reveal additional evidence of water infiltration. This location often collects moisture flowing downward from wall materials.
Check for:
- Damp dust or debris
- Water stains on subfloor materials
- Warped flooring edges
- Residue from dried water exposure
If moisture appears concentrated at the floor level, the source may originate from plumbing leaks, foundation seepage, or flooring-related moisture problems.
If visible mold appears during inspection, do not treat the area as a simple moisture-check issue. Compare the finding with signs of mold behind baseboards before disturbing more trim or wall material.
How to Tell If Baseboard Moisture Is Active or Old
One of the most important steps after detecting moisture behind baseboards is determining whether the moisture source is still active. Active moisture requires immediate action, while old moisture damage may simply require monitoring and controlled drying.
Check Moisture Levels Over Time
Taking repeated moisture meter readings helps determine whether moisture levels are changing. Stable readings suggest old damage, while rising readings indicate ongoing water intrusion.
Monitor readings by:
- Recording measurements at the same location
- Repeating readings over several days
- Comparing results to baseline dry readings
- Watching for consistent increases
If moisture readings remain elevated or increase over time, the moisture source is likely still active.
Look for Active Dampness or Odors
Active moisture often produces stronger odors and visible dampness. Fresh moisture typically appears darker than dried stains.
Signs of active moisture include:
- Wet surfaces inside the wall edge
- Recently darkened drywall paper
- Persistent damp odors
- Condensation forming on nearby surfaces
Fresh dampness indicates that water intrusion is still occurring and must be addressed quickly.
Evaluate the Likely Moisture Source
Understanding the likely source of moisture helps determine whether damage is ongoing. Common sources include plumbing leaks, window failures, appliance malfunctions, and condensation problems.
If moisture persists or spreads after the area has had time to dry, treat the readings as evidence of an unresolved source rather than a one-time damp spot. In cases where moisture persists or spreads despite initial drying attempts, it may indicate a larger structural issue requiring targeted correction.
Persistent moisture behind baseboards often signals a deeper underlying cause. If the issue keeps returning after drying or the source cannot be identified, see how to fix persistent moisture behind baseboards for repair-readiness guidance.
When Moisture Behind Baseboards Needs Professional Help
Some moisture problems can be confirmed and monitored by homeowners, but others require professional inspection to prevent structural damage or mold growth. Recognizing when moisture conditions exceed safe DIY evaluation is essential for protecting the home.
Large Areas of Elevated Moisture
If moisture readings remain high across long wall sections, the problem may involve multiple materials inside the wall cavity. Moisture that spreads horizontally often indicates a persistent leak or water migration inside structural framing.
Warning signs include:
- High moisture readings across several feet of wall
- Multiple areas showing swelling or softening
- Recurring moisture after previous drying attempts
- Expanding discoloration along baseboards
Large affected areas usually indicate an active moisture source that requires targeted repair before drying can be effective.
Evidence of Mold or Long-Term Moisture Exposure
If mold growth appears during inspection, further evaluation becomes necessary. Mold behind baseboards often develops after prolonged dampness, particularly in areas with poor airflow or repeated water intrusion.
Signs that mold-related conditions may require professional involvement include:
- Visible mold growth behind removed trim
- Strong persistent odors
- Extensive staining or discoloration
- Repeated moisture readings in the same location
If mold is suspected, understanding the risks associated with hidden mold is important before proceeding. For more detailed symptom guidance, see signs of mold behind baseboards.
Unidentified Moisture Sources
Moisture problems that cannot be traced to an obvious source — such as a known leak — require careful investigation. Hidden plumbing failures, foundation seepage, or structural water intrusion may be involved.
Call a professional when:
- The moisture source cannot be identified
- Moisture returns after temporary drying
- Damage extends beyond a small localized area
- Structural materials appear weakened
Early professional evaluation can prevent damage from spreading into adjacent walls, flooring, or structural components.
Common Misconceptions About Moisture Behind Baseboards
A few common assumptions can cause homeowners to miss hidden baseboard moisture.
“If the Baseboard Looks Dry, the Wall Is Fine”
This is one of the most common incorrect assumptions. Baseboards often conceal moisture damage because the visible surface dries faster than hidden materials.
Moisture can remain trapped behind trim even when the outer surface appears normal. This is why inspection techniques — rather than surface appearance alone — are necessary to confirm conditions.
“A Small Leak Won’t Cause Hidden Damage”
Even minor leaks can produce long-term moisture exposure. Slow water intrusion often causes more hidden damage than sudden flooding because it continues unnoticed for extended periods.
Small leaks beneath sinks, near appliances, or inside wall cavities frequently lead to localized baseboard damage that worsens over time.
“Moisture Always Leads to Immediate Mold Growth”
While mold risk increases with prolonged moisture exposure, mold does not develop instantly. Moisture must remain present long enough to support microbial growth.
Understanding the difference between short-term moisture and long-term dampness helps homeowners make better decisions about monitoring versus immediate intervention.
FAQ — Detecting Moisture Behind Baseboards
Can baseboards hide water damage?
Yes. Baseboards cover the lowest edge of drywall, where water typically collects. This makes them one of the most common places for hidden moisture damage to develop without immediate detection.
Should I remove baseboards to check for moisture?
Not always. Many situations can be evaluated using visual inspection and moisture meters first. However, removing a small section of baseboard may be necessary if moisture readings remain elevated or visual symptoms worsen.
Can a moisture meter detect water behind baseboards?
Yes. Moisture meters are highly effective for detecting elevated moisture levels inside drywall and wood near baseboards. Pinless meters are especially useful because they allow scanning without damaging materials.
Does moisture behind baseboards always mean mold?
No. Moisture alone does not guarantee mold growth. Mold develops when moisture remains present long enough to support microbial growth. Early detection significantly reduces mold risk.
How long can moisture stay behind baseboards?
Moisture can remain trapped for days, weeks, or longer when airflow is limited, especially if the source is still active or the wall cavity is drying slowly.
When should I call a professional for moisture behind baseboards?
You should contact a professional when moisture spreads beyond a small area, repeatedly returns after drying attempts, or produces visible structural damage. Persistent problems often require targeted repair to stop ongoing water intrusion.
Conclusion
Detecting moisture behind baseboards requires careful observation, systematic testing, and an understanding of how moisture behaves at the base of walls. Because baseboards conceal early damage, subtle signs such as swelling trim, soft drywall, and elevated moisture readings often provide the first warning.
Using non-invasive inspection methods first allows homeowners to confirm suspicious areas without unnecessary removal. When evidence of moisture continues to increase, removing a small section of baseboard provides valuable insight into hidden wall conditions.
The goal is not to remove every baseboard immediately, but to confirm whether the warning signs are isolated, old, or active. When visual clues and meter readings point to hidden moisture, a small inspection area can reveal the problem before it spreads behind walls or flooring.
Key Takeaways
- Baseboards frequently hide early moisture damage because water collects at the lowest part of walls.
- Swelling trim, soft drywall, and musty odors are strong early warning signs.
- Moisture meters provide reliable confirmation without immediate removal.
- Removing a small section of baseboard allows direct inspection when necessary.
- Persistent or spreading moisture often requires professional evaluation.
- Early detection prevents mold growth and reduces long-term repair costs.
10 Comments
Comments are closed.