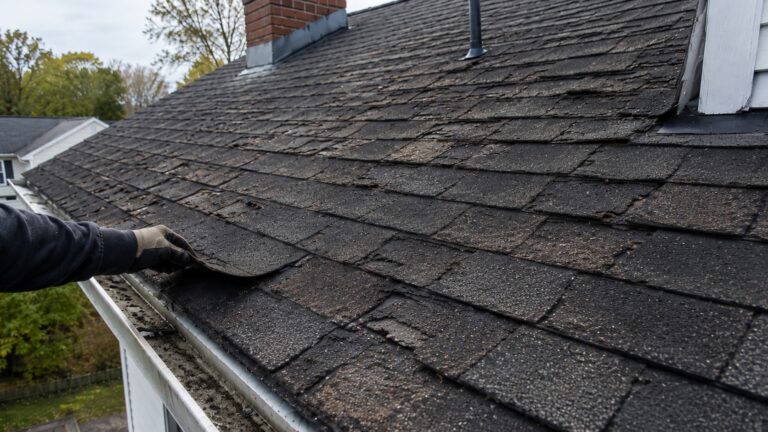
How Improper Window Installation Causes Leaks
A window can leak even when the window unit itself is not defective. In many cases, water enters because the window was not installed correctly into the surrounding wall system. The glass may be intact, the sash may close properly, and the frame may look normal from inside the room, but water can still move around the exterior opening when flashing, sealant, slope, siding, or drainage details were handled incorrectly.
This is why leaks around new or replacement windows can be so frustrating. A new window may be watertight as a product, but it still has to be integrated with the exterior cladding, weather-resistive barrier, flashing, rough opening, sill area, and trim. If those layers are installed in the wrong order or left disconnected, rainwater can be directed into the wall instead of away from it.
Improper installation causes leaks by creating hidden water paths. Some mistakes allow rain to enter from above the window. Others let water collect under the sill, move behind trim, bypass flashing, or travel behind siding before reaching the rough opening. The visible leak may appear at the bottom corner of the window even though the installation mistake is above or beside the frame.
This article explains how poor window installation causes leaks, why a good window can still leak when installed incorrectly, and what homeowners should understand before blaming the window unit itself. For the larger moisture system around windows and doors, see how windows and doors cause hidden moisture problems.
Why a Poorly Installed Window Can Leak Even If the Window Unit Is Good
A window opening is one of the most vulnerable interruptions in an exterior wall. The wall is supposed to shed rainwater in layers. Siding or cladding handles the first exposure, the drainage plane handles water that gets behind the surface, and flashing redirects water around openings. The window has to be tied into that system so water moves out and away instead of into the wall.
When the installation is wrong, the window may still look finished. Trim can hide gaps. Caulk can cover joints. Interior casing can make the opening look clean. But behind those visible finishes, water may be able to reach the rough opening, sill area, framing, insulation, or sheathing.
This is especially common when a replacement window is installed into an older opening without correcting the surrounding water-management details. The new window may be functional, but old flashing defects, deteriorated trim, hidden rot, or poor siding integration may remain. In that situation, the leak may continue even though the window itself is new.
Improper installation can also create leaks that only appear under certain storm conditions. A window may stay dry during light rain but leak during wind-driven rain because wind pressure pushes water into side gaps, reversed laps, or poorly sealed trim joints. The installation problem is real, but it may only show itself when weather exposes the weak point.
To understand the broader pathways water can take around a window opening, see how water enters around exterior windows. Improper installation is one major cause of those pathways, but it is not the only possible cause.
The Most Common Window Installation Mistakes That Cause Leaks
Window installation mistakes usually cause leaks by interrupting drainage. Instead of shedding water outward, the assembly allows water to move inward, collect at vulnerable joints, or bypass the protective layers around the opening. The most important mistakes involve flashing sequence, sill drainage, sealant placement, frame alignment, rough-opening fit, and integration with the surrounding wall.
Flashing Installed in the Wrong Order
Flashing must be installed so upper layers shed water over lower layers. This is similar to the way shingles work on a roof. Water should move down and outward without being able to slip behind the next layer. If flashing is lapped backward, water can be guided behind the window instead of over the exterior face.
This mistake may be hidden after siding and trim are installed. From the ground, the window may look normal. But behind the surface, a reversed lap can collect water and send it into the rough opening whenever rain runs down the wall.
The leak may not appear exactly where the flashing mistake exists. Water entering near the top or side of the window can travel downward along framing or sheathing and show up at the lower corners. That is why the wettest visible spot is not always the original entry point.
For a deeper explanation of proper redirection principles, see how window flashing is supposed to work. Here, the key point is simpler: incorrect installation sequence can turn flashing from a water-shedding detail into a water-entry path.
Missing or Poorly Integrated Head Flashing
The top of the window is especially important because it receives water running down the wall above the opening. Head flashing is supposed to direct that water outward so it does not slip behind the window trim or into the wall cavity.
When head flashing is missing, too short, buried incorrectly, or not integrated with the drainage plane, water can enter from above the window. The homeowner may not see water at the top. Instead, the moisture may travel down the sides of the rough opening and appear at the sill, lower corners, or interior trim.
This kind of installation mistake is often mistaken for a bad window unit because the water appears around the frame. But the window may only be the exit point. The actual problem may be that water from the wall above was never redirected away from the opening.
No Sill Pan or Poor Sill Drainage
The sill area is one of the most important parts of a window installation because it has to manage any water that reaches the bottom of the opening. Even a well-detailed window assembly should assume that some moisture may eventually reach the sill area. A proper drainage detail gives that water a way to move out instead of soaking into the wall.
When a window is installed without a sill pan or without a reliable lower drainage path, water can collect beneath the frame. This moisture may sit against wood framing, seep into the lower corners, or move inward under the window. Over time, the homeowner may notice staining below the sill, soft trim, swelling drywall, or recurring dampness near the bottom corners.
Sill drainage problems are especially common when the bottom of the opening is flat, back-sloped, blocked, or dependent only on caulk. If water cannot drain outward, it will eventually look for another path. That path may be into the rough opening, behind interior trim, or down into the wall below the window.
This does not mean every lower-corner leak is caused by the sill pan. Water may enter above the window and simply collect at the bottom. But when leaks repeatedly appear below the frame, poor sill drainage should be considered as part of the installation problem.
For a more focused explanation of slope-related leak behavior, see how poor window slope causes water intrusion. In this installation-focused article, the key point is that the bottom of the opening must drain outward instead of becoming a hidden water reservoir.
Sealant Used in the Wrong Place
Sealant is useful in window installation, but it is not a substitute for flashing or drainage. One of the most common installation mistakes is relying on caulk as the primary water-control layer. Caulk can help seal specific joints, but it cannot correct missing flashing, poor lapping, bad sill drainage, or gaps behind exterior trim.
Sealant can also cause problems when it is placed where water is supposed to drain. Some parts of a window assembly need a path for incidental moisture to escape. If an installer seals a drainage path shut, water may become trapped inside the assembly. That trapped moisture can keep the sill, trim, or rough opening damp after storms.
Another problem is poor surface preparation. Sealant applied to wet, dusty, uneven, painted, or deteriorated surfaces may not bond well. It can pull away quickly, especially as the frame and surrounding materials expand and contract. The joint may look finished after installation, but it may fail once the window is exposed to sun, rain, and temperature movement.
Installation-related sealant mistakes are different from normal long-term aging. A properly placed sealant joint can still fail years later from UV exposure and movement, but a poorly designed or poorly applied joint may leak much sooner. For the aging side of the issue, see why window sealant fails over time.
Window Installed Out of Level, Out of Plumb, or Twisted
A window does not have to be visibly crooked to have installation problems. If the frame is installed out of level, out of plumb, twisted, or stressed by uneven fastening, the unit may not drain or seal the way it was designed to. Small distortions can affect the contact between the sash, weatherstripping, frame, and exterior drainage paths.
An out-of-level window may also encourage water to collect in the wrong location. Instead of draining evenly, water may sit against one lower corner or move toward a vulnerable joint. If the frame is twisted, one side may seal tightly while another side leaves a small gap that becomes noticeable during wind-driven rain.
Poor alignment can also create operational symptoms, such as difficulty closing, uneven gaps, rubbing, or latches that do not line up cleanly. These symptoms do not prove a leak by themselves, but they can suggest the window was not seated correctly or has shifted under stress.
A simple homeowner clue is uneven spacing between the sash and frame. If one side has a noticeably tighter gap than the other, the window may deserve a closer installation review, especially if leaks appear during wind-driven rain.
Frame distortion matters because water control depends on small details working together. If the window is not sitting correctly in the opening, sealant, flashing, and weatherstripping may all be placed under more stress than intended.
Poor Fit in the Rough Opening
The rough opening is the framed space where the window sits. If the opening is too large, uneven, damaged, or poorly prepared, the installer may rely too heavily on foam, trim, shims, or surface sealant to make the finished window look correct. Those materials can hide gaps, but they do not automatically create a reliable water-management system.
A poor fit can leave wide spaces around the frame where water has more opportunity to move. If the window is not properly centered, supported, and fastened, movement can also weaken sealant joints and create uneven pressure points. Over time, small openings may form where rain can enter.
Shimming mistakes can also contribute to leaks. Shims are used to position and support the window, but they should not distort the frame or create unsupported gaps. If the frame is pulled unevenly by fasteners or wedged poorly in the opening, the window may not sit as designed.
Poor rough-opening preparation is especially risky in replacement work. If old damage, rot, soft framing, or past leak paths are covered instead of corrected, the new window may inherit the same moisture problem. A replacement window can only perform as well as the opening it is installed into.
Poor Integration With Siding or Housewrap
A window must be integrated with the surrounding wall, not just fastened into the opening. The siding, exterior trim, housewrap, flashing, and drainage plane all need to direct water away from the rough opening. If those layers are not connected correctly, water can travel behind the exterior surface and reach the window from the side or above.
This is one reason window leaks are sometimes blamed on the wrong component. The window may be installed tightly in the opening, but the siding or weather barrier around it may still direct water inward. In that case, the leak is not only a window problem. It is a wall integration problem.
Common examples include siding cut improperly around the frame, housewrap lapped behind flashing instead of over it, trim installed without proper drainage consideration, or cladding transitions that leave open water paths. These mistakes may not be visible after the exterior is finished, but they can show up later as recurring leaks around the window.
When water gets behind the exterior surface and reaches the opening, the leak may look like a window-unit failure even though the real problem is the wall/window assembly.
Why Installation Leaks Often Show Up After Rain, Not Immediately
Improper window installation does not always create an obvious leak right away. Some leaks need repeated rain exposure before the moisture becomes visible indoors. Water may first wet exterior trim, then reach the rough opening, then soak into insulation or framing, and only later appear as a stain or damp spot.
Storm direction also matters. A poorly installed window on a protected wall may not leak often because little water reaches the weak point. The same installation mistake on an exposed wall may leak during heavy rain or storms with wind from a certain direction. This is why homeowners sometimes say a window leaks only “sometimes,” even though the underlying defect is always present.
New installation materials may also move after exposure. Fresh sealant can shrink or separate. Trim can expand and contract. Framing can shift slightly. If the installation depended too heavily on surface sealant instead of proper flashing and drainage, the leak may appear weeks or months after the work was completed.
Slow leaks are also easy to miss because drywall, wood, and insulation can absorb moisture before damage becomes visible. By the time bubbling paint, soft trim, or staining appears, the leak may have been occurring through several storms.
Why Caulking a Poorly Installed Window Usually Fails
Caulking can help when the problem is a simple exposed joint, but it usually fails when the window was installed incorrectly. That is because installation leaks are often caused by hidden water paths, not just visible gaps. If water is entering behind the flashing, behind the siding, under the sill, or through the rough opening, adding surface caulk may only cover the symptom.
A common mistake is treating caulk as the main defense against rain. Around a properly installed window, sealant supports the water-control system, but it does not replace flashing, drainage, slope, or correct wall integration. If those details are wrong, caulk becomes a temporary patch over a deeper problem.
Repeated caulking can also trap water if it blocks drainage points. Some parts of a window assembly must allow incidental moisture to escape. When those paths are sealed shut, water can remain hidden around the sill or lower frame. This can make the area stay damp longer after storms and increase the risk of damage to trim, framing, and nearby wall materials.
If the same window has been caulked more than once and the leak keeps returning, the problem is probably not just an open surface joint. The water may be entering from above, from behind siding, through reversed flashing laps, or from a poorly drained sill area. At that point, the repair needs to focus on the water path rather than another layer of sealant.
How Improper Installation Can Damage the Wall Around the Window
An installation-related leak can affect more than the visible window frame. Once water reaches the rough opening, it can wet the surrounding wall materials. The first visible signs may be minor, but repeated moisture can spread into trim, drywall, insulation, sheathing, and framing.
Interior trim often shows early damage because it sits close to the leak path. Painted wood, MDF, or composite trim may swell, crack, separate at joints, or develop peeling paint. Drywall near the window may bubble, stain, soften, or develop a wavy surface if moisture reaches the paper face or gypsum core.
Insulation around the rough opening can also hold moisture. When insulation stays damp, it slows drying and may keep nearby wood or drywall wet longer than expected. This is one reason a small window leak can create a lingering moisture problem even when there is no large puddle inside the room.
Wood framing and sheathing are a greater concern when the leak repeats over time. Occasional brief wetting may dry without major damage, but repeated wetting can lead to staining, softening, decay risk, and conditions where mold is more likely to grow. The risk depends on how often the materials get wet, how long they stay damp, and whether the leak path is corrected.
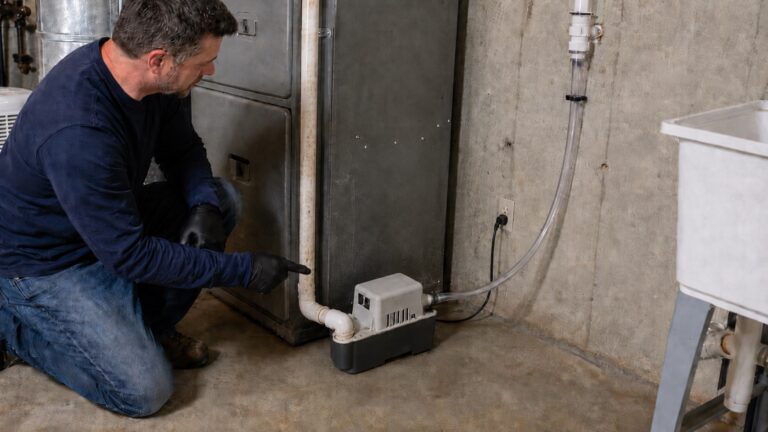
Visible damage does not always show the full extent of the problem. A small stain below the window may be connected to a larger hidden damp area around the rough opening. If interior symptoms are present, it may help to compare them with signs of water damage around windows and consider whether hidden moisture testing is needed around the frame.
What to Do if You Suspect a Window Was Installed Wrong
If you suspect improper installation, start by documenting the pattern instead of rushing to seal the window again. Note when the leak appears, which direction the rain is coming from, whether wind is involved, and whether the leak happens during every storm or only certain conditions.
Do not remove exterior trim, siding, or interior casing if you are unsure what is behind it or if electrical wiring, structural damage, or active water entry may be involved. Opening the wall can reveal useful information, but it can also expose hidden damage that needs proper repair.
Take photos of interior symptoms such as stains, swollen trim, bubbling paint, or damp lower corners. If you can safely view the exterior from the ground, photograph visible gaps, cracked sealant, missing trim details, siding problems, or areas where water may be collecting. These photos can help when speaking with an installer, contractor, or inspector.
Also note whether the leak appears at the top of the frame, one lower corner, both lower corners, or below the sill. A lower-corner stain does not always mean the sill is the entry point, but the location can help a contractor decide whether to check head flashing, side flashing, sill drainage, or siding integration first.
If the window was recently installed, check the installer warranty and contact the company that performed the work. Be specific about the leak pattern. Explain when it happens, where water appears, and whether the issue has returned after caulking or other surface repairs. A recent installation leak should not be dismissed as normal.
Avoid repeated surface patching if the leak keeps coming back. Caulk, paint, or interior repairs may make the area look better temporarily, but they do not solve reversed flashing, missing sill drainage, poor housewrap integration, or hidden moisture inside the wall.
Professional evaluation becomes more important when the window is new or recently replaced, the leak returns after caulking, water appears inside the wall, trim or drywall feels soft, moldy odor develops, or the moisture pattern suggests hidden damage. Depending on the situation, the right professional may be a window installer, siding contractor, exterior repair contractor, or water-intrusion specialist.
If you need to understand whether moisture has spread beyond the visible trim, see how to detect moisture around window frames. For a broader plan to trace repeated leaks and prevent moisture from returning, see how to find, fix, and prevent moisture problems in homes.
FAQ About Improper Window Installation and Leaks
Can a new window leak because it was installed wrong?
Yes. A new window can leak if it was not integrated correctly with the wall’s flashing, drainage plane, sill area, trim, or siding. The window unit may be functional, but water can still enter around the opening if the installation details direct rain inward.
How soon after installation can window leaks appear?
Some leaks appear during the first heavy rain. Others take weeks or months to show because sealant shrinks, trim moves, wind-driven rain exposes a weak joint, or hidden materials absorb moisture before staining becomes visible indoors.
Is a leaking replacement window always defective?
No. A defective window is possible, but many replacement-window leaks are caused by the opening, flashing, siding integration, sill drainage, or old damage that was not corrected during installation. The water path should be checked before assuming the window product is the only problem.
Can missing window flashing cause interior water damage?
Yes. Missing or poorly integrated flashing can allow rainwater to enter behind the window trim or into the rough opening. From there, water may reach drywall, insulation, framing, sheathing, or interior trim before the homeowner notices visible staining.
Can caulk fix a bad window installation?
Caulk may help if the leak is coming through a simple exposed joint, but it cannot fix reversed flashing, missing sill drainage, poor housewrap integration, frame distortion, or water entering behind siding. Repeated caulking usually means the underlying water path has not been corrected.
Who should inspect a window leak after recent installation?
A qualified window installer, exterior repair contractor, siding contractor, or water-intrusion specialist may be needed, depending on where the leak appears to originate. If the window was recently installed, start with the installer or warranty contact, but seek a broader inspection if hidden wall moisture is suspected.
Key Takeaways About Window Installation Leaks
- A good window can still leak if it was installed incorrectly into the surrounding wall system.
- Improper flashing, missing sill drainage, poor sealant placement, bad alignment, and poor siding integration are common installation-related leak causes.
- Leaks often appear at lower corners even when the installation mistake is above or beside the window.
- Caulk cannot replace flashing, drainage, slope, or proper wall integration.
- Repeated leaks around a new or replacement window should be documented and evaluated before more surface patching is attempted.
Final Action Step
If a new or replacement window keeps leaking, do not assume the glass or sash is the problem first. Document when the leak appears, look for signs of poor flashing, sill drainage, sealant placement, frame alignment, and wall integration, and have the installation details evaluated before adding more caulk or repairing the interior finish.