Why Roof Flashing Failures Cause Leaks
Roof flashing failures cause leaks because they break the roof’s water-shedding sequence at the places where the roof surface is interrupted. Flashing is not just decorative metal or a small trim detail. It is a water-control system that directs rain away from vulnerable joints around chimneys, walls, skylights, dormers, valleys, roof edges, and other transitions.
When flashing is missing, loose, reversed, corroded, poorly overlapped, or patched with failing sealant, water can get behind the roofing layers instead of staying on the surface. Once water gets behind flashing, it may enter the roof deck, attic, wall cavity, insulation, ceiling drywall, or structural framing before the homeowner sees a stain.
This article explains why flashing failures cause leaks. If you need help recognizing visible warning signs first, see Signs Roof Flashing Is Failing. For the broader roofing moisture system, see Most Common Roofing Material Failures.
How Roof Flashing Is Supposed to Keep Water Out
Roof flashing works by moving water across vulnerable transitions and back onto a safe drainage path. The roof covering handles broad open areas, but shingles, tiles, metal panels, or membranes cannot protect every joint by themselves. Wherever the roof meets another surface, flashing helps bridge the gap and direct water outward.
The basic idea is simple: water should always flow over the next layer, not behind it. Proper flashing is installed in a sequence that uses slope, overlap, and drainage direction. Each piece should guide water down and away from the roof opening, wall joint, chimney base, skylight curb, or roof edge.
Flashing Protects Places Where the Roof Surface Is Interrupted
The open roof field is usually easier to waterproof than the details. A flat shingle course, metal panel, or tile section sheds water in one direction. Flashing is needed where that simple path changes.
Common flashing locations include:
- Chimney bases
- Roof-to-wall intersections
- Sidewalls and dormers
- Skylight curbs
- Valleys
- Roof edges
- Kickout flashing areas
- Some roof penetrations and vent curbs
These areas are more vulnerable because water can slow down, collect, turn sideways, or be pushed by wind. Flashing gives water a controlled path so it does not enter the joint between two materials.
Flashing Depends on Correct Overlap
Correct overlap is the core principle behind flashing. Each layer must be arranged so water runs over the outside face of the next layer. If flashing is reversed, buried behind the wrong material, cut too short, or not integrated with shingles and wall materials, water can move behind the system.
This is why flashing failures can be serious even when the metal is still present. Flashing that is installed in the wrong order may look like flashing from a distance, but it may not actually direct water outward. A small reverse lap or gap can create a hidden path into the roof or wall assembly.
Flashing Must Work With the Roof and Wall System
Flashing rarely works alone. It has to integrate with shingles, underlayment, siding, masonry, counterflashing, drip edges, gutters, and wall drainage planes. If one layer drains behind another instead of over it, water can bypass the visible roof covering.
For example, roof-to-wall flashing must move water away from the wall and onto the roof surface or into the gutter. If the wall material drains behind the flashing, or if kickout flashing is missing at the lower end, roof runoff may enter the siding or wall cavity instead of being directed outside.
This is why flashing leaks often happen after poor repairs or incomplete roof replacements. The visible roofing may look new, but the flashing may not be tied into the surrounding materials correctly.
Flashing Is Not the Same as Sealant
Sealant can support certain flashing details, but it should not be the main water-control system. Proper flashing relies on shape, overlap, slope, and integration. Sealant is vulnerable to sun exposure, temperature movement, drying, cracking, and separation.
If a roof transition depends entirely on caulk, tar, or roofing cement to keep water out, it is more likely to leak over time. Those materials may temporarily slow water entry, but they do not correct poor overlap, missing flashing, reversed layers, or movement between roof materials.
A durable flashing detail should shed water even before sealant is considered. Sealant may help at edges or joints, but it should not replace the physical flashing path that moves water away from the opening.
Why Flashing Leaks When Water Gets Behind the Layers
Flashing leaks when water gets behind the layers that are supposed to shed it outward. A roof is built like a drainage system. Water should move from the upper layers to the lower layers, always staying on the outside of the roof assembly. When flashing breaks that sequence, water can move into the hidden parts of the roof instead.
This can happen even when the roof surface looks normal. Shingles may appear intact, the chimney may look solid, and the wall may look dry from outside, but a small flashing gap can allow water to enter behind the visible materials. Once water is behind the flashing, it can follow framing, underlayment, roof sheathing, insulation, or wall cavities before showing up indoors.
Reverse Laps Let Water Flow Behind the System
A reverse lap happens when roofing or flashing layers are overlapped in the wrong direction. Instead of water flowing over the next layer, it flows behind it. This is one of the most important reasons flashing failures cause leaks.
For example, step flashing along a sidewall should work with each shingle course so water moves down the roof and stays on the surface. If the flashing is placed incorrectly, cut too short, or covered by the wrong layer, water can move behind it and enter the wall or roof deck.
Reverse laps are especially dangerous because they may not be obvious from the ground. The flashing may appear to exist, but the hidden layering may be wrong. A roof can look finished and still have a water path behind the materials.
Gaps Allow Wind-Driven Rain to Enter
Not every flashing gap leaks during every storm. A small opening may stay dry during light rain but leak during wind-driven rain, heavy runoff, or long storms. Wind can push water sideways or upward under flashing edges that are supposed to stay protected.
This is why homeowners often notice flashing leaks only during certain weather. A ceiling stain may appear after strong wind from one direction but not after ordinary rainfall. The flashing may be marginal: good enough for light water flow, but not tight enough for storm pressure.
Gaps around chimneys, walls, dormers, skylights, and roof edges deserve attention because those areas already handle complicated water movement. Once water reaches a gap, it can slip behind the roof covering and travel out of sight.
Missing Kickout Flashing Can Send Water Into Walls
Kickout flashing is used where a roof edge meets a vertical wall and gutter area. Its job is to direct roof runoff away from the wall and into the gutter. When kickout flashing is missing, too small, or installed incorrectly, water can run behind siding instead of being pushed outward.
This type of flashing failure can cause serious hidden wall damage because the leak may not appear as a roof drip right away. Water may soak sheathing, trim, insulation, or framing behind the siding. The homeowner may notice peeling paint, swollen trim, moldy wall areas, or interior staining long after the roof-wall detail started failing.
Kickout flashing problems are a good example of why flashing is part of the whole drainage system. The issue is not only whether metal exists. The issue is whether the metal sends water to the correct place.
Water Can Follow Surface Tension and Capillary Action
Water does not always fall straight down. It can cling to surfaces, wrap around edges, and move through narrow gaps. This is one reason flashing has to be shaped and overlapped correctly. If metal edges, siding gaps, shingles, or masonry joints create a path, water may follow that path behind the roof covering.
Small openings can matter more than they appear to. A narrow gap between flashing and a wall, a tiny crack in sealant, or a lifted metal edge can allow repeated wetting. One storm may not cause visible damage, but repeated moisture entry can eventually stain sheathing, soften drywall, wet insulation, or damage framing.
Improper Installation: The Most Common Reason Flashing Fails Early
Flashing often fails early because it was installed incorrectly from the beginning. Good flashing is not just a piece of metal placed near a joint. It has to be the right size, in the right order, integrated with the right materials, and positioned so water drains outward.
Improper installation is especially common around roof-to-wall intersections, chimneys, skylights, dormers, and roof edges. These areas require careful layering. If the installer relies on caulk, skips a flashing piece, reuses damaged metal, or fails to connect the flashing with the wall drainage path, leaks can develop even on a relatively new roof.
Step Flashing Installed Incorrectly
Step flashing is used where a sloped roof meets a vertical wall. Each piece should work with an individual shingle course so water is directed down and out. When step flashing is missing, nailed incorrectly, too short, or covered by the wrong layer, water can enter behind the shingles or wall covering.
One common problem is using one long piece of flashing instead of properly layered step flashing. Another is burying flashing behind siding in a way that does not allow water to drain out. In both cases, the wall-roof joint may look covered, but the water path may be wrong.
Step flashing failures often lead to stains near exterior walls, dormers, or upper corners of rooms. The leak may appear far from the actual flashing defect because water can move inside the wall or roof assembly before reaching drywall.
Counterflashing Not Integrated Correctly
Counterflashing is often used where flashing meets masonry, such as around chimneys. It helps cover and protect the top edge of base flashing so water does not run behind it. If counterflashing is loose, poorly cut, shallow, sealed only with caulk, or not properly embedded into the masonry joint, water can get behind the flashing.
This is one reason chimney leaks can be difficult to diagnose. The shingles may look fine, and the base flashing may appear present, but the counterflashing may not be stopping water from entering the upper edge of the system.
Counterflashing problems may show up only during heavy or wind-driven rain because water has to reach a specific opening before it leaks. Over time, small gaps can grow as sealant shrinks, mortar deteriorates, or metal moves.
Missing or Poorly Placed Kickout Flashing
Missing kickout flashing is a common roof-wall failure. Without it, water running down the roof can continue behind siding instead of being directed into the gutter. This can create wall damage even when the roof itself does not show obvious interior leaks at first.
Poorly placed kickout flashing can also fail if it is too small, aimed incorrectly, blocked by siding, or not connected to the gutter area. The purpose is to interrupt the water path and force runoff outward. If it does not do that, the wall can become the drainage path.
This type of problem is especially important because it may damage siding, sheathing, framing, and insulation before the homeowner notices a ceiling stain.
Flashing That Is Too Short, Too Flat, or Poorly Overlapped
Flashing has to be sized and shaped for the water it is expected to manage. If the flashing is too short, water can spill past it. If it is too flat, water may sit or move sideways instead of draining. If the overlaps are too small or reversed, water can work behind the metal.
Poorly overlapped flashing is vulnerable during storms because heavy water flow can reach the weak point faster. A small overlap may seem acceptable during installation, but it can fail when water volume increases or wind pushes rain against the joint.
Correct flashing should work with gravity. When it fights the natural water path, relies too much on sealant, or leaves exposed edges, leaks become much more likely.
Why Sealant and Tar Patches Fail Around Flashing
Sealant, caulk, tar, and roofing cement are often used around flashing because they seem like quick ways to stop water. Sometimes they can help with small details, but they should not be treated as the main flashing system. Flashing is supposed to move water mechanically through correct overlap, slope, and placement. Sealant is only a supporting material.
When a roof transition depends mostly on caulk or tar, the repair is usually vulnerable from the beginning. Sun exposure, roof heat, cold weather, wind, moisture, and movement between materials can all break down patching compounds. Once the patch cracks or separates, water can return to the same weak path.
Caulk Shrinks, Cracks, and Separates
Caulk and sealant are flexible for a time, but they do not stay new forever. Heat can dry them out. Cold can make them less flexible. UV exposure can degrade the surface. Repeated expansion and contraction can pull the sealant away from metal, masonry, shingles, or siding.
As the sealant shrinks or cracks, small openings form at the edges. Water can then enter behind the flashing or under the patch. The leak may return slowly, showing up only during heavy rain at first. Over time, the opening can widen and allow more frequent moisture entry.
This is why a bead of caulk over a flashing gap is usually not a long-term repair. It may slow the leak temporarily, but it does not correct missing, reversed, loose, corroded, or poorly overlapped flashing.
Roofing Cement Can Hide the Real Flashing Problem
Roofing cement and tar patches are often used as emergency leak stops. They may cover a visible gap, but they can also hide the actual defect. Under the patch, the flashing may still be loose, rusted, reversed, too short, or disconnected from the surrounding roof layers.
Heavy patches can also make later diagnosis harder. A roofer may need to remove old roofing cement to see whether the flashing itself is installed correctly. If the patch has cracked, lifted, or trapped water at the edge, it may be contributing to the leak rather than solving it.
Old tar patches around chimneys, skylights, sidewalls, or valleys are often clues that the area has leaked before. The patch may not reveal the original cause, but it suggests the flashing detail deserves closer inspection.
Sealant Does Not Correct Bad Layering
Flashing works through layering. Water should flow over the top of each lower layer, not behind it. If the layers are reversed, too short, or not connected to the correct drainage path, sealant cannot reliably fix the problem.
For example, if step flashing is missing behind siding, adding caulk along the outside edge may not stop water that is already entering behind the wall material. If counterflashing is not properly integrated into masonry, surface sealant may crack and allow water behind it again. If kickout flashing is missing, caulk cannot redirect roof runoff into the gutter.
The more a flashing detail depends on exposed sealant, the more likely it is to fail again. A durable repair usually requires correcting the flashing assembly, not just covering the symptom.
How Thermal Movement Opens Flashing Gaps
Thermal movement is another reason flashing failures cause leaks. Roof materials expand and contract as temperatures change. Metal flashing, asphalt shingles, wood decking, masonry chimneys, siding, and roof framing do not all move at the same rate. Over time, that movement can open gaps at joints that once looked tight.
This is especially important at roof transitions. A chimney does not move exactly like the roof deck around it. A wall surface does not expand and contract the same way as metal step flashing. A skylight curb may shift differently from shingles and underlayment. These small differences can stress flashing edges, sealant lines, fasteners, and overlaps.
Different Materials Move Differently
Flashing often connects materials that behave differently. Metal expands and contracts quickly with temperature changes. Masonry absorbs heat and moisture differently. Wood roof decking can swell, shrink, or move with humidity. Asphalt shingles soften in heat and become less flexible in cold weather.
When these materials meet, the flashing has to tolerate movement while still keeping water out. If it is too rigid, too tightly fastened, poorly overlapped, or dependent on brittle sealant, movement can create small openings.
Those openings may not leak every day. They may leak when rain is pushed by wind, when snow melts and refreezes, or when a long storm keeps the joint wet long enough for water to find the gap.
Chimneys and Walls Create Movement Stress
Chimneys and roof-to-wall intersections are common places for movement-related flashing leaks. Masonry chimneys can expand, contract, absorb moisture, and experience freeze-thaw stress. Walls and siding can move differently from the roof plane. Flashing has to bridge those movement differences.
If counterflashing pulls away from masonry, step flashing separates from a wall, or sealant cracks along a vertical joint, water can enter behind the system. The leak may start small, but repeated movement can make the gap larger over time.
This is one reason flashing that looked acceptable when installed can leak years later. The original detail may have had little margin for movement, and seasonal expansion eventually exposed the weakness.
Wind and Freeze-Thaw Cycles Can Widen Small Openings
Wind can lift loose flashing edges, drive rain into gaps, and stress fasteners. Freeze-thaw cycles can make small openings worse when trapped moisture freezes and expands. Over time, tiny gaps around flashing can become larger leak paths.
This process is gradual. A homeowner may not notice a problem until the first ceiling stain appears, but the flashing may have been weakening through many seasons of movement. Older roofs are especially vulnerable because sealants, fasteners, metal edges, and surrounding roofing materials may all be less flexible than they were when new.
Age does not automatically mean flashing is leaking, but it increases the chance that movement, corrosion, and old patching will create water-entry points. For the larger age-related leak-risk picture, see How Roof Age Affects Leak Risk.
How Fasteners, Corrosion, and Aging Create Leak Paths
Even when flashing was installed correctly at first, fasteners, corrosion, and age can create leak paths over time. Flashing has to stay secure while the roof expands, contracts, sheds water, and handles wind. If the metal weakens or the attachment points loosen, water can find openings that were not present when the roof was new.
Fastener and corrosion problems are especially common around older chimneys, sidewalls, skylights, roof edges, and areas that have been patched more than once. These details may still look mostly intact from the ground, but small openings around screws, nails, seams, or rusted edges can allow repeated moisture entry.
Exposed or Loose Fasteners Can Let Water In
Fasteners can become leak points when they are placed incorrectly, left exposed, driven through the wrong part of the flashing, or no longer sealed. A nail or screw hole may look small, but it can allow water into the roof assembly when it is exposed to runoff or wind-driven rain.
Over time, nails can back out, screws can loosen, washers can deteriorate, and surrounding materials can move. Once the flashing is no longer held tightly in the right position, water may enter around the fastener or behind the metal edge.
Fastener leaks are often hard to see without close inspection. The visible symptom may be a stain in the attic or ceiling, while the actual opening is a small hole near a flashing edge.
Corrosion Can Thin or Puncture Flashing
Metal flashing can corrode when it is exposed to moisture, incompatible materials, trapped debris, or long-term weathering. Rust or corrosion may start as surface discoloration, but it can eventually thin the metal, create pinholes, or weaken the flashing edge.
Corrosion becomes more serious when it appears near seams, laps, fasteners, masonry joints, or roof edges. These are places where flashing needs strength and tight water control. If corrosion creates a hole or weakens the overlap, water can bypass the flashing and enter the hidden roof layers.
Corrosion does not always mean active leakage is already happening, but it shows that the flashing is losing durability. When rust appears with staining, gaps, loose edges, or damp attic materials, the leak risk is much higher.
Older Roofing Materials May Stop Supporting the Flashing
Flashing does not work in isolation. It depends on nearby shingles, underlayment, siding, masonry, roof decking, and sealant details. As those materials age, they may no longer support the flashing correctly.
Old shingles may curl or crack near flashing. Underlayment may deteriorate. Siding may pull away. Masonry joints may loosen. Roof decking may shift or soften if it has been repeatedly wet. When the surrounding materials weaken, even a decent flashing piece may no longer be held in the right position.
This is why flashing leaks often appear on older roofs as part of a larger pattern of roof aging. The flashing may be the water-entry point, but age-related movement and material deterioration may be the reason the opening formed.
Why Flashing Leaks Often Show Up Away From the Source
Flashing leaks can be confusing because the visible stain is not always directly below the flashing defect. Once water gets behind the flashing, it may follow hidden paths before it becomes visible inside the home. This can make a flashing leak look like a ceiling leak, wall leak, chimney leak, skylight leak, or even a plumbing problem.
Water can travel along roof sheathing, rafters, trusses, insulation, ceiling joists, wall framing, or the back side of drywall. It may drip at the first low point it reaches, not at the original entry point. That is why guessing from the stain location alone can lead to the wrong repair.
Water Follows Framing and Hidden Surfaces
When water enters behind flashing, it usually does not fall straight down. It can cling to the underside of roof sheathing, run along rafters, soak insulation, or move into a wall cavity. The final ceiling stain may appear several feet from the actual opening.
For example, water entering at sidewall flashing may run down a rafter before staining a ceiling corner. Water entering near a chimney may follow framing around the chimney chase. Water entering around a skylight curb may spread into insulation before it shows on drywall.
This is why flashing leaks often require source tracing rather than surface patching. If the stain keeps returning after a small patch, the original water path may not have been corrected.
Wind-Driven Rain Can Make Leaks Intermittent
Some flashing leaks appear only during certain storms. Wind-driven rain can push water sideways into openings that do not leak during light rain. Heavy runoff can overwhelm weak overlaps. Long rain events can keep a joint wet long enough for water to find a narrow gap.
This intermittent pattern can make flashing leaks seem unpredictable. The roof may stay dry during several rains, then leak during one storm with the right wind direction. That does not mean the leak disappeared and returned. It usually means the flashing defect only leaks under certain water-pressure conditions.
If the interior stain does not clearly reveal the source, How to Detect Hidden Roof Leaks is the better follow-up because it focuses on tracing roof-origin moisture through hidden paths.
Flashing Leaks Can Be Confused With Valley or Penetration Leaks
Flashing leaks can overlap visually with other roof leak sources. A valley may leak because debris, worn shingles, or valley flashing failure is allowing water into a high-flow channel. A pipe boot or roof vent may leak because the penetration flashing or rubber boot has cracked. These are related roof details, but they have their own failure patterns.
If the leak pattern is concentrated in a valley, use Signs Roof Valleys Are Failing as the more specific guide. If the moisture appears around a pipe boot, vent, exhaust opening, or other roof penetration, use Signs Roof Penetrations Are Leaking instead.
Correct diagnosis matters because a general flashing patch may not fix a damaged pipe boot, clogged valley, reversed step flashing, or missing kickout detail. Each failure needs the right repair path.
When Flashing Failure Requires Professional Repair
Flashing problems often require professional repair because the correct fix usually involves more than sealing a visible crack. The roofer may need to remove shingles, lift siding, reset counterflashing, replace corroded metal, install missing kickout flashing, or integrate the flashing with underlayment and wall drainage layers.
Professional repair is especially important when the flashing failure is active, recurring, hidden, or difficult to access. A roof transition that leaks repeatedly can wet roof decking, attic insulation, wall sheathing, framing, and ceiling drywall before the homeowner sees major damage.
Call a qualified roofer when you notice:
- Repeated stains after rain near chimneys, skylights, dormers, or roof-wall intersections
- Loose, separated, reversed, or missing flashing
- Rust holes or advanced corrosion
- Missing or poorly placed kickout flashing
- Old tar patches that keep cracking or leaking
- Wet attic insulation near a flashing area
- Water trails on rafters or sheathing near roof transitions
- Leaks that return after previous repairs
- Flashing problems on steep, high, fragile, or storm-damaged roofs
Flashing repair should solve the water path, not just cover the visible gap. If the roof has repeated moisture problems or the source is difficult to confirm, When to Hire a Roofing Contractor for Moisture Problems can help clarify when the problem has moved beyond safe homeowner observation.
Frequently Asked Questions
Why does roof flashing leak?
Roof flashing leaks when water gets behind the layers that are supposed to shed it outward. Common causes include poor overlap, missing flashing, corrosion, loose fasteners, failed sealant, bad installation, thermal movement, and gaps around roof transitions.
Why does flashing leak only during heavy rain?
Heavy or wind-driven rain can push water sideways, overwhelm weak overlaps, or reach small gaps that do not leak during light rain. A flashing detail may look dry in ordinary weather but fail when water volume, wind direction, or storm duration increases.
Can caulk stop a flashing leak?
Caulk may slow a flashing leak temporarily, but it is not a durable substitute for correctly installed flashing. Sealant can crack, shrink, separate, or break down from sun and movement. Long-term repair usually requires correcting the flashing detail itself.
Why does flashing leak after roof replacement?
Flashing can leak after roof replacement if old flashing was reused, new flashing was installed incorrectly, step flashing was skipped, kickout flashing was missing, or the flashing was not integrated with siding, masonry, underlayment, and shingles in the correct order.
Can bad flashing cause wall damage?
Yes. Failed roof-wall flashing or missing kickout flashing can send roof runoff behind siding and into wall cavities. This can wet sheathing, framing, insulation, trim, and drywall before the homeowner sees obvious interior staining.
Conclusion
Roof flashing failures cause leaks because they interrupt the roof’s water-control sequence at the places where leaks are most likely to start. When flashing is missing, reversed, loose, corroded, poorly overlapped, or patched with failing sealant, water can move behind the protective layers instead of draining safely away.
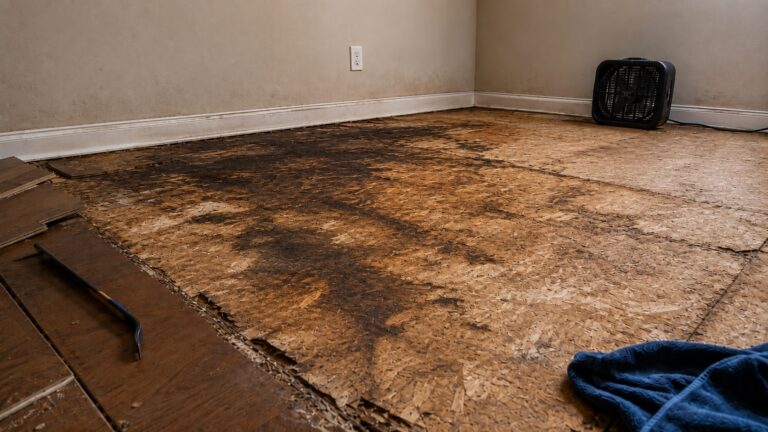
The leak may begin at a small detail, but the damage can spread into hidden roof and wall assemblies. Water can travel along rafters, sheathing, insulation, and framing before appearing indoors. That is why flashing leaks often return after surface patches that do not correct the actual water path.
Effective flashing repair requires understanding how water is supposed to drain through the roof system. When flashing failure is part of a larger moisture problem, use a broader prevention approach like How to Find, Fix, and Prevent Moisture Problems in Homes to reduce the risk of hidden damage returning after the roof detail is repaired.
Key Takeaways
- Flashing failures cause leaks when water gets behind the roof layers instead of draining outward.
- Poor overlap, reverse laps, missing kickout flashing, and bad integration can create hidden water paths.
- Caulk, tar, and roofing cement are not durable substitutes for correctly installed flashing.
- Thermal movement, wind, corrosion, fastener problems, and aging can open flashing gaps over time.
- Flashing leaks often show up indoors away from the actual source because water travels through hidden roof and wall paths.