How to Dry Attic Insulation After Moisture Exposure: Safe Steps and When Replacement Is Needed
Wet attic insulation can sometimes be dried, but only when the moisture exposure was light, clean, recent, and the insulation still has its shape. Saturated, moldy, contaminated, repeatedly wet, or badly compressed insulation usually needs to be removed instead of dried.
The safest response is to stop the moisture source first, improve attic airflow, monitor the insulation and nearby wood, and replace any material that stays damp or loses its structure. Insulation can look dry on the surface while moisture remains trapped deeper inside the fibers.
For broader recovery guidance after leaks or repeated moisture events, see how to prevent recurring moisture damage. If the attic moisture may be part of a wider hidden-moisture problem, the broader inspection guide on how to find hidden moisture in different areas of your home can help you compare attic conditions with other areas of the house.
This guide explains how to dry attic insulation safely, how long drying usually takes, and when replacement becomes necessary.
What Happens When Attic Insulation Gets Wet
Unlike exposed wood framing, attic insulation can hold moisture inside the material, which slows evaporation and makes surface dryness unreliable.
Wet insulation does not simply drain like a solid surface. Moisture can remain trapped between fibers or particles even when the top layer begins to feel dry.
Moisture Absorption Happens Quickly
Most attic insulation materials absorb moisture rapidly when exposed to water or humidity. This occurs during events such as:
- Roof leaks following storms
- Condensation buildup during cold weather
- Improperly vented exhaust fans
- Ice dam formation along roof edges
- High humidity entering through ceiling leaks
Once moisture enters insulation, it may spread beyond the visible wet spot. Fiberglass batts can hold water between fibers, blown fiberglass can settle, and cellulose can clump or mat down when wet.
If insulation has recently been exposed to moisture, comparing conditions with signs of moisture in attic insulation can help determine how widespread the wetting may be.
Wet Insulation Loses Thickness and Efficiency
Moisture exposure can cause insulation to compress, settle, clump, or lose loft. Once that happens, the insulation may no longer perform properly even after some moisture evaporates.
Compressed insulation creates several problems:
- Reduced drying efficiency
- Slower evaporation rates
- Greater moisture retention
- Loss of thermal performance
Even after moisture begins to evaporate, compressed insulation may remain less effective than before. This is why evaluating insulation condition during drying is just as important as removing moisture itself.
Early Mold Risk Begins During the Drying Phase
Mold does not require long-term flooding to develop. In many cases, mold growth begins during the drying phase if moisture remains trapped inside insulation.
Conditions that increase early mold risk include:
- Limited airflow around damp insulation
- Warm temperatures combined with moisture
- Delayed drying response
- Repeated moisture exposure events
If mold-like odors or discoloration appear during drying, reviewing early warning signs described in signs of mold growth in attic spaces helps determine whether mold conditions are developing.
First Steps After Discovering Wet Insulation
The actions taken immediately after discovering wet insulation have a major impact on how successfully drying will proceed. Delayed response increases the likelihood of mold growth and structural damage.
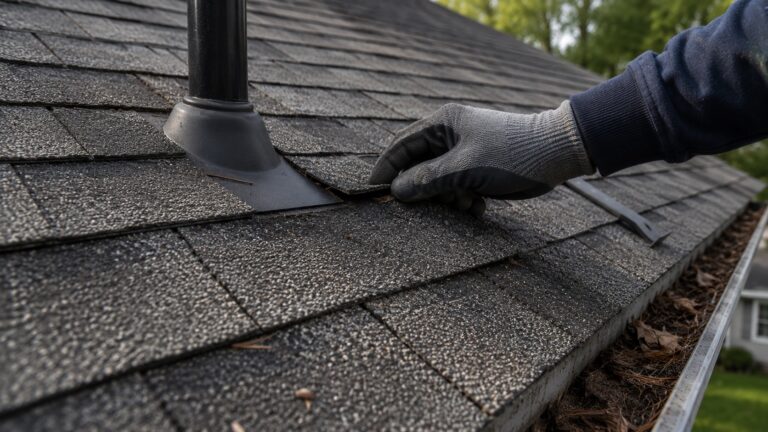
Identify and Stop the Moisture Source
Drying cannot begin effectively until the source of moisture has been stopped. Attempting to dry insulation while water continues entering the attic will lead to repeated wetting and prolonged damage.
Common moisture sources to investigate include:
- Roof leaks near flashing or shingles
- Condensation caused by poor ventilation
- Bathroom or kitchen exhaust fans venting into the attic
- Air leakage from living spaces
- Blocked soffit or ridge vents
If moisture sources are unclear, investigating causes described in why mold forms in attic insulation helps identify the underlying conditions responsible for insulation wetting.
Assess the Size of the Affected Area
Once moisture entry has stopped, the next step is evaluating how much insulation has been affected. This helps determine whether drying is realistic or replacement may be necessary.
Key inspection observations include:
- Size of wet insulation area
- Depth of moisture penetration
- Presence of compression or clumping
- Signs of mold development
- Nearby wood moisture conditions
Localized damp spots may be easier to dry, while large saturated areas often require removal or replacement. Evaluating the severity early allows homeowners to make informed decisions before moisture spreads further.
Important: If the insulation was wet from sewage, floodwater, animal contamination, or dirty roof runoff carrying debris into the attic, do not try to dry and reuse it. Contaminated insulation should usually be removed and replaced using proper protective equipment.
How to Dry Wet Attic Insulation Safely
After the moisture source is stopped and the affected area is identified, controlled drying can begin. The goal is to move humid air away from the insulation, keep ventilation paths open, and confirm that moisture is not trapped below the surface.
Increase Airflow Around Damp Insulation
Airflow is one of the most important factors in drying attic insulation. Moving air helps carry moisture away from wet materials and encourages evaporation.
Ways to improve airflow around damp insulation include:
- Opening attic access points when weather conditions allow
- Clearing insulation away from soffit vents
- Removing obstructions that block natural airflow
- Ensuring ridge and roof vents remain unobstructed
- Allowing air pathways to remain open across insulation surfaces
Natural airflow alone may be sufficient for lightly damp insulation. However, heavily saturated insulation often requires additional drying support.
If airflow problems exist, addressing them early prevents repeated moisture buildup. Preventive airflow adjustments described in how to prevent moisture build-up in attics can help reduce long-term moisture risks.
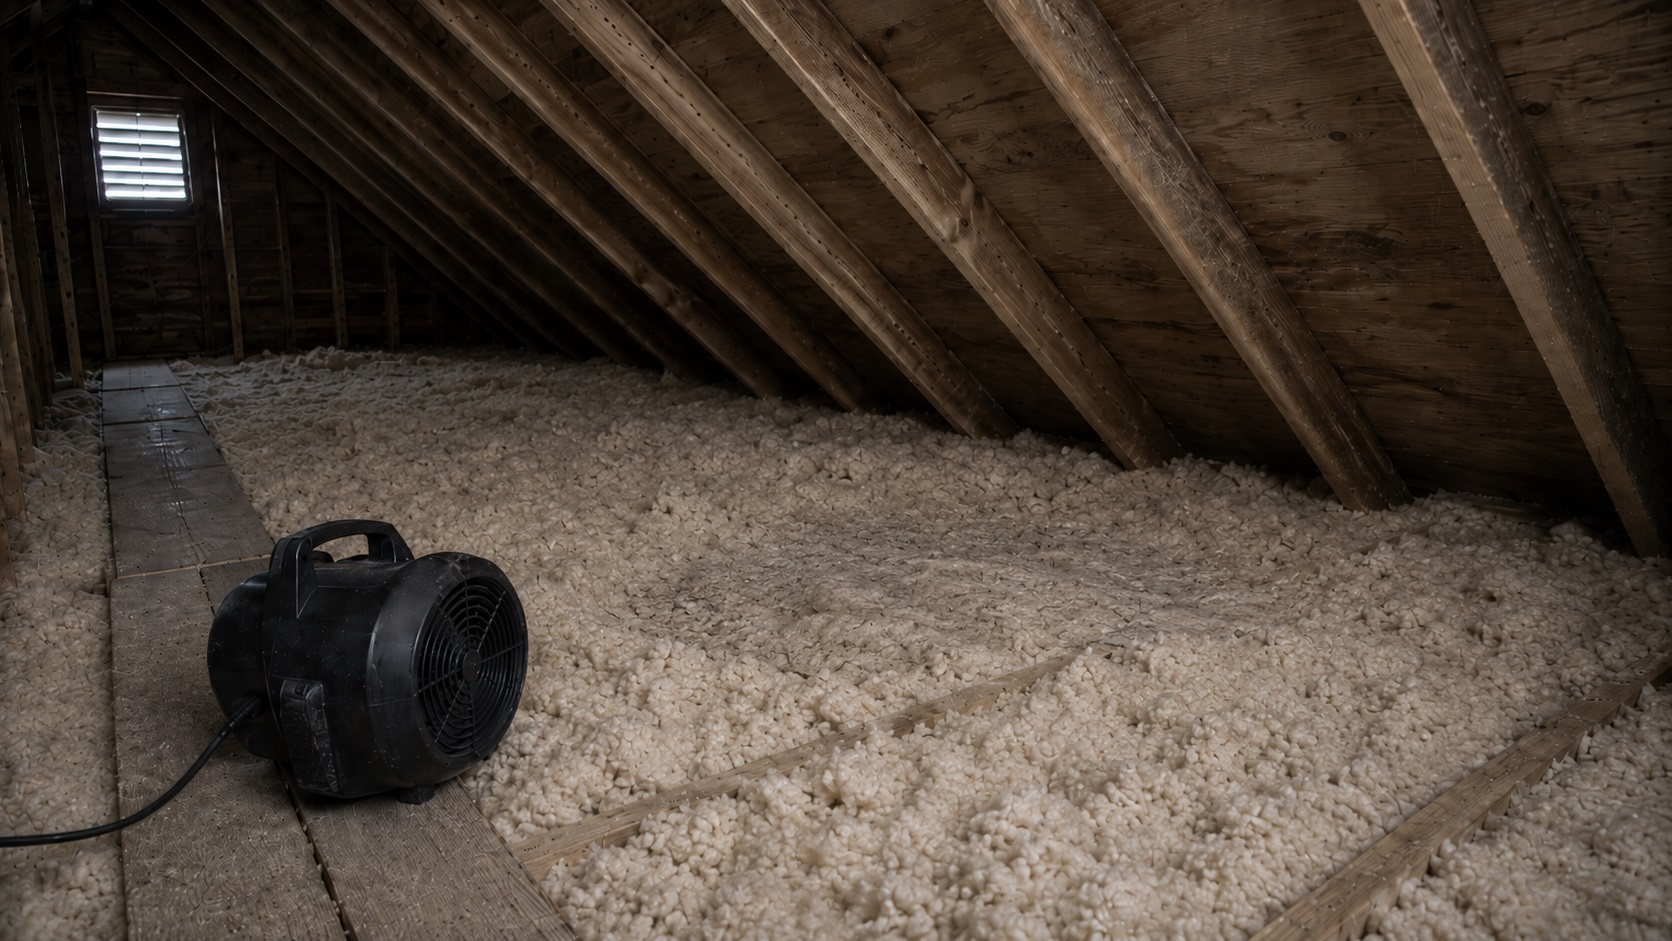
Use Mechanical Air Movement When Necessary
When natural airflow is not enough, mechanical air movement can help accelerate drying. Fans placed to move air across damp insulation surfaces increase evaporation and reduce drying time.
Important considerations when using fans include:
- Position fans to move air across insulation, not directly into it
- Avoid creating dead zones where moisture can remain trapped
- Maintain steady airflow rather than short bursts
- Use only safe, properly rated equipment and keep cords, plugs, and fans away from wet materials
Mechanical air movement works best when moisture sources have already been eliminated. Do not aim strong airflow directly into loose insulation in a way that scatters fibers, dust, or possible mold debris. If moisture continues entering the attic, airflow alone will not solve the problem.
Improve Ventilation to Remove Humidity
Ventilation helps carry humid air out of the attic so moisture released from insulation does not stay trapped above the ceiling.
Ventilation improvements may involve:
- Clearing blocked soffit vents
- Removing insulation that covers intake vents
- Checking ridge vent airflow pathways
- Ensuring balanced intake and exhaust airflow
Ventilation improvements are particularly important during large drying events. Without proper ventilation, humidity released from insulation may remain trapped inside the attic.
If repeated moisture buildup occurs despite drying attempts, reviewing conditions explained in why attic insulation stays damp can help identify whether hidden moisture retention is affecting drying progress.
Monitor Moisture Progress During Drying
Drying insulation is not a one-time action—it is a monitored process. Observing how insulation changes over time helps determine whether drying is working or if further action is required.
When possible, check nearby roof sheathing, rafters, and ceiling framing with a moisture meter rather than relying only on how the insulation feels by hand.
Signs that drying is progressing successfully include:
- Insulation gradually returning to normal thickness
- Reduced damp or cool sensation when touched
- Decreasing musty odors
- No new condensation forming on nearby wood
Signs that drying may be incomplete include:
- Persistent dampness after several days
- Continued musty odors
- Visible mold development
- Insulation remaining compressed
If drying progress appears slow or uncertain, reassessing moisture conditions described in signs of moisture in attic insulation helps confirm whether additional drying steps are needed.
How Long Attic Insulation Takes to Dry
Drying time varies widely depending on the amount of moisture present and the environmental conditions inside the attic. Some insulation dries quickly, while heavily saturated areas may require removal rather than extended drying.
Drying Time for Light Moisture Exposure
Light moisture exposure often occurs from short-term condensation or minor humidity events. In these cases, insulation may only be slightly damp.
Typical drying time for light exposure:
- Approximately 1 to 3 days
- Requires steady airflow
- Requires stable ventilation conditions
Light dampness usually produces minimal compression and limited mold risk if drying begins promptly.
Drying Time for Moderate Moisture Exposure
Moderate wetting occurs when insulation absorbs noticeable moisture but has not become fully saturated. This situation often follows small leaks or repeated condensation cycles.
Typical drying time for moderate exposure:
- Approximately 3 to 7 days
- Requires consistent airflow support
- May require mechanical drying assistance
Moderate moisture conditions carry higher mold risk, especially if drying is delayed.
Severe Saturation Often Requires Removal
Severely saturated insulation behaves differently from lightly damp materials. When insulation absorbs large amounts of water, internal moisture retention makes drying extremely difficult.
Indicators of severe saturation include:
- Heavy insulation that feels soaked
- Large compressed sections
- Water dripping from insulation
- Strong persistent odors
In these situations, drying alone may not restore insulation performance. Removal and replacement are often required to prevent long-term moisture damage.
When Wet Attic Insulation Must Be Removed Instead of Dried
Not all wet insulation can be safely dried. In some situations, removal becomes the safest and most effective option. Attempting to dry heavily saturated insulation often wastes time and allows mold growth to continue inside trapped moisture pockets.
Understanding when drying is realistic—and when removal is necessary—helps homeowners avoid prolonged moisture problems.
Insulation That Has Become Severely Saturated
Severely saturated insulation absorbs more water than it can realistically release through evaporation. Once insulation becomes soaked, moisture spreads deep into internal fibers and remains trapped even after airflow improves.
Signs of severe saturation include:
- Insulation that feels heavy or dripping wet
- Large sections that appear soaked rather than damp
- Water pooling beneath insulation layers
- Persistent moisture after several days of drying
When insulation reaches this level of saturation, removal is often necessary. Attempting to dry heavily soaked insulation can delay recovery and increase the risk of mold contamination.
Insulation Showing Visible Mold Growth
If mold growth is visible on insulation surfaces, removal is frequently the safest approach. Mold contamination spreads easily through insulation fibers, making surface cleaning alone ineffective.
Common indicators that mold contamination may require removal include:
- Dark or fuzzy growth spreading across insulation
- Strong musty odors that persist during drying
- Discoloration spreading beyond initial moisture areas
- Mold returning after previous drying attempts
If mold is suspected, comparing observations with signs of mold growth in attic spaces helps confirm whether contamination is likely active.
Insulation That Remains Compressed After Drying
Insulation that stays compressed after moisture exposure often cannot recover its original performance. Compression reduces airflow within insulation layers and limits evaporation.
When insulation remains flattened or clumped after drying, it typically indicates internal damage that cannot be reversed. In these situations, replacement is usually recommended to restore proper thermal performance and prevent recurring moisture retention.
Persistent compression problems are frequently linked to long-term moisture retention patterns explained in why attic insulation stays damp.
Preventing Mold Growth During the Drying Process
During drying, mold prevention depends on removing moisture fast enough that damp insulation does not remain wet for days.
Begin Drying as Soon as Moisture Is Found
Time plays a major role in mold formation. The longer insulation remains damp, the greater the likelihood that mold will begin developing.
Prompt response actions include:
- Stopping moisture entry immediately
- Increasing airflow without delay
- Removing obviously saturated insulation
- Monitoring conditions daily
Delays in drying increase the risk that minor moisture problems will become mold-related issues.
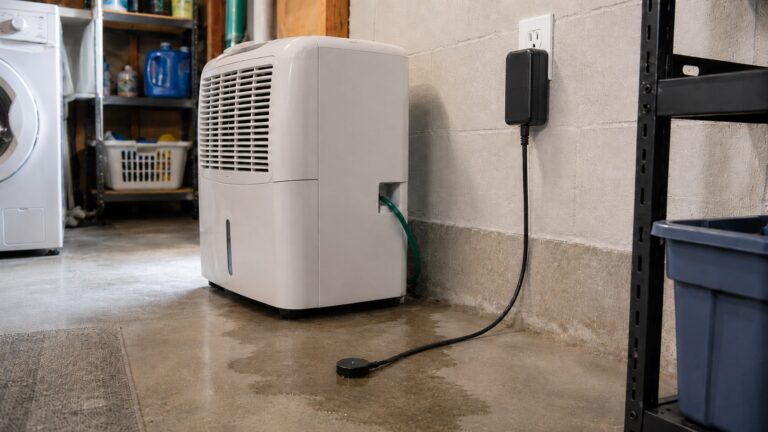
Reduce Indoor Humidity During Drying
Indoor humidity levels influence attic drying conditions. High humidity slows evaporation and allows moisture to remain trapped inside insulation layers.
Ways to reduce humidity during drying include:
- Running exhaust fans in kitchens and bathrooms
- Limiting activities that produce large amounts of moisture
- Ensuring exhaust systems vent outdoors properly
- Maintaining consistent indoor temperature levels
Humidity control supports faster drying and reduces the risk of mold formation.
Check for Recurring Moisture Sources
Drying efforts will fail if moisture continues entering the attic. Hidden moisture pathways often cause recurring dampness even after initial drying attempts.
Recurring moisture sources may include:
- Unsealed attic penetrations
- Inadequate roof repairs
- Blocked ventilation pathways
- Improper exhaust venting
If repeated moisture exposure occurs, reviewing corrective strategies described in how to fix persistent attic moisture problems helps identify long-term solutions.
How to Decide Whether Insulation Can Be Saved
Determining whether insulation can be dried successfully depends on several practical factors. Making this decision early prevents unnecessary effort and reduces the risk of hidden mold problems.
Situations Where Insulation Can Often Be Saved
Some insulation can recover successfully if moisture exposure is limited and drying begins quickly.
Insulation may be salvageable when:
- Dampness is limited to small areas
- No visible mold growth is present
- Insulation structure remains intact
- Moisture exposure lasted only a short time
- Drying begins within a day or two
Light moisture exposure combined with fast response improves the chances of successful drying.
Situations Where Replacement Is Usually Necessary
Replacement becomes more likely when moisture damage is widespread or prolonged. Continuing to dry compromised insulation often leads to recurring moisture problems.
Replacement is typically recommended when:
- Insulation remains damp after several days of steady airflow and ventilation
- Mold contamination spreads across large areas
- Strong odors persist despite drying
- Insulation has lost its shape or structure
- Moisture exposure occurred repeatedly
- Wet cellulose insulation has clumped, matted down, or stayed compacted after drying attempts
- The insulation was exposed to sewage, floodwater, animal waste, or other contamination
In these cases, removal prevents long-term mold risk and restores insulation effectiveness.
Key Takeaways
- Wet attic insulation holds moisture internally and dries more slowly than exposed materials.
- Stopping the moisture source is the first step before beginning any drying process.
- Airflow and ventilation are essential for successful drying.
- Lightly damp insulation may dry within days, while severe saturation often requires removal.
- Mold can begin forming during the drying phase if moisture remains trapped.
- Compressed insulation often indicates long-term moisture retention.
- Fast response significantly reduces the risk of mold and structural damage.
- Wet cellulose insulation that clumps, mats down, or stays compacted is usually harder to save than lightly damp fiberglass.
Frequently Asked Questions About Drying Wet Attic Insulation
Can wet attic insulation dry on its own?
Lightly damp insulation may dry naturally if moisture exposure was brief and airflow conditions are good. However, insulation that has absorbed significant moisture rarely dries completely without active airflow support. Because insulation traps moisture internally, relying on passive drying alone often leads to delayed drying and increased mold risk.
If insulation remains damp after several days, comparing symptoms with why attic insulation stays damp can help determine whether hidden moisture retention is preventing proper drying.
How long does attic insulation usually take to dry?
Drying time depends on how much moisture entered the insulation and how well airflow is managed. Light dampness may dry within 1 to 3 days, while moderate moisture may require 3 to 7 days of consistent airflow and ventilation. Severely saturated insulation often requires removal because internal moisture becomes too difficult to eliminate.
Is wet attic insulation dangerous?
Wet insulation can become dangerous if mold begins to develop or if moisture spreads to nearby wood structures. Damp insulation also reduces energy efficiency and may contribute to indoor air quality problems if mold growth occurs.
If mold-like odors or discoloration appear, reviewing signs of mold growth in attic spaces helps determine whether contamination may already be present.
Should fans be used to dry attic insulation?
Fans can help improve airflow and speed drying when used properly. Air movement across insulation surfaces helps remove moisture and supports evaporation. However, fans are most effective when moisture sources have already been stopped and ventilation pathways remain clear.
Using fans without fixing moisture entry problems may delay drying without resolving the root cause.
Can mold grow while insulation is drying?
Yes. Mold can begin forming during the drying phase if moisture remains trapped inside insulation fibers. This is why early drying response, airflow, and moisture-source control are essential.
If odors, dark spotting, or recurring dampness appear during drying, compare the area with signs of mold growth in attic spaces before assuming the insulation can be saved.
Conclusion: Dry Quickly, but Replace Insulation That Cannot Be Safely Saved
Drying attic insulation after moisture exposure starts with stopping the source, improving airflow, and checking whether moisture is still trapped below the surface. Light, clean dampness may dry with prompt action, but saturated, moldy, contaminated, repeatedly wet, or compressed insulation usually needs replacement.
If attic insulation stays damp after drying efforts or the moisture keeps returning, the problem may be larger than a one-time wet spot. In that case, reviewing how to fix persistent attic moisture problems can help identify whether ventilation, air leaks, roofing defects, or recurring moisture sources need professional attention.
One Comment
Comments are closed.