How to Detect Hidden Moisture in Crawl Spaces
Hidden moisture in crawl spaces is usually detected by checking the areas most likely to trap moisture, then confirming suspicious spots with a moisture meter, humidity readings, and repeated measurements. The most important places to test are floor joists, subfloor panels, insulation edges, vapor barrier seams, plumbing penetrations, foundation corners, and low soil areas.
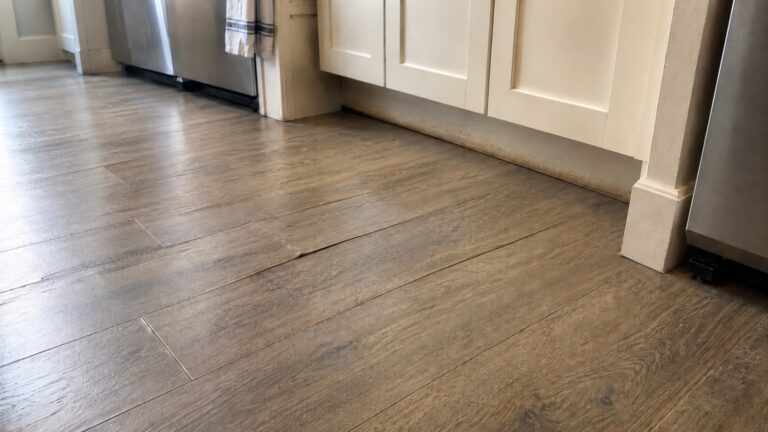
If you have already noticed musty odors, damp air, soft insulation, floor movement, or recurring indoor humidity, those symptoms may point to moisture below the home. Reviewing signs of moisture in crawl spaces can help decide whether a full moisture check is needed, while this guide focuses on confirming hidden moisture once you suspect it.
This article is part of the broader guide to finding hidden moisture in different areas of your home, but the steps below focus specifically on crawl spaces where moisture often hides behind insulation, under vapor barriers, and inside wood framing.
For the fastest inspection, start at the lowest and wettest-looking areas first: vapor barrier seams, foundation corners, plumbing penetrations, and low soil spots. Then move upward to insulation edges, joists, beams, and the underside of the subfloor. This bottom-up approach helps separate ground moisture, plumbing leaks, condensation, and moisture trapped inside building materials.
Where Hidden Moisture Typically Forms in Crawl Spaces
Hidden crawl-space moisture usually forms where water vapor, soil moisture, plumbing leaks, or exterior seepage meet materials that absorb or conceal dampness. Start with the areas below before testing random surfaces.
Under Insulation Materials
Insulation is one of the most common places for hidden moisture to accumulate. Because insulation traps air, it can also trap moisture. In crawl spaces, insulation often covers wood framing and hides moisture from view.
Moisture trapped under insulation may occur when:
- Humid air condenses on cooler surfaces
- Ground moisture rises into insulation layers
- Airflow is restricted around floor cavities
- Water intrusion occurs near foundation edges
To detect moisture beneath insulation, inspect accessible edges first instead of pulling large sections down. Look for sagging batts, darkened paper facing, compressed fiberglass, damp edges, rusted fasteners, or staining on the joist beside the insulation. If insulation appears moldy, contaminated, or heavily wet, stop disturbing it and use moisture readings on exposed wood instead.
Inside Wood Framing and Subfloor Materials
Wood absorbs moisture slowly and releases it slowly. This makes wooden components such as joists, beams, and subfloor panels common locations for hidden moisture.
Hidden moisture inside wood framing may develop when:
- Humidity levels remain elevated
- Condensation occurs repeatedly
- Moisture enters through foundation gaps
- Insulation traps moisture against wood
Wood may appear dry on the surface while still containing internal moisture. Because of this, visual inspection alone is often insufficient to confirm moisture levels.
Test the bottom and side faces of joists, beam pockets near foundation walls, the underside of subfloor panels, and any darker wood around plumbing or duct penetrations. Compare each suspicious reading with a similar piece of wood in a visibly dry area of the same crawl space.
If wood is soft, delaminated, crumbly, or visibly distorted, the issue has moved beyond simple moisture detection. Those conditions belong with broader signs of structural moisture problems.
Behind Vapor Barriers
Vapor barriers are designed to reduce moisture movement from soil into crawl spaces. However, moisture can still collect beneath or behind these barriers, especially when installation gaps or tears exist.
Hidden moisture behind vapor barriers may develop when:
- Groundwater accumulates below plastic sheeting
- Barrier seams are incomplete or damaged
- Moisture becomes trapped beneath sealed areas
- Drainage problems allow water to collect under the barrier
Check vapor barrier edges, seams, tears, and areas around piers. Moist soil under clear or white plastic, condensation beads on the underside of the barrier, muddy low spots, lifted plastic, or mineral staining near seams can indicate moisture below the barrier even when the walking surface looks dry.
Near Plumbing and Penetration Points
Plumbing lines and utility penetrations create small openings where moisture can enter or accumulate. These areas are particularly vulnerable because water supply lines, drain lines, and ducts may introduce humidity or leaks into the crawl space.
Common penetration-related moisture sources include:
- Slow plumbing leaks
- Condensation on cold water pipes
- Drain line seepage
- Outdoor water entry through wall openings
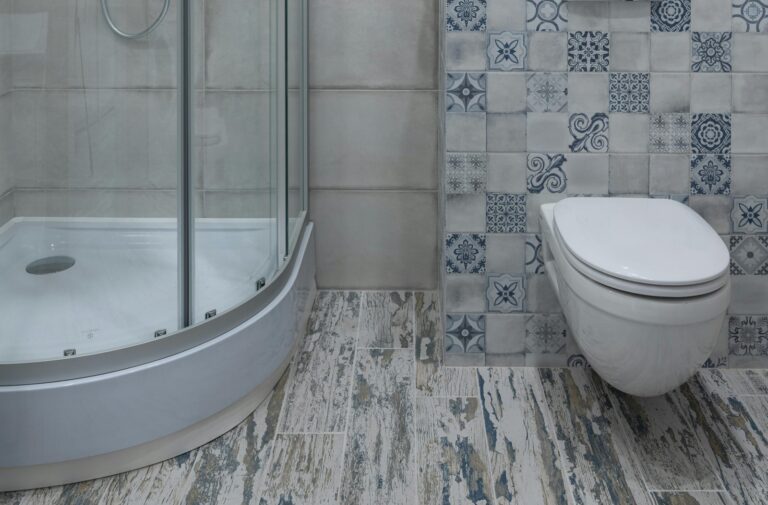
Check the wood directly below supply lines, drain fittings, tub traps, toilet areas, hose bib penetrations, duct boots, and utility openings. Localized staining, green or white pipe corrosion, damp soil below a fitting, or one joist reading higher than nearby joists can reveal a small hidden leak before it spreads.
Foundation Corners and Low Spots
Crawl spaces are rarely perfectly level. Low areas and foundation corners often collect moisture because water naturally flows toward the lowest point available.
Hidden moisture frequently forms in:
- Low soil depressions
- Corners near exterior walls
- Areas with poor drainage
- Zones shielded from airflow
Even when the rest of the crawl space appears dry, these areas may remain damp. Persistent moisture in these locations often indicates recurring water entry patterns that should be investigated further.
If you find repeated puddling, mud lines, washed soil, or water trails instead of hidden dampness inside materials, the next step is closer to detecting water intrusion in crawl spaces rather than only testing hidden moisture.
Basic Visual Detection Techniques
Before using a meter, visually scan for stains, sagging insulation, condensation, rusted fasteners, damp soil, water marks on foundation walls, and darker wood near plumbing or low areas. Visual clues tell you where to take moisture readings.
Not every dark mark is active moisture. Old water stains, tannin marks, soil dust, rust marks, and previous leak history can remain after the material is dry. Treat stains as inspection targets, then confirm them with moisture readings, humidity patterns, and recent weather or plumbing history.
Using Bright Lighting and Low-Angle Observation
Proper lighting significantly improves moisture detection. A bright flashlight directed across surfaces at a low angle can reveal subtle reflections, stains, or surface irregularities that may otherwise be invisible.
Low-angle lighting helps identify:
- Condensation patterns
- Moisture streaks
- Uneven surface textures
- Minor discoloration
Shiny reflections often appear where moisture collects. These reflections may be faint but are often visible when light is directed along the surface rather than directly at it.
Touch-Based Detection Methods
Touch can help identify cooler or slightly damp surfaces, but use gloves and avoid touching suspected mold, contaminated insulation, exposed wiring, or sewage-affected materials. Treat touch as a screening step only, not proof that hidden materials are dry or wet.
Touch-based indicators include:
- Cooler-than-normal surfaces
- Slight dampness on wood
- Sticky residue on materials
- Unexpected softness in insulation
Because surface dryness does not guarantee internal dryness, touch should always be combined with additional confirmation methods.
Checking for Condensation Patterns
Condensation patterns often reveal hidden moisture problems before structural damage develops. These patterns typically appear on cooler surfaces where warm, humid air contacts colder materials.
Common condensation indicators include:
- Droplets forming on pipes or beams
- Moisture collecting along metal surfaces
- Repeated dampness during temperature changes
- Water streak patterns forming over time
Recurring condensation is an important sign that humidity levels inside the crawl space are too high. Conditions like these often develop due to environmental factors explained in why crawl spaces develop moisture problems, which describes how moisture sources develop in enclosed spaces.
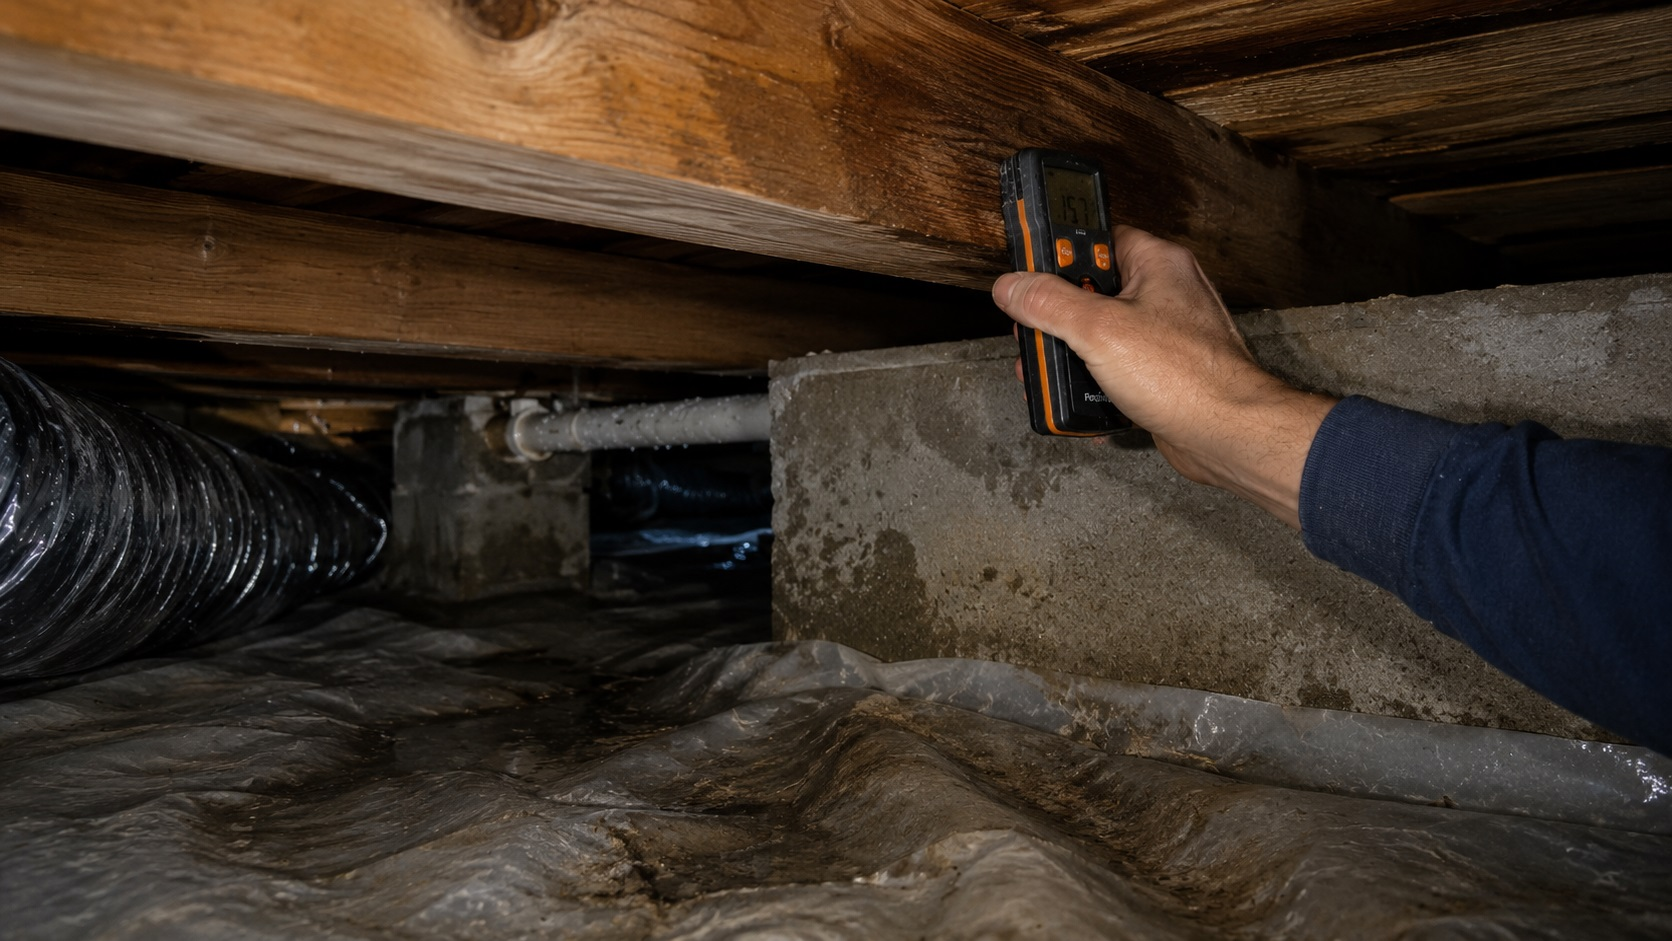
Using Moisture Meters to Find Hidden Moisture
Moisture meters are the most useful tools for confirming hidden moisture in crawl spaces. While visual inspection helps locate suspicious areas, moisture meters show whether wood, subfloor panels, or other accessible materials contain elevated moisture that may not be visible from the surface.
These tools help compare moisture levels in accessible materials such as wood framing, subfloor panels, and some insulation facings. Because hidden moisture often develops before visible damage appears, meter readings are most useful when they are compared across several crawl-space locations.
Pin-Type Moisture Meters
Pin-type moisture meters use two small metal probes that penetrate the surface of a material. These probes measure electrical resistance between the pins, which changes depending on the amount of moisture present inside the material.
Pin-type meters are especially useful for:
- Testing wooden beams and joists
- Checking subfloor panels
- Measuring moisture inside framing lumber
- Identifying localized moisture pockets
Because pin-type meters measure below the surface, they are often the best choice for checking wood components inside crawl spaces when the meter is set correctly for the material being tested.
When testing wood, readings typically fall into predictable ranges:
- 6–12% — Usually dry for interior wood
- 12–16% — Slightly elevated; compare with nearby dry wood
- 16–20% — Moisture concern, especially if readings repeat in the same area
- Above 20% — High moisture condition that can support mold growth and wood deterioration if it persists
Instead of relying on a single reading, take multiple measurements across different areas. Comparing readings between suspected wet zones and known dry areas helps confirm whether moisture is localized or widespread.
Pinless Moisture Meters
Pinless moisture meters use sensors to scan materials without penetrating the surface. These meters measure moisture by detecting changes in the material’s electrical properties.
Pinless meters are useful for:
- Scanning large surface areas quickly
- Checking finished surfaces without damage
- Locating general moisture zones
- Comparing moisture levels across wide areas
Pinless meters are often used first to locate suspicious areas, followed by pin-type meters to confirm moisture levels more precisely.
Use pinless meters as scanning tools, not final proof. If a pinless meter shows a suspicious area, confirm it with a pin-type reading in wood or with repeated readings from nearby materials in the same crawl space.
How to Read and Interpret Moisture Meter Results
Reading moisture meter results correctly is just as important as using the tool itself. Moisture readings must be interpreted in context rather than treated as isolated numbers.
Key interpretation principles include:
- Compare readings between dry and suspicious areas
- Look for consistent patterns rather than single spikes
- Monitor readings over time when possible
- Focus on changes rather than exact values
For example, if most wood readings measure between 8% and 10%, but one section reads 18%, that localized increase strongly suggests hidden moisture in that specific area.
A high reading after rain, plumbing use, or a humid weather pattern suggests active moisture. A dark stain with normal readings may be old damage or a previous moisture event. Rechecking the same spot later helps confirm whether the area is still getting wet.
Avoid common meter mistakes: testing only one spot, comparing different materials, pressing a pinless meter over metal fasteners, ignoring temperature changes, or assuming a normal surface reading proves insulation or subfloor layers are dry.
Repeated elevated readings across multiple areas indicate broader moisture problems that may require additional investigation.
Advanced Detection Tools for Hidden Moisture
Advanced tools are useful when moisture is suspected but hard to locate. They should guide where you test, not replace material moisture readings.
Infrared (Thermal) Cameras
Infrared cameras detect temperature differences across surfaces. Moist areas often appear cooler than surrounding materials because moisture affects heat transfer rates.
Infrared cameras can help identify:
- Cold spots indicating moisture retention
- Hidden damp areas inside walls or subfloor sections
- Moisture spreading patterns
- Areas requiring further testing
Infrared cameras do not detect water directly. Instead, they highlight temperature differences that suggest possible moisture zones. These areas must always be confirmed with moisture meter readings.
Hygrometers for Measuring Crawl Space Humidity
Hygrometers measure relative humidity levels inside crawl spaces. Elevated humidity levels often indicate moisture conditions that may lead to condensation or hidden material dampness.
If crawl-space relative humidity stays around 60% or higher for long periods, condensation and material dampness become more likely, especially on cooler wood, pipes, ducts, and foundation surfaces. A single high reading matters less than a repeated pattern over days or weeks.
Data Logging Sensors
Data logging sensors track humidity and temperature over time. These devices provide long-term moisture monitoring, helping identify patterns that may not be visible during short inspections.
Data logging sensors are useful for:
- Tracking seasonal moisture changes
- Monitoring humidity trends
- Identifying recurring moisture events
- Evaluating effectiveness of moisture control measures
Long-term data collection helps reveal whether moisture problems occur consistently or only under specific environmental conditions.
How to Confirm Moisture Location Accuracy
Do not rely on one reading. Confirm hidden crawl-space moisture by testing the same material in several nearby spots, comparing it with a dry reference area, and repeating the test after rain, humidity swings, or HVAC changes.
Cross-Checking Multiple Readings
Moisture rarely appears evenly throughout a crawl space. It usually forms localized zones near plumbing, foundation edges, vapor barrier gaps, low soil areas, or cooler surfaces where condensation forms.
To confirm accurate results:
- Take readings from several nearby locations
- Compare readings between suspected and dry areas
- Repeat tests along structural members
- Check both horizontal and vertical surfaces
If elevated readings consistently appear in the same area, hidden moisture is likely present. If readings vary randomly, further testing may be necessary to identify the source.
Comparing Dry and Wet Reference Areas
Using reference areas improves moisture detection accuracy. A dry reference area provides a baseline measurement that helps identify abnormal readings.
Dry reference areas typically include:
- Wood located far from exterior walls
- Areas with strong airflow
- Sections without visible staining
- Materials protected from condensation
By comparing suspicious areas to dry reference zones, moisture patterns become easier to identify. Significant differences between readings usually indicate localized moisture conditions.
Checking Moisture Patterns Over Time
Hidden moisture problems often follow patterns rather than remaining constant. Testing the same areas over multiple days or weeks can reveal whether moisture conditions are improving or worsening.
Time-based monitoring helps identify:
- Recurring moisture after rainfall
- Seasonal humidity changes
- Persistent damp zones
- Moisture spreading into new areas
Monitoring patterns over time helps distinguish temporary moisture events from ongoing problems that require further investigation.
Safety Guidelines During Moisture Detection
Crawl spaces can contain wiring, moldy insulation, pests, sharp debris, sewage contamination, low clearances, and weakened wood. Do not enter if the space has standing water near electrical components, strong sewage odors, unstable framing, or heavy visible mold.
Electrical Safety Risks
Do not enter a crawl space with standing water near wiring, wet junction boxes, damaged cable, low-hanging electrical lines, or outlets mounted close to damp soil or wet framing.
Electrical safety precautions include:
- Staying out until electrical hazards have been checked by a qualified professional
- Avoiding contact with exposed electrical components
- Using battery-powered lighting tools
- Stopping inspection if electrical damage is suspected
If electrical components appear damaged or wet, professional assistance is required before entering the crawl space.
Air Quality and Respiratory Hazards
Moist crawl spaces can contain mold spores, rodent debris, disturbed insulation fibers, soil dust, and sewage-related contamination. Avoid stirring up insulation or crawling through visibly contaminated areas.
Air safety considerations include:
- Wearing an appropriate respirator when mold, heavy dust, or contaminated insulation may be present
- Avoiding disturbed insulation with visible mold
- Limiting time in confined spaces
- Leaving immediately if strong odors become overwhelming
Air quality concerns are especially important when moisture conditions support mold growth. If mold is suspected, reviewing safety guidance from how to remove mold permanently helps clarify safe next steps.
Structural and Physical Hazards
Crawl spaces often contain uneven surfaces, sharp objects, and low clearances. Moisture conditions may also weaken structural components, increasing physical risks.
Structural safety precautions include:
- Watching for weakened wood surfaces
- Avoiding areas that appear unstable
- Using stable footing when moving inside the space
- Remaining aware of overhead obstructions
If structural damage appears severe, professional inspection is recommended before continuing moisture detection efforts.
When Detection Results Require Professional Help
Some moisture detection results indicate conditions that exceed safe homeowner evaluation. When readings show widespread moisture or signs of structural damage, professional assistance may be necessary.
Professional help is recommended when:
- Moisture readings remain elevated across large areas
- Mold growth becomes visible
- Wood appears soft or structurally weakened
- Standing water continues to return
- Moisture patterns spread over time
If the concern is no longer just hidden moisture but visible damage, wood softness, sagging insulation, pest damage, or widespread staining, use a broader crawl space moisture damage inspection approach.
Professional inspectors can verify readings, identify moisture sources, check drainage and ventilation conditions, and decide whether repair or drying work is needed. After moisture is confirmed, preventing moisture build-up in crawl spaces becomes the next step.
Frequently Asked Questions About Detecting Hidden Crawl Space Moisture
What is the best tool to detect hidden moisture in a crawl space?
The most useful tool for confirming hidden moisture in crawl spaces is a moisture meter. Pin-type meters are usually best for checking wood directly, while pinless meters allow faster scanning across large surfaces.
Hygrometers are also useful because they measure humidity levels in the air, which helps identify moisture conditions that may lead to condensation or material dampness.
Can moisture hide inside wood without visible signs?
Yes, moisture frequently hides inside wood without visible surface signs. Wood absorbs moisture internally, which means structural materials such as joists and beams can contain elevated moisture levels even when surfaces appear dry.
This is why visual inspection alone is often insufficient. Moisture meters help confirm whether wood contains internal moisture that cannot be seen.
How accurate are moisture meters in crawl spaces?
Moisture meters can be very useful in crawl spaces, but accuracy depends on matching the meter setting to the material, taking several readings, and comparing suspicious areas with dry reference areas. Metal fasteners, surface contamination, temperature changes, and different material types can affect readings.
A repeated high reading in the same wood member is more meaningful than one isolated number.
Can infrared cameras detect moisture directly?
Infrared cameras do not detect moisture directly. Instead, they detect temperature differences caused by moisture-related cooling effects. Areas that appear cooler may indicate moisture, but these locations must always be confirmed using moisture meter readings.
Infrared tools are best used as screening devices that help locate areas needing further testing.
How often should crawl spaces be checked for hidden moisture?
Crawl spaces should be checked at least once per year and again after heavy rain, plumbing leaks, drainage changes, or long humid periods. Additional checks are recommended if indoor symptoms appear, such as musty odors, rising humidity, soft floors, or floor movement.
Repeated checks are more useful than one inspection because hidden crawl-space moisture often follows weather and humidity patterns.
If hidden moisture is confirmed, the next step is to identify why the crawl space is staying damp. Start with why crawl spaces develop moisture problems before choosing repairs, drying methods, or prevention steps, so the source is corrected instead of only the symptoms.
One Comment
Comments are closed.