How to Detect Hidden Moisture in Exterior Walls
To detect hidden moisture in exterior walls, start by looking for repeat patterns after rain, comparing suspicious wall areas with dry control areas, and using a moisture meter to confirm whether readings are elevated. Thermal imaging can help locate possible wet zones, but it should usually be confirmed with meter readings or further inspection.
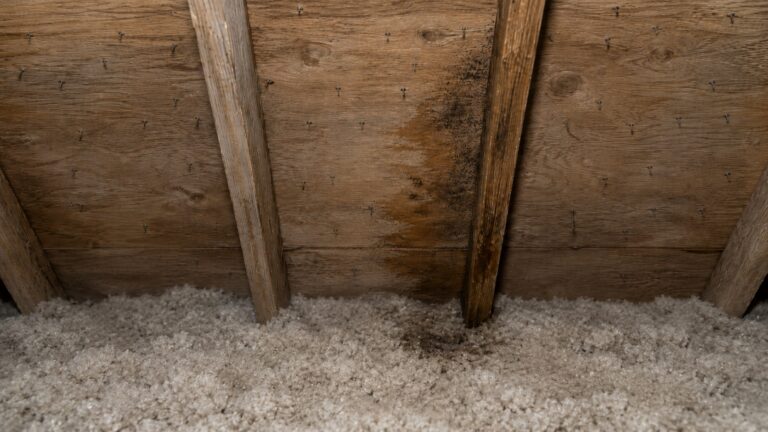
This matters because moisture inside exterior walls can remain trapped behind drywall, insulation, siding, and framing. By the time stains, peeling paint, soft drywall, or musty odors appear, the wall assembly may have been damp for weeks or months.
If you are still trying to decide whether your wall symptoms are moisture-related, review signs of moisture in exterior walls first. If symptoms are already present, this guide explains how to move from suspicion to confirmation without immediately opening the wall. For broader room-by-room detection guidance, see how to find hidden moisture in different areas of your home.
Why Hidden Moisture in Exterior Walls Is Hard to Find
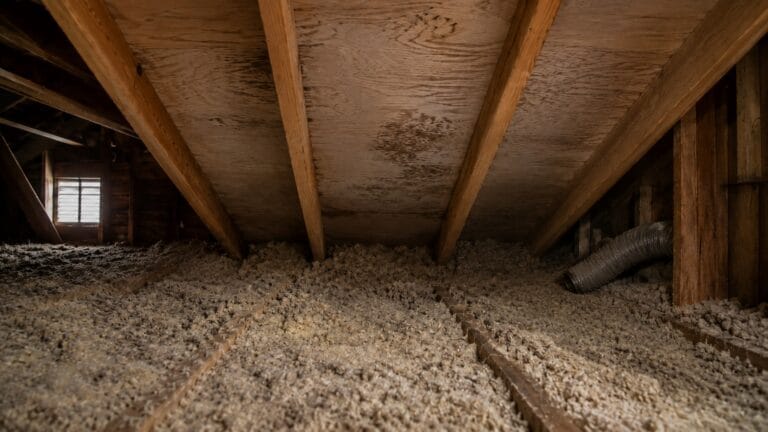
Exterior walls are designed to conceal structural layers behind finished surfaces. Drywall, siding, insulation, and framing work together to create a barrier between indoor and outdoor conditions. When moisture enters this system, it often remains trapped within concealed spaces.
If the concern appears to be outside the wall rather than on the interior drywall, how to detect moisture behind exterior siding covers siding-specific inspection clues in more detail.
Several factors make hidden moisture difficult to detect:
- Wall cavities prevent direct visual access to internal materials
- Insulation can absorb and hold moisture without visible signs
- Exterior finishes may appear dry while internal materials remain damp
- Moisture movement can follow unpredictable pathways
Water does not always travel straight downward. It may move sideways through insulation, along framing members, or across interior surfaces before appearing in a different location. This behavior makes identifying the true source of moisture challenging.
Another complication is intermittent moisture exposure. In many homes, moisture enters only during specific conditions, such as heavy rain or wind-driven storms. During dry weather, surfaces may appear normal even though moisture remains inside the wall.
This is why repeated patterns matter. If symptoms return after rainfall or seasonal humidity changes, it strongly suggests moisture is entering the structure repeatedly. Understanding why these recurring events occur often requires reviewing typical pathways explained in why exterior walls develop moisture problems.
Hidden moisture may also develop through condensation rather than direct water intrusion. When warm indoor air contacts cooler exterior surfaces, condensation can form inside the wall cavity. Over time, repeated condensation cycles can produce the same damage as liquid water infiltration.
Reliable detection usually comes from combining several clues: visible changes, weather timing, comparison readings, and tool-based confirmation.
Early Ways to Detect Moisture Without Tools
Before using a meter, check whether the wall behaves differently from nearby dry areas. Repeated changes after rain, cold spots, hidden staining, and recurring odors can help identify where tool-based testing should begin.
Tracking Changes After Rain or Humidity Events
One of the most reliable ways to detect hidden moisture is monitoring how wall surfaces respond to environmental changes. Moisture problems often become more visible after rainstorms, snowmelt, or periods of high humidity.
Look for patterns such as:
- Stains that darken after rainfall
- Musty odors that intensify during humid weather
- Paint bubbling that appears after storms
- Surface dampness following seasonal weather changes
If symptoms appear consistently after rain events, exterior water entry becomes more likely than a one-time indoor humidity issue.
A simple moisture log can be useful: record the date, recent weather, wall location, odor level, visible changes, and any meter readings. If the same wall section changes after similar weather events, the pattern is more meaningful than a single observation.
Comparing Wall Temperatures by Touch
Temperature differences between walls can provide important clues about hidden moisture. Wet materials transfer heat differently than dry ones, causing localized cooling.
To perform a basic comparison:
- Place your hand on different wall sections
- Compare exterior-facing walls to interior walls
- Identify areas that feel unusually cold or damp
- Repeat comparisons during different weather conditions
Cool spots alone do not always indicate moisture. However, when cold surfaces appear alongside staining, odors, or peeling finishes, the likelihood of moisture involvement increases.
This method is most useful during colder months, but it should only guide where to test next. A cold wall can also result from poor insulation, air leakage, or thermal bridging.
Checking Behind Furniture and Stored Items
Furniture placed tightly against exterior walls can hide early signs of moisture buildup. Restricted airflow behind furniture slows drying, allowing moisture to persist longer than it would in open areas.
Periodic inspection behind furniture may reveal:
- Hidden discoloration on wall surfaces
- Localized mold spots
- Musty odors trapped in enclosed spaces
- Damp surfaces that were previously unnoticed
This situation commonly occurs in bedrooms, storage rooms, and living spaces where large furniture remains stationary for extended periods.
If the area behind furniture is damp while open wall areas are dry, restricted airflow may be contributing. If the same area also worsens after rain, exterior water entry becomes more likely.
Observing Repeating Patterns in the Same Location
Moisture rarely appears randomly. Instead, it typically returns to the same location repeatedly. This repetition often indicates a consistent moisture pathway.
Watch for:
- Stains that reappear after cleaning
- Dark spotting or musty odor recurring in identical areas
- Paint damage returning after repairs
- Soft drywall, swelling, or surface changes returning in the same area
Repeating symptoms strongly suggest that moisture is entering through a specific structural weakness or environmental condition.
When patterns are observed repeatedly, more advanced detection tools—such as moisture meters—may be required to confirm the presence of moisture inside concealed wall materials.
Best Order for Testing an Exterior Wall
The most reliable approach is to test in a consistent order instead of jumping straight to one suspicious spot. This helps separate real moisture patterns from normal wall variation.
- Start with the wall area where stains, odors, peeling paint, or cold spots appear.
- Test a nearby wall section that appears normal and has similar construction.
- Compare readings at the same height on both wall sections.
- Repeat readings after rain or high humidity if the problem seems weather-related.
- Look for a pattern of elevated readings rather than trusting one isolated result.
Using Moisture Meters to Detect Hidden Moisture
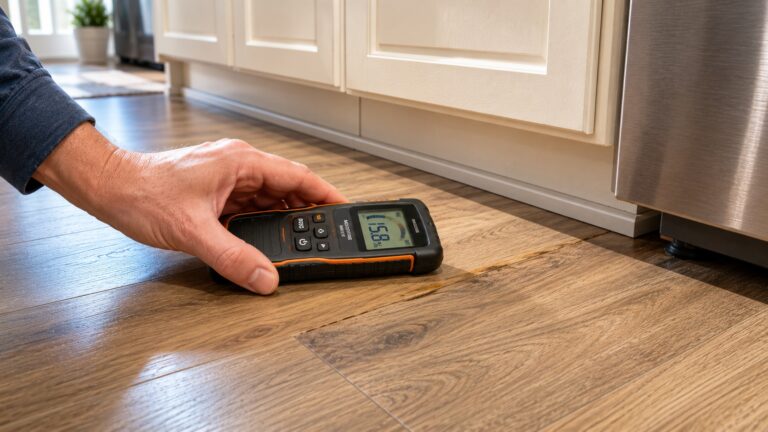
Moisture meters are one of the most useful homeowner tools for confirming suspected moisture inside exterior walls. They do not reveal the full cause of the problem, but they can show whether one wall area is wetter than comparable dry areas.
Meters are most helpful after warning signs appear, especially when stains, peeling finishes, soft drywall, or odors keep returning. The goal is not to get one perfect number. The goal is to find a consistent pattern of elevated readings.
Pin vs Pinless Moisture Meters
There are two primary types of moisture meters commonly used for wall detection: pin meters and pinless meters. Each type has advantages and limitations depending on the surface material and testing situation.
Pin moisture meters use two small metal probes that are inserted into the material. These probes measure electrical resistance, which changes based on moisture content.
Pin meters are useful for:
- Measuring moisture in wood trim and framing
- Testing localized areas with visible damage
- Comparing moisture levels between nearby locations
- Identifying whether moisture is concentrated in a specific spot
Because pin meters penetrate the surface slightly, they provide direct readings from inside the material. However, they leave tiny holes where the probes enter, making them less suitable for finished decorative surfaces.
Pinless moisture meters operate differently. Instead of penetrating the material, they use electromagnetic signals to measure moisture beneath the surface.
Pinless meters are useful for:
- Scanning larger wall areas quickly
- Testing finished drywall without damage
- Comparing moisture levels across broad surfaces
- Locating potential problem zones before detailed testing
Many homeowners prefer pinless meters for initial detection because they do not damage wall finishes. However, pinless meters may be influenced by surface density or underlying materials, making interpretation important.
Both types of meters can provide valuable information when used properly. In some cases, using both tools together offers more reliable confirmation.
How to Take Accurate Moisture Readings
Accurate readings depend on consistent testing methods. Improper placement or inconsistent comparison points can lead to misleading results.
To improve accuracy, follow these practical guidelines:
- Test both suspected areas and nearby dry areas for comparison
- Take multiple readings across the same wall section
- Avoid probing or pressing meters directly over electrical outlets, switches, visible wiring paths, or wet electrical areas
- Keep the meter flat and stable during measurement
- Repeat readings during different weather conditions when possible
Comparison is one of the most important aspects of detection. Instead of relying on a single reading, testing multiple locations helps identify abnormal moisture patterns.
For example, if one section of wall shows significantly higher readings than surrounding areas, it may indicate localized moisture intrusion. This difference is often more meaningful than the reading itself.
It is also helpful to test walls at different heights. Moisture may accumulate near the bottom of walls due to gravity, or near the top when water enters through roofline or flashing defects.
Recording results in a simple notebook can help identify trends over time. If readings increase after rainfall or humidity events, this pattern strongly suggests ongoing moisture entry.
Understanding What Moisture Readings Mean
Interpreting moisture readings correctly is just as important as taking them. Moisture meters measure moisture content relative to material type, meaning readings must be evaluated within context.
Typical interpretation patterns include:
- Low readings: Readings that match nearby dry areas usually suggest normal moisture levels
- Moderate readings: These deserve more comparison, especially if they appear near stains, odors, or peeling finishes
- High readings: Repeated high readings across several nearby points often suggest active or recent moisture
However, readings alone do not identify the moisture source. A high reading confirms that moisture exists—but not how it entered or how long it has been present.
Another important concept is baseline comparison. Every home contains natural moisture levels. Testing known dry areas first establishes a reference point, allowing abnormal readings to stand out more clearly.
Surface conditions also affect readings. For example:
- Recently cleaned walls may temporarily show elevated readings
- Metal components inside walls may affect measurements
- Thick wall coverings can influence meter sensitivity
- Temperature differences may alter electrical conductivity
Because of these variables, moisture meter readings should always be interpreted alongside visible symptoms and environmental conditions.
Using Thermal Imaging to Identify Hidden Moisture
Thermal imaging can help locate possible hidden moisture zones inside exterior walls, but it does not detect water directly. It detects temperature differences across wall surfaces.
Moisture often causes localized cooling because wet materials transfer heat differently than dry ones. Thermal imaging identifies these temperature variations as visual patterns.
Thermal imaging is useful for:
- Locating areas with unusual temperature differences
- Identifying large moisture zones quickly
- Detecting hidden moisture behind finished surfaces
- Confirming areas that require additional testing
However, thermal imaging requires careful interpretation. Not all temperature differences indicate moisture. Drafts, insulation gaps, and structural variations can produce similar patterns.
For this reason, thermal imaging is often used as a screening tool rather than a final confirmation method. Areas identified with thermal imaging are typically verified using moisture meters or further inspection techniques.
In many homes, thermal imaging is performed by professionals due to the cost of equipment and the expertise required to interpret results accurately.
Common Causes of False Moisture Readings
Moisture meters and thermal cameras can be misleading when other materials or conditions affect the reading. Before assuming a wall is wet, check for common false-reading causes.
Metal Components Inside Walls
Metal components hidden inside walls can interfere with moisture meter readings, especially when using pinless meters. Nails, screws, metal studs, and electrical wiring can affect electromagnetic signals, causing readings to appear higher than actual moisture levels.
This situation commonly occurs near:
- Wall studs fastened with metal hardware
- Electrical boxes and outlets
- HVAC ducting routed through wall cavities
- Metal reinforcement brackets
If readings appear unusually high near known electrical locations or fasteners, it may indicate interference rather than moisture. Testing adjacent areas helps determine whether readings are consistent or isolated.
Surface Condensation
Condensation on wall surfaces can temporarily raise moisture readings without indicating internal moisture problems. This often occurs when warm indoor air contacts cooler exterior walls, especially during cold weather.
Surface condensation may appear as:
- Small water droplets on painted surfaces
- Temporary dampness during early morning hours
- Moisture forming near windows or cold corners
- Short-term humidity spikes after showers or cooking
In many cases, condensation dries naturally once indoor humidity levels stabilize. However, repeated condensation cycles can eventually lead to long-term moisture damage if left unaddressed.
Recently Painted or Repaired Surfaces
Fresh paint or recently repaired drywall may retain moisture during curing periods. Testing these surfaces too soon can produce elevated readings that reflect drying materials rather than hidden moisture.
Allowing sufficient drying time before testing improves reading accuracy. Manufacturers typically provide recommended curing times for paints and patching compounds.
If uncertain whether curing moisture is affecting results, comparing readings several days apart helps determine whether moisture levels are decreasing normally.
Temperature Variations and Seasonal Changes
Temperature fluctuations influence moisture readings by affecting material conductivity and heat transfer. Seasonal changes—especially transitions between cold and warm weather—can produce temporary anomalies.
Walls exposed to outdoor temperature swings may feel colder or produce inconsistent readings during seasonal transitions. This is particularly noticeable in regions with large temperature differences between day and night.
Monitoring readings across multiple days helps identify whether elevated values remain stable or fluctuate due to temperature conditions.
Detection Limitations Homeowners Should Understand
While detection tools provide valuable information, they do not reveal every detail about moisture conditions inside walls. Recognizing the limits of detection helps homeowners make informed decisions about when further investigation is necessary.
Moisture detection methods confirm presence—not cause, depth, or severity of structural damage.
Moisture Detection Does Not Identify the Source
A moisture meter reading confirms elevated moisture levels but does not reveal where water originated. Moisture may travel along framing members or insulation layers before appearing in a different location.
For example, water entering near a roofline may travel downward before becoming visible near the lower portion of a wall. Understanding typical movement pathways—such as those explained in how water enters homes through structural gaps—helps explain why moisture sometimes appears far from its origin.
Deep Moisture May Not Always Be Detected
Some detection tools measure moisture only near the surface. Deep moisture trapped inside thick materials may remain undetected until it reaches the outer surface.
This limitation is especially relevant when moisture accumulates behind dense materials such as layered wall assemblies or insulation barriers.
If symptoms continue despite low readings, deeper inspection methods may be necessary.
Single Readings Are Not Reliable Indicators
Relying on a single reading can produce misleading conclusions. Moisture patterns vary across wall surfaces, and isolated readings may not reflect broader conditions.
Multiple readings taken across different locations provide more accurate detection results. Comparing readings between suspected areas and known dry sections improves reliability.
Repeated testing over time strengthens detection accuracy, especially after rainfall or humidity changes.
When Moisture Detection Requires Professional Tools
Homeowner testing is useful for screening, but some conditions require professional evaluation. Call for help when symptoms persist, readings spread across large areas, or the wall shows signs of structural damage.
Persistent Symptoms Without Clear Detection Results
If moisture-related symptoms continue despite normal meter readings, deeper investigation may be necessary. Hidden moisture sometimes remains trapped behind materials that limit surface detection.
Professional evaluation tools may include:
- Advanced thermal imaging systems
- High-sensitivity moisture measurement devices
- Wall cavity inspection cameras
- Humidity monitoring equipment
These tools allow professionals to identify concealed moisture that may not be detectable using basic homeowner methods.
Large Areas of Suspected Moisture
When moisture signs appear across wide wall sections, professional equipment helps determine the full extent of affected areas. Large-scale detection requires tools capable of scanning broad surfaces quickly and accurately.
Professional detection also helps prioritize repair planning when multiple wall sections show elevated moisture levels.
Structural Movement or Severe Damage
If walls show visible deformation, cracking, or softness, professional assessment is recommended. These conditions may indicate structural involvement beyond simple surface moisture.
At this stage, detection shifts from identifying moisture presence to evaluating structural integrity.
What to Do After You Confirm Hidden Moisture
After confirming hidden moisture, avoid painting, caulking, or covering the area until the source is understood. Sealing over damp materials can trap moisture and allow damage to continue behind the surface.
Immediate actions after confirmation may include:
- Documenting affected areas with photographs
- Recording moisture readings for future comparison
- Observing changes during rainfall events
- Monitoring surrounding areas for spreading damage
Identifying likely causes becomes the next priority. Moisture in exterior walls often results from weather exposure, drainage problems, or compromised sealing systems. Reviewing typical failure patterns described in why exterior walls develop moisture problems can help narrow down potential sources.
Once causes are identified, preventive steps can reduce recurrence. For guidance on long-term protection strategies, see how to prevent moisture build-up in exterior walls, which explains practical ways to reduce moisture risk.
If materials are already wet, the next issue is drying and damage control. That recovery phase belongs in how to dry exterior walls after water intrusion.
FAQ About Detecting Hidden Moisture in Exterior Walls
Can moisture exist behind exterior walls without visible signs?
Yes, moisture can remain hidden inside exterior walls without producing obvious visible damage. Insulation, framing, and interior finishes can trap moisture long before stains or warping appear. In many cases, moisture builds slowly and only becomes visible after materials begin to deteriorate.
This is why detection methods—such as comparing wall temperatures or using moisture meters—are valuable even when visible damage is limited.
How should I compare moisture meter readings on an exterior wall?
Compare the suspicious exterior wall area with a nearby wall section that appears dry and has similar construction. Test at the same height, take several readings, and look for a repeated pattern rather than one isolated number.
Readings are more meaningful when they rise after rain, match visible symptoms, or remain elevated compared with nearby dry control areas.
Can thermal cameras detect water inside walls?
Thermal cameras do not detect water directly. Instead, they detect temperature differences across surfaces. Moisture often causes cooler areas because wet materials transfer heat differently than dry materials.
These temperature differences help identify areas that may contain moisture, but further confirmation—often using moisture meters—is typically required to verify moisture presence.
What causes false moisture readings in walls?
False readings may result from several factors, including hidden metal components, recent repairs, temperature changes, or surface condensation. Electrical wiring, fasteners, and dense materials inside walls can interfere with meter signals.
Testing multiple areas and comparing readings over time helps reduce the risk of misinterpretation.
How deep can moisture meters detect moisture inside walls?
The depth of detection depends on the meter type and wall material. Many homeowner-grade moisture meters detect moisture near the surface rather than deep inside the wall cavity.
If symptoms persist despite normal readings, deeper inspection methods described in how to inspect exterior walls for moisture damage may be necessary to identify hidden damage.
Conclusion: Confirm the Moisture Before You Open the Wall
Hidden moisture in exterior walls should be confirmed with patterns, comparison points, and tool-based testing before major repair decisions are made. A moisture meter, weather log, and repeated readings can help separate a real wall moisture problem from condensation, cold spots, or false readings.
Once moisture is confirmed, the next step is determining the extent of the affected area and the likely source. How to inspect exterior walls for moisture damage explains the broader inspection process after detection.
One Comment
Comments are closed.