How to Detect Plumbing Leaks Inside Walls
To detect a plumbing leak inside a wall, look for moisture that returns after drying, stains that darken after fixture use, soft drywall, bubbling paint, musty odor near one wall, or damage near bathrooms, kitchens, laundry rooms, or supply lines. These patterns matter because the leaking pipe is hidden behind finished surfaces and may not show visible water right away.
Detecting a plumbing leak inside a wall is not about guessing where the pipe is. It is about observing patterns: where the moisture appears, when it returns, whether it worsens after plumbing use, and whether other moisture sources could explain the damage. This helps narrow the problem before walls are opened or repairs are attempted.
Hidden leaks can affect drywall, framing, insulation, flooring, and nearby structural materials. Understanding how plumbing leaks cause structural damage helps explain why wall leak detection should happen early, before visible damage spreads.
Why Plumbing Leaks Inside Walls Often Show Up Away From the Pipe
Wall leaks are difficult because water rarely appears exactly where the pipe is leaking. Once water escapes inside a wall cavity, it can travel along pipes, studs, insulation, drywall backing, or framing members before showing up on a visible surface.
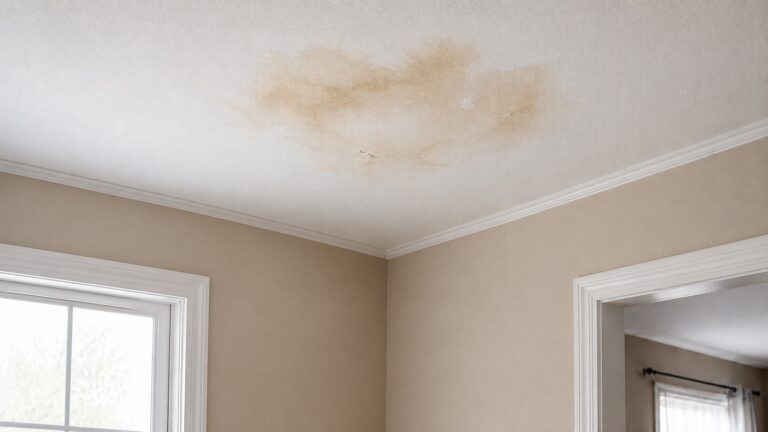
This means a stain may appear below, beside, or even in a nearby room from the actual leak source. A small pipe leak behind a bathroom wall may show up as a ceiling stain below the bathroom. A shower valve leak may appear on the opposite side of the wall. A slow supply line leak may create a musty odor before any stain becomes obvious.
Several factors delay detection:
- Drywall absorbs moisture before showing visible damage
- Insulation can hold water inside the wall cavity
- Wood framing may wick moisture away from the leak point
- Paint can hide early dampness until bubbling begins
- Water may only appear after certain plumbing fixtures are used
Because of this, accurate detection depends on repeated observation rather than one quick inspection. If moisture returns in the same place after drying, or if symptoms worsen after using a nearby fixture, the chance of a hidden plumbing leak becomes much higher.
Hidden wall leaks are part of a broader moisture-control problem. A whole-home approach to finding, fixing, and preventing moisture problems can help homeowners recognize when a wall stain is an isolated issue and when it may be part of a larger hidden moisture pattern.
Common Signs That Suggest a Leak Inside a Wall
Before using tools or opening the wall, look for signs that combine moisture damage with plumbing location or plumbing timing. A stain beside a bathroom wall, below a shower, behind a kitchen sink, or near a laundry hookup is more suspicious when it changes after water is used.
Recurring Wall Stains
Water stains are one of the most common signs of a hidden leak. They may appear as yellow, brown, gray, or darker areas on drywall or ceiling surfaces. The most important detail is whether the stain grows, darkens, or returns after the area has dried.
A stain that remains unchanged may be old damage. A stain that expands or becomes damp again usually indicates ongoing moisture.
Bubbling or Peeling Paint
Paint begins to bubble or peel when moisture interferes with the bond between the wall surface and the paint layer. This often happens when water is reaching the back side of the drywall or moving through the wall material from behind.
Bubbling paint near plumbing fixtures, bathroom walls, kitchens, laundry areas, or ceilings below bathrooms deserves closer attention.
Soft or Spongy Drywall
Drywall loses strength when it absorbs water. If a section of wall feels soft, spongy, swollen, or crumbly compared with nearby dry areas, moisture has likely been present long enough to affect the material.
Soft drywall is a stronger warning sign than surface staining because it suggests the wall material itself has begun to deteriorate.
Musty Odors in One Area
A musty smell coming from one wall, cabinet, corner, or room can indicate trapped moisture. Odor may appear before visible staining because water can remain hidden inside insulation, framing, or wall cavities.
If the smell becomes stronger after using a nearby sink, shower, tub, or toilet, the odor pattern may point toward a hidden plumbing leak.
Unexplained Water Use
If no fixtures are running but the water meter still moves, or the water bill rises without a clear reason, a hidden supply-line leak is possible. This does not show exactly where the leak is, but it raises the urgency of checking wall areas near bathrooms, kitchens, laundry rooms, and pipe runs.
Step-by-Step Process to Detect Leaks Inside Walls
Detecting a plumbing leak inside a wall requires a structured approach. The goal is to confirm whether moisture is actively returning, identify patterns, and narrow down the likely source without opening the wall prematurely.
1. Establish a Dry Baseline
Before testing anything, dry the visible surface as much as possible. Use a towel to remove surface moisture and allow the area to air dry if needed, but do not assume the wall cavity is dry just because the surface looks dry. This step gives you a baseline so you can tell whether new moisture returns.
While drying the area, take note of:
- The exact size and shape of any stains
- The location relative to nearby plumbing fixtures
- Whether the surface feels soft or solid
If possible, mark the edge of the stain lightly with a pencil so you can track whether it expands over time.
2. Monitor When Moisture Returns
After establishing a dry baseline, observe the area over time. The key question is not just whether moisture is present, but when it appears.
Pay attention to patterns such as:
- Moisture appearing after using a sink or shower
- Dampness forming after flushing a nearby toilet
- Stains becoming darker after water use
- No moisture when fixtures are unused, followed by reappearance after plumbing use
These timing patterns help connect the leak to a specific plumbing fixture.
3. Check Nearby Plumbing Fixtures
Look at all fixtures near the affected wall, including sinks, showers, bathtubs, toilets, dishwashers, or washing machines. Even if the leak appears in one location, the source may be slightly above or beside it.
Run each fixture individually and observe the wall after each test. For example:
- Run the sink for several minutes
- Use the shower and check the wall afterward
- Flush the toilet and observe any changes
If moisture appears after using a specific fixture, the leak is likely connected to that plumbing line.
4. Use Touch and Visual Inspection
Carefully inspect the wall by sight and touch. Look for subtle differences in texture, temperature, or firmness compared with surrounding areas.
Check for:
- Cool spots that may indicate moisture behind the surface
- Soft or weakened drywall
- Areas where paint or finish is separating
- Discoloration that follows a vertical or irregular path
These clues help map how water may be moving inside the wall.
5. Confirm Whether the Pattern Repeats
After testing nearby fixtures, watch whether the same area becomes damp again under the same conditions. A repeated pattern is stronger evidence than one stain, one odor, or one damp spot.
Signs that confirm an active leak include:
- Moisture returning after each use of a fixture
- Stains gradually expanding beyond their original boundary
- Surface damage worsening over time
If symptoms persist or grow, further investigation becomes necessary. In some cases, identifying related problems such as hidden shower plumbing leaks can help connect wall symptoms to their source.
How to Narrow Down the Leak Location
Once you confirm that moisture is actively returning, the next step is narrowing down where the leak is likely coming from. Because water travels inside walls, the visible damage is often not directly at the source. Using position, timing, and nearby fixtures helps reduce guesswork.
If the moisture pattern does not clearly connect to plumbing use, use the broader guide on how to find hidden water leaks inside walls to compare plumbing leaks with roof, exterior wall, window, and condensation sources.
Use Vertical Position to Trace the Source
Water inside walls generally moves downward. If you see a stain on a wall or ceiling, the source is usually above that point.
For example:
- A ceiling stain below a bathroom may point to bathroom plumbing above
- Lower wall staining near a sink may point to nearby supply or drain lines
- Damage near a shower wall may point to shower plumbing, valve leaks, or drain issues
The visible stain is a clue, not final proof. Water can move sideways or downward before becoming visible.
Use Horizontal Spread to Identify Leak Paths
A leak inside a wall may spread sideways along framing, baseboards, or flooring edges. If staining follows a horizontal line near the base of a wall, water may be collecting along the bottom plate or baseboard area.
This pattern often suggests the leak has been active long enough for moisture to move beyond the original pipe location.
Compare Nearby Plumbing Fixtures
Comparing nearby fixtures helps separate likely sources. If a wall becomes damp only after the shower runs, the shower plumbing or drain area becomes more likely. If moisture appears after flushing, the toilet connection or drain line may need closer inspection. If moisture appears even when fixtures are not used, a supply line leak may be possible.
The goal is not to diagnose the exact repair from the surface. The goal is to narrow the likely source so the right area can be inspected more carefully.
How to Tell the Difference Between a Leak and Other Moisture Sources
Not every wet wall is caused by a plumbing leak. Condensation, roof leaks, exterior wall leaks, window leaks, and old water damage can create similar symptoms. Comparing timing and location helps avoid misdiagnosis.
Condensation vs Plumbing Leak
Condensation occurs when warm air meets a cold surface, causing moisture to form. This is common in bathrooms and areas with high humidity.
Condensation usually shows:
- Even moisture across surfaces
- Appearance after hot showers or humidity spikes
- No clear starting point
- Moisture that disappears with ventilation
A plumbing leak typically shows:
- Localized damage in one area
- Moisture that returns repeatedly in the same spot
- Damage that spreads over time
- Patterns linked to plumbing use
Roof or Exterior Water Intrusion
Water entering from outside can mimic plumbing leaks. Roof leaks, siding issues, or window failures may allow water to travel inside walls.
Signs of exterior intrusion include:
- Moisture appearing after rainfall
- Damage near exterior walls or ceilings
- No connection to plumbing use
If symptoms only appear during or after rain, the source may not be plumbing.
Old Water Damage
Stains can remain on walls long after a leak has been repaired. The key difference is whether moisture is still active.
To confirm active moisture:
- Dry the visible surface as much as possible
- Observe whether the stain becomes damp again
- Check if the affected area expands over time
If no new moisture appears, the damage may be from a previous issue rather than a current leak.
When to Use Tools or Call a Professional
Non-invasive observation can confirm many hidden leaks, but there are limits to what can be determined without specialized tools. When moisture patterns are unclear or damage continues to spread, using basic tools or calling a professional can help identify the exact source.
Simple tools that may help include:
- A pinless moisture meter to compare the suspect wall with nearby dry wall areas
- Flashlights to inspect subtle surface changes
- Paper markers to track stain growth over time
These tools can support detection, but they do not replace proper diagnosis when the leak is hidden deep within the wall.
Professional evaluation is recommended if you notice:
- Moisture returning without a clear source
- Damage spreading across walls, ceilings, or floors
- Persistent soft or unstable drywall
- Signs of water reaching electrical areas
- Multiple possible leak sources that cannot be isolated
Safety note: If moisture is near outlets, switches, breaker panels, light fixtures, or wiring, stop the inspection and call a qualified professional. Do not probe wet drywall near electrical components.
Professionals may use targeted moisture mapping, pressure testing, thermal imaging, borescopes, or acoustic listening tools to narrow the leak location before removing drywall.
Frequently Asked Questions About Detecting Leaks Inside Walls
How can I detect a plumbing leak inside a wall without cutting it open?
Dry the visible surface, mark the stain edge, run nearby fixtures one at a time, and watch whether moisture returns in the same area. A pattern tied to plumbing use is stronger evidence than one isolated stain.
What are the first signs of a hidden pipe leak?
Early signs include recurring stains, musty odors, bubbling paint, and soft drywall. These symptoms often appear before visible water is present.
Can leaks inside walls stop and start?
Yes. Intermittent leaks may only occur when a fixture is used or when pressure changes. This is why repeated observation is important.
How accurate are visual detection methods?
Visual and pattern-based methods are effective for identifying likely leaks, but they may not pinpoint the exact location. Professional tools are often needed for precise confirmation.
When should I call a professional?
Call a professional if moisture keeps returning, drywall becomes soft, damage spreads, the water meter suggests a hidden supply leak, or moisture appears near electrical areas.
Key Takeaways
- Plumbing leaks inside walls often show indirect signs rather than visible water
- Detection relies on patterns, timing, and repeated observation
- Moisture that returns after drying is a strong indicator of an active leak
- Unexplained water meter movement can suggest a hidden supply-line leak
- Water can travel inside walls, making the visible damage appear away from the source
- Condensation, exterior leaks, and old damage can mimic plumbing leaks
- Non-invasive methods can narrow the problem, but professionals may be needed for confirmation

4 Comments
Comments are closed.