How to Detect Slow Plumbing Leaks (Step-by-Step Detection Methods)
Slow plumbing leaks are among the most damaging moisture problems in a home because they often go unnoticed for long periods. Unlike sudden pipe bursts, slow leaks release small amounts of water over time, gradually soaking materials and causing hidden damage behind cabinets, walls, and floors.
Many homeowners first suspect a slow leak after noticing cabinet swelling, stains, musty odors, or unexplained water usage. If the damage is concentrated below a sink, review the signs of water damage under sink cabinets to confirm whether moisture damage may already be developing.
This guide explains how to detect slow plumbing leaks step by step by checking visible plumbing connections, using your water meter, tracking water usage, listening for hidden flow, and inspecting nearby walls, cabinets, and floors for moisture patterns.
Why Slow Plumbing Leaks Are Hard to Detect
Slow leaks rarely produce obvious flooding. They release small amounts of moisture that spread through nearby materials, allowing damage to develop behind cabinets, walls, or floors before water becomes visible.
Water released from plumbing systems often travels along surfaces before becoming visible. In many cases, the source of the leak is located above the area where damage appears. This movement pattern makes locating slow leaks more challenging than identifying sudden failures.
Another reason slow leaks are difficult to detect is evaporation. Small amounts of moisture may dry before forming visible puddles, leaving only subtle clues such as stains, odors, or humidity changes.
Because slow leaks behave differently from large leaks, detection requires careful observation and systematic testing rather than reacting to obvious water damage.
Warning Signs That a Slow Plumbing Leak May Be Present
Before performing formal detection methods, many homeowners notice subtle signs that suggest hidden moisture problems. Recognizing these early warning signals can help confirm whether further inspection is necessary.
Recurring Damp Spots
Moisture that repeatedly appears in the same location often indicates a hidden leak. These damp areas may appear on cabinet floors, under appliances, or along walls.
If moisture returns after drying, the source is likely ongoing rather than accidental.
Musty or Persistent Odors
Musty smells often develop when materials remain damp for extended periods. Slow leaks create ideal conditions for odor formation because moisture accumulates gradually without drying completely.
Persistent odors inside enclosed spaces such as cabinets or closets frequently indicate hidden moisture.
Unexplained Increase in Water Usage
An unexpected rise in water usage is one of the strongest indicators of a hidden plumbing leak. Even small leaks can waste significant amounts of water when allowed to continue over time.
Comparing recent water bills with previous months may reveal unusual increases that cannot be explained by changes in household activity.
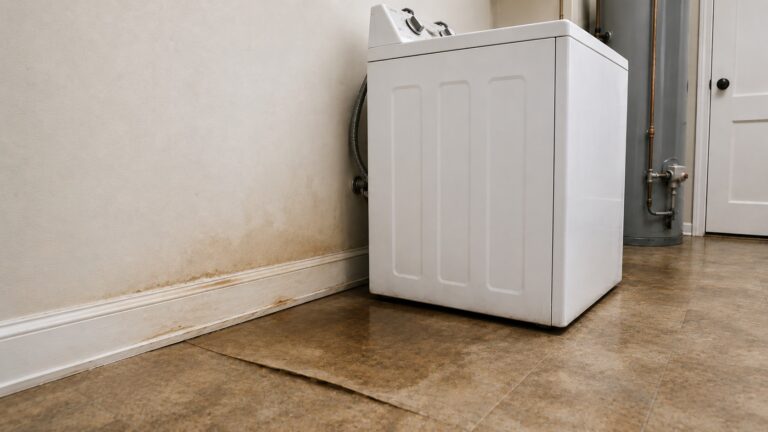
Visible Stains or Surface Damage
Slow leaks often leave visual clues on surrounding materials. These may include stains, swelling, or peeling surfaces near plumbing components.
If damage appears without a clear explanation, a hidden leak may be present behind nearby surfaces.
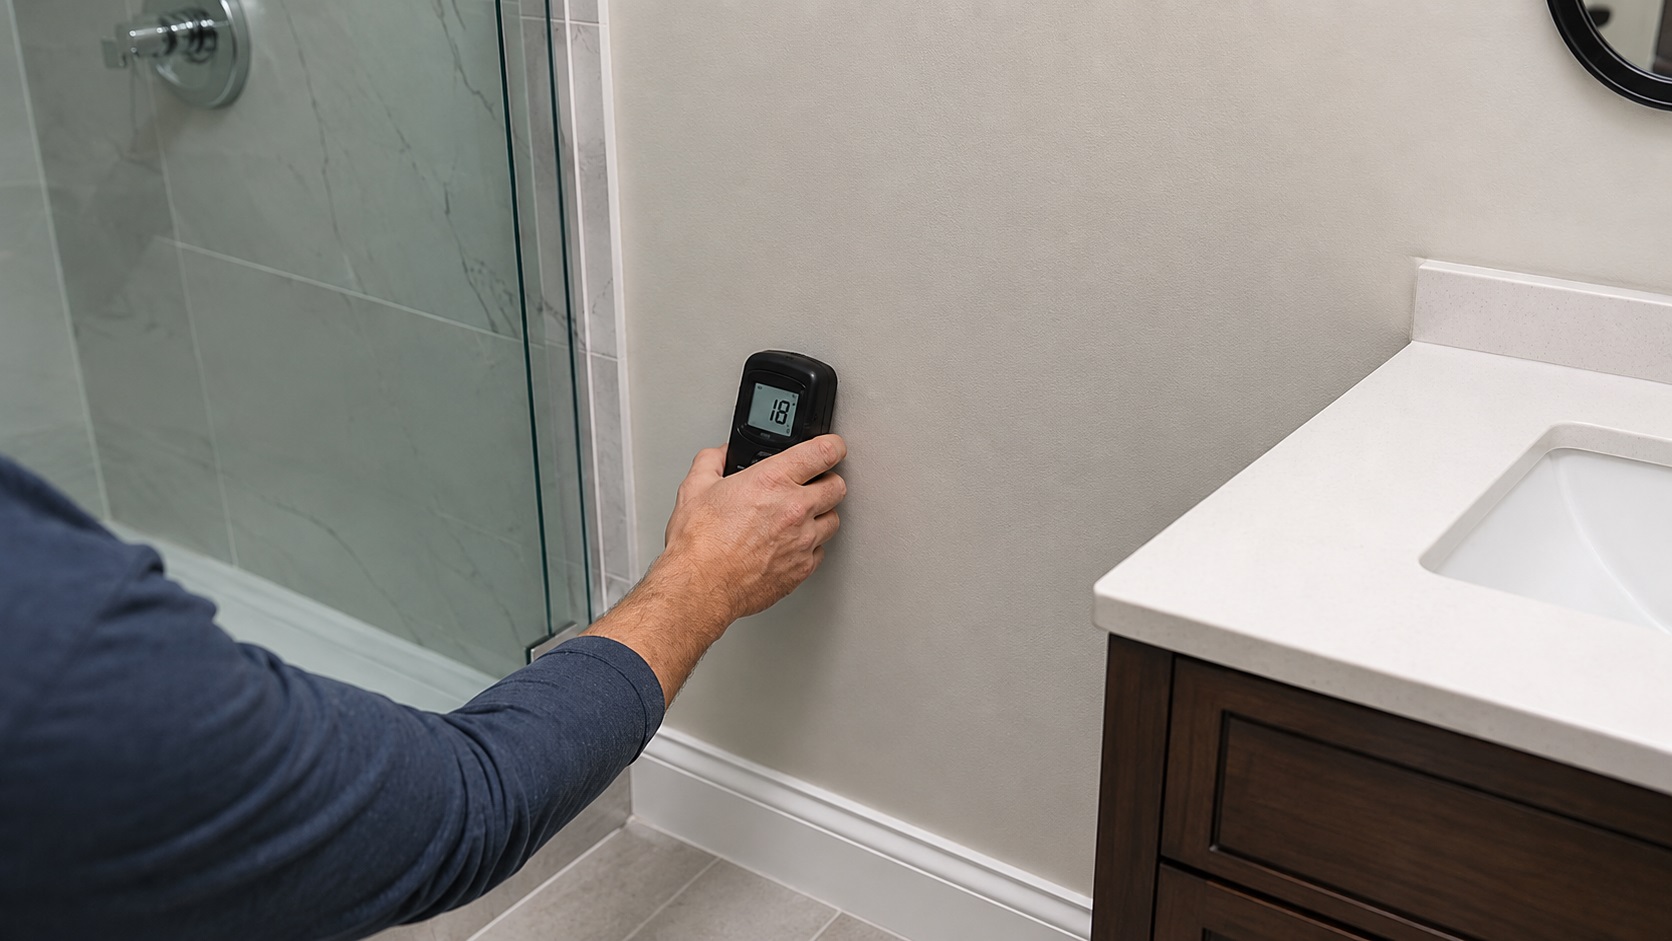
Elevated Indoor Humidity
Persistent moisture in enclosed spaces can raise humidity levels. If humidity readings remain elevated without obvious causes, hidden plumbing leaks may be contributing to excess moisture.
To verify humidity patterns, review how to test indoor humidity levels for proper measurement methods.
How to Inspect Plumbing Connections Visually
Visual inspection is the first practical step in detecting slow plumbing leaks. Many leaks begin at accessible fittings and joints where water connections are made.
Use a dry paper towel or tissue around each connection point. Press it against supply line fittings, shutoff valves, drain joints, appliance hose connections, and the floor directly below them. Even a small wet mark on the towel can reveal slow seepage that is difficult to see with the eye alone.
Check Under Sink Plumbing
Under-sink areas contain several connection points that commonly develop leaks. Inspect supply lines, shutoff valves, and drain fittings for visible moisture.
Look closely at pipe joints and connectors where small drips may develop. Mineral buildup, rust, or discoloration often signals repeated exposure to moisture.
Inspect Around Appliances
Appliances connected to water lines frequently develop slow leaks over time. Dishwashers, refrigerators with ice makers, and washing machines should be inspected regularly.
Check hoses and connectors for moisture, corrosion, or loose fittings. Even minor dampness can indicate the beginning of a leak.
Examine Valve Connections
Water shutoff valves and connectors may loosen gradually due to pressure changes or wear. Inspect these areas carefully for signs of moisture or residue.
Mineral deposits around fittings often indicate that water has been escaping intermittently.
How to Use Your Water Meter to Detect Leaks
One of the most reliable ways to detect slow plumbing leaks is by using your home’s water meter. This method works because any leak—even a very small one—causes water to move through the system. If the meter shows movement when no water is being used, it strongly suggests that water is escaping somewhere in the plumbing system.
Step 1: Turn Off All Water Sources
Before checking the meter, make sure all water fixtures inside and outside the home are completely turned off. This includes faucets, showers, dishwashers, washing machines, irrigation systems, and any appliances connected to water lines.
Take a few minutes to confirm that no water is actively running. Even small uses such as dripping faucets or automatic appliances can affect the results.
Step 2: Locate the Water Meter
Most residential water meters are located outside the home near the street, in a basement, or in a utility area. The meter typically displays either a digital reading or a mechanical dial that shows water movement.
Look for indicators such as a small spinning dial, digital flow display, or pointer needle. These components react to even minimal water movement within the system.
Step 3: Record the Meter Reading
Write down the current reading displayed on the meter. If the meter includes a small movement indicator, observe whether it continues to spin after all water has been turned off.
Even slight movement suggests that water is still flowing somewhere within the plumbing system.
Step 4: Wait and Recheck the Meter
After recording the initial reading, wait at least 30 to 60 minutes without using any water. For very slow or intermittent leaks, a longer no-use period can reveal movement that a quick check might miss. During this waiting period, make sure no appliances, irrigation systems, toilets, or fixtures activate.
After waiting, return to the meter and compare the reading with the original value. If the numbers have changed or the movement indicator has shifted, a leak is likely present.
Understanding Water Meter Test Results
If the meter reading remains unchanged, the plumbing system may not currently have an active leak. However, intermittent leaks may not appear during short testing periods.
If movement occurs, it strongly indicates that water is escaping somewhere in the system. At this stage, further inspection should focus on likely leak locations such as cabinets, appliances, and concealed plumbing areas.
If you cannot find the leak after a positive meter test, check toilets next by listening for silent refilling and looking for water movement in the bowl. A running toilet can mimic a hidden plumbing leak on the meter, so rule it out before opening walls or assuming the leak is inside a cavity.
How to Track Water Usage for Hidden Leak Clues
Water usage patterns provide valuable clues about hidden plumbing leaks. Even small leaks can waste significant amounts of water when left undetected over time.
Review Monthly Water Bills
Comparing water bills over several months can reveal unusual increases in water usage. Look for patterns that show steady increases without clear changes in household activity.
Unexpected spikes in usage often indicate hidden leaks or continuously running fixtures.
Track Daily Water Usage Patterns
Observing daily water habits can help identify unusual changes. If water usage appears higher than normal without increased activity, further inspection may be necessary.
Consistent monitoring over time helps reveal patterns that isolated readings may miss.
Watch for Continuous Meter Movement
Some leaks produce steady water movement that continues even when fixtures are not in use. Watching for continuous meter movement during quiet periods helps confirm whether water loss is occurring.
This method is especially useful for detecting slow leaks that do not produce visible damage immediately.
How to Detect Hidden Leaks Behind Walls
Some plumbing leaks occur inside wall cavities where they cannot be directly observed. These hidden leaks often reveal themselves through indirect signs rather than visible water flow.
Look for Wall Surface Changes
Walls affected by hidden moisture may develop visible surface damage. Look for discoloration, bubbling paint, or soft drywall that feels weakened.
These changes often indicate that water has been spreading behind the wall surface.
For more details on wall-related warning signs, review the signs of hidden moisture in walls and compare those symptoms with nearby plumbing fixtures, supply lines, and drain locations.
Check for Persistent Musty Odors
Hidden leaks often create musty smells that linger even when surfaces appear dry. These odors develop when moisture remains trapped within enclosed spaces.
If odors persist without visible sources, hidden plumbing leaks may be present inside walls or behind fixtures.
Watch for Changes in Wall Texture
Soft or uneven wall surfaces may indicate water absorption behind the surface. When pressed gently, damaged areas may feel weaker than surrounding materials.
This change in texture often signals prolonged moisture exposure.
When Slow Leaks Become Serious Problems
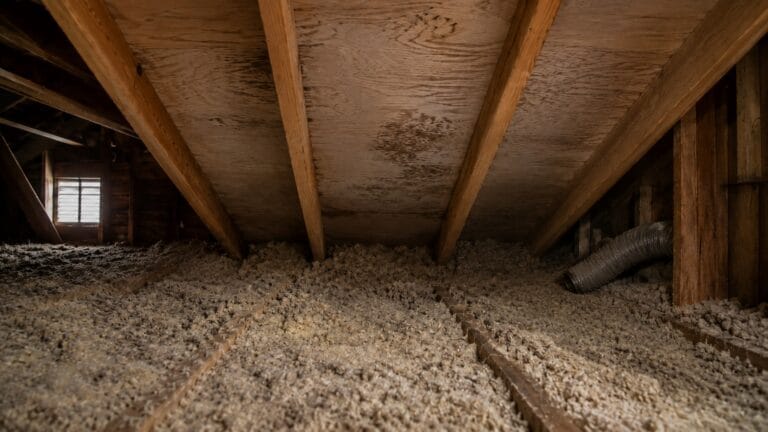
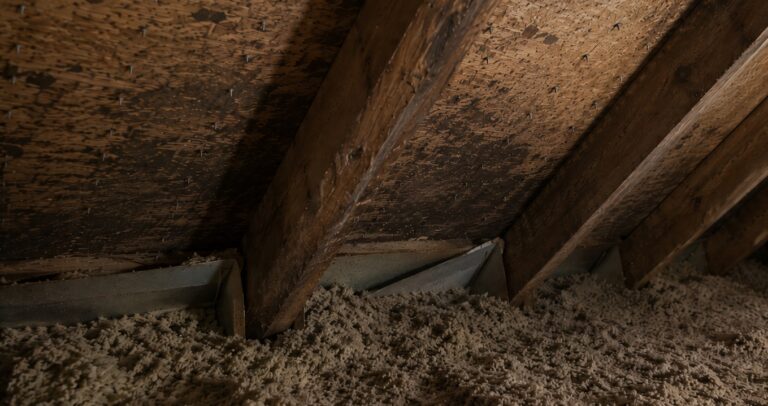
Slow plumbing leaks often begin as minor issues, but over time they can cause extensive damage if left undetected. Because these leaks release small amounts of water continuously, surrounding materials remain damp for long periods. This repeated exposure weakens wood, drywall, flooring, and insulation.
As moisture spreads, mold growth becomes more likely. Mold can develop in concealed areas long before visible damage appears, especially when drywall, wood, or cabinet materials stay damp. For a broader explanation of how plumbing leaks damage surrounding materials over time, review how plumbing leaks cause structural damage.
Structural damage also becomes more likely as leaks persist. Cabinet bases may soften, floors may warp, and walls may weaken. If multiple warning signs appear together, it usually indicates that the leak has been active for an extended period.
Detecting leaks early reduces repair costs, limits mold risk, and protects surrounding materials from long-term damage. Even small leaks should be investigated promptly to prevent gradual deterioration.
Stop the inspection and call a plumber or water-damage professional if you find active dripping near electrical components, soft or crumbling drywall, sagging floors, sewage odors, widespread mold, or moisture that keeps returning after the visible plumbing has been dried. Do not paint, caulk, or cover damaged materials until the leak source has been found and fixed.
FAQ: How to Detect Slow Plumbing Leaks
What is the easiest way to detect a slow plumbing leak?
Using your water meter is one of the simplest and most reliable methods. Turning off all water sources and checking for meter movement helps confirm whether water is escaping somewhere in the system.
How long should I wait during a water meter test?
A 30- to 60-minute no-use period is a practical starting point. Very slow or intermittent leaks may require a longer observation period, especially if the meter does not move during a quick check.
Can slow leaks occur without visible water damage?
Yes. Many slow leaks develop behind walls, beneath cabinets, or under flooring where moisture cannot be seen directly. In these cases, indirect signs such as odors, humidity changes, or rising water usage may appear first.
Why does my water bill increase even when usage stays the same?
An unexplained increase in water usage often indicates hidden leakage. Even small leaks can waste significant amounts of water over time, leading to higher utility costs.
Do slow leaks always produce noise?
Not always. Some slow leaks produce quiet dripping or hissing sounds, but others remain silent. Listening for unusual sounds can help, but visual and meter-based detection methods remain more reliable.
What should I check first if I suspect a slow leak?
Begin with accessible plumbing areas such as under sinks, around appliances, and near shutoff valves. These locations contain the most common connection points where leaks develop.
Conclusion
Detecting slow plumbing leaks requires careful observation, water meter checks, and consistent monitoring. Because these leaks develop gradually, the earliest signs are often subtle and easy to overlook.
Small leaks may seem harmless at first, but repeated exposure can weaken materials and create long-term moisture conditions.
Regular inspection of plumbing connections, water meter testing, and usage tracking provide a dependable way to identify hidden leaks before they cause costly damage.
Key Takeaways
- Slow plumbing leaks release small amounts of water that cause gradual damage over time.
- Water meter testing is one of the most reliable ways to confirm hidden leaks.
- Recurring moisture, odors, and unexplained water usage increases are common warning signs.
- Hidden leaks behind walls often reveal themselves through stains, odors, or surface changes.
- Early detection reduces repair costs and limits long-term moisture damage.
For more guidance on how leak-related moisture affects surrounding materials, start with how plumbing leaks cause structural damage.


3 Comments
Comments are closed.