How to Fix Water-Damaged Drywall: Step-by-Step Repair Guide for Homeowners
Water-damaged drywall can often be repaired if the panel is dry, firm, and free of mold. If the drywall is soft, swollen, crumbling, sagging, or contaminated, the damaged section usually needs to be cut out and replaced instead of patched.
This guide explains how to repair water-damaged drywall step by step, including when to patch, when to replace damaged sections, and how to finish the wall safely. If the drywall was recently wet, dry the wall first and confirm the moisture is gone before starting. For the drying process, use our guide on how to dry walls after water damage before proceeding.
This article supports our broader guide on how to prevent recurring moisture damage, which explains how to stop repeated leaks, trapped moisture, and long-term water damage after the initial repair.
Can Water-Damaged Drywall Be Repaired?
Yes, water-damaged drywall can often be repaired—but only if the damage is minor and the material remains structurally sound. In many cases, drywall that has been soaked, swollen, or contaminated must be replaced rather than repaired.
The key factor is how severely the drywall was affected. Minor water exposure may leave only cosmetic damage, while major leaks can weaken drywall panels and create hidden mold risks.
Minor vs Severe Drywall Damage
| Damage Level | Typical Symptoms | Recommended Action |
|---|---|---|
| Minor | Light stains, small damp spots, no swelling | Dry and repair surface |
| Moderate | Soft areas, peeling paint, slight swelling | Cut out and patch affected section |
| Severe | Bulging, crumbling, mold growth | Remove and replace drywall |
If you’re unsure whether drywall is still usable, measuring moisture levels can help. Our guide on moisture levels that indicate water damage explains how to determine if drywall is safe to repair.
Signs That Drywall Needs Repair After Water Damage
Water damage is not always obvious at first. Some drywall problems develop slowly, especially when moisture remains trapped inside wall cavities.
Watch for these common warning signs that indicate drywall repair is needed:
- Visible water stains or discoloration
- Soft or spongy drywall when pressed
- Bubbling or peeling paint
- Swollen seams or bulging panels
- Cracks forming after a leak
- Musty odors coming from walls
- Loose or separating drywall joints
If you notice multiple symptoms, hidden moisture may still be present. In those cases, check for additional warning signs using our guide on signs of hidden moisture in walls.
When Drywall Must Be Replaced Instead of Repaired
Some water-damaged drywall cannot be safely repaired. Attempting to patch severely damaged material can trap moisture inside the wall and allow mold to develop later.
Replacement is usually required when drywall has lost its strength or shows contamination.
Drywall Replacement Warning Signs
| Condition | Why Replacement Is Necessary |
|---|---|
| Drywall is soft or crumbling | Structural strength is compromised |
| Bulging or sagging panels | Internal swelling cannot be reversed |
| Visible mold growth | Mold spreads through paper facing |
| Strong musty smell | Indicates hidden contamination |
| Water exposure lasted more than 48 hours | High mold risk |
If mold is present on or inside the drywall, do not treat the project as a basic patch repair. Mold-contaminated drywall often needs removal, containment, and safe cleanup. Use our guide on how to remove mold from drywall before repairing or closing the wall.
Tools and Materials Needed to Fix Water-Damaged Drywall
Having the right tools makes drywall repair safer and more efficient. Many homeowners can complete small repairs using common hand tools.
| Tool or Material | Purpose |
|---|---|
| Utility knife | Cut damaged drywall sections |
| Drywall saw | Create precise openings |
| Replacement drywall | Replace damaged sections |
| Joint compound | Seal seams and joints |
| Drywall tape | Reinforce repair areas |
| Sandpaper | Smooth repair surface |
| Moisture meter | Confirm wall dryness |
| Safety glasses, gloves, and dust mask or respirator | Protect during cutting, sanding, and dusty removal work |
Using a moisture meter is especially helpful when verifying that drywall has fully dried before repair. If you’re not already using one, our Best Moisture Meters for Homeowners guide can help you choose a reliable model.
Step-by-Step: How to Fix Water-Damaged Drywall
Repairing drywall safely requires careful preparation and attention to moisture control. Skipping steps can lead to future mold problems or repeated wall damage.
Follow the structured repair workflow below to restore damaged drywall correctly.
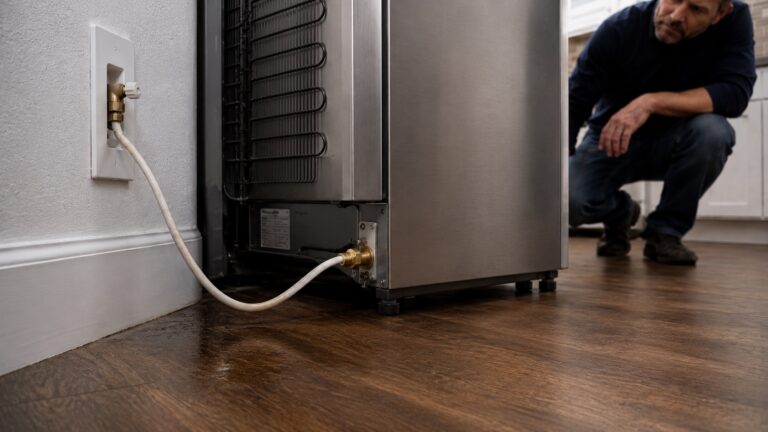
Step 1 — Stop the Water Source First
Before beginning any repair, make sure the water source has been completely stopped. Repairing drywall while leaks remain active will cause repeated damage and may lead to hidden mold growth.
Common water sources include:
- Plumbing leaks inside walls
- Roof leaks or water entering through the ceiling
- Bathroom or shower wall leaks
- Condensation buildup from high humidity
- Appliance failures such as washing machines
If the source is unknown, identify hidden leaks first by following our guide on how to find hidden water leaks inside walls.
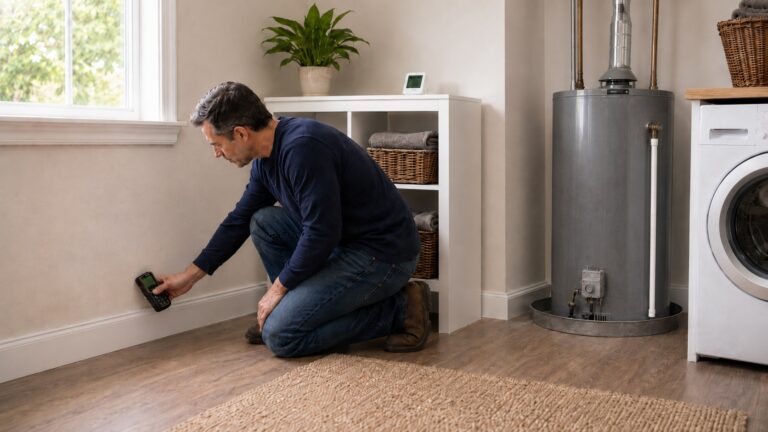
Step 2 — Confirm the Drywall Is Completely Dry
Before cutting or repairing drywall, you must confirm that all affected materials are fully dry. Repairing drywall while moisture remains trapped inside walls can lead to mold growth, hidden deterioration, and repeated damage.
If the wall has recently been exposed to water, follow proper drying procedures first. Our detailed guide on how to dry walls after water damage explains how to safely remove trapped moisture before beginning repairs.
How to Verify Drywall Is Dry Enough to Repair
- Use a moisture meter to test multiple areas
- Compare readings to nearby dry wall sections
- Look for consistent readings across the wall surface
- Confirm there is no lingering musty odor
- Check insulation inside the wall if accessible
Drywall should feel firm and stable when pressed. If the surface still feels cool, damp, or slightly soft, additional drying time is needed before repairs begin.
| Material | What to Check Before Repair | Action If Still Wet |
|---|---|---|
| Drywall | Readings should match nearby dry drywall on the same meter setting | Continue drying before patching or painting |
| Wood framing | Wood should be near normal indoor moisture levels and feel dry and firm | Keep drying and inspect for staining, warping, or decay |
| Insulation | Insulation should be dry, fluffy, and free of odor or contamination | Replace if saturated, compressed, moldy, or musty |
Maintaining proper humidity during drying is critical. If indoor humidity remains high, moisture removal slows dramatically. Use our guide on how to test indoor humidity levels to monitor conditions while the wall dries.
Step 3 — Remove Damaged Drywall Sections
Once the wall is completely dry, the next step is removing damaged drywall. Even small areas of compromised drywall can spread damage if left untreated, especially when swelling or weakening has occurred.
Always remove drywall that is soft, swollen, crumbling, or contaminated. Cutting out damaged sections creates a stable surface for repair and prevents future structural issues.
How to Cut Out Water-Damaged Drywall
- Mark the damaged area with a pencil
- Extend cut lines to the center of wall studs
- Use a drywall saw to cut clean rectangular sections
- Remove all soft or compromised material
- Inspect insulation and framing inside the wall
Cutting along stud centers makes installing replacement drywall easier and provides solid attachment points.
Important Safety Tips When Cutting Drywall
- Wear safety glasses, gloves, and a dust mask or respirator when cutting or sanding
- Turn off electrical power before cutting near outlets, switches, or wet wiring
- Make shallow cuts at first so you do not slice hidden wiring or plumbing
- Stop if you find mold, sewage contamination, burned wiring, or soft structural framing
If mold is discovered while removing drywall, stop the repair work and follow safe drywall-specific mold cleanup guidance before closing the wall. Start with our guide on how to remove mold from drywall.
Step 4 — Inspect Framing and Insulation Before Repair
After removing damaged drywall, inspect the exposed wall cavity carefully. Hidden damage inside walls can lead to repeated problems if overlooked.
This step is especially important after leaks that lasted more than a few hours or involved significant water exposure.
What to Look for Inside the Wall
- Wet or compacted insulation
- Warped wood framing
- Visible mold growth
- Rust on metal components
- Water stains on studs
Wet insulation rarely dries properly inside closed walls and often requires replacement. If insulation was saturated, removing and replacing it helps prevent moisture buildup later.
For a broader inspection path, see our guide on how to find hidden moisture in different areas of your home.
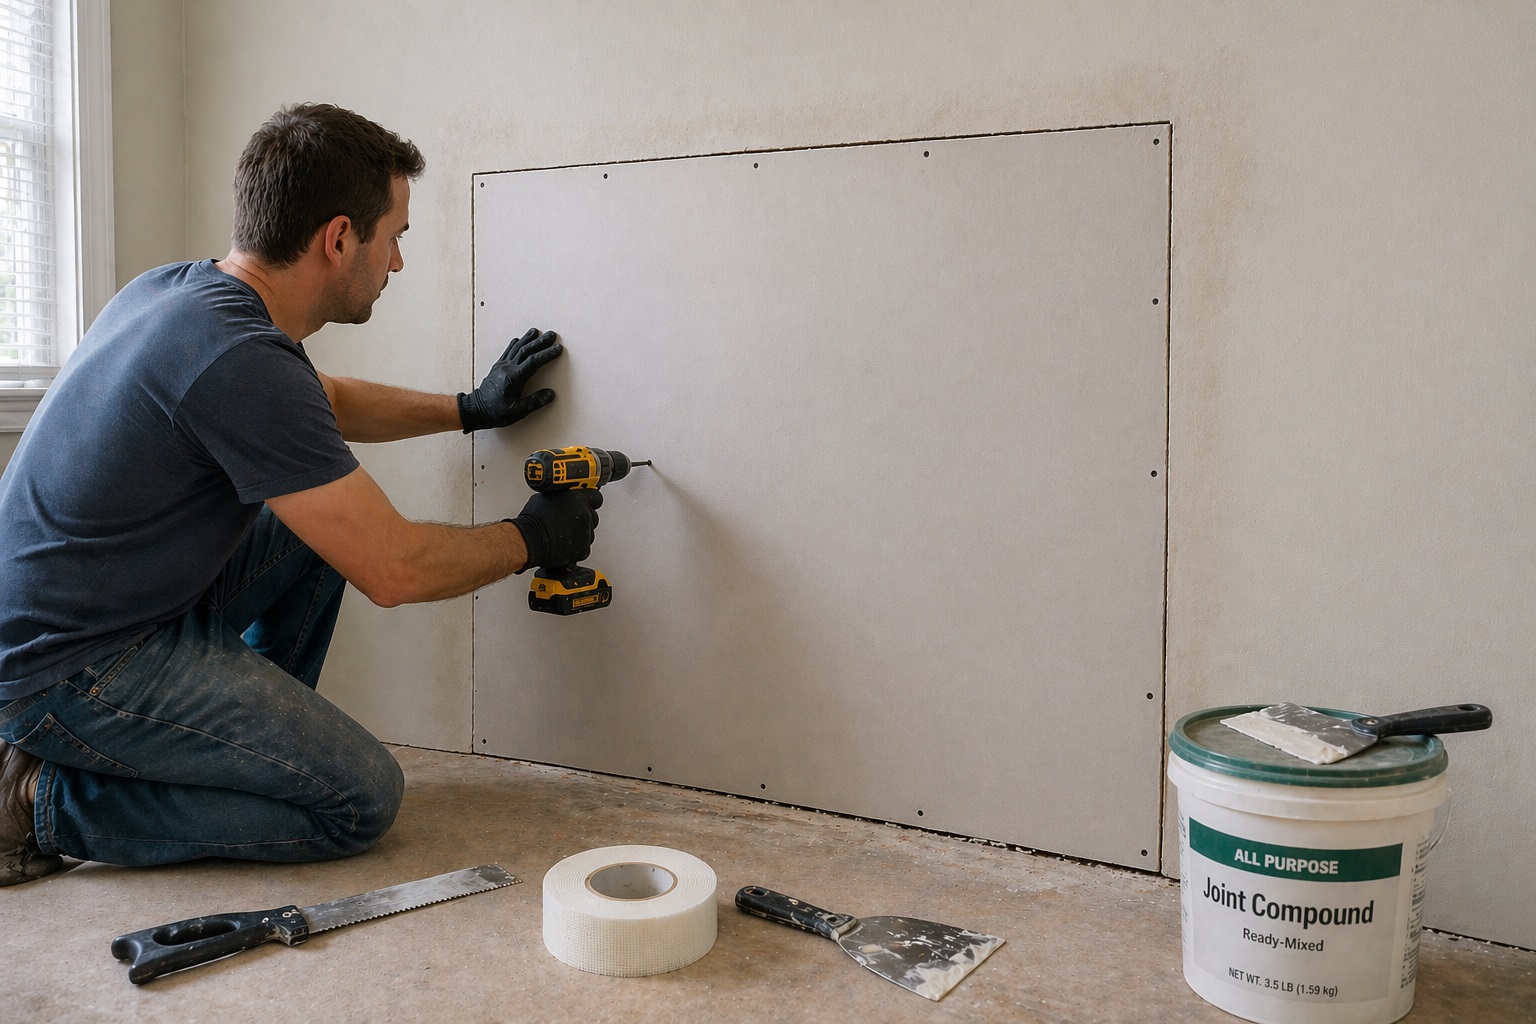
Step 5 — Install Replacement Drywall
Once damaged material has been removed and the wall cavity is dry, you can begin installing new drywall. Proper installation ensures the repaired area blends smoothly with surrounding surfaces.
How to Install Replacement Drywall
- Measure the opening carefully
- Cut a drywall patch to match the opening
- Position the patch flush with existing drywall
- Secure drywall to studs using drywall screws
- Ensure screws are slightly recessed but not overdriven
Drywall thickness should match the original panel used in your wall. Most residential walls use 1/2-inch drywall, while ceilings commonly use 5/8-inch drywall.
| Wall Type | Typical Drywall Thickness |
|---|---|
| Interior wall | 1/2 inch |
| Ceiling | 5/8 inch |
| Garage wall | 1/2 or 5/8 inch |
Step 6 — Tape and Seal the Joints
After installing replacement drywall, joints must be reinforced and sealed to create a smooth, durable surface. This step prevents cracks and ensures long-term structural strength.
How to Apply Drywall Tape and Joint Compound
- Apply a thin layer of joint compound along seams
- Press drywall tape into the compound
- Smooth the tape using a drywall knife
- Apply a second layer of compound over the tape
- Allow compound to dry completely
Drying times vary depending on humidity and compound thickness. High indoor humidity slows curing, so maintaining proper humidity levels during repairs improves results.
Monitoring indoor humidity during repairs can help prevent delayed drying and moisture problems. If humidity stays elevated, see our guide on how to choose and use a dehumidifier effectively.
Step 7 — Sand and Finish the Repair Area
Once joint compound dries completely, sanding creates a smooth surface ready for painting. Proper finishing helps repaired drywall blend seamlessly with surrounding walls.
How to Finish the Repaired Surface
- Sand dried compound until smooth
- Apply additional thin layers if needed
- Repeat sanding after each layer dries
- Prime the repaired area
- Apply paint to match surrounding wall
Using multiple thin layers produces better results than applying thick compound layers. Thick applications often crack or shrink during drying.
How Long Does It Take to Fix Water-Damaged Drywall?
Repair timelines vary depending on damage severity, drying conditions, and repair size. Minor repairs can be completed in a single day, while larger repairs may take several days.
| Repair Type | Typical Timeline |
|---|---|
| Small patch repair | 4–8 hours |
| Moderate section replacement | 1–2 days |
| Large drywall replacement | 2–4 days |
| Mold-contaminated repair | Varies (may require professional help) |
Drying time often accounts for most of the delay. Proper moisture removal before repairs significantly improves repair success and prevents recurring damage.
How to Prevent Future Water Damage to Drywall
Fixing water-damaged drywall solves the immediate problem, but preventing future moisture exposure is just as important. Many repeat drywall failures happen because underlying moisture problems were never fully addressed.
The most important prevention step is making sure the original leak, humidity problem, or water-entry point has been fixed before the repaired wall is closed and painted.
Practical Ways to Prevent Future Drywall Damage
- Fix plumbing leaks immediately when detected
- Seal roof leaks and flashing failures promptly
- Maintain proper indoor humidity levels (30–50%)
- Inspect high-risk areas such as bathrooms and kitchens
- Monitor walls near windows and exterior doors
- Use exhaust fans in moisture-heavy rooms
- Check for condensation during seasonal temperature changes
Maintaining stable humidity helps protect repaired drywall, especially in bathrooms, basements, laundry rooms, and other moisture-prone areas. Learn how to measure indoor conditions in our guide on how to test indoor humidity levels.
You can also reduce mold risks after repairs by following the prevention strategies outlined in our guide on how to prevent mold behind walls.
Common Mistakes to Avoid When Fixing Water-Damaged Drywall
Many drywall repairs fail because important preparation steps were skipped. Avoiding common mistakes improves repair durability and reduces long-term moisture risks.
Drywall Repair Mistakes That Cause Repeat Damage
| Mistake | Why It Causes Problems |
|---|---|
| Repairing drywall before it dries | Traps moisture and encourages mold growth |
| Ignoring hidden wall moisture | Damage continues behind repaired surface |
| Using incorrect drywall thickness | Creates uneven or weak repairs |
| Failing to remove all damaged sections | Weak areas spread and crack later |
| Skipping humidity control | Slows drying and increases moisture retention |
If moisture problems continue after repairs, hidden leaks or trapped moisture may still be present. In these cases, review our guide on how to find hidden water leaks inside walls to identify underlying causes.
When to Call a Professional for Water-Damaged Drywall Repairs
While many small drywall repairs can be completed by homeowners, certain situations require professional assistance. Attempting complex repairs without proper equipment can lead to structural damage or mold contamination.
Situations That Require Professional Help
- Water damage covers a large wall area
- Mold is visible inside wall cavities
- Water exposure lasted more than 48 hours
- Structural framing appears warped or weakened
- Electrical wiring was exposed to water
- Drywall ceilings are sagging or collapsing
Professional inspection is especially important when mold contamination is suspected inside drywall or wall cavities. For drywall-specific cleanup guidance, review how to remove mold from drywall before attempting repair.
Repair vs Replace: Quick Decision Guide
One of the most common homeowner questions is whether drywall should be repaired or replaced after water damage. The correct decision depends on moisture exposure, structural condition, and contamination risk.
| Condition | Repair Possible? | Recommended Action |
|---|---|---|
| Small stain, drywall still firm | Yes | Dry thoroughly and repair surface |
| Soft or swollen drywall | No | Cut out and replace section |
| Mold visible on drywall | No | Remove contaminated drywall |
| Drywall exposed to water for over 48 hours | Usually No | Replace affected areas |
| Minor ceiling leak with quick drying | Sometimes | Evaluate condition before repair |
If you’re unsure whether the drywall can be saved, use our full decision guide on whether wet drywall can be saved, which explains when repair is realistic and when replacement is safer.
Frequently Asked Questions About Fixing Water-Damaged Drywall
Can water-damaged drywall be repaired without replacing it?
Yes, minor water damage can often be repaired if the drywall remains firm and structurally stable. Small stains or cosmetic damage typically require drying and surface repair, while soft or swollen drywall usually requires replacement.
How long should drywall dry before repairing it?
Drywall should be completely dry before repair begins. Minor moisture exposure may dry within 24–48 hours, while heavily saturated drywall may require several days of drying with fans and dehumidifiers.
What happens if damaged drywall is not repaired?
Unrepaired drywall can weaken over time, develop mold growth, and allow moisture to spread into surrounding materials. Over time, this can increase repair costs and compromise wall integrity.
Do I need to replace insulation after water damage?
If insulation becomes saturated, replacement is usually necessary. Wet insulation loses its effectiveness and may trap moisture inside wall cavities.
How do I know if hidden moisture remains inside the wall?
Hidden moisture can be detected using a moisture meter or by identifying early warning signs. If you suspect hidden damage, review our guide on signs of hidden moisture in walls to evaluate potential risks.
Fix Water-Damaged Drywall Only After the Wall Is Dry and Stable
Repairing water-damaged drywall requires more than patching visible damage. The most successful repairs begin with proper drying, careful material removal, and thorough inspection of hidden wall components.
By following structured repair steps and addressing moisture problems early, homeowners can restore damaged walls while reducing the risk of mold growth and long-term structural issues.
To reduce the chance of repeated wall damage after repairs, use our guide on how to prevent recurring moisture damage to identify the moisture conditions that often cause repairs to fail.
2 Comments
Comments are closed.