How to Dry Subfloors After Water Damage: Step-by-Step Drying Guide for Homeowners
To dry a subfloor after water damage, stop the water source, remove standing water, expose the wet subfloor when necessary, run fans and dehumidifiers, and keep drying until moisture readings return close to normal for that material. Do not reinstall flooring just because the surface looks dry.
Subfloors can hold moisture beneath carpet, laminate, tile, hardwood, and underlayment. If trapped moisture remains for more than 24 to 48 hours, mold growth, swelling, soft spots, and structural weakening become more likely.
For related structural drying methods, see our guide on how to dry walls after water damage. This article supports our guide to how to prevent recurring moisture damage, which explains how to stop water-damaged materials from staying damp or failing again after repairs.
Why Subfloors Must Be Dried Quickly After Water Damage
Subfloors support finished flooring materials and distribute weight throughout the floor system. When moisture enters the subfloor, it spreads rapidly through porous materials such as plywood and oriented strand board (OSB).
Delayed drying increases the risk of:
- Mold growth beneath flooring
- Wood swelling and warping
- Structural weakening of floor materials
- Flooring separation or buckling
- Persistent musty odors
If mold develops beneath flooring, additional remediation may be required.
For complete remediation strategies, review our mold removal guide.
You can identify early warning signs using our guide on signs of mold under flooring.
How Water Affects Subfloor Materials
Subfloors are typically made from materials designed to support heavy loads while resisting minor moisture exposure. However, extended water contact overwhelms these materials and introduces structural risks.
Common Subfloor Materials and Moisture Behavior
| Material | Water Absorption Risk | Drying Difficulty |
|---|---|---|
| Plywood | Moderate | Moderate |
| OSB (Oriented Strand Board) | High | High |
| Concrete | Low absorption | Slow drying |
| Particle board | Very High | Very High |
Materials such as OSB and particle board are particularly vulnerable because they absorb moisture quickly and retain it deep inside their structure.
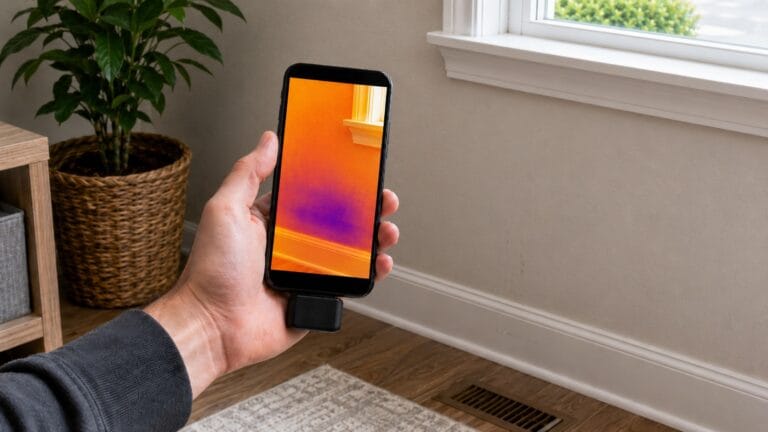
Signs That Subfloors Are Wet After Water Damage
Subfloor moisture is not always visible from the surface. Recognizing early signs helps homeowners begin drying before major damage occurs.
Common Signs of Wet Subfloors
- Flooring feels soft or spongy
- Musty odors near floor level
- Warping or lifting flooring panels
- Visible water stains on flooring seams
- Persistent dampness after leaks
- Unusual floor movement under pressure
If moisture exposure has occurred, quick drying reduces long-term risks. For prevention after the subfloor is dry, see our guide on how to prevent mold under flooring.
How Long Does It Take to Dry a Subfloor?
Drying time depends on the type of subfloor material, amount of water exposure, airflow conditions, and indoor humidity levels.
Typical Subfloor Drying Timelines
| Water Exposure Level | Estimated Drying Time |
|---|---|
| Minor moisture exposure | 24–48 hours |
| Moderate water exposure | 3–5 days |
| Heavy flooding | 5–10 days or longer |
| Severe structural saturation | May require material replacement |
Drying times increase significantly when humidity remains high. Monitoring indoor humidity helps confirm that drying conditions are improving. For measurement methods, see our guide on how to test indoor humidity levels.
Step-by-Step: How to Dry Subfloors After Water Damage
Drying a subfloor requires more than simply letting the area air dry. Effective drying depends on airflow, humidity control, and removing trapped moisture beneath flooring materials. Following a structured drying process improves recovery speed and reduces the risk of mold growth.
Begin drying as soon as possible after water exposure. The sooner drying starts, the greater the chance of saving structural materials.
Safety warning: Do not enter standing water if electrical outlets, wiring, appliances, or extension cords may be wet. If the water came from sewage, floodwater, a toilet backup, or an unknown source, treat it as contaminated and contact a water damage professional before removing flooring or handling saturated materials.
Step 1 — Stop the Water Source Immediately
Before beginning drying procedures, eliminate the source of water intrusion. Continuing leaks or moisture exposure will prevent drying progress and increase the risk of structural damage.
Common Sources of Subfloor Water Damage
- Plumbing leaks beneath floors
- Dishwasher or refrigerator supply failures
- Overflowing sinks or tubs
- Roof leaks reaching upper-level floors
- Flooding events
If the water source remains hidden, identifying leaks quickly becomes essential. Follow our guide on how to find hidden water leaks inside walls to locate moisture sources.
Step 2 — Remove Standing Water
Standing water must be removed immediately to prevent deep saturation of subfloor materials. The longer water remains, the deeper it penetrates into wood and structural layers.
Methods to Remove Standing Water
- Use wet/dry vacuums to remove pooled water
- Use mops or towels to absorb remaining moisture
- Open affected areas to improve access
- Repeat removal until visible water disappears
Removing surface water quickly improves the effectiveness of later drying stages.
Step 3 — Remove Wet Flooring When Necessary
Some flooring materials trap moisture beneath their surface, preventing subfloors from drying effectively. In many cases, removing finished flooring becomes necessary to allow proper airflow. If the flooring, adhesive, or underlayment may be old enough to contain asbestos, do not tear it out yourself until the material has been properly evaluated.
Flooring That Often Requires Removal
| Flooring Type | Removal Likelihood | Reason |
|---|---|---|
| Carpet | Very High | Retains moisture in fibers and padding |
| Laminate | High | Traps water beneath panels |
| Hardwood | Moderate | Moisture becomes trapped beneath boards |
| Tile | Low to Moderate | Moisture may remain beneath grout lines |
If flooring remains installed over a wet subfloor, drying time increases significantly and mold risk rises.
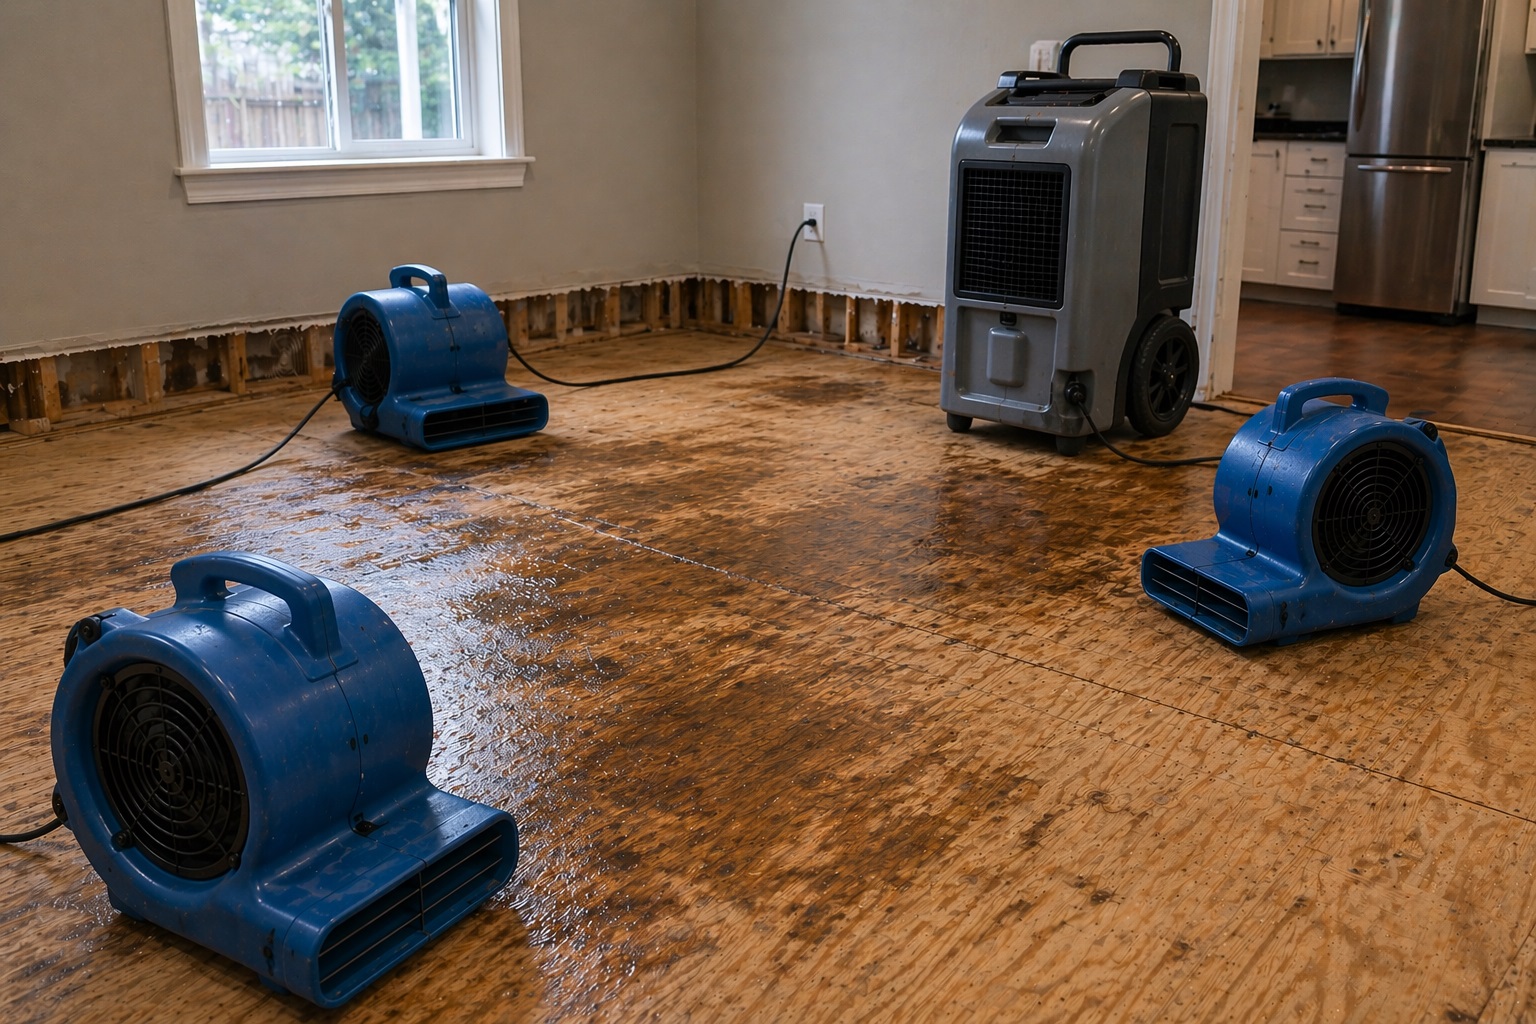
Step 4 — Increase Airflow Across the Subfloor
Airflow is one of the most important factors in drying subfloors. Moving air carries moisture away from wet surfaces and accelerates evaporation.
How to Position Fans for Maximum Drying
- Place fans directly across exposed subfloor surfaces
- Angle airflow across the wettest areas
- Use multiple fans for larger spaces
- Maintain consistent airflow throughout drying
Airflow should remain active continuously until moisture readings return close to normal for the subfloor material.
Step 5 — Use Dehumidifiers to Remove Moisture From the Air
As moisture evaporates from subfloors, it enters the surrounding air. Without humidity control, this moisture can remain trapped indoors and slow the drying process.
How Dehumidifiers Improve Drying Speed
| Function | Benefit |
|---|---|
| Removes moisture from air | Speeds evaporation from subfloor |
| Helps maintain lower humidity | Reduces mold growth risk during drying |
| Improves drying consistency | Prevents moisture rebound |
Maintaining indoor humidity around 30% to 50% can improve drying efficiency. If the area stays humid, see our guide on how to choose and use a dehumidifier effectively.
Step 6 — Apply Controlled Heat When Needed
Warm air increases evaporation speed, helping moisture leave subfloor materials more quickly. However, heat must be used carefully to avoid damaging materials.
Safe Heat Usage Guidelines
- Maintain moderate room temperatures
- Avoid excessive heat that causes warping
- Combine heat with airflow and dehumidification
- Monitor moisture levels regularly
Heat works best when combined with proper ventilation and humidity control.
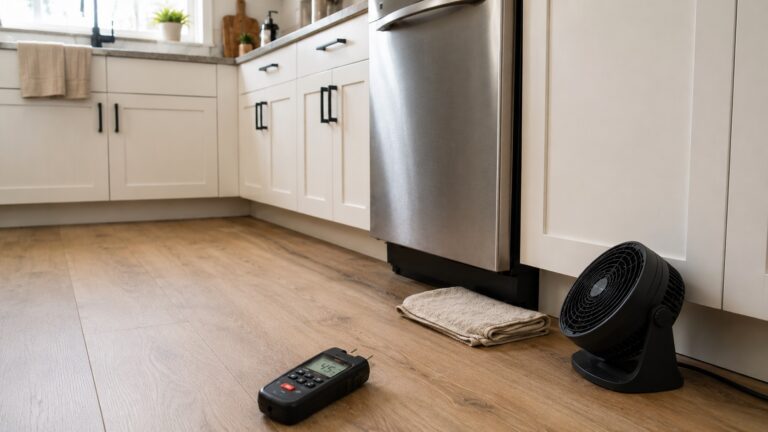
Step 7 — Monitor Moisture Levels During Drying
Drying should be measured rather than estimated. Use a moisture meter to compare the wet area with similar, unaffected subfloor nearby. A subfloor is not ready for flooring installation until readings are stable and close to normal for that material and home environment.
Moisture Reading Guidelines for Wood Subfloors
| Wood Subfloor Reading | Risk Level | Recommended Action |
|---|---|---|
| About 6–12% | Usually normal | Compare with unaffected wood nearby |
| 12–16% | Elevated | Continue drying and recheck |
| Above 16% | High | Increase airflow and dehumidification |
| Above 20% | Severe | Evaluate for hidden saturation or replacement |
Understanding moisture thresholds helps homeowners determine when drying is complete. For additional reference values, review our guide on moisture levels that indicate water damage.
How to Tell When a Subfloor Is Fully Dry
Knowing when a subfloor is completely dry is critical before reinstalling flooring materials. Reinstalling flooring too early traps moisture beneath the surface and significantly increases the risk of mold growth and structural damage.
Drying should never rely on time estimates alone. Instead, use physical inspections and moisture measurements to confirm safe conditions.
Signs That a Subfloor Is Fully Dry
- No visible moisture or damp areas
- No musty or mold-like odors
- Subfloor feels firm and stable
- No visible swelling or warping
- Consistent moisture readings across multiple locations
Moisture Readings That Suggest the Subfloor Is Ready
| Material | Moisture Reading Guideline | Action Required |
|---|---|---|
| Wood subfloor | About 6–12% | Compare with similar unaffected wood before reinstalling flooring |
| Concrete subfloor | Within flooring manufacturer limits | Use the moisture test required for that flooring system before installation |
| Subfloor above 16% | Too high for reinstalling flooring | Continue drying and investigate hidden moisture |
If moisture remains above recommended levels, drying must continue. Use reference thresholds from our guide on moisture levels that indicate water damage to evaluate conditions.
How to Prevent Mold After Drying a Subfloor
Even after drying is complete, ongoing moisture control remains essential. Mold growth often occurs when moisture returns after repairs.
Maintaining stable environmental conditions reduces the likelihood of future mold development beneath flooring.
Post-Drying Mold Prevention Steps
- Maintain indoor humidity between 30% and 50%
- Inspect repaired areas regularly
- Use vapor barriers when reinstalling flooring
- Monitor moisture levels periodically
- Repair leaks immediately if detected
Preventive strategies help reduce long-term moisture risks. You can learn more in our guide on how to prevent mold under flooring.
When Drying Is Not Enough to Save a Subfloor
In some cases, drying alone is not enough to restore subfloor materials. Severe water damage can weaken structural integrity, making replacement the safest solution.
Signs That a Subfloor Must Be Replaced
| Condition | Recommended Action |
|---|---|
| Subfloor feels soft or spongy | Replace affected sections |
| Severe warping or swelling | Remove damaged materials |
| Mold contamination present | Have the affected material evaluated before covering it again |
| Persistent musty odors | Investigate deeper damage |
| Water exposure lasted multiple days | Evaluate for structural replacement |
If the subfloor remains soft, swollen, moldy, or unstable after drying, damaged sections may need replacement before new flooring is installed.
Common Mistakes to Avoid When Drying Subfloors
Most subfloor drying failures happen when flooring is replaced too soon, humidity is not controlled, or moisture readings are never checked.
Subfloor Drying Mistakes That Increase Mold Risk
| Mistake | Why It Causes Problems |
|---|---|
| Stopping drying too early | Moisture remains trapped beneath flooring |
| Using insufficient airflow | Slows evaporation process |
| Ignoring humidity control | Moisture stays trapped indoors |
| Failing to monitor moisture levels | Leads to incomplete drying |
| Leaving flooring installed over wet subfloor | Blocks airflow and traps moisture |
If drying problems persist, additional inspection may be necessary to identify hidden moisture sources.
When to Call a Professional for Subfloor Drying
Some water damage situations require professional drying equipment and expertise. Early intervention can prevent structural failure and reduce long-term repair costs.
Situations That Require Professional Drying
- Large-scale flooding events
- Subfloor saturation across multiple rooms
- Persistent moisture readings after drying
- Structural damage to flooring systems
- Mold contamination discovered during drying
- Water exposure lasting longer than 48 hours
Professional drying teams use moisture mapping, commercial air movers, dehumidifiers, and drying equipment designed to remove deep moisture from structural materials.
Frequently Asked Questions About Drying Subfloors After Water Damage
How long does it take to dry a subfloor after water damage?
Drying time depends on the amount of water exposure, airflow conditions, and humidity levels. Minor moisture may dry within 24 to 48 hours, while significant water damage may require several days or longer.
Can subfloors dry without removing flooring?
In some cases, minor moisture can dry without removing flooring. However, many flooring materials trap moisture beneath the surface, making removal necessary for effective drying.
Can mold grow in a wet subfloor?
Yes. Mold can begin developing within 24 to 48 hours if moisture remains trapped inside subfloor materials.
What happens if a subfloor stays wet?
Wet subfloors may warp, weaken, and develop mold contamination. Over time, this can compromise structural stability and lead to costly repairs.
What humidity level helps dry subfloors faster?
Maintaining humidity around 30% to 50% can improve drying speed and reduce the risk of mold growth.
Dry the Subfloor Completely Before Reinstalling Flooring
Drying subfloors after water damage requires airflow, dehumidification, access to trapped moisture, and moisture readings that confirm the material is actually dry. Do not reinstall flooring until the subfloor is firm, odor-free, and close to normal moisture levels for that material.
For broader prevention steps after leaks, flooding, or repeated dampness, see our guide to preventing recurring moisture damage.
One Comment
Comments are closed.