How to Create a Moisture Inspection Checklist for Your Home
A home moisture inspection checklist helps you check the same high-risk areas in the same way each time, so small moisture clues do not disappear into memory. Instead of only reacting to stains, odors, soft flooring, or visible mold, you record what you inspected, what changed, what may have triggered it, and when the same area needs follow-up.
A practical checklist should cover bathrooms, kitchens, laundry areas, basements, crawl spaces, attics, HVAC areas, windows, doors, floors, ceilings, trim, and exterior water-entry points. It should also include dates, photos, humidity readings when available, moisture readings when needed, recent weather or plumbing events, and a clear next action.
This guide explains how to build a checklist you can use monthly, seasonally, after storms, after leaks, or after repairs. For a deeper location-based guide, you can also review where hidden moisture usually appears in different parts of a home. If you want the broader strategy behind detection, repairs, and prevention, start with the complete guide to find, fix, and prevent moisture problems in your home.
Why a Moisture Inspection Checklist Helps Prevent Bigger Problems
Most moisture damage starts with small clues: a stain that returns after painting, slightly swollen trim, a damp cabinet base, a musty odor after rain, or one room that stays more humid than the rest of the house. A checklist helps you record those clues before they become obvious damage.
The value of the checklist is pattern tracking. A small ceiling mark may not mean much once, but it matters if it grows after every storm. A basement wall that feels damp one day may only need monitoring, but the same wall staying damp all season deserves a closer look.
The checklist should not diagnose every source by itself. Its job is to show what needs rechecking, what needs monitoring, and what needs a deeper inspection. If the same signs keep returning, the next step may be to find the source of moisture in your home instead of simply cleaning, repainting, or drying the surface again.
What Your Moisture Inspection Checklist Should Track
A useful moisture checklist should do more than list rooms. It should help you record where you inspected, what you saw, when you saw it, and whether anything changed since the last check. Moisture patterns are often more important than one isolated observation.
Start with the basics for each inspection:
- The date of the inspection
- The room or area inspected
- Recent weather conditions, especially heavy rain or humidity changes
- Recent plumbing use, leaks, appliance problems, or repairs
- Visible stains, swelling, peeling, soft spots, or discoloration
- Musty odors or damp smells
- Condensation on windows, ducts, pipes, walls, or ceilings
- Humidity readings, if you use a hygrometer
- Moisture readings, if you use a moisture meter
- Photos of suspicious areas
- A follow-up date for rechecking the same area
Photos are especially useful because moisture damage can change slowly. A mark on drywall, a darkened cabinet base, or a warped section of flooring may look unchanged from memory, but a photo can show whether it has grown, darkened, spread, or returned after drying.
Your checklist should also separate minor observations from urgent warning signs. Light window condensation may be worth monitoring, while staining that returns after every storm, dampness under an active plumbing fixture, or moisture near electrical areas should move to follow-up quickly.
When you build your checklist, organize each line around the same basic fields:
| Checklist field | What to record |
|---|---|
| Area | Room, fixture, appliance, wall, ceiling, floor, attic, crawl space, basement, or exterior location. |
| Trigger | Recent rain, humidity change, shower use, laundry, plumbing use, HVAC use, repair, or appliance problem. |
| Visible signs | Stains, swelling, peeling paint, soft spots, cupping, discoloration, seepage, puddles, or mineral deposits. |
| Odor or air clue | Musty smell, damp air, lingering steam, condensation, or no unusual odor. |
| Reading or photo | Humidity reading, moisture reading, photo taken, or no tool used. |
| Action | Recheck, monitor, dry, inspect deeper, trace source, repair source, or call a professional. |
| Follow-up date | The date you will inspect the same area again. |
A checklist should also leave room for patterns that are not obvious during one visit. If several rooms have condensation, high humidity, and musty smells, the problem may not be one leak. It may involve ventilation, humidity control, crawl space moisture, basement dampness, or multiple small sources. In that case, a broader guide on how to diagnose multiple moisture problems in a home may be more useful than treating each symptom separately.
Room-by-Room Moisture Inspection Checklist
The easiest way to build a moisture inspection checklist is to divide the home into zones. Each zone has different risks, so your checklist should tell you exactly what to check in that area instead of using the same generic questions everywhere.
Keep this section practical. The goal is not to inspect every hidden cavity in one pass; it is to create a repeatable list of visible, accessible, and high-risk moisture checks.
Bathrooms
Bathrooms should be one of the first areas on your checklist because they combine plumbing, humidity, condensation, and sealed wall or floor surfaces. Small bathroom moisture problems can hide behind toilets, vanities, tub surrounds, shower walls, baseboards, and flooring.
Add these bathroom items to your checklist:
- Check around the toilet base for softness, staining, movement, or musty odor.
- Look below the sink cabinet for damp wood, discoloration, swollen cabinet material, or active drips.
- Inspect caulk lines around tubs, showers, and backsplashes for gaps or separation.
- Look for peeling paint, bubbling paint, or recurring stains on walls and ceilings.
- Check baseboards near the tub, shower, toilet, and vanity for swelling or dark edges.
- Notice whether mirrors, walls, or windows stay wet long after showers.
- Confirm that the exhaust fan removes moisture instead of letting steam linger.
One isolated damp towel smell is not the same as a hidden moisture problem. But a musty odor that returns after cleaning, damp baseboards near the shower, or staining below an upstairs bathroom should be marked for follow-up.
Kitchens
Kitchens contain several moisture sources close together. The sink, dishwasher, refrigerator water line, garbage disposal, cabinet bases, and flooring can all hide slow leaks. Because cabinets and appliances block visibility, kitchen leaks may not become obvious until flooring, cabinet bottoms, or baseboards begin to change.
Add these kitchen items to your checklist:
- Check under the sink for damp cabinet flooring, stains, warped wood, or musty smells.
- Inspect supply lines, shutoff valves, drain pipes, and disposal connections for moisture.
- Look along the toe-kick area of cabinets for swelling, discoloration, or soft spots.
- Check around the dishwasher for damp flooring, loose flooring edges, or staining near the cabinet side.
- Inspect around and behind the refrigerator if it has a water or ice line.
- Look for flooring that feels soft, cupped, loose, or uneven near appliances.
- Record any musty odor that appears when opening lower cabinets.
Kitchen checklist findings should be taken seriously when they repeat. A single small spill may dry without damage, but recurring dampness under cabinets or near appliances can affect subflooring and wall cavities before the surface looks severe.
Laundry Areas
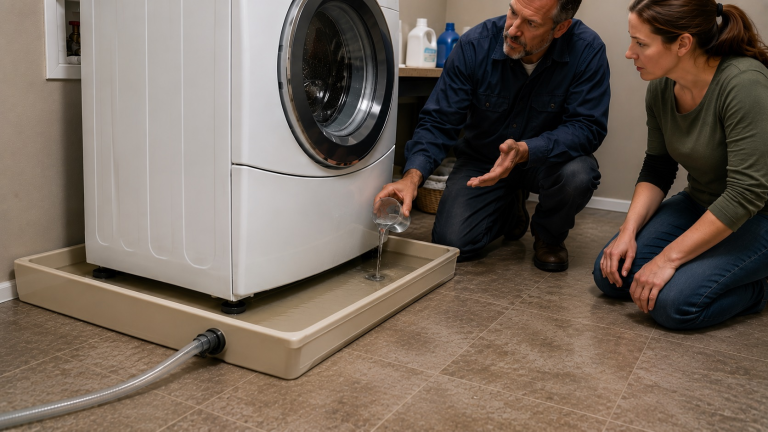
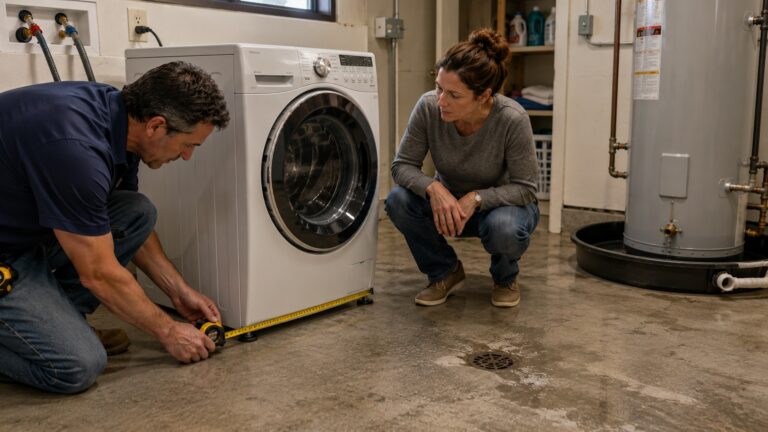
Laundry rooms and laundry closets deserve a dedicated checklist section because they combine pressurized water lines, drain hoses, appliance vibration, warm air, and sometimes poor ventilation. Slow hose leaks or small overflows can run under flooring, behind trim, or into adjacent rooms.
Add these laundry items to your checklist:
- Check washer supply hoses for bulging, cracking, corrosion, or damp connections.
- Look behind and beside the washer for stains, lint buildup, damp flooring, or musty odor.
- Inspect the drain hose and drain box for overflow marks or moisture.
- Check the floor around the washer for soft spots, cupping, or loose flooring.
- Look at baseboards and lower drywall near the appliance for swelling or staining.
- Inspect dryer vent areas for excess condensation, lint blockage, or dampness.
If your washer is in an upstairs laundry room, also add the ceiling below it to your checklist. Staining, bubbling paint, or repeated ceiling marks below laundry equipment can point to a leak that is not obvious from the laundry room itself.
Basements
Basements should be checked for both liquid water and general dampness. Moisture may come through walls, floors, cracks, sump pump areas, drains, window wells, plumbing penetrations, or high humidity. A basement checklist should separate occasional condensation from repeated seepage, drainage problems, or water intrusion after rain.
Add these basement items to your checklist:
- Check foundation walls for staining, damp patches, mineral deposits, or peeling coatings.
- Inspect floor-wall joints for seepage, dark lines, or dampness after rain.
- Look around sump pumps, floor drains, and plumbing penetrations for moisture.
- Check stored boxes, shelving, and furniture for musty odor or damp contact points.
- Record humidity levels if the basement often feels damp.
- Look for mold-like growth, musty odors, or condensation on cold surfaces.
- Check whether moisture appears after rain, snowmelt, or seasonal humidity changes.
Basement findings are especially useful when tied to weather. If the same wall or floor joint becomes damp after rain, your checklist should mark the location, date, rainfall pattern, and whether exterior drainage or grading may be involved.
Crawl Spaces
Crawl spaces can affect moisture levels throughout the home, especially when they have exposed soil, poor drainage, missing vapor barriers, plumbing leaks, blocked vents, or humid air movement. Many crawl space problems are not visible from living areas until odors, floor changes, or humidity problems appear above.
Add these crawl space items to your checklist:
- Look for standing water, wet soil, or damp insulation.
- Check vapor barriers for gaps, tears, missing sections, or pooled water on top.
- Inspect exposed wood for dark staining, softness, or fungal growth.
- Look for plumbing leaks, dripping pipes, or damp areas below bathrooms and kitchens.
- Record musty odors near crawl space access points.
- Check whether floors above feel soft, cupped, or persistently humid.
Do not enter a crawl space if there is standing water near electrical wiring, strong sewage odor, heavy mold growth, animal waste, structural instability, or unsafe access. In those cases, the checklist should record the concern and note that professional evaluation is needed.
Attics
Attics should be part of your moisture checklist because roof leaks, condensation, bathroom fan exhaust problems, blocked ventilation, and insulation issues can all show up above the living space before ceilings reveal damage below.
Add these attic items to your checklist:
- Look for dark staining on roof sheathing, rafters, trusses, or framing.
- Check insulation for wet spots, compression, discoloration, or musty odor.
- Inspect around roof penetrations, vents, chimneys, skylights, and valleys if accessible.
- Look for condensation, frost, rusted fasteners, or damp roof decking.
- Confirm that bathroom fans and dryer vents are not exhausting into the attic.
- Check whether attic moisture signs line up with ceiling stains below.
Attic inspections require caution. Do not step between joists or walk on unsupported ceiling material. If the attic is difficult to access, poorly lit, excessively hot, structurally questionable, or has widespread mold-like growth, use your checklist to record the concern and call a qualified professional.
HVAC Areas
HVAC equipment can create or reveal moisture problems through condensation, clogged drain lines, humid air movement, or equipment leaks. Add HVAC areas to the checklist because moisture may show up in nearby closets, ceilings, walls, floors, or duct insulation.
Add these HVAC items to your checklist:
- Check around air handlers, condensate pans, and drain lines for standing water or staining.
- Look for moisture around HVAC closets, nearby drywall, baseboards, and flooring.
- Inspect visible ducts for condensation, dripping, rust, or wet insulation.
- Record musty odors when the system starts or runs.
- Check whether certain rooms feel unusually damp when the HVAC system runs.
- Look for ceiling stains below attic or upper-level HVAC equipment.
HVAC moisture patterns should be checked during system operation when possible. A drain pan may look dry at one time but overflow when the system runs under humid conditions. Record whether the system was running when you inspected the area.
Windows and Doors
Windows and doors are common moisture checklist areas because they combine exterior exposure, air leakage, condensation, trim joints, sealant lines, and framing openings. Moisture may show as staining, swollen trim, soft sills, peeling paint, condensation, or mold-like growth near corners.
Add these window and door items to your checklist:
- Inspect window sills, lower corners, and trim for staining, swelling, softness, or peeling paint.
- Check around exterior doors for soft flooring, darkened thresholds, swollen trim, or musty odor.
- Look for condensation that repeats on the same windows.
- Record whether moisture appears after rain, wind-driven rain, cold weather, or high indoor humidity.
- Check nearby baseboards and flooring for changes.
- Look for gaps, cracked caulk, damaged weatherstripping, or signs of exterior water entry.
Window condensation and window leakage are not the same problem. Condensation usually relates to temperature, indoor humidity, and surface conditions. Rain-related staining, swollen trim, or damp drywall around the opening may point to water entry. Your checklist should record the trigger, not just the symptom.
Floors, Ceilings, and Trim
Floors, ceilings, and trim often show moisture problems that begin elsewhere. A ceiling stain may come from a roof, bathroom, HVAC unit, or plumbing line above. Soft flooring may come from a toilet, shower, dishwasher, refrigerator line, exterior door, or crawl space moisture. Trim can swell when nearby wall or floor materials stay damp.
Add these items to your checklist:
- Look for ceiling stains, rings, bubbling paint, sagging, or recurring discoloration.
- Check floors for soft spots, cupping, buckling, loose edges, or uneven areas.
- Inspect baseboards for swelling, dark edges, separation from the wall, or crumbling material.
- Record whether stains appear below bathrooms, laundry rooms, kitchens, HVAC equipment, or roof areas.
- Look for musty odors near corners, closets, exterior walls, or floor transitions.
- Take photos of stains or material changes so you can compare them later.
Checklist notes should connect the visible symptom to what is above, below, behind, or outside the area. A stained ceiling is not just a ceiling problem. It is a clue that should be linked to the most likely source zones nearby.
Exterior and Structural Areas to Add to Your Checklist
A home moisture checklist should not stop indoors. Exterior water control affects what happens inside walls, basements, crawl spaces, attics, and floors. Many interior moisture problems begin outside because rainwater is not being shed away from the home correctly.
Add these exterior items to your checklist:
- Check gutters for overflow, clogging, sagging, or leaks.
- Confirm that downspouts discharge water away from the foundation.
- Look for soil sloping toward the home instead of away from it.
- Inspect foundation walls for cracks, stains, damp areas, or water marks.
- Check siding, trim, penetrations, and exterior caulk lines for gaps or deterioration.
- Look around hose bibs, exterior faucets, and utility penetrations for leaks or staining.
- Inspect window wells, door thresholds, patios, decks, and walkways for trapped water.
- Record whether interior dampness appears after specific wind or rain patterns.
Exterior checklist notes are most useful when paired with indoor findings. If a basement corner is damp after rain and the downspout outside that corner dumps water near the foundation, the checklist helps connect the indoor symptom with the exterior condition.
Tools That Make a Moisture Checklist More Useful
You can create a moisture inspection checklist with your eyes, nose, hands, a flashlight, and a notebook. Extra tools are most useful when they help you confirm a pattern, compare areas, or decide whether a suspicious finding needs deeper inspection.
Flashlight
A flashlight helps you inspect under sinks, behind toilets, around appliances, inside closets, along baseboards, in crawl space entries, and around attic framing. Moisture stains, mineral deposits, and swollen material are often easier to see with angled light.
Phone Camera
A phone camera helps you document stains, swelling, discoloration, meter readings, humidity readings, and areas that are difficult to inspect closely. Take photos from the same angle during follow-up checks whenever possible.
Hygrometer
A hygrometer measures relative humidity. It can help you identify rooms that stay more humid than others and track whether humidity improves after ventilation, dehumidifier use, drainage improvements, or seasonal changes. If your checklist includes humidity readings, record the room, reading, date, time, and recent weather.
Moisture Meter
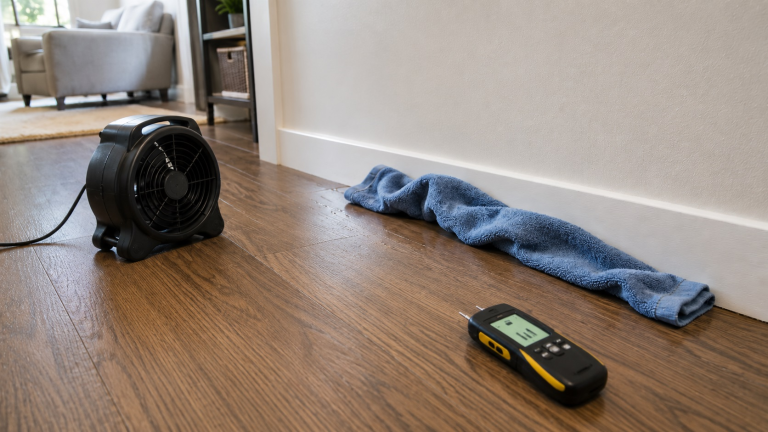
A moisture meter can help check suspicious materials such as drywall, wood trim, subfloors, basement framing, or cabinet bottoms. It is not a magic answer, and readings must be interpreted based on material, location, and comparison areas. Do not push meter pins into electrical areas, visibly moldy materials, or surfaces that may be contaminated by sewage or floodwater. A moisture meter for hidden water damage can make your checklist more useful when you are tracking whether a damp area is drying, staying the same, or getting worse.
Smart Leak Detectors
Smart leak detectors can help monitor high-risk areas between checklist inspections. They are especially useful near water heaters, washing machines, dishwashers, under sinks, near sump pumps, and in basements. They do not replace visual inspection, but they can alert you when water appears where it should not.
Notebook, Spreadsheet, or Digital Checklist
The format matters less than consistency. A paper checklist, spreadsheet, phone note, maintenance app, or printed room-by-room form can all work. The important part is recording the same types of observations each time so you can compare results.
How Often to Use Your Moisture Inspection Checklist
Most homeowners do not need to inspect every area every week. Use a simple schedule: quick checks monthly, full checks seasonally, and targeted checks after rain, leaks, appliance problems, or repairs.
Monthly Quick Check
A monthly quick check can focus on the areas most likely to cause damage if ignored. These include sinks, toilets, tubs, showers, washing machines, water heaters, HVAC drain areas, basements, crawl space access points, and rooms that have had past moisture problems.
The monthly checklist does not need to be long. Look for active dampness, new stains, odors, condensation, soft materials, and anything that has changed since the last inspection.
Seasonal Full Checklist
A seasonal checklist should cover the whole home. Seasonal changes can reveal different moisture patterns. Spring may show basement seepage, roof leaks, or grading problems. Summer may reveal high indoor humidity, crawl space dampness, or condensation around ducts. Fall is a good time to check gutters, drainage, windows, doors, and roof-related areas. Winter can reveal condensation, attic frost, window moisture, or ventilation problems.
After Heavy Rain or Storms
Heavy rain and wind-driven storms deserve targeted follow-up. Check basements, crawl spaces, attic areas, window and door openings, foundation walls, exterior corners, gutter discharge areas, and any location that has leaked before.
Record how soon the inspection happened after the storm. Moisture found within hours of rain may point to active entry. Moisture found days later may require a different interpretation, especially if humidity or slow drying is involved.
After Plumbing Leaks or Appliance Problems
After a plumbing leak or appliance leak, use the checklist to monitor both the obvious wet area and the surrounding materials. Water can move under flooring, behind cabinets, through wall cavities, and into lower ceilings. Check adjacent rooms, ceilings below, baseboards, flooring edges, and nearby cabinets.
After Repairs
Repairs should not be the end of the checklist. After a roof repair, plumbing repair, basement waterproofing work, appliance replacement, or window sealing project, recheck the area until it stays dry through normal use and at least one relevant trigger, such as rain, shower use, laundry, or HVAC operation.
How to Record Moisture Findings and Spot Patterns
A checklist becomes more powerful when you use it as a record, not just a reminder. Moisture problems often make sense only when you compare the same area over time. A stain, odor, or damp spot may seem minor once. It becomes more important when it returns after the same trigger.
When recording findings, be specific. Instead of writing “basement damp,” write “north basement wall damp near floor-wall joint two hours after heavy rain.” Instead of “bathroom smells musty,” write “musty odor inside vanity cabinet after showers; no active drip visible.” These details help you decide what to inspect next.
Good checklist notes should include:
- The exact location of the finding
- What the material looked, smelled, or felt like
- Whether the area was dry, damp, wet, soft, swollen, stained, or discolored
- Whether the finding appeared after rain, plumbing use, showering, laundry, HVAC use, or seasonal humidity
- Whether the finding is new, unchanged, improved, or worse
- Whether a photo, humidity reading, or moisture reading was taken
- The follow-up action and date
Patterns to watch for include moisture returning in the same location, dampness appearing after the same weather event, odors that come back after cleaning, condensation in multiple rooms, or stains that grow between inspections. These patterns are often more useful than one dramatic finding because they show what the home is doing repeatedly.
When Checklist Findings Need a Deeper Inspection
A moisture checklist is an early-warning tool. It can show that something changed, but repeated or serious findings may still need deeper inspection behind, below, or outside the visible surface.
Move beyond the checklist when you find:
- Active dripping, seepage, or standing water
- Stains that grow, darken, or return after drying
- Musty odor that keeps returning after cleaning
- Soft drywall, soft flooring, sagging ceilings, or swollen trim
- Visible mold-like growth or recurring spotting in damp areas
- Moisture near electrical outlets, fixtures, panels, or wiring
- Wet insulation, damp framing, or crawl space wood staining
- Water damage below bathrooms, kitchens, laundry rooms, roofs, or HVAC units
- Repeated dampness after repairs
When these signs appear together, move beyond the checklist. You may need to inspect behind accessible panels, check nearby plumbing, evaluate exterior drainage, review roof or flashing conditions, test suspicious materials, or bring in a qualified professional. The checklist helps you know where the pattern started and how long it has been present.
It is also important not to confuse cleaning with correction. Cleaning a stained surface, removing visible mildew, or repainting a wall does not solve the underlying moisture source. If the same area becomes damp again, the checklist should mark that location as unresolved.
Moisture findings are also more serious when structural materials are involved. Damp drywall is a concern, but damp subflooring, framing, joists, roof sheathing, or crawl space wood can become a larger repair issue if the source continues. If your checklist repeatedly points to structural areas, use it as documentation for a more complete inspection or repair decision.
Once you know which areas are recurring, use those notes to prevent moisture problems across your entire home by correcting sources, improving drainage, controlling humidity, maintaining ventilation, and monitoring high-risk areas after repairs.
Moisture Inspection Checklist Example
You can build your checklist in any format you will actually use. A simple version can look like this:
- Date: ____________________
- Area inspected: ____________________
- Recent trigger: Rain / humidity / plumbing use / appliance issue / storm / repair / seasonal change / none known.
- Visible signs: Stain / swelling / peeling paint / soft material / discoloration / condensation / seepage / puddle / none visible.
- Odor: Musty / damp / earthy / sewage-like / no unusual odor.
- Reading: Humidity reading ________ / moisture reading ________ / no tool used.
- Photo taken: Yes / no.
- Action needed: Recheck / monitor / dry / inspect deeper / trace source / repair source / call a professional.
- Follow-up date: ____________________
The best checklist is not the longest one. It is the one you can repeat consistently. Start with the highest-risk areas in your home, then add more lines only when your home’s layout, leak history, basement, crawl space, older plumbing, or roof concerns justify them.
FAQs About How to Create a Moisture Inspection Checklist
How often should I use a moisture inspection checklist?
Use a quick version monthly for high-risk areas such as sinks, toilets, showers, laundry rooms, water heaters, basements, crawl spaces, and appliance zones. Use the full checklist seasonally and after heavy rain, plumbing leaks, roof leaks, appliance problems, or moisture-related repairs.
What should be included in a home moisture checklist?
Include the inspection date, area inspected, recent trigger, visible signs, odor, humidity or moisture readings if available, photos, action needed, and follow-up date. The checklist should cover both interior areas and exterior water-entry points.
Do I need a moisture meter to inspect my home?
You do not need a moisture meter for a basic checklist. A meter is most useful when you need to compare a suspicious material with a nearby dry area, track whether a damp spot is drying, or document a recurring problem before a deeper inspection.
Should I inspect my home after heavy rain?
Yes. Heavy rain can reveal basement seepage, roof leaks, crawl space moisture, window leaks, exterior wall dampness, grading issues, and gutter or downspout problems. Add a storm follow-up line to your checklist if your home has any rain-related moisture history.
Can a moisture checklist help prevent mold?
A checklist does not prevent mold by itself, but it helps you catch damp materials, high humidity, leaks, and recurring moisture before mold has time to spread.
When should checklist findings be handled by a professional?
Call a professional when you find active leaks, recurring stains, persistent musty odor, visible mold-like growth, damp structural wood, wet insulation, soft flooring, sagging ceiling material, electrical-area moisture, sewage or floodwater contamination, or moisture that keeps returning after repairs.
Key Takeaways
- A moisture inspection checklist helps you inspect consistently instead of relying on memory.
- Check high-risk areas such as bathrooms, kitchens, laundry rooms, basements, crawl spaces, attics, HVAC areas, windows, doors, floors, ceilings, and trim.
- Record dates, locations, weather, odors, stains, humidity readings, moisture readings, photos, and follow-up actions.
- Repeated signs, spreading stains, returning odors, or moisture that appears after the same trigger should move from “monitor” to “inspect deeper.”
- Inspect after heavy rain, plumbing leaks, appliance problems, seasonal changes, and repairs.
- Use tools like hygrometers, moisture meters, cameras, and leak detectors to support the checklist.
- Move beyond the checklist when moisture returns, spreads, smells musty, affects structural materials, or appears near electrical systems.