How to Prevent Moisture Problems Across Your Entire Home
Moisture prevention works best when you treat the home as one connected system. A damp basement, humid bathroom, leaking window, clogged gutter, musty crawl space, or poorly ventilated attic may seem like separate problems, but they often share the same basic pattern: moisture is entering, forming, or staying trapped faster than the home can dry.
The goal is not to eliminate every trace of moisture from the house. That is unrealistic because homes are exposed to weather, plumbing, daily humidity, temperature changes, and seasonal conditions. The real goal is to control bulk water, reduce indoor humidity, improve drying conditions, catch leaks early, and prevent small moisture signs from becoming repeated damage.
This guide shows how to build a whole-home prevention routine around the most common moisture sources: exterior drainage, plumbing and appliance leaks, indoor humidity, ventilation, condensation, below-grade spaces, attics, windows, exterior walls, and repaired areas. For the broader recurrence-prevention framework, see how to prevent recurring moisture damage. For the complete sitewide process, start with how to find, fix, and prevent moisture problems.
Why Whole-Home Moisture Prevention Matters
Many moisture problems begin quietly. A little condensation forms on a cold window. A downspout drains too close to the foundation. A bathroom fan is not used long enough. A washing machine hose develops a slow drip. A basement wall feels damp after rain. None of these signs may seem urgent at first, but repeated moisture can affect paint, drywall, wood, insulation, flooring, cabinets, stored items, and structural materials over time.
Moisture rarely stays neatly contained. A roof leak may stain a ceiling far from the entry point, damp crawl space air may affect flooring above it, poor drainage can contribute to basement dampness, and high indoor humidity can make closets, bathrooms, windows, and exterior wall corners more vulnerable.
Prevention is also important because surface repairs do not solve moisture sources. Painting over a stain, replacing swollen trim, cleaning mildew, or running a dehumidifier may help temporarily, but the problem can return if water is still entering or damp air is still being trapped. If a home repeatedly develops moisture symptoms, it helps to understand why some homes have ongoing moisture problems before treating each symptom as a separate issue.
Use three questions to organize prevention:
- Where can water enter? Roofs, gutters, windows, doors, siding, foundations, plumbing, appliances, HVAC systems, basements, and crawl spaces.
- Where can moisture form? Bathrooms, kitchens, laundry rooms, cold surfaces, ducts, pipes, attics, closets, and poorly ventilated rooms.
- Where can moisture stay trapped? Wall cavities, insulation, carpet padding, subfloors, cabinets, trim, crawl spaces, basements, closets, and stored materials.
When you prevent moisture at all three stages, you reduce the chance of repeated damage. You are not just cleaning up symptoms. You are controlling the conditions that allow those symptoms to return.
Control Exterior Water Before It Reaches the House
The first line of moisture prevention is controlling exterior water before it reaches vulnerable materials. Rainwater, roof runoff, saturated soil, and poor drainage can affect basements, crawl spaces, slabs, exterior walls, window wells, and foundation edges long before water appears indoors.
Start with gutters and downspouts. Gutters should collect roof runoff and move it away from the house, not overflow near walls or dump water beside the foundation. Clogged gutters can send water down siding, behind fascia, near windows, or directly into the soil around the home. Downspouts that end too close to the foundation can saturate the same area every time it rains.
Add these exterior water-control steps to your prevention plan:
- Keep gutters clear of leaves, debris, and roof granules.
- Make sure downspouts discharge water away from the foundation.
- Watch for gutter overflow during heavy rain.
- Correct soil that slopes toward the house.
- Keep mulch, soil, and landscaping from sitting too high against siding or trim.
- Check window wells, stairwell drains, and exterior drains for debris.
- Look for pooling water near foundation walls, crawl space openings, patios, porches, and basement entries.
- Watch for splashback where roof runoff hits the ground and wets siding or lower walls.
Grading is especially important. Soil should generally encourage water to move away from the house rather than hold water against the foundation. Low spots near the home can keep soil wet for long periods, which increases the chance of basement seepage, crawl space dampness, slab-edge moisture, and foundation-adjacent humidity.
Exterior wall details also matter. Gaps around penetrations, deteriorated sealant, failed flashing, damaged siding, loose trim, and poorly protected openings can allow water to enter behind the visible surface. Moisture may not show up immediately inside. It may first appear as musty odor, staining, peeling paint, damp insulation, or hidden wall moisture.
Windows and doors deserve regular attention because they are common water-entry points. Look for cracked caulk, soft trim, staining below corners, gaps at thresholds, and water signs after wind-driven rain. A small recurring stain below a window may point to exterior water entry, not just indoor condensation.
Exterior prevention does not mean every homeowner needs a major waterproofing project. Many prevention steps are basic maintenance: clean gutters, extend downspouts, improve drainage paths, keep exterior openings sealed, and respond early when water repeatedly collects near the home. The key is to reduce how much water reaches vulnerable materials in the first place.
Prevent Plumbing and Appliance Leaks Early
Plumbing and appliance leaks are common sources of home moisture because they often start small. A slow drip under a sink, a loose refrigerator water line, a worn washing machine hose, or a dishwasher leak may not create an obvious flood right away. Instead, the moisture can soak into cabinet bottoms, flooring, subfloors, drywall, and trim before the homeowner notices visible damage.
The best prevention strategy is to check high-risk plumbing and appliance areas before they fail. Focus on places where water lines, drain lines, hoses, valves, and appliance connections are hidden or rarely inspected.
Pay close attention to:
- Kitchen sink supply lines, drain pipes, shutoff valves, and disposal connections
- Bathroom sink cabinets and vanity plumbing
- Toilet bases, supply lines, and shutoff valves
- Dishwasher water lines, drain hoses, and flooring nearby
- Refrigerator water and ice maker connections
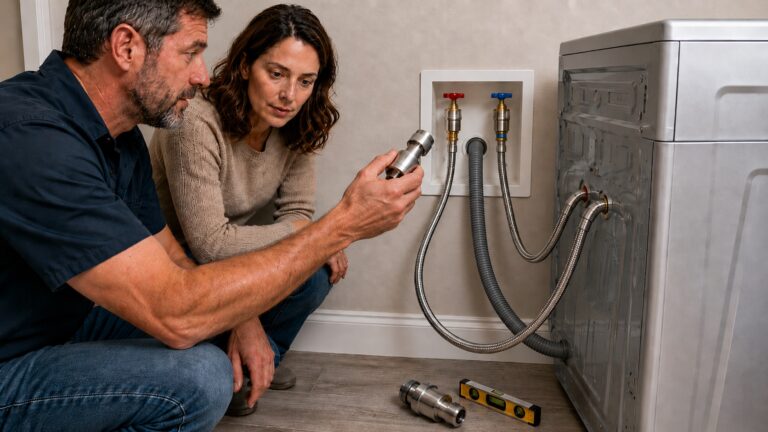
- Washing machine hoses, drain lines, and wall boxes
- Water heaters, pans, valves, and surrounding flooring
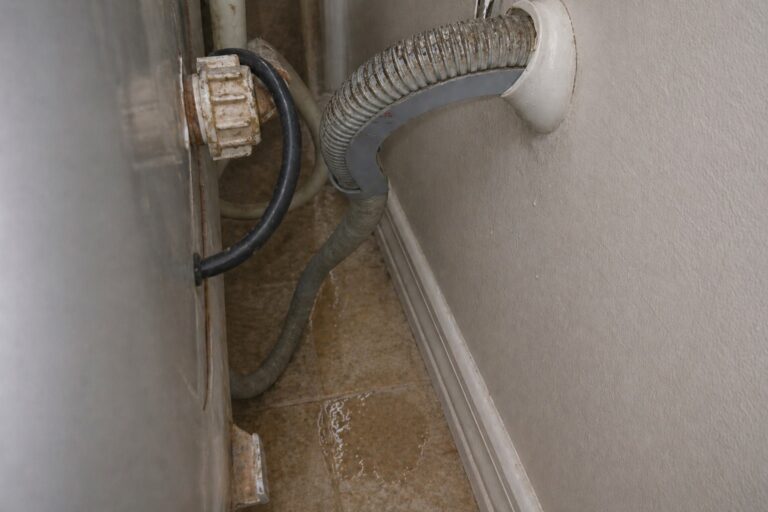
- HVAC condensate drain lines and drain pans
Look for stains, mineral buildup, corrosion, damp cabinet floors, soft flooring, musty odors, swollen trim, or water marks around connections. These early signs often appear before a leak becomes obvious. If an area smells musty every time you open a cabinet or move an appliance, do not assume the surface is dry just because you do not see standing water.
Leak prevention also depends on access. If you cannot see under a sink because it is packed with cleaning supplies, or if a washing machine is pushed tightly against the wall, small leaks may go unnoticed. Keep plumbing areas clear enough that you can inspect them quickly.
In high-risk areas, smart leak detectors or water leak sensors for early detection can help alert you when water reaches the floor or cabinet base. These devices do not replace inspection or repair, but they can catch active water before it spreads under flooring, behind cabinets, or into lower levels.
When you find a leak, fix the source before replacing damaged materials. New cabinet panels, trim, drywall, or flooring can fail quickly if the plumbing connection still drips. Moisture prevention works only when the water source is corrected, the affected area dries, and future leaks are easier to notice.
Keep Indoor Humidity Under Control
Moisture problems do not always come from visible leaks. High indoor humidity can make a home feel damp, slow drying, increase condensation risk, and create conditions where musty odors or mold-like growth return. Humidity control is one of the most important parts of whole-home moisture prevention.
Indoor humidity can come from everyday activities such as showering, cooking, washing dishes, laundry, mopping, drying clothes indoors, breathing, and bringing damp items into the home. These activities are normal, but problems develop when moisture is added faster than the home can remove it.
Common signs that indoor humidity may be too high include:
- Condensation on windows, mirrors, walls, pipes, or ducts
- Rooms that feel damp, sticky, or heavy
- Musty odors in closets, basements, bedrooms, or storage areas
- Mildew on stored items, shoes, clothing, boxes, or fabrics
- Peeling paint or recurring surface spotting in bathrooms
- Dehumidifiers that fill quickly or run constantly
- Moisture problems that worsen during humid weather
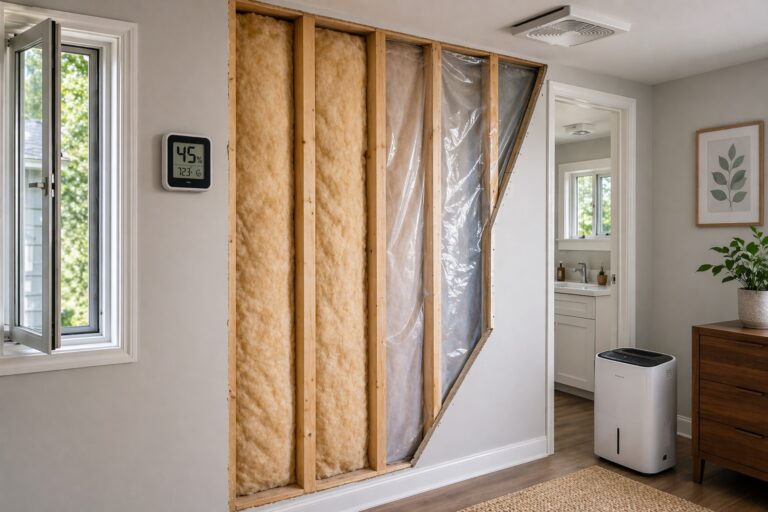
Use hygrometers for home humidity to compare moisture-prone rooms with the rest of the house. A hygrometer will not find a hidden leak inside a wall, but it can show whether one room, basement, closet, or storage area consistently runs more humid than nearby spaces.
To reduce humidity, start with the sources you can control. Run bathroom exhaust fans during and after showers. Use kitchen ventilation when cooking. Avoid drying large amounts of laundry indoors unless the space is ventilated or dehumidified. Keep damp towels, wet shoes, and soaked items from sitting in closed rooms or closets. Make sure dryer vents discharge outdoors and are not blocked.
Dehumidifiers can help in basements, damp rooms, and high-humidity areas, especially when humidity is the main problem. However, a dehumidifier is not a substitute for fixing leaks, drainage failures, wet crawl spaces, roof problems, or damp building materials. For setup, sizing, placement, and daily use, start with how to choose and use a dehumidifier effectively. If you are comparing units, see dehumidifiers for mold prevention.
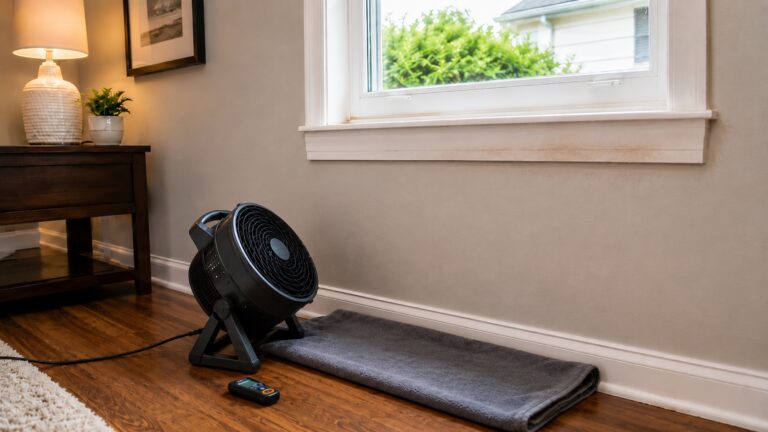
Improve Ventilation in Moisture-Prone Rooms
Ventilation helps remove moisture at the source. Without enough airflow or exhaust, moisture from showers, cooking, laundry, damp storage, and daily living can linger on surfaces even when there is no active leak.
Bathrooms are the most obvious example. A bathroom fan should move moist air out of the room, not simply make noise. If mirrors, walls, ceilings, or windows stay wet long after a shower, ventilation may not be working well enough. Running the fan during the shower and for a while afterward can help reduce moisture buildup.
Kitchens also need moisture control. Cooking, boiling water, dishwashing, and steam can raise humidity quickly. Use exhaust ventilation when possible, especially during long cooking sessions or when moisture collects on windows, cabinets, or walls.
Laundry areas need airflow because washing machines, utility sinks, wet clothes, and dryers can all contribute moisture. A blocked dryer vent, disconnected vent, or poorly ventilated laundry closet can raise humidity and create condensation nearby.
Ventilation also matters in less obvious spaces:
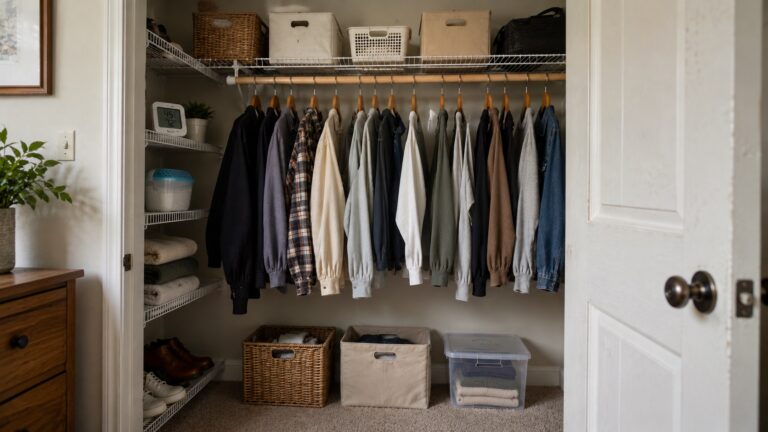
- Closets packed tightly against exterior walls
- Storage rooms with cardboard boxes or fabric items
- Basements with limited air movement
- Crawl spaces with trapped damp air
- Attics where moist indoor air enters and condenses
- Rooms kept closed for long periods
- Areas behind furniture, curtains, and stored items
Good ventilation does not mean letting uncontrolled humid air into the home at the wrong time. In humid climates or during very damp weather, open windows may increase indoor moisture instead of reducing it. The goal is controlled drying: exhaust moisture from wet rooms, improve airflow around vulnerable surfaces, and use dehumidification when outdoor air is too humid to help.
Simple habits can make a difference. Leave closet doors open occasionally, avoid pressing furniture tightly against cold exterior walls, keep storage off damp floors, and let air move around areas that have had past moisture problems. These small steps help materials dry faster and reduce the chance that moisture will stay trapped.
Reduce Condensation on Cold Surfaces
Condensation is one of the most common moisture problems homeowners overlook because it does not always look like a leak. It happens when humid air contacts a surface that is cold enough for moisture to collect. This often appears on windows, exterior wall corners, pipes, ducts, attic surfaces, basement walls, and poorly insulated areas.
Condensation can be temporary and harmless when it dries quickly. It becomes a moisture problem when it forms repeatedly, stays wet for long periods, or affects materials that absorb water. Repeated condensation can contribute to peeling paint, dark window corners, musty odors, damp trim, attic sheathing moisture, duct sweating, and mold-like growth.
Common condensation-prone areas include:
- Window glass, frames, and lower corners
- Exterior wall corners in cold weather
- Closets on outside walls
- Behind furniture placed tightly against exterior walls
- Cold water pipes
- Metal ducts in humid spaces
- Basement foundation walls
- Attic roof sheathing during cold weather
- Rim joists, crawl space edges, and poorly insulated transitions
Preventing condensation usually requires more than lowering indoor humidity. Airflow, surface temperature, insulation, air sealing, and room layout can also matter: a closet on an exterior wall may need more airflow, a cold pipe may need insulation, and a damp attic may need air sealing, roof ventilation, or leak repair.
To reduce condensation risk:
- Keep indoor humidity from staying too high.
- Use bathroom and kitchen exhaust fans when moisture is being produced.
- Improve airflow around windows, closets, furniture, and exterior wall corners.
- Keep curtains or blinds from trapping damp air against cold glass for long periods.
- Insulate cold pipes or ducts where appropriate.
- Watch attic areas for signs that warm indoor air is reaching cold roof surfaces.
- Address repeated cold spots instead of only wiping condensation away.
Wiping condensation can prevent short-term surface wetting, but it does not solve the reason condensation keeps forming. If the same surface stays wet day after day, it should be treated as a recurring moisture condition, not just a cleaning task.
Protect Basements and Crawl Spaces from Long-Term Dampness
Basements and crawl spaces are major moisture-risk areas because they are close to soil, groundwater, foundation walls, exterior drainage, and outdoor humidity. Moisture in these spaces can affect the whole home, even if the basement is unfinished or the crawl space is rarely entered.
A damp basement can raise humidity, damage stored items, affect wall finishes, and create musty odors. A damp crawl space can affect floor framing, insulation, subfloors, indoor air, and flooring above. Because these areas are often out of sight, moisture problems may continue for a long time before they are noticed.
To help prevent basement and crawl space moisture:
- Keep exterior water draining away from the foundation.
- Watch for seepage after heavy rain.
- Keep basement floor drains, sump areas, and window wells clear where applicable.
- Store boxes and belongings off damp floors and away from walls.
- Use dehumidification when humidity remains high.
- Check crawl space access areas for musty odors or visible dampness.
- Watch for wet soil, standing water, damp vapor barrier surfaces, or fallen insulation.
- Do not ignore soft floors above crawl spaces.
Basement and crawl space prevention should not rely on one step alone. A dehumidifier may help the air, but it will not fix exterior water collecting around the foundation. A vapor barrier may help control ground moisture, but it will not solve roof runoff draining beside the home. A sump pump may reduce standing water, but drainage and maintenance still matter. If moisture keeps returning in a basement, move from general prevention to a basement water-control plan such as how to waterproof basements and control water intrusion.
Watch Roofs, Attics, Windows, and Exterior Walls
Moisture prevention also depends on the building envelope — the parts of the home that separate indoor space from outdoor weather. Roofs, attics, windows, doors, siding, flashing, and exterior walls all need attention because small weaknesses can allow water into hidden areas.
Roof leaks often do not appear directly below the entry point. Water can travel along rafters, sheathing, insulation, pipes, or ceiling framing before it stains drywall. That is why roof-related moisture prevention should include watching ceilings, attic insulation, roof penetrations, chimney areas, vents, and flashing details after storms.
Attics need attention because they can develop both leaks and condensation. A roof opening may let rain in, while air leaks from the living space can carry warm humid air into a cold attic. If that moisture condenses on roof sheathing or nails, the attic can develop dampness even when the roof covering itself is not leaking.
Windows and exterior doors should be checked for both rain intrusion and condensation. Staining below a window, swollen trim, soft sills, damp flooring near a door, or moisture after wind-driven rain may indicate a water-entry problem. Condensation on glass may be a humidity issue, but moisture at the frame, sill, trim, or wall below may point to leakage or poor exterior detailing. For a deeper look at these openings, see how windows and doors cause hidden moisture problems.
Exterior walls and siding can also hide moisture. Gaps, failed caulk, loose siding, damaged flashing, wall penetrations, and poorly detailed trim can let water behind the visible surface. The first signs may be interior staining, musty odor, peeling paint, or damp wall areas rather than obvious exterior damage.
To reduce roof, attic, window, and wall moisture risk:
- Check ceilings and attic areas after heavy storms.
- Watch for stains around roof penetrations, chimneys, vents, and valleys.
- Keep attic ventilation and air-sealing issues on your long-term maintenance radar.
- Inspect window and door trim for soft spots, cracks, staining, or failed sealant.
- Look for moisture signs after wind-driven rain.
- Repair exterior gaps before water reaches wall cavities.
- Do not cover repeated stains without confirming the source has stopped.
Because building-envelope moisture can travel, the visible stain may not reveal the exact entry point. If water appears after storms, track the timing, location, wind direction, and nearby exterior details before assuming the nearest visible surface is the source.
Maintain High-Risk Areas After Repairs
Moisture prevention should continue after repairs are complete. A repaired area is often more important to watch than an area that has never had a problem. If a roof, window, plumbing fixture, basement wall, crawl space, HVAC drain, or appliance connection has failed once, it should stay on your follow-up list.
After a repair, check whether the area remains dry under the same conditions that caused the original problem. A roof repair should be checked after rain. A plumbing repair should be checked after the fixture or appliance is used. A basement repair should be checked after storms. A humidity or ventilation improvement should be checked during the season when moisture used to appear.
Post-repair prevention should include:
- Taking photos before and after repair
- Checking the area after the next rain, shower, appliance cycle, or humidity change
- Watching for returning stains, odors, swelling, or softness
- Confirming that materials stayed dry before cosmetic repairs are finished
- Keeping repaired areas on a seasonal inspection schedule
- Tracking humidity or moisture readings when the area has a history of dampness
This is where ongoing tracking can prevent repeat damage. If you want a more detailed system for watching readings and patterns after repairs, use a routine to monitor moisture levels throughout your home. Monitoring helps confirm that prevention steps are working instead of assuming the repair solved everything permanently.
Repairs fail most often when the visible material is restored but the moisture condition remains. A wall may be repainted before the leak is fixed. Flooring may be replaced before the subfloor is dry. A basement may be cleaned without correcting drainage. Prevention after repair is about making sure the same moisture cycle does not restart.
Build a Simple Moisture Prevention Routine
A whole-home moisture prevention routine does not need to be complicated. The best routine is one you can repeat consistently. It should help you notice early warning signs, keep water away from vulnerable areas, control indoor humidity, and follow up after storms, leaks, repairs, and seasonal changes.
Start with a monthly quick check of the most common moisture-risk areas:
- Under kitchen and bathroom sinks
- Around toilets, tubs, showers, and vanities
- Near washing machines, water heaters, dishwashers, and refrigerators with water lines
- Basement walls, floors, and stored items
- Crawl space access areas, if your home has a crawl space
- Window sills, exterior doors, and lower wall corners
- HVAC condensate drain areas and visible duct condensation
- Closets, storage rooms, and areas that have smelled musty before
Then add a seasonal exterior and structural check. Before and after wet seasons, look at gutters, downspouts, grading, window wells, exterior drains, siding, roof edges, attic areas, foundation edges, basement entries, crawl space openings, and exterior wall penetrations. Seasonal checks are important because some moisture risks only appear during rain, snowmelt, humid weather, or cold-weather condensation periods.
After heavy storms, focus on areas that respond to rain. Check basements, crawl spaces, ceilings below roof areas, windows, exterior doors, attic access areas, and exterior walls exposed to wind-driven rain. If a moisture sign appears only after storms, that timing is one of your best clues.
After repairs, add follow-up checks. A repaired leak, sealed window, dried wall, replaced appliance hose, fixed roof area, or improved drainage path should be watched under real conditions. Do not assume a repair is permanent until the area stays dry during the same conditions that caused the original problem.
If you want a more structured way to organize these steps, you can create a moisture inspection checklist for your home. The checklist does not need to replace your prevention plan. It simply helps you remember which areas to check, what signs to record, and when to follow up.
When Prevention Is Not Enough
Prevention reduces risk, but it does not fix active damage by itself. If water is already entering, materials are wet, or symptoms keep returning, prevention steps should shift into inspection, source correction, drying, or repair planning.
Prevention is no longer enough when you notice:
- Active dripping, seepage, or standing water
- Sewage, floodwater, or water that may be contaminated
- Moisture near electrical outlets, fixtures, wiring, panels, or energized equipment
- Recurring stains after cleaning or repainting
- Musty odors that return after ventilation and cleaning
- Soft drywall, swollen trim, warped flooring, or sagging ceiling material
- Wet insulation, damp framing, or darkened structural wood
- Visible mold-like growth that spreads or returns
- Basement or crawl space moisture after most rain events
- Window, roof, wall, or door leaks during storms
- Moisture problems that come back after previous repairs
At that point, the priority is to identify the source instead of continuing with general prevention habits. If the cause is unclear, start by learning how to find the source of moisture in your home. Source correction matters because drying, cleaning, repainting, and dehumidifying may only provide temporary relief if the same moisture path remains active.
If several moisture issues are present at once, organize them by urgency. Active leaks, safety hazards, wet structural materials, contaminated water, and spreading moisture should come before cosmetic repairs. When the repair order is unclear, use a framework to prioritize moisture repairs before spending money on finishes that may fail again.
FAQ About How to Prevent Moisture Problems Across Your Entire Home
What is the best way to prevent moisture problems in a home?
The best way to prevent moisture problems is to control exterior water, catch leaks early, manage indoor humidity, improve ventilation, reduce condensation, protect basements and crawl spaces, and follow up after repairs. Moisture prevention works best as a whole-home system, not a single product or habit.
How do I keep moisture problems from coming back?
To keep moisture problems from coming back, correct the source, dry affected materials, improve the conditions that caused the moisture, and keep the area on a follow-up routine. If you only clean or repaint the surface, the problem may return when the same source becomes active again.
Can a dehumidifier prevent moisture damage?
A dehumidifier can help prevent humidity-related moisture damage, especially in basements, damp rooms, and high-humidity spaces. However, it cannot fix leaks, poor drainage, roof problems, plumbing failures, wet crawl spaces, or damp structural materials by itself.
What rooms need the most moisture prevention?
The highest-risk areas are rooms that add water, rooms below grade, rooms with poor airflow, and areas with hidden materials that dry slowly. Check bathrooms, kitchens, laundry rooms, basements, crawl spaces, attics, HVAC areas, closets, storage rooms, window areas, exterior doors, and past repair locations more often than low-risk rooms.
How often should I check my home for moisture risks?
Check high-risk interior areas monthly, do a broader exterior and structural check seasonally, and inspect after heavy rain, plumbing leaks, appliance cycles, roof repairs, humidity changes, or moisture-related repairs. Homes with basements, crawl spaces, high humidity, or previous water damage may need more frequent follow-up.
When does a moisture prevention issue need repair?
A prevention issue needs repair when moisture is active, recurring, spreading, affecting structural materials, causing visible mold-like growth, creating persistent musty odors, or returning after previous fixes. Prevention habits are helpful, but active sources and wet materials need correction.
Key Takeaways
- Whole-home moisture prevention works best when you control exterior water, indoor humidity, leaks, ventilation, condensation, and repaired areas together.
- Exterior drainage, gutters, downspouts, grading, roofs, windows, doors, siding, and foundation edges should be checked before water reaches hidden materials.
- Plumbing fixtures, appliances, HVAC condensate lines, basements, crawl spaces, closets, and storage areas need routine checks because moisture often starts quietly.
- Dehumidifiers, ventilation, and airflow help most when leaks, drainage failures, wet materials, and structural moisture sources are also corrected.
- Prevention is no longer enough when moisture is active, recurring, contaminated, near electrical systems, affecting structural materials, or returning after repairs.