How to Detect Moisture Behind Exterior Siding
Moisture behind exterior siding is hard to confirm because the wet materials are usually hidden behind siding, house wrap, sheathing, insulation, or drywall. Surface stains and warped panels can point you toward a problem, but they do not prove how far moisture has spread.
The best way to detect moisture behind siding is to combine visual inspection, moisture meter readings, interior wall checks, infrared scanning when available, and repeated testing after weather changes. One reading by itself is rarely enough.
If you have already noticed warning signs such as warped siding, staining, soft trim, or musty odors, review Signs of Water Damage Behind Siding first. This guide focuses on the next step: testing likely problem areas without removing siding unnecessarily.
For broader hidden-moisture testing by location, see How to Find Hidden Moisture in Different Areas of Your Home.
Why Moisture Behind Siding Is Difficult to Confirm
Detecting moisture behind siding is challenging because the materials that hold moisture are hidden beneath multiple protective layers. Most exterior wall systems are designed with overlapping components that allow water to drain outward, but when those systems fail, moisture can remain trapped inside.
Typical wall assemblies include:
- Exterior siding material
- Weather-resistant barrier such as house wrap
- Wood or engineered sheathing panels
- Wall framing and insulation
- Interior drywall surfaces
Water entering behind siding does not always travel directly downward. Instead, it may move sideways, follow framing members, or collect in small cavities where airflow is limited. This makes moisture difficult to detect from surface observations alone.
Another challenge involves delayed symptoms. In many cases, interior wall damage appears long after moisture has entered the exterior wall system. By the time stains appear indoors, moisture may have already weakened structural materials.
Understanding how water moves behind exterior wall assemblies helps improve detection accuracy. These moisture entry pathways are described in How Exterior Walls Allow Moisture Into Homes, which explains how water bypasses protective layers.
Because moisture spreads unevenly, reliable detection requires checking multiple locations rather than relying on a single measurement.
Start With Visual Detection Methods
The first step is not to prove moisture is present, but to choose the best places to test. Visual inspection helps identify high-risk areas where meter readings, infrared scanning, or interior wall checks are most likely to be useful.
Focus on locations where water can enter, slow down, or become trapped behind the siding system: openings, seams, corners, transitions, penetrations, and lower wall sections.
Check Areas Around Windows and Doors
Windows and doors are among the most common entry points for water behind siding. Flashing components installed around these openings are designed to direct water away from the wall, but when flashing fails, moisture can penetrate hidden wall cavities.
During visual inspection, pay attention to:
- Dark streaks beneath window trim
- Staining around door frames
- Caulking gaps between trim and siding
- Water marks forming along lower edges
These locations often serve as starting points for moisture migration behind siding panels.
Inspect Siding Seams and Panel Connections
Siding seams allow materials to expand and contract with temperature changes, but they can also become moisture entry points if improperly installed or damaged.
Focus visual checks on:
- Horizontal lap joints
- Vertical seams between panels
- Corner trim connections
- Transition points between siding materials
Look for small openings, misaligned joints, or areas where sealants have deteriorated. These conditions often allow water to enter behind siding during wind-driven rain.
Observe Drainage Patterns After Rainfall
One of the most effective visual detection methods involves observing how water behaves during or after rainfall. Watching water movement helps identify areas where moisture collects or fails to drain properly.
Important drainage observations include:
- Water pooling near wall bases
- Water streaks forming below trim
- Slow-drying sections of siding
- Repeated wetting in the same location
Consistent moisture patterns indicate areas that require further testing with detection tools.
Drainage failures often relate to moisture pathways that eventually cause long-term wall problems. These underlying causes are explained in Why Exterior Siding Develops Moisture Problems, which explores environmental and structural factors affecting siding performance.
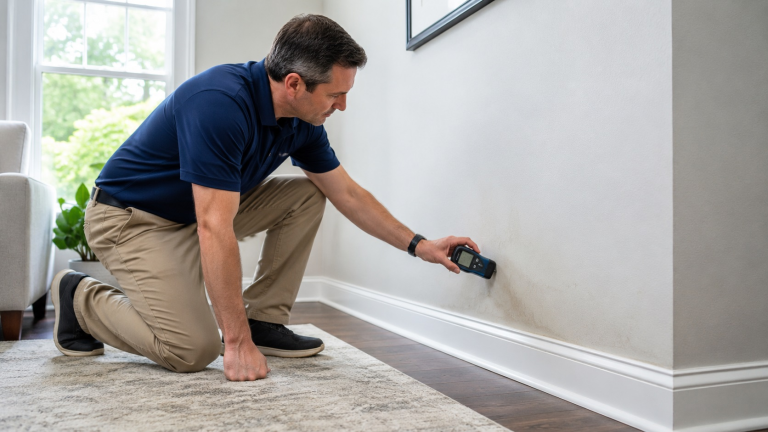
How to Use Moisture Meters on Exterior Walls
After visual inspection identifies possible problem areas, the next step in detecting moisture behind siding is using a moisture meter. These tools measure moisture levels inside materials and provide more reliable confirmation than visual observation alone.
Moisture meters are widely used in residential moisture detection because they allow testing without removing siding or damaging structural components. However, accurate results depend on selecting the correct meter type and using it in appropriate locations.
When used correctly, moisture meters help determine whether moisture is present, how widespread it may be, and whether further investigation is necessary.
Before testing suspected wet areas, take a few baseline readings on a similar dry wall section. Then compare the suspected area against that dry reference point instead of judging one number in isolation.
Understanding Pin-Type Moisture Meters
Pin-type moisture meters use two small metal probes to measure electrical resistance between points. Because water conducts electricity, increased moisture levels lower resistance, allowing the meter to calculate moisture content.
Pin meters are commonly used on:
- Wood trim around windows and doors
- Exposed wooden siding materials
- Accessible framing edges
- Interior drywall near exterior walls
These meters provide accurate readings in wood-based materials, making them especially useful when testing structural trim components that may reveal hidden moisture pathways.
When testing near siding, insert pins only into safe, accessible materials. Avoid puncturing areas where electrical wiring or hidden components may be present.
Understanding Pinless Moisture Meters
Pinless moisture meters detect moisture using electromagnetic signals rather than physical probes. These meters scan surfaces without leaving holes, making them useful for testing finished surfaces.
Pinless meters are commonly used on:
- Painted siding surfaces
- Fiber cement siding panels
- Interior drywall surfaces
- Large wall areas requiring quick scanning
Because pinless meters scan a broader area, they help identify patterns of moisture rather than isolated wet spots. This makes them useful for locating zones where additional testing may be required.
However, pinless meters can be affected by metal flashing, nails, foil-faced insulation, dense materials, surface moisture, and material changes behind the siding. Treat elevated readings as a pattern to investigate, not as final proof of hidden wall damage.
Safe Locations to Take Moisture Readings
Choosing proper testing locations improves the accuracy of moisture detection results. Moisture typically accumulates near structural transitions, where water entry is most likely.
Common testing locations include:
- Below windows and doors
- Near siding seams and joints
- At lower wall sections near foundations
- Around exterior penetrations such as vents
- Interior walls opposite exterior siding
Testing both interior and exterior surfaces improves reliability, but exterior readings through siding can be less dependable than readings taken on wood trim, exposed edges, or interior drywall. Interior readings help confirm whether moisture has moved beyond the siding layer into deeper wall components.
If multiple readings show elevated moisture in the same region, the likelihood of hidden wall damage increases.
For better accuracy, mark readings by location and height: below the opening, beside the opening, several inches away from the suspected area, and on a nearby dry reference wall. A moisture pattern is more useful than a single high reading.
How to Interpret Moisture Meter Readings
Interpreting moisture readings correctly is just as important as taking measurements. Many homeowners assume that any elevated reading confirms serious damage, but temporary moisture from rain or humidity can also influence results.
For wood trim, wood siding, sheathing edges, or accessible framing, typical moisture content ranges include:
- 0–12%: Usually dry for many interior or protected wood materials
- 12–16%: Elevated moisture levels
- 16–20%: Wet materials requiring attention
- Above 20%: High risk of decay or structural damage
To improve accuracy, take multiple readings across nearby locations. Consistent readings above normal levels indicate active moisture conditions rather than isolated surface dampness.
When moisture readings remain elevated across several days, it often signals ongoing water intrusion that requires further investigation.
Using Infrared Detection to Find Hidden Moisture
Infrared detection provides another method for identifying moisture behind siding. Unlike moisture meters, infrared tools do not measure moisture directly. Instead, they detect temperature differences that often indicate hidden moisture patterns.
Moisture cools surrounding materials due to evaporation. Infrared cameras capture these temperature differences and display them as visible patterns on the screen.
This method allows large wall areas to be scanned quickly without causing damage to surfaces.
How Infrared Detection Works
Infrared cameras measure surface temperature variations. Areas containing moisture often appear cooler than surrounding dry materials because evaporation removes heat from damp surfaces.
When scanning exterior walls, cooler zones may indicate:
- Moisture trapped behind siding
- Water intrusion near seams
- Damp sheathing materials
- Hidden moisture migration pathways
Infrared detection is particularly useful for identifying moisture patterns that would otherwise remain invisible during routine inspections.
Limitations of Infrared Moisture Detection
Although infrared scanning is useful, it cannot confirm moisture by itself. Temperature differences may also result from:
- Sun exposure variations
- Wind cooling effects
- Material changes behind the wall surface
- Missing, compressed, or uneven insulation
- Indoor temperature differences near exterior walls
Because of these limitations, infrared detection should always be combined with moisture meter testing or additional inspection methods.
Combining multiple detection techniques improves confidence in results and reduces the risk of false conclusions.
Interior Detection Methods Near Exterior Walls
Moisture behind siding often spreads inward over time, making interior inspection an important part of confirming hidden wall problems. In many cases, moisture appears on interior surfaces before exterior siding damage becomes obvious.
Checking interior walls helps determine whether moisture has moved beyond the outer siding layers into insulation, framing, or drywall.
Check Interior Walls Opposite Exterior Siding
Interior walls that face exterior siding are among the first locations where hidden moisture may become visible. Water traveling through wall layers often reaches drywall surfaces and creates visible changes.
Common interior inspection signs include:
- Yellow or brown staining on drywall
- Paint bubbling or peeling
- Swollen baseboards
- Soft drywall surfaces
- Cracks forming near window corners
These symptoms often indicate that moisture has moved through multiple wall layers. When interior damage appears, further testing is typically required to confirm the extent of moisture spread.
Interior moisture patterns often connect to larger wall system failures. These broader structural patterns are discussed in Signs of Moisture in Exterior Walls, which explains how moisture affects full wall assemblies.
Use Moisture Meters on Interior Drywall
Moisture meters can also be used on interior drywall surfaces to confirm hidden dampness. Interior testing often provides clearer readings than exterior testing because drywall absorbs moisture more visibly than siding materials.
When testing interior drywall:
- Measure near floor edges
- Test beneath windows
- Check around baseboards
- Scan areas with visible discoloration
Elevated readings on interior walls strongly suggest that moisture has traveled through structural materials and reached indoor surfaces.
Watch for Odor Changes During Inspection
Musty odors often serve as early indicators of hidden moisture. These odors result from microbial activity and mold growth inside wall cavities.
During interior detection, pay attention to:
- Earthy or damp smells near exterior walls
- Odors that intensify after rainfall
- Lingering smells that persist despite cleaning
- Localized odors confined to specific rooms
Odors alone cannot confirm moisture, but they help identify areas that require testing with moisture meters or further inspection.
If musty odors appear near siding-related moisture readings, treat them as a clue that the wall cavity may have stayed damp long enough for microbial growth. For odor and mold warning patterns specific to this area, see Signs of Mold Growth Behind Exterior Siding.
When Controlled Probe Testing Becomes Necessary
In some situations, surface testing methods cannot provide enough information to confirm moisture depth. When readings remain elevated or symptoms worsen, controlled probe testing may be required.
Probe testing involves creating small openings to measure moisture levels within deeper wall layers.
What Probe Testing Involves
Probe testing typically includes:
- Drilling small inspection holes
- Inserting moisture probes into wall cavities
- Measuring internal moisture levels
- Sealing test holes after measurement
This method allows inspectors to confirm whether moisture has reached structural components such as sheathing or framing.
Probe testing should be performed carefully because exterior walls can contain wiring, plumbing, foam, insulation, house wrap, flashing components, or structural sheathing. Do not drill blindly into wall cavities, especially near outlets, hose bibs, exterior lights, or mechanical penetrations.
When Probe Testing Is Recommended
Controlled probe testing becomes necessary when multiple detection methods indicate potential moisture problems but cannot confirm depth or severity.
Situations that may require probe testing include:
- Repeated high moisture readings across large areas
- Visible structural movement or wall softness
- Interior moisture that continues spreading
- Persistent moisture following repairs
Because probe testing involves structural penetration, many homeowners choose professional inspection services for this stage.
Timing Your Detection for Better Accuracy
Moisture readings behind siding can change depending on recent rain, sun exposure, wind, temperature, and humidity. Testing at the wrong time can make surface dampness look like hidden moisture or make a real problem appear less serious.
Testing After Rainfall
Rainfall often reveals hidden moisture pathways. After storms, water enters wall cavities through damaged flashing, seal failures, or siding gaps.
However, testing immediately after rainfall may produce misleading results because surface moisture can temporarily raise readings.
For best results:
- Allow several hours of drying time
- Test shaded areas first
- Compare readings across multiple locations
Repeated elevated readings after rainfall often indicate active water intrusion rather than temporary dampness.
Testing During Cooler Weather
Cooler temperatures slow evaporation, making moisture easier to detect. During cooler conditions, damp areas remain visible longer and produce more consistent readings.
Infrared detection also becomes more reliable when temperature differences are easier to observe.
Testing During Humid Conditions
High humidity reduces drying rates, allowing moisture to persist inside wall cavities. This increases the likelihood of detecting hidden dampness.
However, humidity can also influence readings, so testing should be repeated at different times to confirm consistent moisture levels.
Common Moisture Detection Mistakes to Avoid
Even with the right tools, detection mistakes can lead to incorrect conclusions about moisture behind siding. Many homeowners rely on a single reading or overlook environmental conditions that affect results. Avoiding common errors improves accuracy and helps prevent unnecessary repairs.
Relying on a Single Test Location
Moisture rarely spreads evenly through wall systems. It often travels along framing members or collects in isolated pockets. Testing only one location may miss nearby wet areas.
For reliable results:
- Take readings across multiple points
- Compare dry and suspected wet areas
- Repeat measurements after several hours
- Monitor readings over several days when possible
Multiple readings create a clearer moisture pattern and reduce the risk of overlooking hidden damage.
Testing Too Soon After Rain
Testing too soon after rain can confuse surface wetting with hidden moisture. Instead of relying on one post-storm reading, compare the same test points after surface drying and again over the next day or two.
Ignoring Environmental Factors
Environmental conditions can influence detection results. Heat from sunlight, strong winds, and humidity levels all affect surface temperature and moisture distribution.
Conditions that may distort readings include:
- Direct sunlight heating siding surfaces
- Wind cooling exposed areas
- High humidity affecting evaporation rates
- Temperature differences between shaded and exposed walls
Testing under stable environmental conditions improves consistency and reduces false interpretations.
When to Call a Professional Inspector
Some moisture problems exceed the scope of homeowner-level detection methods. Professional inspectors use specialized equipment and advanced techniques to confirm moisture presence and determine damage severity.
Professional evaluation is often recommended when:
- Moisture readings remain elevated over time
- Multiple detection methods confirm hidden moisture
- Structural movement or wall softness appears
- Musty odors or visible mold appear near the same wall area as elevated moisture readings
- Interior wall damage continues spreading
Professional inspectors may use advanced tools such as calibrated moisture meters, high-resolution infrared cameras, and controlled probe testing methods to evaluate wall conditions safely.
Once moisture is confirmed, the next step is to separate the source from the damage. Start with Why Exterior Siding Develops Moisture Problems to understand likely causes. If moisture keeps returning after basic corrections, see How to Fix Persistent Moisture Problems Behind Siding.
Frequently Asked Questions
Can moisture be detected without removing siding?
Yes, many detection methods allow moisture to be identified without removing siding. Visual inspection, moisture meter testing, and infrared scanning can often confirm moisture presence without structural damage.
However, if readings remain elevated or symptoms worsen, limited wall access may be required to confirm moisture depth.
Are moisture meters accurate through siding?
Moisture meters may detect elevated moisture through some siding materials, but results vary depending on siding type, thickness, fasteners, flashing, surface moisture, and the material behind the siding. Readings on wood trim, exposed edges, or interior drywall are often more reliable than readings taken directly through siding panels.
Testing interior surfaces often improves accuracy when exterior readings are uncertain.
Can infrared cameras detect moisture behind siding?
Infrared cameras detect temperature differences that may indicate moisture patterns. They do not measure moisture directly but help identify areas requiring further testing.
Infrared scanning is most effective when used alongside moisture meter readings.
How deep can moisture spread inside exterior walls?
Moisture can travel through multiple wall layers, including sheathing, framing, insulation, and drywall. The depth of spread depends on exposure duration, wall materials, and environmental conditions.
Early detection helps limit moisture penetration and reduces structural risk.
What moisture readings indicate serious problems?
Moisture content above 20 percent in wood materials generally indicates elevated risk for structural damage and decay. Persistent readings above this level across multiple days suggest ongoing water intrusion.
Repeated high readings should be investigated further to determine moisture sources and prevent long-term deterioration.
Key Takeaways
- Visual inspection is the first step in identifying areas likely to contain hidden moisture.
- Moisture meters provide reliable confirmation when used across multiple locations.
- Infrared detection helps identify temperature patterns associated with moisture.
- Interior wall testing often confirms deeper moisture spread.
- Repeated testing improves accuracy and reduces false readings.
- Persistent elevated readings usually indicate active water intrusion requiring further investigation.
Conclusion
Detecting moisture behind exterior siding works best when each clue is checked against the others. Start with vulnerable areas such as window trim, siding seams, penetrations, lower wall sections, and interior walls opposite the suspected exterior area.
If visual clues, meter readings, infrared patterns, odors, or interior wall symptoms point to the same location, hidden moisture becomes much more likely. Persistent elevated readings, soft materials, spreading stains, or musty odors after rain are signs that the wall may need professional inspection before damage spreads further.