How to Inspect Roof Areas for Leak Damage
Inspecting roof areas for leak damage means checking the parts of the roof most likely to let water in: shingles, flashing, valleys, roof penetrations, edges, eaves, and any soft or sagging surface areas. Small defects in these locations can let rain reach insulation, decking, framing, and ceiling materials before the leak becomes obvious indoors.
Many homeowners first realize there is a problem after noticing interior symptoms such as ceiling stains or damp odors. If you have already seen warning signs indoors, reviewing signs of roof leaks inside the house helps confirm whether roof-related moisture is likely. Once a leak is suspected, inspecting roof areas for visible damage becomes the next logical step.
This guide explains how to inspect roof areas safely, what visible damage signs to look for, and when to stop the inspection and call a professional. The goal is not to repair the roof during inspection, but to identify likely leak-prone areas before moisture spreads farther.
When Roof Inspection Is Necessary
Roof inspections are most useful after interior leak signs, severe weather, or visible roof aging. Many leaks begin as small defects before water damage appears indoors.
After Interior Leak Signs Appear
If ceiling stains, dripping water, or musty odors appear inside the home, a roof inspection should be performed as soon as conditions allow. Interior symptoms usually indicate that water has already entered the structure.
Even small stains matter because the visible spot may be smaller than the damp area above it.
After Severe Weather Events
Storms create some of the most common roof damage conditions. High winds, hail, heavy rain, and falling debris can weaken roofing materials and create leak entry points.
Roof inspections are especially important after:
- Strong windstorms
- Hail impacts
- Heavy rainfall events
- Falling tree branches
- Severe temperature changes
Damage caused by storms may not always be obvious from the ground, making periodic inspection necessary.
When Roof Materials Begin Aging
Roof materials naturally deteriorate over time. Asphalt shingles lose protective granules, sealants crack, and flashing may loosen as materials expand and contract with temperature changes.
Aging materials increase the likelihood of leaks, even without storm damage. Reviewing Most Common Roofing Material Failures helps explain why older roofing systems become more vulnerable to moisture intrusion.
Roof Inspection Safety Steps Before You Climb
Roof inspections involve working at heights and walking on potentially unstable surfaces. Safety preparation is essential before beginning any inspection.
Choose Safe Weather Conditions
Never inspect a roof when surfaces are wet, icy, or covered with debris. Wet roofing materials become extremely slippery and increase the risk of falls.
Ideal inspection conditions include:
- Dry weather
- Clear visibility
- Low wind speeds
- Stable footing conditions
Waiting for safe weather reduces the risk of accidents and allows for better visibility of damage.
Use Proper Ladder Placement
A stable ladder is critical for safe roof access. The ladder should be positioned on level ground and secured against movement.
Recommended ladder practices include:
- Extending the ladder at least 3 feet above the roof edge when accessing the roof
- Maintaining three points of contact when climbing
- Inspecting ladder condition before use
- Avoiding unstable or uneven surfaces
Improper ladder placement is one of the most common causes of inspection-related injuries. As a safety rule, extend the ladder at least 3 feet above the roof edge when using it to access the roof.
Wear Protective Equipment
Basic protective equipment improves safety and reduces injury risk. Recommended gear includes:
- Slip-resistant footwear
- Work gloves
- Eye protection
- Long sleeves to prevent abrasions
Protective equipment helps prevent minor injuries that can occur while moving across roofing materials.
Know When Not to Inspect the Roof Yourself
Some conditions make roof inspection unsafe for homeowners. If the roof is steep, wet, brittle, severely damaged, difficult to access, or near overhead electrical lines, inspect from the ground and call a professional instead.
If leaks continue after interior investigation, reviewing how to detect hidden roof leaks helps determine whether additional internal inspection methods are required before accessing roof surfaces.
How to Inspect Roof Shingles for Leak Damage
Shingles form the primary protective layer of most residential roofs. When shingles become damaged, cracked, or displaced, water can enter the roof system and begin spreading into underlying materials. Careful inspection of shingles is one of the most important steps in identifying potential leak sources.
Some shingle defects can be spotted from the ground with binoculars, but small cracks, lifted edges, and exposed fasteners usually require closer inspection or professional evaluation.
Look for Missing Shingles
Missing shingles create direct openings where water can enter the roof. This type of damage often occurs after high winds or falling debris.
Areas with missing shingles should be inspected immediately, especially if interior leak signs have appeared. Even a single missing shingle can allow enough moisture to damage insulation and roof decking.
Check for Curling or Lifting Edges
Shingles that curl upward or lift away from the roof surface are more vulnerable to wind and water intrusion. Curling often occurs as shingles age and lose flexibility.
Lifted edges allow wind-driven rain to enter beneath the shingle layer. Over time, this repeated water exposure weakens underlying materials.
Inspect for Cracked or Broken Shingles
Cracked shingles may allow water to penetrate even if they appear mostly intact. Cracks often develop due to temperature changes, aging materials, or impact damage.
Small cracks can widen after repeated heat, cold, and rain exposure, increasing the chance of water entry.
Look for Granule Loss
Granules protect shingles from ultraviolet exposure and weathering. When granules wear away, shingles become more vulnerable to cracking and moisture intrusion.
Signs of granule loss include:
- Bare patches on shingles
- Accumulation of granules in gutters
- Uneven color or texture on roof surfaces
Granule loss alone does not always mean immediate failure, but it signals that shingles may be nearing the end of their service life.
How to Inspect Roof Flashing for Leak Damage
Flashing protects vulnerable areas where roof surfaces meet vertical structures. These locations include chimneys, walls, dormers, and skylights. Flashing failure is one of the most common causes of roof leaks.
Because flashing joints experience movement from temperature changes, they are more likely to loosen over time.
Check Chimney Flashing Carefully
Chimneys create large openings through the roof structure. Flashing around chimneys must remain tightly sealed to prevent water entry.
Look for:
- Gaps between flashing and chimney surfaces
- Rust or corrosion on metal flashing
- Loose flashing sections
- Cracked sealant around joints
Even small gaps in chimney flashing can allow significant water intrusion during storms.
Inspect Step Flashing Along Walls
Step flashing protects areas where roof slopes meet vertical walls. This type of flashing is installed in overlapping sections that direct water away from the wall.
Signs of step flashing damage include:
- Lifted flashing edges
- Missing flashing pieces
- Visible rust or corrosion
- Water staining below wall intersections
Problems with step flashing often lead to leaks that affect interior wall and ceiling areas.
Look for Sealant Breakdown
Sealants around flashing joints degrade over time due to sun exposure and temperature fluctuations. Once sealant cracks or separates, water can enter beneath flashing components.
Sealant failure often appears as:
- Cracked or brittle sealant lines
- Separated edges
- Gaps forming around joints
Understanding why roof flashing failures cause leaks helps explain how minor flashing defects lead to recurring roof leaks.
How to Inspect Roof Valleys for Leak Damage
Roof valleys carry large volumes of water during rainfall. These areas are especially vulnerable to leaks because they handle concentrated water flow. Start by looking for debris lines, worn shingle edges, exposed underlayment, rusted metal valley sections, or stains that show water is not flowing evenly.
Damage in roof valleys often leads to persistent leak problems.
Look for Debris in Valley Areas
Leaves, branches, and other debris can accumulate in valleys, blocking proper water drainage. When water flow is restricted, moisture may back up beneath shingles.
If debris is present and the roof is unsafe to access, note the location and have it removed safely rather than walking on risky roof areas.
Check for Worn Valley Materials
Valley materials experience heavy wear due to constant water exposure. Over time, shingles in valley areas may thin, crack, or lose granules.
Look for:
- Exposed underlayment
- Cracked or worn shingles
- Rust or deterioration on metal valleys
These signs indicate increased vulnerability to water intrusion.
Inspect for Uneven Water Flow Patterns
Uneven staining or erosion patterns along valleys may indicate improper drainage. Water that pools or flows unevenly increases the risk of leaks.
Valley problems often lead to recurring leak issues that worsen over time.
How to Inspect Roof Penetrations for Leak Damage
Roof penetrations are among the most common sources of roof leaks because they create openings through the roofing surface. Each penetration relies on flashing, seals, and surrounding materials to keep water out. Over time, these protective elements can weaken or deteriorate.
Careful inspection of roof penetrations is essential, especially if leaks appear near bathrooms, kitchens, or mechanical areas where roof openings are common.
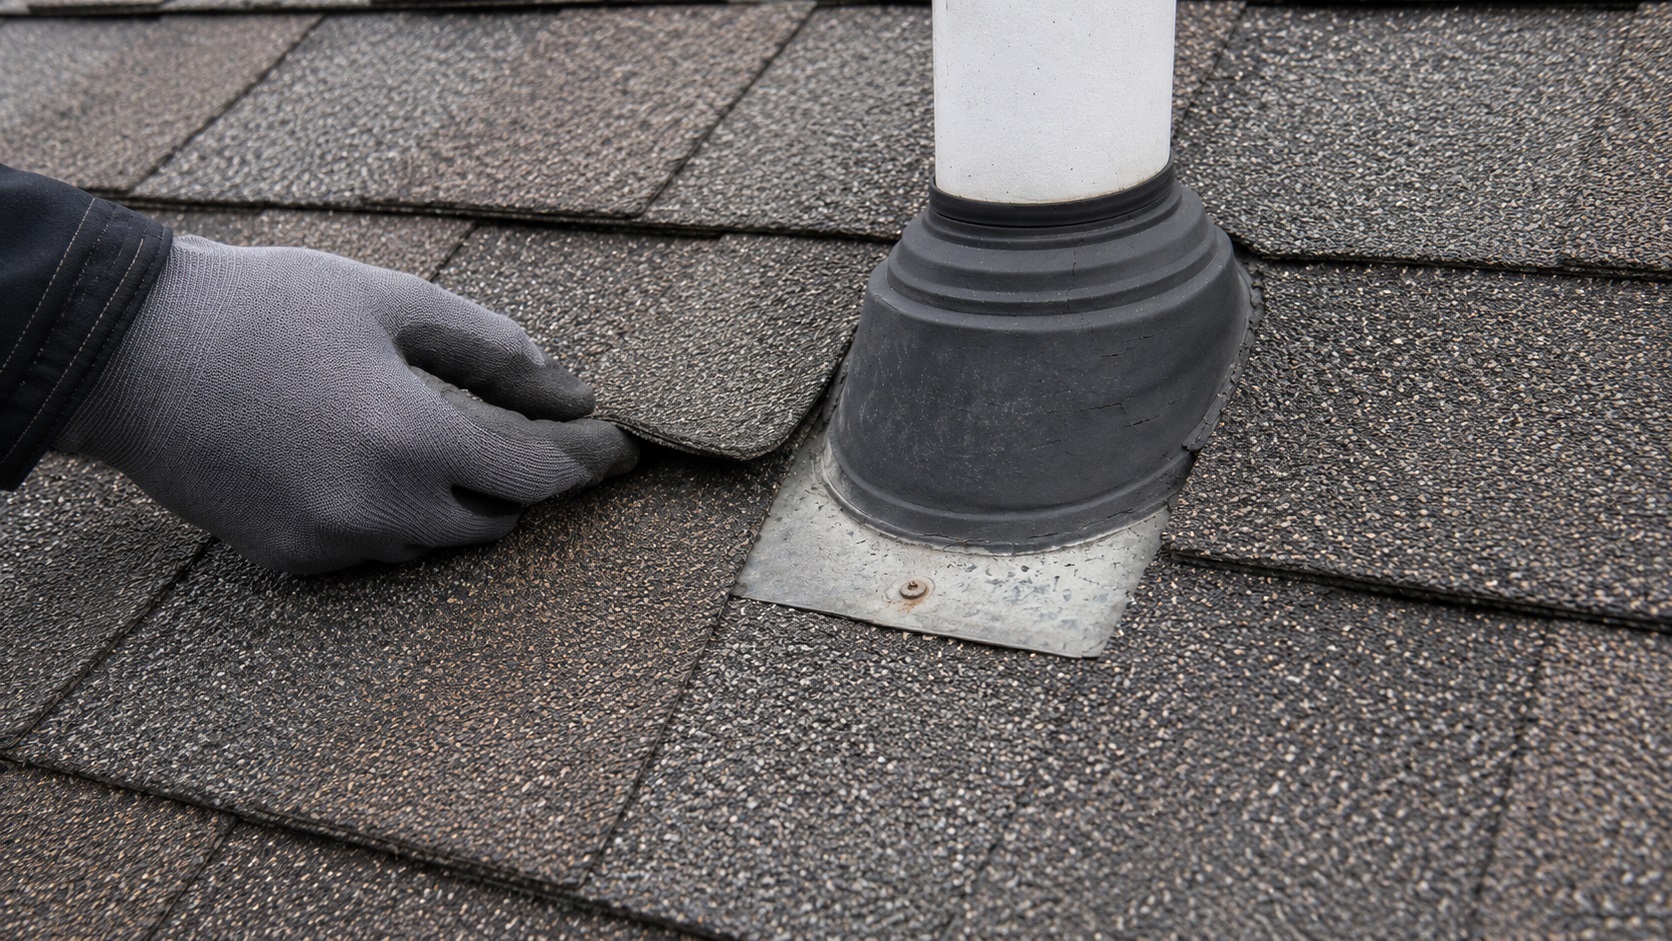
Inspect Vent Pipe Boots
Vent pipe boots seal the space around plumbing pipes that pass through the roof. These boots are often made of rubber or flexible materials that deteriorate over time due to sun exposure.
Signs of vent pipe boot failure include:
- Cracked or split rubber collars
- Loose flashing bases
- Gaps around pipe openings
- Water staining below vent areas
Even small cracks in pipe boots allow rainwater to enter the roof structure repeatedly.
Check Skylights and Roof Windows
Skylights introduce additional joints into the roof system. These joints require strong seals to prevent water from entering around the edges.
Inspect skylights for:
- Loose or damaged flashing
- Cracked sealant lines
- Water staining along skylight edges
- Condensation buildup inside frames
Skylight leaks often develop slowly and may produce stains that spread outward across nearby ceiling surfaces.
Inspect Chimney Penetrations
Chimneys create large roof openings that require complex flashing systems. If flashing around the chimney separates or corrodes, water can enter easily.
Look closely for:
- Rusting metal components
- Loose flashing sections
- Gaps between masonry and flashing
- Deteriorated sealant
Chimney flashing failures are among the most common causes of persistent roof leaks.
How to Inspect Roof Edges and Eaves
Roof edges and eaves are exposed to wind, water runoff, and debris accumulation. These areas often show early signs of deterioration, especially after storms.
Inspecting edges carefully helps identify damage that may not be visible from the center of the roof.
Check Drip Edges for Separation
Drip edges direct water away from fascia boards and roof edges. If drip edges become loose or separated, water may flow beneath roofing materials instead of off the roof.
Signs of drip edge problems include:
- Loose metal sections
- Visible gaps at roof edges
- Water stains along fascia boards
- Rust or corrosion
Loose drip edges often allow water to enter beneath shingles near roof edges.
Inspect Fascia Boards for Rot
Fascia boards support gutters and protect the roof edge. When water repeatedly contacts fascia boards, wood may begin to rot or weaken.
Signs of fascia damage include:
- Soft or spongy wood
- Peeling paint
- Dark discoloration
- Loose gutter attachments
Rotting fascia boards may indicate long-term moisture exposure from leaking roof components.
Look for Wind-Lift Damage Along Edges
Roof edges are vulnerable to wind uplift, especially during storms. Shingles along these areas may lift or loosen, allowing water to enter beneath them.
Lifted shingles should be inspected carefully, as they often indicate early failure of fastening systems.
How to Identify Structural Damage on Roof Surfaces
Structural damage to roof surfaces is more serious than surface-level wear. These conditions often indicate long-term moisture exposure or underlying support failure.
Identifying structural damage early helps prevent dangerous roof collapse or widespread interior damage.
Look for Soft or Spongy Areas
Soft areas on the roof surface often indicate deteriorated decking beneath the shingles. This condition usually develops after prolonged moisture exposure.
Do not step on suspected soft areas. Soft decking can collapse unexpectedly under weight, so these areas should be inspected from a safe distance or by a professional.
Check for Sagging Sections
Sagging roof sections may indicate weakened structural components or prolonged moisture damage. This condition should be treated as a serious safety concern.
Sagging areas should never be walked on. These sections may require immediate professional evaluation.
Inspect for Uneven Roof Lines
Uneven roof lines often indicate structural movement or support failure. Warped or distorted roof shapes suggest long-term moisture damage affecting underlying framing.
Structural distortion rarely develops suddenly. It usually results from prolonged water exposure.
If structural damage signs appear alongside interior damage, reviewing signs of water damage from roof leaks helps determine how far moisture has spread inside the structure.
When Professional Inspection Is Necessary
While many homeowners can perform basic roof inspections, some situations require professional evaluation. Roofing systems can hide complex damage that is not visible from the surface. Knowing when to stop a personal inspection and call a professional helps prevent injuries and reduces the risk of overlooked damage.
When Roof Damage Covers Large Areas
If damage appears across multiple sections of the roof, the problem may extend beyond isolated materials. Widespread granule loss, missing shingles, or multiple flashing failures often indicate aging roofing systems that require comprehensive repair.
Large areas of damage are difficult to assess accurately without experience. Professional roofers have the tools and knowledge needed to evaluate the full extent of deterioration.
When Roof Surfaces Feel Unsafe
Steep slopes, loose materials, or visibly unstable areas create dangerous walking conditions. If the roof surface feels unstable underfoot, back away carefully and stop the inspection immediately.
Attempting to inspect unsafe surfaces increases the risk of falls and injury. Professional inspectors use specialized equipment designed for working safely on steep or damaged roofs.
When Leaks Continue After Initial Inspection
If roof inspections fail to identify the source of moisture, the leak may be hidden beneath roofing layers or inside structural components. In these cases, advanced diagnostic methods may be required.
If the exterior inspection does not reveal the source, use how to detect hidden roof leaks for structured leak tracing before assuming the visible roof surface is the only problem.
When Structural Damage Is Suspected
Soft decking, sagging roof lines, or uneven surfaces suggest deeper structural problems. These conditions increase the risk of collapse or widespread water damage.
Professional evaluation becomes essential when structural damage is visible, especially if interior symptoms continue to worsen.
Common Roof Inspection Mistakes to Avoid
Even careful homeowners sometimes overlook important inspection details. Avoiding common mistakes improves inspection accuracy and prevents unnecessary repairs.
Focusing Only on Visible Damage
Some roof damage may not appear dramatic but still allows water entry. Small cracks, loose flashing, or minor sealant failures can cause significant moisture problems over time.
Inspecting all vulnerable areas—not just obvious damage—provides a more accurate understanding of roof condition.
Ignoring Drainage Problems
Blocked gutters or poor drainage can contribute to roof leaks. Water that cannot drain properly may back up beneath roofing materials.
During inspection, check gutters and downspouts for debris accumulation that could affect drainage patterns.
Attempting Repairs Without Proper Identification
Repairing roof areas without identifying the true source of the leak often results in temporary fixes. Water may continue entering through unnoticed defects.
Inspection should focus on identifying root causes before applying repairs.
Skipping Regular Inspections
Many homeowners only inspect roofs after visible damage occurs. Routine inspections help identify small problems before they develop into major leaks.
Regular inspection supports long-term prevention, but ongoing maintenance belongs more fully in how to prevent roof leak damage.
How Roof Leak Damage Progresses If It Is Missed
Missed roof damage usually progresses from small exterior defects to damp decking, insulation moisture, ceiling stains, and eventually hidden mold or structural deterioration. If mold risk is already a concern, why roof leaks cause mold growth explains that part of the problem in more detail.
Frequently Asked Questions About Inspecting Roof Areas for Leak Damage
How often should roof areas be inspected?
Most roofs should be inspected at least once per year and after major storms. Regular inspections help identify damage before leaks develop.
Can roof inspections be performed from the ground?
Some damage can be spotted from the ground using binoculars. However, close inspection of shingles and flashing usually requires roof access or professional assistance.
What damage signs should never be ignored?
Missing shingles, cracked flashing, sagging roof areas, and recurring interior leak symptoms should always be treated as serious concerns.
Should inspections be done after every storm?
After severe storms involving high winds or hail, inspection is recommended to identify possible damage before leaks occur.
What should I photograph during a roof leak inspection?
Photograph missing shingles, lifted edges, cracked flashing, pipe boots, valleys, roof edges, stains near penetrations, and any soft or sagging areas from a safe distance. Photos help compare changes over time and make professional evaluation easier.
What to Do After You Find Possible Roof Leak Damage
If you find missing shingles, lifted edges, cracked flashing, worn valleys, failed pipe boots, rotted fascia, soft decking, or sagging roof sections, treat the area as a possible leak source. Document what you see, avoid walking on unsafe sections, and schedule repair before the next heavy rain whenever possible.
If interior stains, damp odors, or recurring leaks continue after the exterior inspection, the leak may be hidden below the roof surface and should be evaluated more deeply.
Key Takeaways
- Roof inspections help identify leak damage before moisture spreads inside the structure.
- Shingles, flashing, valleys, and roof penetrations are the most common leak-prone areas.
- Soft decking and sagging roof sections indicate possible structural damage.
- Routine inspections after storms help prevent long-term moisture problems.
- Professional inspection is recommended when damage is widespread or structural risk is present.
2 Comments
Comments are closed.