How to Detect Slow Water Heater Leaks
Slow water heater leaks are hard to confirm because they may not show up as a steady drip or obvious puddle. You may wipe the floor dry, check again later, and find nothing. Then the damp spot returns after showers, laundry, dishwashing, or a heating cycle. That on-and-off pattern is the first clue that the leak may only appear under certain conditions.
The goal is not to guess immediately whether the tank has failed. The goal is to narrow down where the water first appears. A slow leak may come from the tank base, a drain valve, a pipe connection, a shutoff valve, a relief valve discharge pipe, an expansion tank connection, or another nearby moisture source. The puddle on the floor is only the final clue.
If you are still deciding whether the moisture you noticed is actually a warning sign, start with signs of water leaks around water heaters. This guide focuses on the next step: confirming whether a slow water heater leak is active and tracing the likely source.
Why Slow Water Heater Leaks Are Hard to Confirm
These leaks are hard to confirm because they often appear intermittently. A small connection leak may only drip when pressure changes. A valve may release a little water during certain operating conditions. A tank-base leak may start as a faint damp ring before it becomes a visible puddle. Water may also collect in the pan or evaporate from warm concrete before you see it spread.
The location of the visible water can also be misleading. Water follows gravity, pipe surfaces, tank jackets, floor slope, and small gaps. A leak near the top of the heater can run down the side and collect at the base. A discharge pipe may drip into the pan. A nearby pipe may leak and make the water heater look responsible.
This is why detection should focus on three things:
- Where the water appears first
- Whether the water returns after the area is dried
- Which component is wet before the floor becomes wet
A slow leak should be treated as both a plumbing issue and a moisture-control issue. Even a small leak can keep nearby flooring, trim, drywall, stored items, or framing damp if it continues long enough. For a broader explanation of how leak moisture affects surrounding materials, see how plumbing leaks cause structural damage.
Start by Drying and Clearing the Area
The first step is creating a clean inspection baseline. If old water is still on the floor or stored items are blocking the heater, it is difficult to tell whether new moisture is appearing.
Start by clearing the area around the water heater. Move cardboard boxes, paper goods, towels, tools, storage bins, cleaning supplies, and anything else that could hide or absorb moisture. If the heater is in a closet or tight utility space, open the area enough to see the floor, pan, fittings, valves, and nearby wall edges.
Next, dry visible water if it is safe to do so. Wipe the floor, the outside edge of the pan, and any nearby non-electrical surfaces where water has collected. If there is standing water near electrical components, wiring, or controls, do not touch the equipment. Call a qualified professional instead.
Do not remove access panels, touch wiring, or reach into control areas while trying to confirm a leak.
After the area is dry, take a photo of the heater, pan, and floor. This gives you a reference point. If water returns later, you can compare the new moisture pattern with the original condition instead of relying on memory.
A clean baseline should include:
- A dry floor around the heater
- A visible tank base and drain pan
- No boxes or stored items hiding the floor
- Clear access to valves and pipe connections
- A photo or note showing the starting condition
Do not cover the floor with rugs, towels, mats, or plastic to “catch” the water during this stage. Those materials can hide the leak pattern and trap moisture against the floor. If you need to monitor a possible drip, use a small piece of dry cardboard or paper towel in a controlled location where it does not block the heater, pan, drain, or airflow.
Once the area is clean and dry, you can begin tracing where the water appears first instead of simply wiping up the same puddle over and over.
Track Where the Water Appears First
After the area is dry, the most important question is not where the puddle ends up. It is where the water appears first. Water may collect at the lowest point on the floor even if the leak starts several inches above the tank or several feet away from the heater.
Check the water heater in stages. Look shortly after drying the area, then again after hot water use, after the tank has had time to reheat, and later in the day. If the heater only leaks under certain conditions, a single inspection may miss it.
Pay attention to these first-appearance clues:
- Water forming directly under the tank
- A damp ring returning around the base
- Water collecting first in the drain pan
- A bead of water forming at a pipe connection
- Moisture running down the tank jacket
- A drip from the drain valve
- Water appearing near the discharge pipe
- Moisture spreading from another nearby appliance or drain
If the floor is concrete, new moisture may look like a darker patch instead of a shiny puddle. If the floor is finished with vinyl, laminate, wood, or carpet, look at seams, edges, and baseboards. Water can move under the visible surface before it becomes obvious from above.
If the heater sits in a pan, check whether water appears inside the pan first, outside the pan first, or along only one edge of the pan.
A simple way to track the pattern is to mark the outer edge of a damp area with painter’s tape or take a photo from the same angle each time. If the wet area expands, returns, or changes direction, the leak is active. If it only appears after hot water use, that timing is also useful information.
Check the Tank Base for Slow Leaks
The tank base is one of the most important areas to inspect because water appearing from beneath the heater can be more serious than a small drip from a fitting above. A leaking tank is not the same as a loose valve or damp pipe connection.
Look closely around the lower edge of the tank. Use a flashlight if the area is dark. Watch for water emerging from under the metal jacket, a damp ring that reforms after drying, rust staining at the bottom rim, or moisture that appears without any wet fitting above it.
Signs that may point toward the tank base include:
- Water appearing evenly around the bottom of the heater
- A damp ring that returns after the floor is dried
- Rust or corrosion near the lower tank edge
- Water forming under the tank with no visible drip above
- Moisture that increases after the tank reheats
- Water collecting in the pan directly under the tank
Do not assume every base puddle means the tank has failed. Water from a top connection, side valve, or discharge pipe can run down and collect at the bottom. The key is whether the base is the first wet area or simply where water collects after traveling from somewhere else.
If water truly appears to be coming from beneath the tank, treat it as a higher-priority leak sign. Tank-related leaks usually require professional evaluation. This article can help you identify the likely source, but it should not be used as a tank repair guide.
Check Pipe Connections and Shutoff Valves
Many slow water heater leaks begin at pipe connections rather than inside the tank. The cold-water inlet, hot-water outlet, shutoff valve, flexible connectors, unions, threaded fittings, and expansion tank connection can all release small amounts of water. These leaks may run down the heater and make the base look suspicious.
Start at the top of the heater and work downward. Use a flashlight to look around each connection. Do not only look for dripping water. Also look for corrosion, mineral buildup, wet insulation, green or white crust, staining, or a single bead of water forming under a joint.
Common connection leak clues include:
- A wet spot beneath the cold-water inlet
- Moisture around the hot-water outlet
- Corrosion at threaded fittings
- Water forming around a shutoff valve stem
- Wet flexible supply connectors
- Mineral buildup where water has dried repeatedly
- Damp pipe insulation near the heater
- Water trails running down the tank jacket
Use a dry paper towel to check around fittings if the leak is very small. Lightly touch the towel below the connection and see whether it picks up moisture. Do not force, loosen, tighten, or disassemble the fitting while checking. The goal is to identify the source, not to perform a repair.
If the connection is wet and the floor below it is also wet, the leak may be starting higher than the puddle suggests. That kind of source tracing is especially important in tight mechanical rooms and utility closets where water can run along surfaces before spreading across the floor.
When connected plumbing is part of the problem, the issue may fit into a broader plumbing leak pattern rather than only a water heater issue. For wider leak-tracing context, see how to detect slow plumbing leaks.
Check the Drain Valve
The drain valve is located near the lower part of the water heater. Because it sits close to the floor, a small drain valve leak can easily be mistaken for a tank-bottom leak. The water may drip directly into the pan, run down the lower tank area, or collect at the base before you notice where it started.
Look at the valve outlet, the area around the valve body, and the floor or pan directly below it. A slow leak may appear as a single drop, a damp valve cap, mineral crust around the outlet, or a wet streak below the valve.
Drain valve leak clues include:
- A drop forming at the end of the drain valve
- Water directly below the valve outlet
- Crusty mineral buildup around the valve
- A wet cap or hose-thread area
- Rust staining below the lower valve
- Moisture that returns after the valve area is dried
Do not assume a damp lower tank area always means the tank itself is leaking. If the drain valve is wet first and the water then spreads along the pan or floor, the valve may be the source. At the same time, do not try to force the valve open or closed if it appears old, corroded, or brittle. The purpose of this inspection is source detection, not repair.
Check the Temperature and Pressure Relief Valve Discharge Pipe
The temperature and pressure relief valve, often called the T&P valve, is a safety component. It is designed to discharge water if temperature or pressure conditions require relief. Because of that, water from the discharge pipe should be treated differently from an ordinary fitting drip.
The discharge pipe usually runs downward from the relief valve toward the floor, pan, or another safe discharge location. If the end of that pipe is wet, dripping, or leaving stains, the water may not be coming from the tank base at all. It may be discharge from the relief valve.
Look for these signs:
- Water dripping from the end of the discharge pipe
- Mineral deposits below the discharge pipe
- Water stains where the pipe terminates
- Recurring wetness in the pan below the discharge pipe
- Moisture that appears after heating cycles
- Discharge that changes from occasional dripping to steady flow
Do not plug, cap, block, or redirect the discharge pipe. Repeated dripping or steady flow from this pipe can point to pressure, temperature, thermal expansion, or valve issues that need proper evaluation. If the relief valve discharge is recurring, call a qualified plumber rather than treating it as a normal nuisance drip.
If you want to understand why water heater leaks develop in the first place, including corrosion, pressure stress, worn valves, and aging connections, see why water heaters develop hidden leaks.
Use Simple Tools to Confirm the Pattern
You do not need complicated equipment to begin detecting a slow water heater leak. Simple observation tools can make small moisture patterns easier to see. The key is to use them safely and avoid blocking the heater, pan, drain, or relief valve discharge path.
Use dry paper towels around fittings
A dry paper towel can reveal tiny drips that are hard to see. Lightly touch the towel under a pipe connection, valve, or fitting. If it comes away damp, that area may be leaking. You can also place a small piece below a suspected drip point, as long as it does not interfere with safe operation or airflow.
Use cardboard on the floor
Dry cardboard can help show where water lands first, especially on concrete where dampness may be difficult to see. Place a small piece near the suspected drip area, not under components that need clearance and not where it blocks the pan or drain. New spots on the cardboard can reveal the direction and timing of the leak.
Take photos over time
Photos are useful when the leak is intermittent. Take one photo after drying the area, then another after hot water use, after the tank reheats, or the next morning. Comparing photos can show whether stains, puddles, or damp areas are expanding.
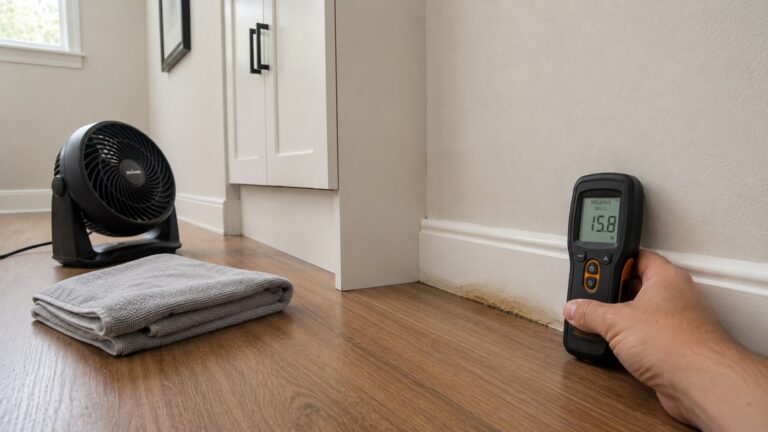
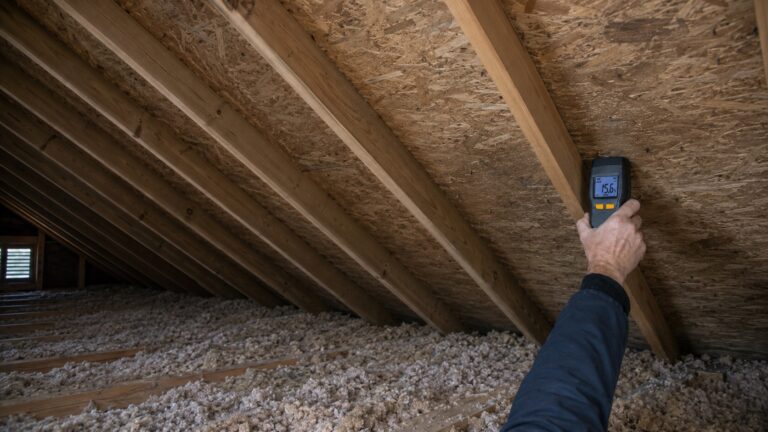
Use a moisture meter on nearby materials
A moisture meter can help check nearby baseboards, drywall, trim, wood flooring, or subfloor edges if water has moved beyond the heater area. It cannot tell you whether the inside of the tank is failing, but it can help you find out whether surrounding materials are staying damp.
If you plan to check nearby materials regularly, see best moisture meters for hidden water damage for tool options that fit homeowner inspection work.
Use a leak sensor for ongoing monitoring
A water leak sensor can help monitor the pan or floor after you dry the area. This is especially useful when the heater is in a finished basement, laundry room, garage corner, utility closet, or area you do not check every day. Place the sensor where water would likely appear first, such as near the pan edge or beside the tank base, while keeping it clear of heat, wiring, and moving parts.
For monitoring options, see best water leak sensors for early detection.
Monitor After Hot Water Use
Slow water heater leaks may not show up at random. They may appear after the heater works harder, after pressure changes, or after the tank reheats. That is why timing matters.
After drying the area, check it again after common hot-water events:
- After showers or baths
- After laundry cycles
- After running the dishwasher
- After several people use hot water
- After the tank has had time to reheat
- The next morning after overnight recovery
If water appears only after these events, write down the timing. A leak that shows up after hot water use may point to pressure changes, valve discharge, fittings, or tank operation. A leak that appears overnight may be slow enough that it only becomes visible after several hours.
Keep the monitoring period practical. If water returns repeatedly, spreads, or appears near electrical components, stop watching and get the source addressed. At that point, the pattern has already shown that moisture is active.
Separate Water Heater Leaks From Nearby Moisture Sources
One of the most important parts of detecting a slow water heater leak is ruling out nearby moisture sources. Water near the heater does not always come from the heater. It may collect there because the floor slopes toward the tank, because a nearby pipe is leaking, or because another system is draining or dripping in the same area.
Before deciding that the water heater is the source, look around the entire utility area. Check nearby appliances, drains, pipes, and walls. In basements, garages, and utility rooms, several systems may share the same floor area.
Common sources that can mimic a water heater leak include:
- HVAC condensate lines or pumps
- Condensation on cold water pipes
- A leaking washing machine hose
- A utility sink drain or supply leak
- A water softener discharge line
- A nearby floor drain backing up
- Basement seepage after rain
- Condensation in a humid mechanical room
- Overhead plumbing leaks that drip near the heater
Look above and around the water heater, not just at the floor. A pipe leak overhead can drip onto the tank or pan. A nearby condensate line can create water that appears to come from the heater. A floor drain issue can send water toward the heater from below rather than from the heater outward.
If more than one plumbing fixture or appliance is nearby, broader leak detection may be needed. In that case, the process in how to detect slow plumbing leaks can help you compare the water heater area with other possible sources.
When Slow Leak Detection Means You Should Call a Plumber
Some slow leak patterns can be observed briefly, but others should move quickly to professional evaluation. The purpose of detection is not to delay repairs. It is to understand the pattern well enough to respond appropriately.
Call a plumber if you notice:
- Water appearing from beneath the tank
- Water that returns every time the area is dried
- Steady dripping from a valve, fitting, or discharge pipe
- Recurring water in the drain pan
- Water from the temperature and pressure relief valve discharge pipe
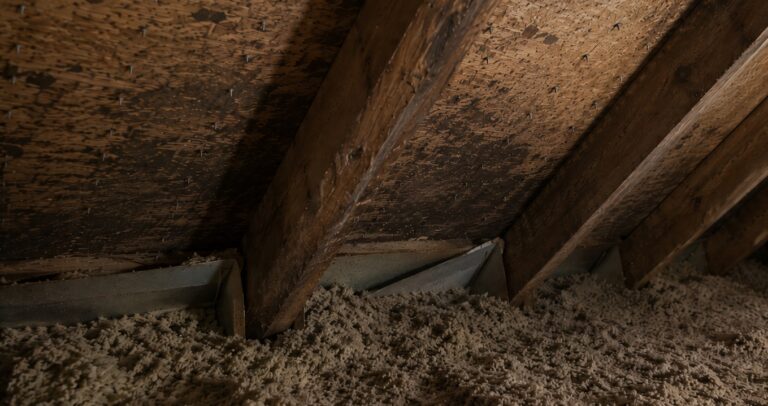
- Severe rust or corrosion around the heater
- Wet electrical components, wiring, or controls
- Any gas odor near a gas water heater, which should be treated as an urgent safety issue
- Water spreading into finished flooring, drywall, or baseboards
Tank-base leaks, recurring relief valve discharge, and leaks near electrical or gas components should not be treated as routine DIY issues. If water is spreading or the leak is increasing, stop monitoring and get the system evaluated.
Once a leak has been confirmed, the next step is preventing additional damage around the heater. That may include better monitoring, safer storage practices, leak alarms, a properly draining pan, and regular inspections. For that next stage, see how to prevent water heater leak damage.
What to Do if the Leak Has Reached Flooring
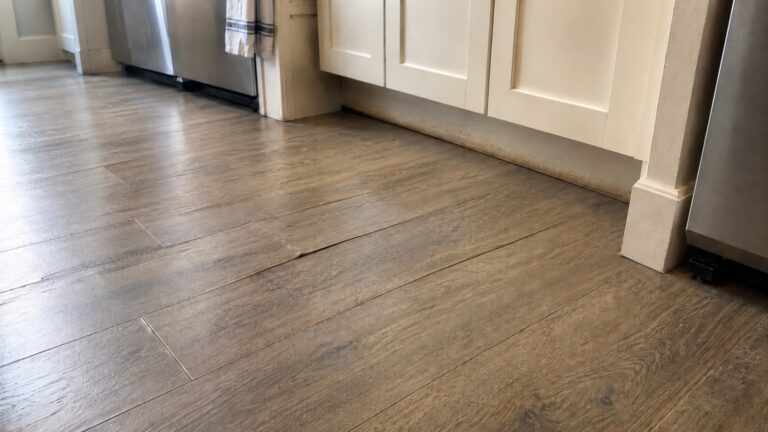
If a slow water heater leak has reached finished flooring, baseboards, drywall, or subfloor materials, source detection is only part of the job. The affected materials may need to be dried after the leak is controlled. Wiping the visible surface may not remove moisture trapped under flooring edges or behind trim.
Watch for swelling, soft spots, lifting flooring seams, damp baseboards, musty odor, or discoloration near the heater. These signs suggest the leak has affected surrounding materials, not just the heater area. If the moisture has moved beyond concrete or the pan, drying should be handled promptly.
For the recovery stage after a water heater leak, see how to dry floors after water heater leaks.
FAQ: How to Detect Slow Water Heater Leaks
How can I tell where my water heater is leaking from?
Dry the area first, then watch where water appears before it spreads. Check above the puddle, including the pipe connections, shutoff valve, drain valve, relief valve discharge pipe, pan, and tank base. The first wet component is more useful than the final puddle location.
Can a water heater leak only when it is heating?
Yes. Some slow leaks appear during heating cycles, pressure changes, or after heavy hot water use. That is why it helps to check the heater after showers, laundry, dishwashing, and reheating periods.
How do I know if the tank itself is leaking?
A tank leak is more likely if water appears from beneath the heater, forms a damp ring at the base with no wet fittings above it, or is paired with rust and corrosion near the lower tank. However, water can travel from other parts of the system, so the source should be confirmed before assuming the tank has failed.
Does water in the pan prove the tank is leaking?
No. Water in the pan confirms that water is entering the pan, but it does not prove the tank itself is leaking. It may come from the tank, a valve, a fitting, the discharge pipe, or another source above the pan.
Can condensation look like a water heater leak?
Yes. Condensation on cold pipes, nearby HVAC equipment, or humid utility spaces can sometimes create moisture near the heater. However, recurring water, pan water, rust, or dripping from heater components should still be investigated.
Should I use a moisture meter near a water heater?
A moisture meter can be useful for checking nearby baseboards, drywall, trim, wood flooring, or subfloor edges if the area has been wet. It cannot diagnose the inside of the tank, but it can help show whether surrounding materials are staying damp.
When should I stop monitoring and call a plumber?
Call a plumber when water returns repeatedly, appears from beneath the tank, comes from the relief valve discharge pipe, spreads into finished materials, appears near electrical components, or is paired with severe rust, corrosion, or gas odor.
Final Check Before You Decide What to Do Next
Detecting a slow water heater leak is about pattern and source. A puddle near the base is only one clue. Before deciding what to do next, confirm whether the first wet area is the tank base, a pipe connection, a valve, the discharge pipe, the pan, or another nearby moisture source.
Do not ignore moisture that returns after drying. Once you know the likely source, you can move from guessing to the right next step: professional evaluation, damage prevention, or drying affected materials.
Key Takeaways
- Start with a dry, clear inspection area so new moisture is easier to identify.
- Look above the puddle because water often travels before collecting at the base.
- Tank-base moisture is more concerning when no fittings above it are wet.
- Drain valves, shutoff valves, pipe connections, and expansion tank fittings can all cause slow leaks.
- Water from the temperature and pressure relief valve discharge pipe should never be blocked or ignored.
- Paper towels, cardboard, photos, leak sensors, and moisture meters can help reveal slow leak patterns.
- If water returns repeatedly or spreads into finished materials, stop monitoring and get the source addressed.