How to Dry Floors After Water Heater Leaks
A water heater leak can wet the floor faster than many homeowners expect. Water may spread across concrete, collect under vinyl or laminate flooring, soak carpet pad, wick into baseboards, or move behind nearby trim before the leak looks serious. Even after the visible puddle is gone, moisture may remain under flooring edges or inside nearby materials.
To dry floors after a water heater leak, stop or control the source first, remove standing water, clear wet storage, move air across the affected floor, lower humidity, and check flooring edges, baseboards, drywall, and subfloor areas before assuming the space is dry.
This guide focuses on localized drying after a water heater leak. If you are still trying to identify whether the water came from the heater, start with how to detect slow water heater leaks. If you want to reduce the chance of repeat damage after cleanup, see how to prevent water heater leak damage.
Act Quickly After a Water Heater Leak
The first priority after a water heater leak is to act quickly and safely. Water that sits on flooring or stays trapped under edges can lead to swelling, odor, staining, material breakdown, and mold risk. The faster you remove standing water and begin drying, the better chance you have of limiting damage.
Start by looking at the situation before touching anything. If water is near electrical components, wiring, outlets, controls, or gas equipment, do not stand in the water or handle the heater. A leak around a water heater can involve plumbing, gas, scalding water, and electrical risks, so unsafe conditions should be handled by qualified professionals.
If the area is safe to approach, begin with these first steps:
- Stop or control the water source if you can do so safely
- Move dry belongings away from the wet area
- Remove soaked cardboard, fabric, rugs, or storage items
- Use towels or a wet/dry vacuum for standing water if conditions are safe
- Open doors to improve airflow around the heater area
- Take photos before and during cleanup for reference
- Watch where water may have moved under flooring edges or baseboards
Do not cover the wet area with rugs, plastic, storage bins, or mats. Covering the floor can trap moisture and make drying slower. A floor that looks cleaner after surface wiping may still be wet underneath if water has moved into seams, cracks, trim edges, or carpet pad.
Water heater leaks are part of a broader recurring moisture risk in homes. The parent guide to preventing recurring moisture damage explains why quick response and follow-up monitoring matter after any leak event.
Confirm the Leak Source Is Stopped Before Full Drying
Drying will not work if the water heater is still adding new water to the floor. Fans, towels, and dehumidifiers can reduce visible moisture, but they cannot solve an active leak. Before you focus on full drying, make sure the leak source is stopped, controlled, or being handled by a plumber.
Look for recurring water at the tank base, drain valve, pipe connections, drain pan, or temperature and pressure relief valve discharge pipe. If water keeps returning after you dry the area, the source is still active. In that case, continue treating it as a leak problem, not just a drying problem.
Signs the source may not be stopped include:
- New water appears after the floor is wiped dry
- The drain pan continues to collect water
- A valve or fitting is still dripping
- Water appears again after hot water use
- The damp area grows instead of shrinking
- The floor dries and then becomes wet again later
If the leak source is unclear, do not guess based only on where the puddle collected. Water can run down from a pipe connection, discharge pipe, drain valve, or nearby plumbing before spreading across the floor. Source confirmation should come before deep drying or floor repair.
If you are unsure what warning signs you missed before the leak reached the floor, review signs of water leaks around water heaters. Those early signs can help you recognize future problems before they reach nearby flooring.
Once the water source is stopped or controlled, the drying process can shift from emergency cleanup to moisture removal. That means removing standing water, exposing wet edges, using airflow, reducing humidity, and checking materials that may still be damp below the surface.
Remove Standing Water and Wet Storage
After the leak source is stopped or controlled, remove standing water as quickly as you can safely do so. Standing water continues to soak into flooring edges, trim, wall materials, cardboard, rugs, and stored items. The longer it remains, the harder the area may be to dry completely.
For small amounts of clean water on a hard surface, towels may be enough for the first pass. For larger puddles, a wet/dry vacuum can remove water faster if it is safe to use in that area. Do not use household vacuums for water, and do not use electrical equipment while standing in water, near unsafe wiring, or close to active gas or electrical controls.
Remove wet storage from the area instead of leaving it to dry beside the heater. Cardboard boxes, paper goods, fabrics, rugs, wood scraps, and stored belongings can hold moisture against the floor and hide whether water is still spreading. Move salvageable items to a dry location where they can be inspected separately.
Prioritize removing:
- Wet cardboard boxes
- Rugs, mats, towels, or fabric storage
- Paper goods or cleaning supplies in paper packaging
- Wood items sitting directly on the floor
- Storage bins that trapped water underneath
- Items blocking the water heater pan or drain line
- Anything touching damp baseboards or drywall
Once the standing water and wet storage are removed, keep the area open. Do not put items back until the floor, baseboards, and nearby materials are dry. If storage contributed to hidden moisture, change the storage layout before using the area again.
Dry Concrete Floors Around the Heater
Concrete is common under water heaters in garages, basements, and utility rooms. It may tolerate short-term water better than wood or laminate, but that does not mean it should be ignored. Concrete can darken when damp, hold moisture in surface pores, and allow water to move into cracks, wall edges, or nearby finished materials.
Start by removing all visible standing water. Then use airflow to move air across the damp concrete surface. If the area is enclosed, a dehumidifier can help pull moisture from the air as the floor releases it. Keep doors open if that improves airflow, but avoid pushing humid air into finished rooms without a way to remove that moisture.
Concrete drying concerns include:
- Dark areas that remain after surface water is removed
- Water sitting in low spots or cracks
- Moisture near the wall-floor joint
- Dampness under the water heater pan
- Moisture trapped beneath storage bins or mats
- Water moving toward nearby finished flooring
A stain may remain after concrete dries, so color alone is not a reliable drying indicator. Check whether the concrete still feels damp, water keeps appearing, humidity remains high, or nearby materials are still absorbing moisture.
If the concrete is in a basement or utility room with recurring moisture problems, drying the water heater leak may be only one part of a larger moisture-control issue. In those cases, use the sitewide guide to finding, fixing, and preventing moisture problems in homes to evaluate whether other moisture sources are contributing.
Dry Tile and Grout Near the Heater
Tile floors often look easy to dry because the tile surface itself does not absorb water the way carpet or wood does. The hidden risk is usually at the grout lines, floor edges, baseboards, wall transitions, and any cracks where water can move below the surface.
After a water heater leak on tile, remove standing water from the surface first. Then focus airflow across the grout lines and perimeter edges. If the water reached the wall or trim, do not assume the tile surface is the only wet area. Baseboards, drywall, and underlayment may still hold moisture.
Check tile areas for:
- Damp grout lines near the water heater
- Water trapped at the wall-floor joint
- Moisture under nearby baseboards
- Loose or cracked grout
- Water spreading under a transition strip
- Musty odor near the floor edge
If tile is installed over a wood subfloor, hidden moisture matters more than the surface appearance. Water can travel through grout cracks, under trim, or around penetrations and affect the layers below. If the floor continues to smell musty or the surrounding trim remains damp, the drying process is not finished.
Tile over concrete may be less vulnerable than tile over wood, but it can still hide water at edges and transitions. Keep airflow moving across the floor and use dehumidification in enclosed rooms until the area stays dry without recurring dampness.
Dry Vinyl, Laminate, and Wood Flooring Carefully
Vinyl, laminate, and wood flooring need careful attention after a water heater leak because water can move below the visible surface. Even if the top looks dry, moisture may be trapped at seams, under plank edges, below transition strips, behind baseboards, or in the subfloor.
Vinyl plank and sheet vinyl can slow evaporation when water gets underneath. Laminate can swell at the edges when water enters seams. Wood and engineered wood can cup, crown, darken, or separate if moisture remains too long. These materials should not be judged only by how the surface feels after wiping.
After removing standing water, look closely for:
- Raised or swollen plank edges
- Gaps opening between boards
- Cupping or crowning in wood flooring
- Soft spots near the water heater
- Water under transition strips
- Dampness along baseboards
- Musty odor near flooring seams
- Moisture that returns after the surface is dried
Use airflow across the flooring surface and along the edges. If possible, remove rugs, mats, storage bins, and anything else that traps moisture against the floor. In a small water heater closet or laundry room, a dehumidifier can help pull moisture from the air as the flooring releases it.
Do not seal wet flooring under plastic or cover it with rugs to make the room look usable again. That traps moisture and can make hidden damage worse. If water has gone under floating floors, laminate, engineered wood, or vinyl plank, the floor may need professional evaluation or partial removal so the subfloor can dry.
A moisture meter can help check whether nearby wood trim, baseboards, or subfloor-accessible areas are still damp. For tool options, see best moisture meters for hidden water damage.
Dry Carpet Near a Water Heater Leak
Carpet is one of the harder floor materials to dry after a water heater leak because the surface and pad behave differently. The carpet face may start to feel dry while the pad underneath remains wet. If the pad stays damp, odor and mold risk increase, and moisture can continue affecting the subfloor below.
If the leak is small, clean, and caught quickly, surface extraction and airflow may help. But if the carpet pad is wet, the leak lasted more than a short time, or the area smells musty, surface drying is usually not enough. Carpet pad often needs lifting, drying, or replacement depending on the amount of water and how long it remained wet.
Carpet warning signs include:
- The carpet feels damp after surface drying
- The pad feels squishy or wet underneath
- Water reached the wall or baseboard edge
- A musty smell remains
- Carpet backing separates or wrinkles
- The subfloor feels soft underfoot
- The leak was not discovered quickly
Do not assume carpet is dry because the top no longer feels soaked. Press near the water heater, at the wall edge, and around the damp area. If water comes up, the pad is still wet. If the carpet is in a finished room, laundry area, basement, or utility closet, the surrounding baseboards and drywall edges should also be checked.
Professional drying is often the safer choice when carpet pad is wet. Restoration equipment can extract water, lift carpet when needed, move air under the carpet, and monitor whether the subfloor is actually drying.
Check Baseboards, Drywall Edges, and Subfloor
After a water heater leak, the floor is not the only area that may need drying. Water can travel horizontally along the floor and then wick upward into baseboards, drywall edges, trim, cabinet sides, door casing, or nearby framing. These materials can stay damp after the visible floor surface looks normal.
Baseboards are common moisture traps because water can slip behind them and stay there with limited airflow. Drywall can wick water upward from the bottom edge. Subfloor materials can hold moisture under finished flooring, especially near seams, penetrations, and wall edges.
Check nearby materials for:
- Swollen or separating baseboards
- Paint bubbling near the floor
- Soft drywall at the lower edge
- Dark staining along trim
- Musty odor near wall-floor joints
- Flooring that feels soft or uneven
- Moisture readings that stay elevated
- Water marks behind stored items
If baseboards or drywall are damp, airflow across the floor alone may not be enough. Trim may need to be loosened or removed by someone qualified to expose trapped moisture. If the subfloor is wet, drying may require more than surface fans.
If subfloor moisture appears to be the main concern, use how to dry subfloors after water damage for the fuller subfloor-specific drying process.
The longer water remains in these hidden areas, the higher the risk of odor, staining, material deterioration, and mold growth. If the leak lasted long enough to reach walls, subflooring, or carpet pad, consider whether the project has moved beyond basic DIY drying.
Use Airflow and Dehumidification the Right Way
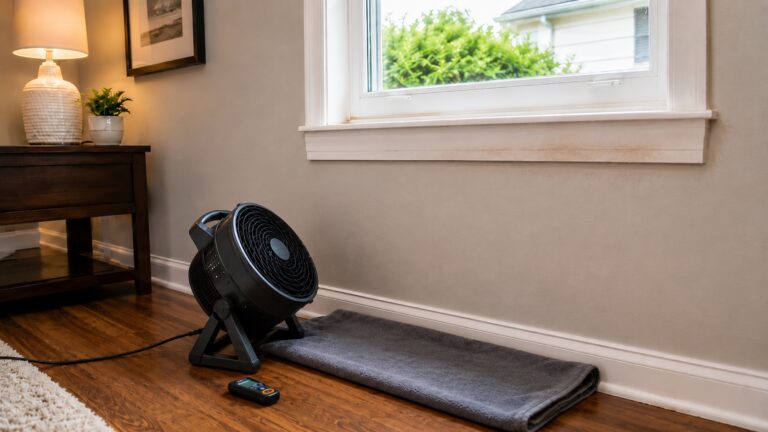
Airflow and dehumidification work together after a water heater leak. Fans move moisture off wet surfaces, while dehumidifiers remove that moisture from the air so the room does not stay humid. This matters most in small closets, basements, laundry rooms, and enclosed utility areas.
Set fans so air moves across the wet floor, along wall-floor edges, and around the water heater area without blowing directly into unsafe electrical or gas components. Open closet doors and move storage so air can reach damp surfaces. If the room is enclosed or humidity feels high, run a dehumidifier to remove moisture from the air.
Good drying conditions include:
- Air moving across the wet floor surface
- Air reaching baseboards and flooring edges
- A dehumidifier running in enclosed or humid spaces
- Wet rugs, mats, boxes, and storage removed from the area
- Closet doors or utility room doors opened when safe
- No plastic, rugs, or bins covering damp flooring
- Regular checks to confirm the area is actually drying
Do not rely only on heat. Heating the room may help evaporation in some conditions, but if moisture is released into stagnant air without dehumidification or ventilation, the room can remain damp. The goal is to remove moisture from the floor and from the air, not just make the surface feel warm.
If mold is already visible or a strong musty odor is present, avoid aggressive air movement that could spread contaminated dust or spores. In that case, professional evaluation may be safer than using high-speed fans without containment.
How to Know the Floor Is Actually Dry
A floor is not necessarily dry just because the surface looks dry. After a water heater leak, moisture may remain under flooring seams, behind baseboards, inside carpet pad, under transition strips, or in subfloor materials. Confirming dryness is especially important when water reached finished flooring or walls.
Signs the area is drying properly include:
- No new water appears after the leak source is stopped
- The floor surface stays dry after several checks
- Baseboards and wall edges no longer feel damp
- No musty odor remains near the heater
- Flooring edges are not swelling further
- Carpet pad is not damp or squishy
- Moisture readings are stable and close to nearby dry areas
A moisture meter can be useful for comparing affected materials to similar dry materials nearby. For example, compare a baseboard near the heater with a baseboard farther away in the same room. The goal is not to chase a single perfect number, but to see whether the affected area is returning to a normal range for that material and location.
Take readings in the same type of material when possible, such as wet baseboard compared with dry baseboard, rather than comparing wood trim to concrete or tile.
Continue checking the area after the first drying session. A slow water heater leak may return if the source was not fully corrected. Flooring can also release moisture gradually. If odors, damp edges, soft spots, or high readings persist, the floor may still need more drying or professional inspection.
When to Call a Water Damage Restoration Professional
Some water heater leaks are small enough for careful homeowner drying, especially if they are caught quickly on bare concrete. Other leaks need professional drying because water has moved into hidden or vulnerable materials.
Call a water damage restoration professional if:
- The leak may have lasted more than 24 to 48 hours
- Water went under laminate, vinyl plank, wood, or engineered flooring
- Carpet pad is wet
- Baseboards or drywall are damp
- The floor feels soft, swollen, cupped, or uneven
- A musty odor remains after surface drying
- Moisture readings stay elevated
- The water heater is in an upper-level closet
- Water reached ceiling, wall, or floor cavities below
- Water is near electrical components, gas equipment, or unsafe conditions
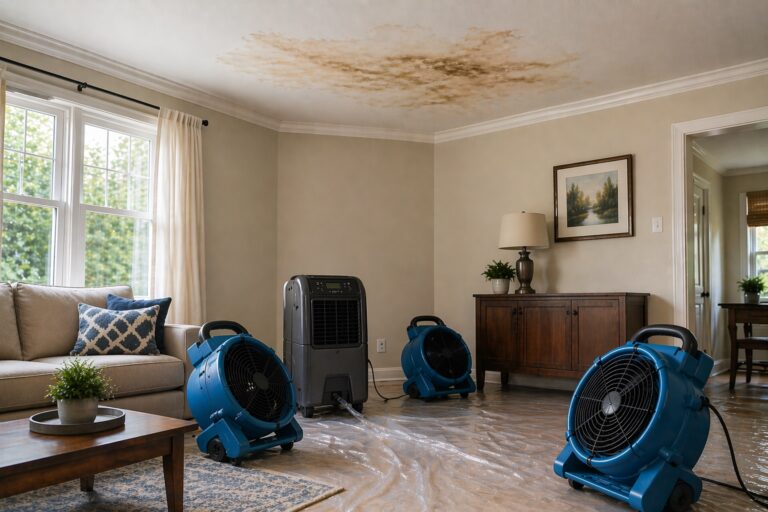
Professional drying equipment can move air through hidden spaces, remove moisture from the air, monitor material moisture, and determine whether flooring or trim needs to be lifted or removed. This is especially important when the visible floor looks dry but the pad, subfloor, or wall edges may still be wet.
If you are unsure whether the situation exceeds DIY drying, see when to call water damage restoration services.
Prevent the Same Damage From Happening Again
After the floor is dry, do a brief prevention check instead of treating cleanup as finished. A water heater leak can recur if the original source was not corrected, the pan does not drain properly, the area is blocked by storage, or early warning signs are ignored.
After drying, check the water heater area for:
- A visible and accessible drain pan
- A pan drain that is clear and properly routed
- No absorbent storage near the heater
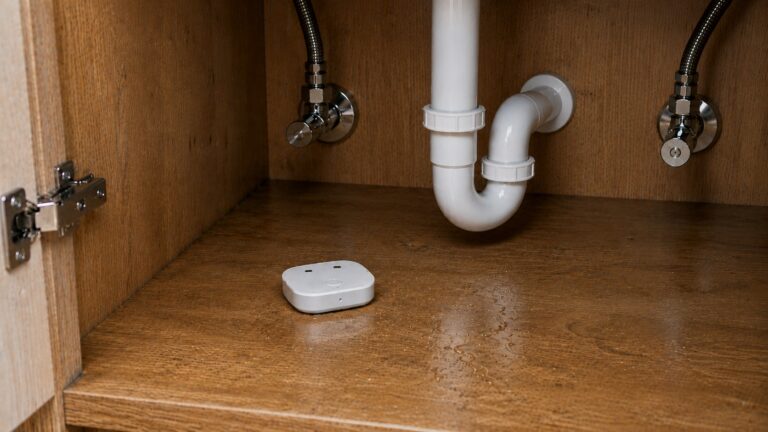
- A leak sensor near the pan or base
- Clear access to valves, fittings, and the floor
- No rugs, mats, or boxes hiding the leak path
- A plan to inspect the area after heavy hot water use
If the leak happened once, the area deserves closer monitoring. A water alarm near the heater can catch future leaks before they reach flooring. Keeping the floor visible makes it easier to notice water before it spreads into walls or stored items.
For a full prevention plan after recovery, return to how to prevent water heater leak damage.
FAQ: How to Dry Floors After Water Heater Leaks
How long does it take to dry floors after a water heater leak?
Drying time depends on the amount of water, how long the leak lasted, the flooring material, room humidity, airflow, and whether water reached hidden layers. Bare concrete caught quickly may dry faster than carpet, laminate, wood, or subfloor materials. If hidden materials are wet, drying can take longer and may require professional equipment.
Can laminate flooring dry after a water heater leak?
Laminate may dry if the leak was very small and caught quickly, but it is vulnerable to swelling at seams and edges. If water went underneath the planks, the floor is swelling, or a musty odor remains, the flooring may need professional evaluation or partial removal.
Do I need to remove flooring after a water heater leak?
Not always. Flooring removal depends on how much water entered, how long it remained, what type of flooring is installed, and whether moisture is trapped underneath. Flooring is more likely to need removal when water reaches carpet pad, subflooring, laminate seams, wood flooring, or wall edges.
Can a water heater leak cause mold under flooring?
Yes, a water heater leak can contribute to mold if moisture remains under flooring, behind baseboards, or in subfloor materials long enough. Quick source control and drying reduce the risk, but persistent odor, dampness, or hidden wet materials should be checked.
Should I use fans or a dehumidifier?
Use both when possible if the area is safe. Fans move air across wet surfaces, while a dehumidifier removes moisture from the air. In enclosed water heater closets, basements, laundry rooms, and humid utility spaces, dehumidification is especially helpful.
Is concrete dry once the surface looks dry?
Not always. Concrete can look dry on the surface while moisture remains in cracks, low spots, wall edges, or nearby materials. Check adjacent baseboards, storage areas, and floor edges before assuming the area is fully dry.
When should I call restoration services after a water heater leak?
Call restoration services when water reached finished flooring, carpet pad, drywall, baseboards, subflooring, an upper-level floor cavity, or any area that remains damp after surface drying. Also call if the leak lasted more than a short time, odors remain, or moisture readings stay elevated.
Final Checks Before You Put the Area Back in Use
Before putting storage, rugs, or finished materials back in place, confirm three things: the water heater is no longer leaking, the floor and nearby edges are staying dry, and no musty odor, swelling, soft spots, or elevated moisture readings remain.
If the area stays dry, keep the water heater base visible, avoid absorbent storage nearby, and use a drain pan or leak sensor where appropriate. If dampness returns, treat it as an unresolved leak or hidden moisture problem rather than a finished cleanup.