Best Roof Leak Detection Tools for Tracing Hidden Water Problems
Introduction
A roof leak is not always obvious. A ceiling stain may appear several feet away from the actual entry point, and water can travel along rafters, insulation, roof decking, wall cavities, and drywall seams before it becomes visible indoors. That is why the best roof leak detection tools are not just “gadgets.” They help you confirm whether a stain is active, trace where moisture may be moving, inspect hidden areas, and monitor known trouble spots after repairs.
This guide focuses on diagnostic tools for roof leak tracing, not roof repair materials. If you are trying to patch a roof, use a repair-focused guide instead. But if you need to figure out whether a roof leak is active, how far moisture has spread, or whether a hidden area needs closer inspection, the products below can help you make a better decision before cutting open drywall or calling a contractor.
For broader roof failure context, start with the DryHomeGuide roofing authority page on common roofing material failures. You may also want to review how to find roof leaks before mold forms if you are still working through the full inspection process. For a broader home moisture framework beyond roofing, see the DryHomeGuide guide to finding, fixing, and preventing moisture problems in homes.
As an Amazon Associate, this site earns from qualifying purchases. This does not affect the price you pay. Our recommendations are based on research, product reliability, and real-world usability in moisture-prone environments.
Quick Picks for Roof Leak Detection Tools
These tools work best as a sequence: scan suspected ceiling or attic moisture first, confirm damp spots when needed, inspect hidden cavities only after narrowing the leak area, and use sensors to monitor known trouble spots after repairs.
| Category | Recommended Product | Amazon Link |
|---|---|---|
| Best Overall for Roof Leak Tracing | Klein Tools ET140 Pinless Moisture Meter | Check availability on Amazon |
| Best Budget Scanner for Checking Ceiling Stains | General Tools MMD7NP Pinless Moisture Meter | Check availability on Amazon |
| Best Pin Meter for Confirming Active Moisture | General Tools MMD4E Digital Moisture Meter | Check availability on Amazon |
| Best Thermal Tool for Finding Hidden Leak Patterns | FLIR ONE Gen 3 Thermal Camera for Android USB-C | Check availability on Amazon |
| Best Standalone Thermal Camera for Larger Scans | Hti-Xintai HTI-19 Thermal Imaging Camera | Check availability on Amazon |
| Best Inspection Camera for Tracing Hidden Leak Paths | DEPSTECH DS300 Dual Lens 1080P Borescope with 4.3″ IPS Screen and 16.5FT Snake Cable | Check availability on Amazon |
| Best Smart Alert for Known Roof Leak Trouble Spots | Govee WiFi Water Leak Detector 3 Pack | Check availability on Amazon |
Roof Leak Detection Tool Reviews
Best Overall for Roof Leak Tracing: Klein Tools ET140 Pinless Moisture Meter
The Klein Tools ET140 is the strongest first-pass tool for most homeowners trying to trace a suspected roof leak from inside the house. It is pinless, so it can scan ceiling drywall, upper wall areas, attic framing, and other accessible surfaces without leaving holes. That matters when you are not ready to open the ceiling but need to know whether a stain, soft area, or suspicious patch is still holding moisture.
This tool is especially useful after rain, when you want to compare a suspicious ceiling stain with nearby dry material. It will not tell you exactly where the roof is leaking, but it helps you map where moisture is showing up indoors. That makes it a practical starting point before moving to a pin meter, attic inspection, or contractor evaluation.
Key Features
- Pinless scanning design for checking surfaces without puncturing drywall or wood.
- Designed to detect relative moisture below the surface.
- Material modes for common building materials such as drywall, masonry, hardwood, and softwood.
- Useful for comparing suspicious areas against known dry areas.
- Compact handheld format that is easy for homeowners to use during ceiling and attic checks.
Pros
- ✔ Non-invasive scanning is ideal for finished ceilings and walls.
- ✔ Strong fit for the first stage of roof leak tracing.
- ✔ Good brand recognition from a well-established tool company.
- ✔ Easier for most homeowners than a pin-style meter.
- ✔ Useful around ceiling stains, chimney leak areas, roof valleys, skylight-adjacent ceilings, and attic framing.
Cons
- ✖ Provides relative readings, not a complete roof leak diagnosis by itself.
- ✖ Surface materials, depth, and hidden layers can affect readings.
- ✖ Does not show the exact roof entry point.
Best For
- Homeowners who want one practical tool to start checking roof leak moisture indoors.
- Scanning ceiling stains after rain without poking holes.
- Comparing damp-looking areas with nearby dry drywall or wood.
- Checking attic-side roof framing or sheathing where surfaces are accessible.
Check the Klein Tools ET140 Pinless Moisture Meter on Amazon to see current availability.
Best Budget Scanner for Checking Ceiling Stains: General Tools MMD7NP Pinless Moisture Meter
The General Tools MMD7NP is a good lower-cost pinless option for homeowners who want to check suspicious roof leak stains without buying a more expensive inspection setup. Like the Klein ET140, it is designed for non-invasive scanning, which makes it useful for finished drywall, ceiling stains, and upper wall areas where roof water may have traveled.
This is a strong choice when your main concern is simple: “Is this ceiling stain still damp?” It can help you compare one area against another, track whether moisture is drying over time, and decide whether further inspection is needed. It should not replace a full attic inspection, but it is a useful tool for early roof leak detection inside the home.
Key Features
- Pinless moisture scanning for drywall, wallboard, masonry, and wood materials.
- Non-invasive design helps reduce unnecessary holes in finished surfaces.
- Useful for checking ceiling stains, upper walls, and roof-adjacent interior surfaces.
- Simple display and homeowner-friendly operation.
- Good option for occasional moisture checks after storms or roof repairs.
Pros
- ✔ Budget-friendly alternative to higher-end pinless meters.
- ✔ Good for first-pass checks on painted ceilings and drywall.
- ✔ Helps homeowners compare suspicious and dry areas.
- ✔ Useful for monitoring whether a known damp spot is drying.
- ✔ Does not require puncturing the surface.
Cons
- ✖ Not as refined as more advanced inspection tools.
- ✖ Can be affected by surface layers, material density, and nearby hidden materials.
- ✖ Should be confirmed with a pin meter if you need a more direct moisture reading.
Best For
- Homeowners who want a simple scanner for checking ceiling stains after rain.
- Budget users who do not need a professional-grade tool.
- Monitoring a suspicious area before and after roof repairs.
- Checking whether visible staining may still be holding moisture.
Check the General Tools MMD7NP Pinless Moisture Meter on Amazon to see current availability.
Best Pin Meter for Confirming Active Moisture: General Tools MMD4E Digital Moisture Meter
The General Tools MMD4E is different from the first two products because it uses pins. That makes it less ideal for broad scanning across finished ceilings, but better for confirming whether a specific suspicious spot is actually wet. In a roof leak detection workflow, this tool works best after a pinless meter or visual inspection has already narrowed the problem area.
For example, if a ceiling stain feels slightly soft, a pinless meter reads higher in one small area, or attic framing looks darker after rain, a pin-style meter can give a more direct moisture check at that point. The tradeoff is that pins leave small holes, so it should be used carefully on visible finished surfaces.
Key Features
- Pin-type moisture testing for direct contact with building materials.
- Useful for confirming suspicious drywall, wood, or other material after initial scanning.
- Audible and visual alerts help homeowners interpret high, medium, and low moisture conditions.
- Backlit display for easier reading in dim attic or interior conditions.
- Helpful for checking trim, attic framing, drywall edges, and accessible wood members.
Pros
- ✔ Better for confirmation than a pinless scanner alone.
- ✔ Useful when you need to know whether a specific spot is actively damp.
- ✔ Good for wood framing, exposed attic areas, and less visible surfaces.
- ✔ Affordable compared with professional dual-mode meters.
- ✔ Helps avoid guessing based only on stains or discoloration.
Cons
- ✖ Pins can leave small holes in finished drywall or trim.
- ✖ Not ideal for scanning large ceiling areas quickly.
- ✖ Readings depend on material type and proper pin contact.
Best For
- Confirming active moisture after a pinless scanner finds a suspicious area.
- Testing exposed attic framing near a suspected roof leak.
- Checking wet-looking drywall, wood, or trim where small pinholes are acceptable.
- Homeowners who want a low-cost confirmation tool for leak tracing.
Check the General Tools MMD4E Digital Moisture Meter on Amazon to see current availability.
Best Thermal Tool for Finding Hidden Leak Patterns: FLIR ONE Gen 3 Thermal Camera for Android USB-C
The FLIR ONE Gen 3 is a useful upgrade tool when you need to look for suspicious temperature patterns that may point toward hidden moisture. Thermal cameras do not directly prove that water is present. Instead, they show temperature differences. Wet materials, damp insulation, air leaks, and cooler roof-adjacent surfaces can sometimes stand out visually when conditions are right.
This makes the FLIR ONE useful for scanning ceiling slopes, upper walls, attic access areas, skylight zones, and chimney-adjacent ceilings. The most accurate approach is to use it as a pattern-finding tool, then confirm suspicious areas with a moisture meter. Also note that this specific affiliate link is for the Android USB-C version, so compatibility should be clearly checked before purchase.
Key Features
- Smartphone-connected thermal imaging tool for Android USB-C devices.
- Helps visualize temperature differences across ceilings, walls, and attic-adjacent areas.
- Useful for finding suspicious cold or damp-looking patterns after rain.
- Compact design that is easier to store than a standalone thermal camera.
- Can support broader home inspection tasks while staying useful for roof leak tracing.
Pros
- ✔ Strong brand recognition in thermal imaging.
- ✔ Helpful for seeing patterns that are not obvious to the eye.
- ✔ Useful around ceiling slopes, skylights, chimney areas, and roof valleys.
- ✔ More visual than a standard moisture meter.
- ✔ Good upgrade tool for homeowners who want more than spot readings.
Cons
- ✖ This link is for Android USB-C, not every phone type.
- ✖ Thermal images do not prove moisture by themselves.
- ✖ Results depend on temperature contrast and inspection timing.
- ✖ Suspicious areas should still be confirmed with a moisture meter.
Best For
- Homeowners who want to scan for hidden roof leak patterns visually.
- Checking ceiling slopes, attic knee walls, and roof-adjacent interior surfaces.
- Finding suspicious areas before using a pinless or pin moisture meter.
- Android USB-C users who want a compact thermal inspection tool.
Check the FLIR ONE Gen 3 Thermal Camera for Android USB-C on Amazon to see current availability.
Best Standalone Thermal Camera for Larger Scans: Hti-Xintai HTI-19 Thermal Imaging Camera
The Hti-Xintai HTI-19 is a standalone thermal imaging camera for homeowners who do not want to depend on a smartphone attachment. It is better suited to larger scans when you want a dedicated handheld screen for checking ceilings, attic areas, upper walls, or roof-adjacent rooms.
This product should be positioned as a larger-scan thermal option, not as a guaranteed roof leak finder. Like the FLIR ONE, it shows heat patterns. It may help reveal suspicious areas where damp material or insulation differences are affecting surface temperatures, but you should confirm moisture with a meter before making repair decisions.
Key Features
- Standalone thermal imaging camera with built-in display.
- Useful for scanning larger interior areas without attaching a phone.
- Can help identify unusual temperature patterns near suspected roof leaks.
- Rechargeable handheld design for repeated inspection use.
- Useful for comparing ceiling areas, wall tops, attic-facing surfaces, and other roof-adjacent zones.
Pros
- ✔ Does not require a smartphone connection.
- ✔ Easier to use for larger scan areas than a small phone attachment.
- ✔ Useful for visualizing possible damp or temperature-anomaly patterns.
- ✔ Can support attic, wall, ceiling, and general home moisture investigations.
- ✔ Good fit for homeowners who prefer a dedicated tool.
Cons
- ✖ More specialized than a basic moisture meter.
- ✖ Thermal readings can be misread without confirmation.
- ✖ Not necessary for every homeowner.
- ✖ Sits closer to the minimum acceptable rating threshold than some other products in this lineup.
Best For
- Homeowners who want a standalone thermal camera instead of a phone-connected tool.
- Larger ceiling or attic-area scans after storms.
- Visual pattern checking before using a moisture meter.
- Repeated inspection work across several rooms or roof-adjacent areas.
Check the Hti-Xintai HTI-19 Thermal Imaging Camera on Amazon to see current availability.
Best Inspection Camera for Tracing Hidden Leak Paths: DEPSTECH DS300 Dual Lens 1080P Borescope with 4.3″ IPS Screen and 16.5FT Snake Cable
The DEPSTECH DS300 is the best fit in this lineup for looking into hard-to-reach spaces after you have already narrowed down the likely leak area. A borescope is not the first tool most homeowners should buy for a roof leak, but it can be very useful around soffits, attic corners, wall cavities, chimney-adjacent areas, and small access openings where water may be traveling out of sight.
This product is included because roof leaks often move through enclosed paths before showing up indoors. If you have a small access hole, attic gap, or narrow cavity where a flashlight cannot reach, an inspection camera can help you see staining, damp debris, rusted fasteners, or hidden water pathways. Keep the scope focused on roof leak tracing; this should not become a general drain or sewer inspection article.
Key Features
- Dual-lens inspection camera for viewing concealed areas from more than one angle.
- Built-in 4.3-inch screen, so it does not require a phone app.
- 16.5-foot semi-rigid cable for reaching attic edges, wall cavities, and tight spaces.
- Water-resistant probe design for damp inspection environments.
- Useful for roof-adjacent cavities, soffit areas, chimney zones, and enclosed inspection paths.
Pros
- ✔ Helps inspect areas that are hard to see directly.
- ✔ Built-in screen keeps setup simple.
- ✔ Good cable length for residential attic and wall-cavity inspection.
- ✔ Useful after moisture readings narrow the likely problem zone.
- ✔ Can reduce unnecessary exploratory cutting when used carefully.
Cons
- ✖ Not the first tool most homeowners need for simple ceiling stains.
- ✖ Requires an access point or small opening to be useful.
- ✖ Does not measure moisture directly.
- ✖ Can be frustrating in insulated or debris-filled cavities.
Best For
- Tracing hidden roof leak paths through soffits, attic corners, and enclosed cavities.
- Inspecting around chimney-adjacent voids or roof penetration areas from inside.
- Looking behind small openings before cutting larger access holes.
- Homeowners who already have a narrowed-down leak zone and need visual confirmation.
Check the DEPSTECH DS300 Dual Lens 1080P Borescope on Amazon to see current availability.
Best Smart Alert for Known Roof Leak Trouble Spots: Govee WiFi Water Leak Detector 3 Pack
The Govee WiFi Water Leak Detector 3 Pack is different from the other products in this guide. It does not trace hidden moisture inside a ceiling or show you where water entered the roof. Instead, it is a monitoring tool for known trouble spots. That makes it useful after you already suspect or have repaired a leak-prone area.
For roof-related use, this type of sensor makes the most sense in accessible attic areas, under known drip points, near roof-mounted HVAC equipment, below skylight-adjacent trouble zones, or near areas where prior leaks have occurred. It can alert you when water reaches the sensor, but it should not be treated as a replacement for moisture meters, attic inspection, or roof repair.
Key Features
- Three leak sensors with a WiFi gateway for home monitoring.
- App and email alert capability when sensors detect water contact.
- Audible alarm for local warning.
- Useful in accessible attic areas or known drip-risk zones.
- Can help monitor repaired areas after roof work.
Pros
- ✔ Good for ongoing monitoring after a roof repair.
- ✔ Useful near known attic leak-prone areas.
- ✔ Multi-sensor pack covers more than one trouble spot.
- ✔ Alerts can help catch active dripping earlier.
- ✔ Also useful around water heaters, laundry areas, sinks, and other home leak risks.
Cons
- ✖ Does not detect hidden moisture inside drywall or insulation.
- ✖ Only alerts when water reaches the sensor.
- ✖ Requires thoughtful placement in accessible areas.
- ✖ Not a substitute for diagnosing the source of a roof leak.
Best For
- Monitoring known roof leak trouble spots after repairs.
- Placing in accessible attic drip zones.
- Homeowners who want an early warning if a known problem area leaks again.
- Supplementing moisture meters and visual inspections.
Check the Govee WiFi Water Leak Detector 3 Pack on Amazon to see current availability.
Roof Leak Detection Tool Comparison Table
| Product | Category | Best Use Case | Key Strengths | Main Limitation | Amazon Link |
|---|---|---|---|---|---|
| Klein Tools ET140 Pinless Moisture Meter | Best Overall for Roof Leak Tracing | Scanning ceiling stains and roof-adjacent drywall without puncturing surfaces. | Non-invasive, homeowner-friendly, useful across drywall, wood, and masonry. | Shows relative moisture patterns, not the exact roof entry point. | View on Amazon |
| General Tools MMD7NP Pinless Moisture Meter | Best Budget Scanner for Checking Ceiling Stains | Budget-friendly scanning after rain or around visible roof leak stains. | Pinless design, simple operation, good for surface comparison. | Less advanced than higher-end diagnostic tools. | View on Amazon |
| General Tools MMD4E Digital Moisture Meter | Best Pin Meter for Confirming Active Moisture | Confirming whether a specific spot is actively damp. | Direct pin contact, audible/visual alerts, useful on wood and drywall. | Leaves small pinholes and is not ideal for broad scanning. | View on Amazon |
| FLIR ONE Gen 3 Thermal Camera for Android USB-C | Best Thermal Tool for Finding Hidden Leak Patterns | Finding suspicious temperature patterns around ceilings and attic-adjacent areas. | Visual thermal scanning, compact phone-connected design, useful pattern detection. | Android USB-C compatibility only; thermal patterns must be confirmed with a moisture meter. | View on Amazon |
| Hti-Xintai HTI-19 Thermal Imaging Camera | Best Standalone Thermal Camera for Larger Scans | Scanning larger ceiling, wall, or attic-adjacent areas without a phone. | Dedicated handheld display, useful for broader visual inspections. | More tool than many homeowners need for a single stain. | View on Amazon |
| DEPSTECH DS300 Dual Lens 1080P Borescope | Best Inspection Camera for Tracing Hidden Leak Paths | Looking into soffits, attic corners, wall cavities, and tight roof-adjacent spaces. | Built-in screen, dual-lens viewing, semi-rigid cable, useful in concealed areas. | Needs an access point and does not measure moisture directly. | View on Amazon |
| Govee WiFi Water Leak Detector 3 Pack | Best Smart Alert for Known Roof Leak Trouble Spots | Monitoring known attic leak zones or repaired areas for active drips. | App/email alerts, audible alarm, multi-sensor coverage. | Only detects water that reaches the sensor. | View on Amazon |
Buying Guide: How to Choose the Right Roof Leak Detection Tool
The right tool depends on where you are in the roof leak investigation. A homeowner with one ceiling stain does not need the same setup as someone tracing recurring attic moisture after multiple roof repairs.
Start with a pinless moisture meter if you are checking finished ceilings
If you are looking at a stained ceiling or upper wall and do not want to make holes, start with a pinless moisture meter. The Klein Tools ET140 is the strongest overall choice for this job, while the General Tools MMD7NP is the budget-friendly alternative. These tools help you scan a surface and compare one area with another.
Use a pinless meter after rain, then check the same area again later. If the reading is elevated after storms and drops during dry weather, that pattern may support an active leak concern. If you are still early in the process, read signs of roof leaks inside the house so you know what visual clues to compare with your readings.
Use a pin meter when you need confirmation
A pin meter such as the General Tools MMD4E is best when you have already narrowed the suspicious area. It can help confirm moisture in a specific spot, but it is not as clean for large finished areas because the pins can leave small holes.
Use it on attic framing, trim edges, already-damaged drywall, or areas where small marks will not matter. If the ceiling is visibly deteriorated or sagging, moisture readings are not enough; review signs of ceiling water damage and consider whether the area needs professional evaluation.
Choose a thermal camera for pattern recognition, not proof
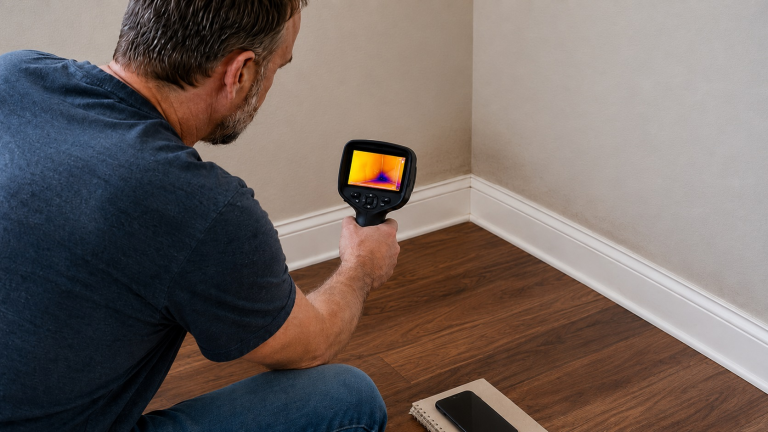
Thermal cameras are helpful when you want to scan a larger area for suspicious temperature differences. They can be useful around skylights, chimney-adjacent ceilings, vaulted ceilings, roof valleys, and upper walls where moisture may spread beyond the visible stain.
However, a thermal camera does not prove that a spot is wet. Air leaks, insulation gaps, ductwork, exterior temperature changes, and framing differences can also create thermal patterns. Use the FLIR ONE or Hti-Xintai HTI-19 to find suspicious areas, then confirm those areas with a moisture meter.
Choose a borescope when the leak path is hidden inside a cavity
A borescope is most useful after you have already narrowed the problem area. If you suspect water is moving through a soffit, chimney chase, attic corner, or enclosed wall cavity, the DEPSTECH DS300 can help you look into the space through an access point.
This is not the best first purchase for every homeowner. But when a roof leak keeps showing up in a confusing location, an inspection camera can help you see hidden staining, damp debris, rusted fasteners, or water pathways that a surface scanner cannot show.
Use leak sensors for monitoring, not diagnosis
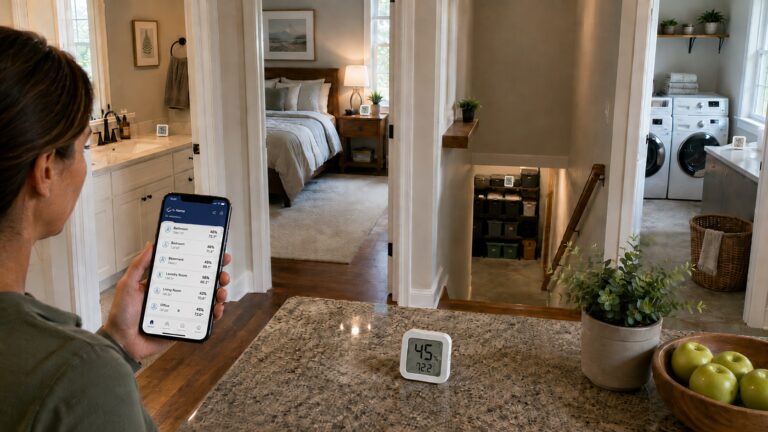
The Govee WiFi Water Leak Detector 3 Pack is useful after you already know where a problem might recur. Place sensors in accessible attic areas, under known drip points, or near previous roof leak trouble spots. This is especially useful after a repair, when you want to know if the same area leaks again during the next storm.
For a broader repair-follow-up workflow, see how to monitor roof areas after repairs.
How to Use Roof Leak Detection Tools Correctly
Check after rain when possible
Roof leak detection is usually more useful after rain or during a wet weather pattern. If you test a ceiling stain after several dry days, it may read lower even if the leak is still a problem during storms.
Compare suspicious areas with known dry areas
Do not rely on one reading. Test a suspicious stain, then test nearby drywall that looks dry. This comparison helps you understand whether the stain area is behaving differently from surrounding material.
Use more than one tool when the decision matters
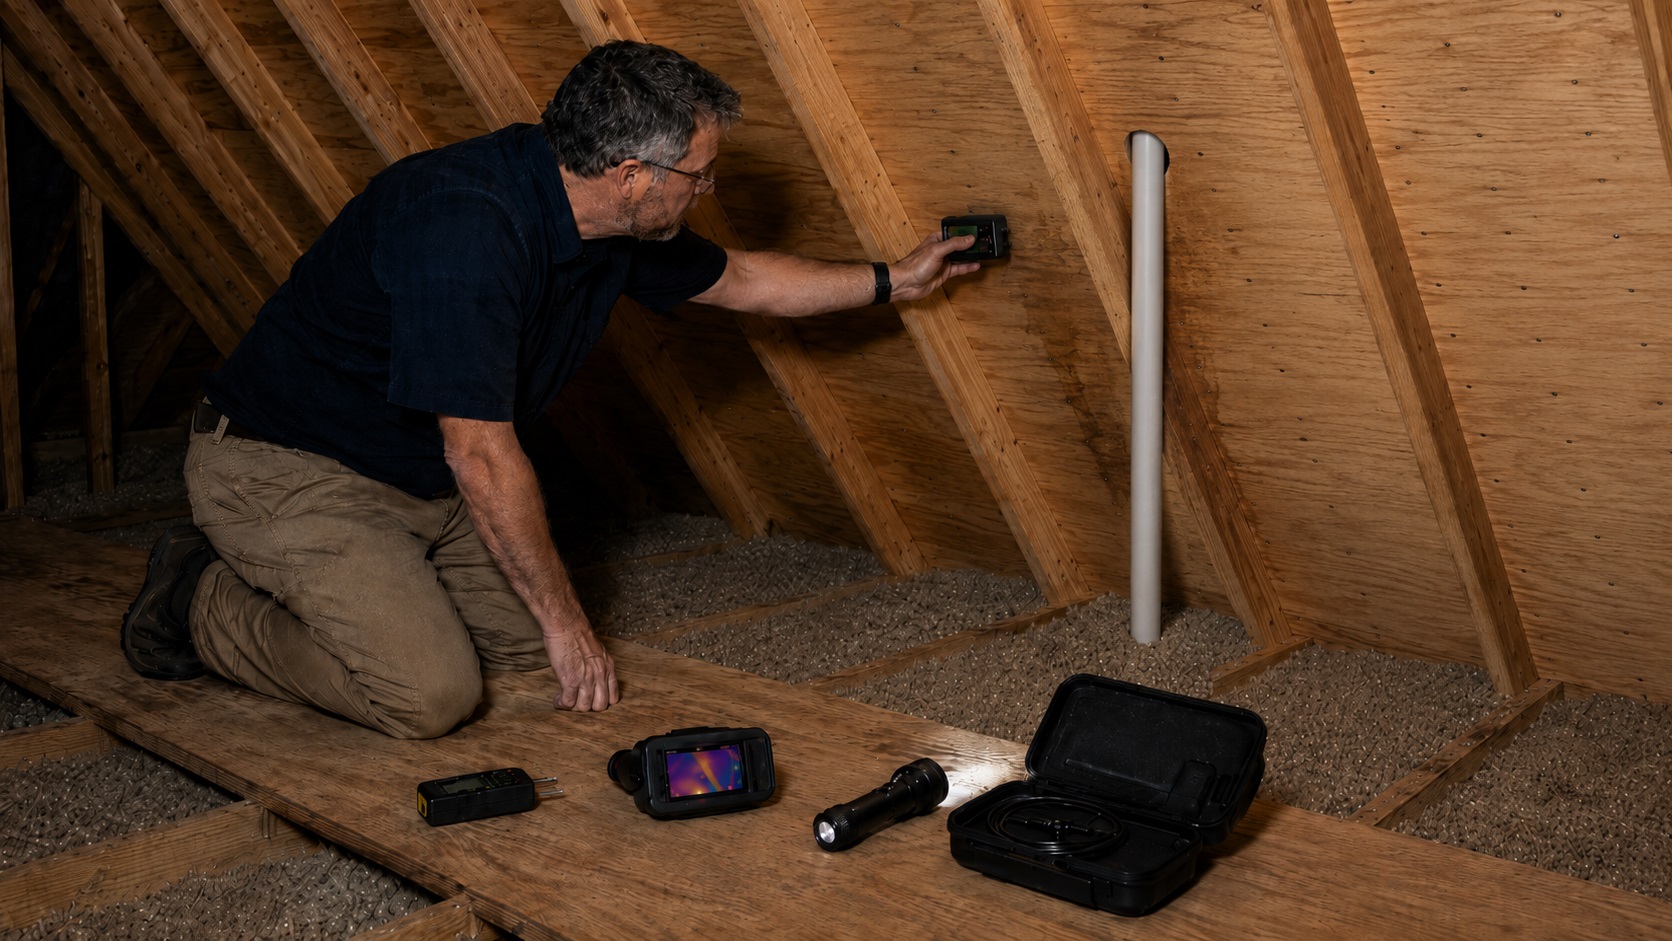
A good roof leak tracing workflow often looks like this:
- Scan the ceiling or wall with a pinless meter.
- Use a thermal camera to look for larger hidden patterns if needed.
- Confirm a specific suspicious area with a pin meter where small holes are acceptable.
- Inspect accessible attic areas visually.
- Use a borescope only if the leak path is hidden and you have an access point.
- Place leak sensors in known trouble spots after repairs.
Mark and date your findings
Take photos of stains, readings, and inspection areas. Date each photo. Roof leaks can change over time, and documentation helps you compare whether the problem is growing, drying, or returning after repairs.
Do not ignore attic or roof safety
Attics can have weak framing, exposed nails, loose insulation, low visibility, and fall hazards. Walk only on framing members or safe platforms. Do not step on drywall ceilings. If the area is difficult to access, hire a qualified professional.
Do not climb onto a wet, steep, damaged, or high roof just to confirm a leak path. Use interior and attic clues first, then call a roofer when roof access is unsafe.
Connect tool readings with visible roof-risk areas
Interior readings become more useful when you connect them to roof features above the area. Common leak-prone zones include chimneys, valleys, skylights, vent boots, roof penetrations, flashing joints, and areas where previous repairs were made. For a more roof-specific inspection sequence, see how to inspect roof areas for leak damage.
Mistakes That Lead to False Roof Leak Readings
Assuming the stain is directly below the leak
Water often travels before it appears indoors. A ceiling stain may be below a rafter path, insulation channel, chimney flashing area, roof valley, or penetration several feet away from the actual entry point.
Using a thermal camera as proof of water
A thermal camera shows temperature differences. It does not prove moisture. Always confirm suspicious thermal patterns with a moisture meter before making major repair decisions.
Scanning only the center of the stain
Moisture may extend beyond the visible stain. Scan around the stain, toward the nearest wall, and along possible framing paths. Water can spread along seams before it shows on the surface.
Testing once and assuming the problem is solved
Roof leaks often show up only during certain wind directions or rain intensity. A dry reading after one clear day does not prove the leak is gone. Recheck during or after future storms if the area has a history of leakage.
Using a pin meter too early on finished surfaces
Pin meters are useful, but they leave small holes. Start with pinless scanning on visible ceilings and walls. Save pin testing for confirmed suspect areas or less visible materials.
Putting leak sensors where water will never reach them
Leak sensors only work when water touches the sensor. In an attic, water may drip along framing or insulation rather than onto the floor. Place sensors thoughtfully under likely drip points, not randomly.
Buying repair tools before confirming the leak source
Do not jump straight to roof patch products or sealants if you do not know where water is entering. This article is about finding the problem. Repair products belong in a separate repair-focused guide, such as best roof repair tools for homeowners.
Roof Leak Detection Tool FAQ
What is the best roof leak detection tool for most homeowners?
For most homeowners, the best starting tool is a pinless moisture meter such as the Klein Tools ET140. It lets you scan ceiling stains, walls, and accessible attic materials without puncturing finished surfaces.
Can a moisture meter find the exact roof leak?
No. A moisture meter can help show where moisture is present inside the home, but it does not identify the exact roof entry point. It is a diagnostic tool that helps narrow the investigation.
Are thermal cameras good for roof leak detection?
Thermal cameras can be useful for finding suspicious temperature patterns, especially around ceilings, attic slopes, and roof-adjacent wall areas. However, they do not prove moisture by themselves. Confirm suspicious thermal patterns with a moisture meter.
Should I use a pin or pinless moisture meter for ceiling stains?
Start with a pinless meter if the ceiling is finished and you do not want holes. Use a pin meter later if you need to confirm moisture in a specific area where small pinholes are acceptable.
Can a borescope help find a roof leak?
Yes, but only in the right situation. A borescope can help inspect hidden cavities, soffits, chimney-adjacent spaces, and attic corners if you have access. It does not measure moisture directly, so it works best after other tools narrow the area.
Where should I put leak sensors for roof-related monitoring?
Place leak sensors in accessible attic areas under known or suspected drip points, near previous leak locations, below roof-mounted equipment, or near trouble spots such as skylight areas if water can realistically reach the sensor.
When should I call a roofer instead of relying on tools?
Call a roofer if the leak is active, the ceiling is sagging, roof decking may be soft, stains keep growing, mold is suspected, or you cannot safely access the attic or roof area. Tools can help document the problem, but they do not replace safe professional repair.
How do I know if a roof leak is recurring?
A recurring roof leak often appears after certain storms, returns in the same ceiling area, leaves expanding stains, or shows moisture readings that rise again after rain. For more troubleshooting help, see signs of recurring roof leaks.
Which Roof Leak Detection Tool Should You Choose?
The best roof leak detection tools depend on what you are trying to confirm. If you need one practical starting tool, choose the Klein Tools ET140 Pinless Moisture Meter because it is pinless, simple, and well-suited to scanning ceiling stains and roof-adjacent surfaces. If you want a lower-cost option, the General Tools MMD7NP Pinless Moisture Meter is a good budget scanner.
If you already have a suspicious spot and need confirmation, the General Tools MMD4E Digital Moisture Meter is the better choice. If you want to see larger hidden patterns before testing specific areas, choose the FLIR ONE Gen 3 Thermal Camera for Android USB-C or the Hti-Xintai HTI-19 Thermal Imaging Camera. If the leak path is hidden inside a cavity, the DEPSTECH DS300 Dual Lens 1080P Borescope can help you inspect tight spaces. If you already know where a roof leak may recur, the Govee WiFi Water Leak Detector 3 Pack is useful for ongoing monitoring.
The safest approach is not to rely on one reading or one tool. Use these products as part of a careful roof leak tracing workflow: scan, compare, confirm, inspect, document, and monitor. If readings keep rising after rain or the damage appears structural, use your findings to make a clearer decision about professional inspection and repair.