Best Thermal Imaging Cameras for Detecting Moisture
Hidden moisture is frustrating because the wall can look fine while trouble is already starting behind the paint, trim, ceiling, or flooring. That is why many homeowners compare the best thermal imaging cameras for detecting moisture before cutting into drywall or calling a contractor.
This is the kind of problem that makes homeowners say, “I know something is wrong, but I cannot tell where it starts.”
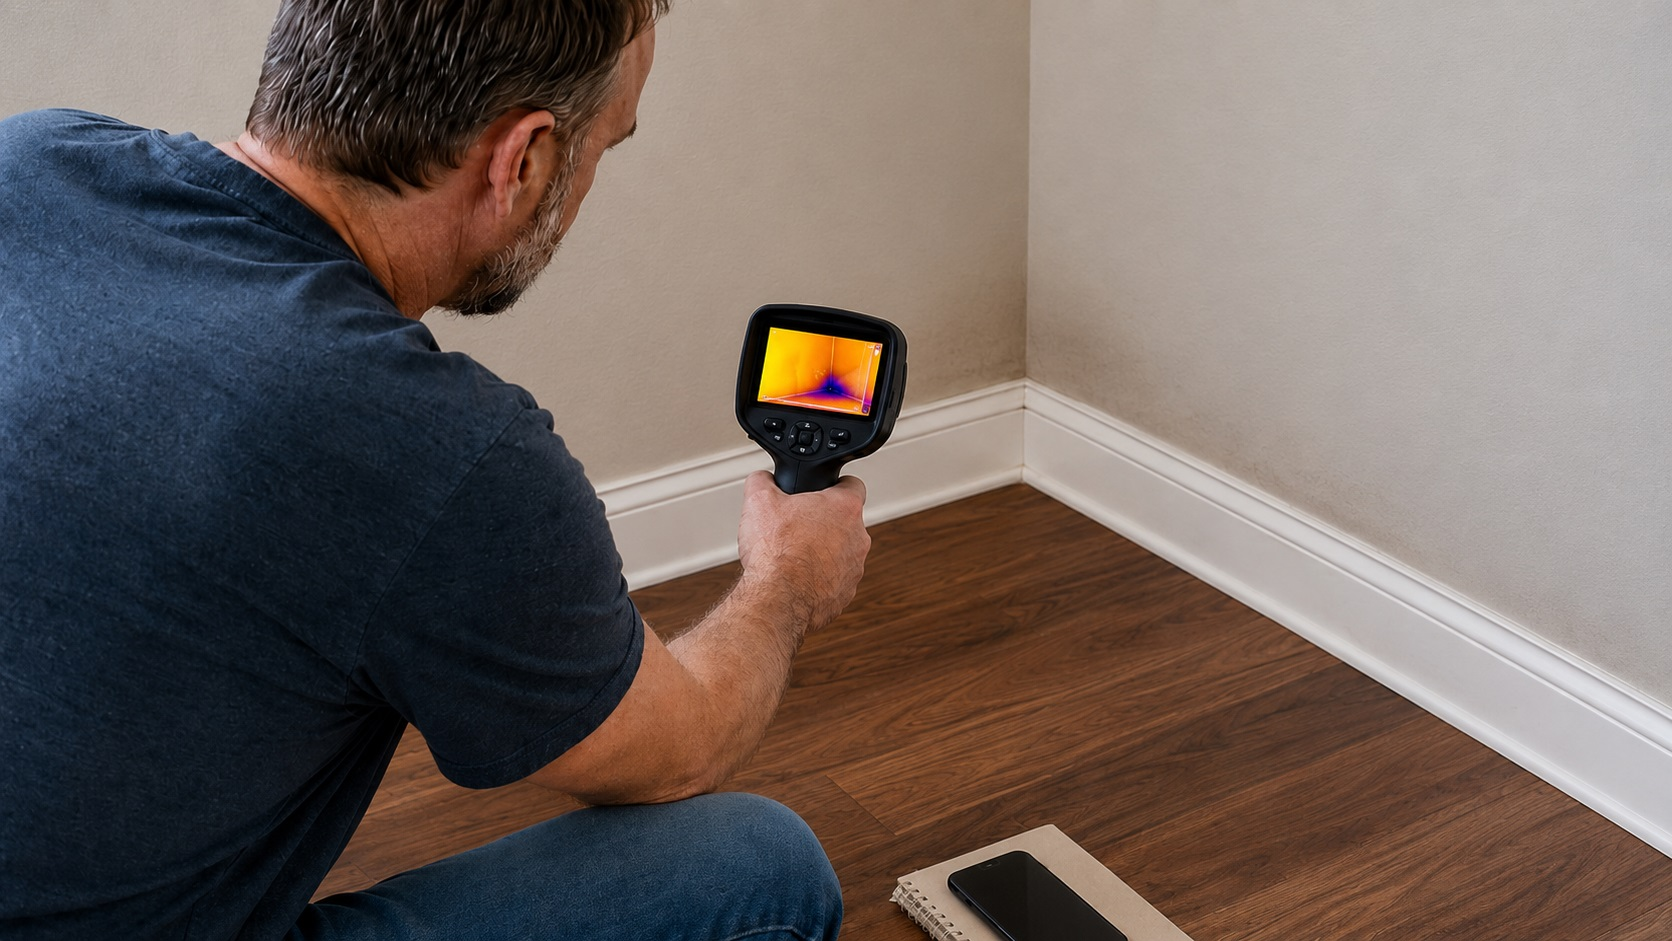
That is where the best thermal imaging cameras for detecting moisture can help. A thermal camera does not directly measure water.
Instead, it shows temperature differences that may point to evaporative cooling, damp materials, air leaks, insulation gaps, roof leaks, window leaks, plumbing problems, or areas that deserve closer inspection.
Important: Thermal imaging is a screening tool, not a moisture confirmation tool. Before removing drywall, filing a claim, or assuming mold is present, confirm suspicious areas with a moisture meter and inspect the source of the moisture.
For confirmation, most homeowners should pair thermal imaging with one of the best moisture meters for hidden water damage.
For homeowners trying to find moisture behind walls, the goal is not to replace a professional inspection or a moisture meter. The goal is to find suspicious areas faster, narrow down where to test, and avoid guessing blindly. If you are trying to investigate hidden dampness without opening walls, start with the site guide on how to find hidden moisture in different areas of your home, then use this product comparison to choose the right thermal camera for your budget and skill level.
Disclosure: As an Amazon Associate, Dry Home Guide earns from qualifying purchases. If you buy through links on this page, we may earn a commission at no extra cost to you.
Quick Picks Summary
- Best Overall: TOPDON TC004 3.5″ Thermal Imaging Camera
- Best Budget Standalone Camera: TOPDON TC004 Mini Thermal Imaging Camera
- Best for Contractors / Home Inspectors: FLIR C5 Compact Thermal Imaging Camera with WiFi
- Best Phone-Based Android Option: TOPDON TC001 Thermal Camera for Android
- Best Simple FLIR Spot-Inspection Camera: FLIR TG165-X Thermal Imaging Camera with Bullseye Laser
- Optional: Best for Older iPhones: FLIR ONE Gen 3 Thermal Camera for iOS Smartphones
For most homeowners, the best thermal imaging camera for leaks is the one that helps you scan quickly, save useful images, and confirm suspect areas with a moisture meter.
Which Thermal Camera Should You Choose?
- Choose the TOPDON TC004 if you want the best all-around standalone camera.
- Choose the TOPDON TC004 Mini if you want a lower-cost handheld option.
- Choose the FLIR C5 if you need stronger documentation for serious inspections.
- Choose the TOPDON TC001 if you use Android and want a phone-based camera.
- Choose the FLIR TG165-X if you want a simple FLIR tool for spot checks.
- Choose the FLIR ONE Gen 3 only if your iPhone is compatible.
Best Thermal Imaging Cameras for Detecting Moisture: Product Reviews
The products below are arranged by the type of homeowner or inspector they serve best, not simply by which model has the longest feature list.
For every camera below, remember the same rule: use thermal imaging to find suspicious areas, then use a moisture meter to confirm whether the material is actually wet.
TOPDON TC004 3.5″ Thermal Imaging Camera
Category Label: Best Overall
For homeowners who want a serious moisture-inspection tool without relying on a phone, the TOPDON TC004 is the most balanced pick here. It gives you a built-in screen, good image detail for residential scanning, onboard storage, and a practical handheld design. For a homeowner trying to inspect basement walls, ceiling stains, window areas, attic surfaces, plumbing-adjacent walls, or cold spots near exterior walls, it offers the best mix of capability and everyday usability in this lineup.
This camera earns its keep when you need to scan a whole wall, ceiling, or room instead of poking around one small spot at a time. You can look for unusual cold patches, damp-looking temperature patterns, thermal bridges, missing insulation areas, and surface changes that may deserve confirmation with a moisture meter. It is not a direct moisture meter, but it can help you decide where to investigate next.
It also works well as a general thermal camera for home inspection because the same tool can help you check insulation gaps, HVAC temperature patterns, and suspicious leak areas.
Key Features
- Standalone handheld thermal camera with built-in display
- Higher-detail thermal imaging than basic entry-level units
- Helps scan walls, ceilings, floors, basement areas, and HVAC-adjacent surfaces
- Onboard storage for documenting unusual thermal patterns
- Ideal for homeowners who want a dedicated inspection tool instead of a phone attachment
Pros
- ✔ Strong balance for scanning full walls, ceilings, basement corners, and HVAC-adjacent areas
- ✔ Does not require a phone, app, or phone battery to operate
- ✔ Better suited for whole-room scanning than very basic spot thermal tools
- ✔ Works well for moisture, leak, insulation, and HVAC-related investigation
Cons
- ✖ More tool than some casual homeowners need for one small suspected leak
- ✖ Thermal patterns still need confirmation with a moisture meter
- ✖ May take some practice to interpret reflections, drafts, and temperature differences correctly
Best For
- Homeowners who want one dependable thermal camera for repeated moisture checks
- Scanning basement walls, ceilings, attics, exterior walls, and window areas
- DIY users who want a serious inspection tool but do not need a high-end professional system
Check the TOPDON TC004 3.5″ Thermal Imaging Camera on Amazon to see current availability.
TOPDON TC004 Mini Thermal Imaging Camera
Category Label: Best Budget Standalone Camera
The TOPDON TC004 Mini makes sense if you want a real handheld thermal camera without jumping straight into a larger inspection tool. It is smaller and simpler than the full TC004, but it still gives homeowners a useful way to scan for unusual thermal patterns around walls, ceilings, floors, doors, windows, and HVAC areas.
This model fits the homeowner who wants to check cold spots near baseboards, possible moisture after small leaks, condensation-prone bathroom walls, or damp-looking basement corners. It is not the best choice for detailed professional reporting, but it is a useful step above guessing by sight or touch alone.
Key Features
- Compact standalone thermal camera design
- Designed for basic residential moisture and temperature pattern checks
- Does not require a smartphone connection
- Simple handheld format for quick scans around the home
- Good entry point for homeowners who want thermal imaging without a larger tool
Pros
- ✔ Good lower-cost option for a standalone thermal camera
- ✔ Easier to manage than phone-based tools for some users
- ✔ Helpful for quick checks after leaks, condensation, or musty odors
- ✔ Compact enough to keep with other home inspection tools
Cons
- ✖ Less detailed than higher-resolution thermal cameras
- ✖ Not ideal for professional-grade inspection reports
- ✖ Can still miss moisture if the surface temperature difference is weak
Best For
- Budget-conscious homeowners who want a standalone thermal camera
- Basic moisture checks around walls, ceilings, and basement areas
- Users who do not want to rely on a phone attachment
Check the TOPDON TC004 Mini Thermal Imaging Camera on Amazon to see current availability.
FLIR C5 Compact Thermal Imaging Camera with WiFi
Category Label: Best for Contractors / Home Inspectors
The FLIR C5 is the pick I would aim at serious DIY users, home inspectors, restoration pros, and contractors who want a compact camera from an established thermal imaging brand. It is designed for building, HVAC, electrical, and mechanical inspection work, which makes it especially relevant for homes with recurring moisture problems.
It is also a strong infrared camera for moisture detection when you need clearer documentation for repeat inspections or contractor conversations.
For moisture detection, the FLIR C5 makes the most sense when you need to document unusual thermal patterns and inspect several systems in the same home. It can help identify areas that may need follow-up with a pinless moisture meter, pin-type meter, borescope, or professional inspection. If you are building a more complete inspection kit, this camera pairs naturally with a guide such as best moisture meters for hidden water damage.
Key Features
- Compact thermal camera designed for inspection work
- Works across building, HVAC, electrical, and mechanical applications
- WiFi capability for moving images into a documentation workflow
- Good fit for recurring home inspections and repair documentation
- Established brand reputation in thermal imaging
Pros
- ✔ Strong choice for serious inspection work
- ✔ Compact enough for field use, contractor bags, and homeowner inspections
- ✔ Good option when documentation matters
- ✔ Helpful beyond moisture, including HVAC and electrical temperature checks
Cons
- ✖ More advanced than many casual homeowners need
- ✖ Still requires careful interpretation and confirmation testing
- ✖ Higher-end features may be unnecessary for a single leak investigation
Best For
- Home inspectors, contractors, restoration pros, and serious DIY users
- Documenting moisture-related temperature patterns before and after repairs
- Homes with repeated moisture problems in several areas
Check the FLIR C5 Compact Thermal Imaging Camera with WiFi on Amazon to see current availability.
TOPDON TC001 Thermal Camera for Android
Category Label: Best Phone-Based Android Option
The TOPDON TC001 is the best choice here for Android users who want a compact phone-based thermal camera instead of a separate handheld device. It connects to compatible Android phones, tablets, and some computers, making it helpful for homeowners who are comfortable using an app-based tool.
For moisture investigation, the TC001 can help scan around suspect walls, windows, ceilings, floors, cabinets, and HVAC areas. Because the phone acts as the screen, it can feel more natural for users who already take photos and notes during home inspections. The main caution is compatibility. This is not the right product for iPhone users, and buyers should confirm their device connection before purchasing.
Key Features
- Phone-based thermal camera for compatible Android devices
- Compact design that is easy to store and carry
- Best suited for homeowners who prefer app-based inspection tools
- Good option for scanning multiple rooms without carrying a larger camera
- Can support photo-based documentation during moisture investigations
Pros
- ✔ Strong option for Android users who want a small thermal imaging tool
- ✔ Uses the phone screen, which many homeowners already know how to use
- ✔ Easy to carry for quick checks around the home
- ✔ Good fit for homeowners who want digital inspection notes and images
Cons
- ✖ Not for iPhone users
- ✖ Depends on phone compatibility, battery, and app usability
- ✖ Less convenient if you prefer a dedicated tool with its own screen
Best For
- Android users who want a compact thermal camera attachment
- Homeowners who already document repairs with their phone
- Checking suspicious areas before using a moisture meter or opening a wall
Check the TOPDON TC001 Thermal Camera for Android on Amazon to see current availability.
FLIR TG165-X Thermal Imaging Camera with Bullseye Laser
Category Label: Best Simple FLIR Spot-Inspection Camera
The FLIR TG165-X is a good fit for homeowners who want a simple FLIR thermal imaging tool for spot checks rather than a more advanced inspection camera. It is helpful for quickly checking surface temperature differences around walls, HVAC registers, ceiling areas, basement corners, doors, and windows.
This is not the most detailed thermal camera in the lineup, but that simplicity is part of its appeal. Some homeowners do not need a large set of reporting features. They need a straightforward tool that helps them find unusual temperature patterns and decide whether to test the area further. If your main goal is quick scanning rather than detailed thermal documentation, this model makes sense.
Key Features
- Simple handheld thermal imaging format
- Bullseye laser aiming for easier spot targeting
- Made for quick surface temperature checks
- Good fit for HVAC, wall, ceiling, and building inspection use
- Established FLIR brand name
Pros
- ✔ Simple to use for quick inspection passes
- ✔ Good brand choice for users who prefer FLIR
- ✔ Helpful for HVAC-related temperature checks as well as moisture investigation
- ✔ Does not require a phone or app connection
Cons
- ✖ Not as detailed as more advanced thermal cameras
- ✖ Better for spot inspection than full-room documentation
- ✖ May not satisfy users who want high-resolution thermal images
Best For
- Homeowners who want a simple FLIR thermal tool
- Quick checks around HVAC vents, ceiling spots, basement walls, and window areas
- Users who prefer a dedicated handheld tool over a phone attachment
FLIR ONE Gen 3 Thermal Camera for iOS Smartphones
Category Label: Optional: Best for Older iPhones
The FLIR ONE Gen 3 for iOS is the optional pick for homeowners who have a compatible older iPhone and want a phone-based thermal camera. It is especially appealing if you want a small tool for occasional moisture checks and do not want to buy a full standalone thermal camera.
The biggest issue is compatibility. This model is best treated as an optional pick because many newer iPhones use USB-C instead of Lightning. If your iPhone is not compatible, this is the wrong product.
If it is compatible, it can still be helpful. Use it to scan walls, ceilings, windows, doors, and areas near plumbing lines for suspicious temperature patterns. As with the Android option, the phone-based format works well for people who like taking notes, photos, and screenshots during inspections.
Key Features
- Phone-based thermal camera for compatible iOS devices
- Compact attachment design
- Helpful for occasional home moisture and temperature pattern checks
- Good option for users who prefer smartphone-based inspection tools
- Can help document suspicious areas before follow-up testing
Pros
- ✔ Convenient for compatible older iPhone users
- ✔ Compact and easy to store
- ✔ Good for quick scans around common moisture-risk areas
- ✔ Helpful for homeowners who already use their phone for home documentation
Cons
- ✖ Compatibility is the biggest concern, especially with newer iPhones
- ✖ Depends on phone battery, app support, and connection type
- ✖ Not as flexible as a standalone thermal camera for some users
Best For
- Owners of compatible older iPhones with the correct connector
- Occasional home moisture checks
- Users who want a compact phone-based tool rather than a separate camera
Check the FLIR ONE Gen 3 Thermal Camera for iOS Smartphones on Amazon to see current availability.
Thermal Imaging Camera Comparison Table
| Product | Category Label | Best Use Case | Key Strengths | Main Limitation | Amazon Link |
|---|---|---|---|---|---|
| TOPDON TC004 3.5″ Thermal Imaging Camera | Best Overall | Whole-home moisture scanning and repeated inspections | Standalone design, strong image detail, practical for walls, ceilings, basements, and HVAC areas | More tool than some casual users need | View on Amazon |
| TOPDON TC004 Mini Thermal Imaging Camera | Best Budget Standalone Camera | Basic homeowner thermal checks without using a phone | Compact, dedicated handheld format, simple moisture pattern scanning | Less detailed than higher-end models | View on Amazon |
| FLIR C5 Compact Thermal Imaging Camera with WiFi | Best for Contractors / Home Inspectors | Serious inspection work and documentation | Established brand, compact body, strong fit for building and HVAC inspections | May be more advanced than needed for one-time homeowner use | View on Amazon |
| TOPDON TC001 Thermal Camera for Android | Best Phone-Based Android Option | Android users who want a compact thermal camera attachment | Portable, app-based, easy to document suspicious areas | Not for iPhone users; depends on device compatibility | View on Amazon |
| FLIR TG165-X Thermal Imaging Camera with Bullseye Laser | Best Simple FLIR Spot-Inspection Camera | Quick temperature checks around suspect areas | Simple operation, FLIR brand, helpful for HVAC and surface checks | Not as detailed as advanced thermal cameras | View on Amazon |
| FLIR ONE Gen 3 Thermal Camera for iOS Smartphones | Optional: Best for Older iPhones | Compatible older iPhone users who want a compact phone-based tool | Small, convenient, good for occasional inspections | Compatibility risk with newer iPhones | View on Amazon |
How to Choose the Best Thermal Camera for Moisture Detection
Before choosing a thermal camera, think about the kind of moisture problem you are actually trying to solve.
A one-time bathroom leak, a recurring basement issue, and a whole-home inspection do not call for the same tool.
A homeowner checking one bathroom wall may only need a simple tool. Someone monitoring a basement, crawl space, attic, and several exterior walls after repeated leaks needs more capability.
If you mainly need a thermal camera for water leaks, choose a model that makes it easy to scan broad wall, ceiling, and floor areas before narrowing down the exact test spot.
| Your Situation | Best Type of Thermal Camera |
|---|---|
| One-time leak check | Budget standalone or phone-based model |
| Repeated moisture problems | Higher-detail standalone camera |
| Contractor or inspection documentation | Professional-style compact thermal camera |
| Phone-first workflow | Compatible Android or iPhone thermal attachment |
Choose a standalone camera if you want fewer compatibility problems
Standalone models like the TOPDON TC004, TOPDON TC004 Mini, FLIR C5, and FLIR TG165-X do not depend on your phone model, operating system, connector, or battery. That matters if you want a tool you can keep with your moisture meter, flashlight, ladder, and inspection notebook.
A standalone thermal camera is usually the better choice if you plan to inspect more than one home, scan after storms, monitor recurring damp areas, or document conditions before calling a contractor.
Choose a phone-based camera if portability matters most
Phone-based thermal cameras are compact and convenient. They are a good fit if you already document home problems with your phone and want to add thermal images to that workflow. The TOPDON TC001 is the strongest phone-based choice in this lineup for Android users. The FLIR ONE Gen 3 can make sense for compatible older iPhones, but compatibility should be checked carefully before purchase.
Do not assume a phone thermal camera will work with every phone from the same brand. Connector type, operating system support, app compatibility, and physical phone case clearance can all matter.
Think about the surfaces you need to inspect
Thermal imaging is most helpful when there is a temperature difference to see. Damp materials may appear cooler because of evaporation, but that pattern can change depending on room temperature, airflow, sunlight, surface material, and whether the area is actively wet.
If your main concern is trying to detect damp walls, scan slowly across the entire wall surface instead of focusing only on the stained or musty area.
For example, a cold streak below a second-floor bathroom may point you toward a plumbing chase, while a cooler patch below a window may point toward exterior water entry or condensation.
Only scan areas you can inspect safely. Do not enter wet electrical areas, unstable attics, flooded basements, or mold-heavy spaces just to get a better thermal image.
Thermal cameras are often helpful around:
- Ceilings below roof leaks or plumbing lines, especially if you are also checking for issues covered in how to find roof leaks before mold forms
- Basement walls after rain
- Window frames and exterior wall corners
- Bathroom walls and floors near showers or toilets
- Kitchen cabinets, dishwasher areas, and refrigerator water lines
- HVAC ducts, registers, and condensation-prone areas
For a broader room-by-room process, use the whole-home moisture inspection guide alongside your thermal camera.
If you are trying to locate moisture without destructive testing, also read how to detect moisture without opening walls. That guide covers the broader inspection process, while this article focuses specifically on choosing a thermal camera.
Do not replace a moisture meter with a thermal camera
A thermal camera and moisture meter answer different questions:
- Thermal camera: “Where does this area look unusual?”
- Moisture meter: “Is this material actually wet?”
For hidden moisture investigation, the best approach is often to scan first, then confirm with a meter.
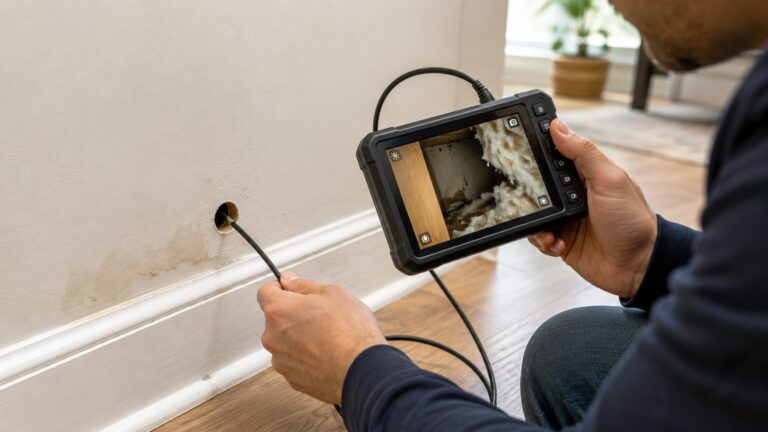
If a suspicious area needs visual confirmation inside a wall cavity, a tool from the best borescopes for inspecting inside walls list may be more useful than thermal imaging alone.
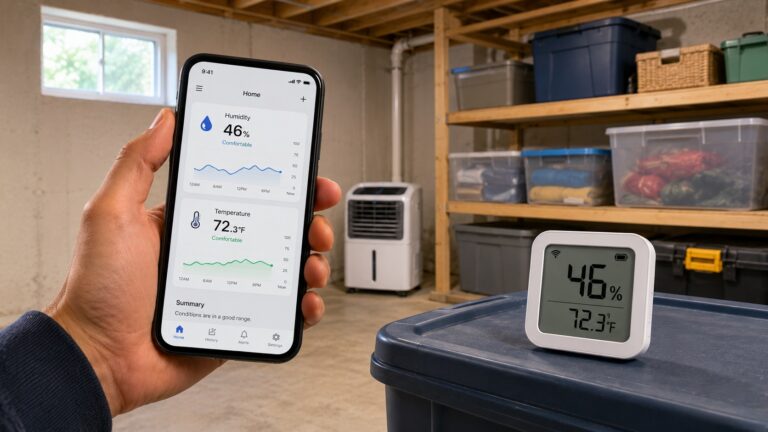
For many homeowners, the best setup is a thermal camera plus a moisture meter. Use the thermal camera to scan broad areas, then use the moisture meter to confirm suspect spots. For more information on measuring indoor conditions, see how to test indoor humidity levels.
Choose more detail if you are scanning larger areas
For one small leak area, a simple thermal tool may be enough. For larger rooms, basements, attics, or repeated investigations, better image detail makes it easier to separate meaningful patterns from normal temperature variation. That is why the TOPDON TC004 is the best overall pick, while the FLIR C5 is better suited for serious documentation and inspection workflows.
How to Use a Thermal Imaging Camera for Moisture Problems
Thermal cameras are powerful, but they are easy to misuse. A good camera can still give confusing results if the room conditions are wrong or the user assumes every cold area is wet.
Thermal imaging for hidden moisture works best when you treat the image as a clue, not a final answer.
Scan when temperature contrast is useful
Thermal imaging works best when there is enough temperature difference between materials. For example, a damp area may stand out more clearly after a leak, after rain, during HVAC operation, or when indoor and outdoor temperatures differ. If every surface in the room is the same temperature, even a good camera may show very little.
A clean thermal image is not always a clean bill of health. If the surface has already dried, if insulation hides the temperature difference, or if the leak is intermittent, the camera may not show a dramatic pattern.
Compare suspicious areas with nearby normal areas
Do not inspect one spot in isolation. Compare the suspect wall, floor, or ceiling area with a similar dry area nearby. Look for patterns, not just one color. A long cold streak below a window, a patch under a plumbing line, or a shape that follows a ceiling joist may matter more than a random small spot.
For example, if one lower corner of a bedroom wall looks cooler than the same corner on the opposite side of the room, that pattern deserves a closer look.
Watch for air leaks and insulation gaps
Cold areas are not always wet. They may be caused by missing insulation, drafts, thermal bridging, HVAC airflow, or exterior temperature transfer. This is especially common near windows, doors, rim joists, attic hatches, and exterior wall corners. If you see unusual patterns around windows, the guide on how to detect moisture around window frames can help you separate moisture concerns from normal window-area temperature differences.
Confirm with a moisture meter
After you find a suspicious thermal pattern, test the area with a pinless or pin-type moisture meter where appropriate. If the thermal image and moisture reading both point to a problem, you have a stronger reason to keep investigating. If the thermal image looks suspicious but the moisture meter reads normal, the issue may be insulation, airflow, surface temperature, or another non-moisture condition.
A thermal camera may show a cool area after recent moisture exposure, but it cannot always tell whether the problem is active, old, or already drying. That is why follow-up moisture readings and repeat checks matter.
Document the same area over time
If you are monitoring a repaired leak, take thermal images from the same distance and angle each time. Make notes about the date, weather, HVAC status, and whether it had rained recently. This is especially helpful for recurring issues, such as basement dampness, roof leaks, or repeated condensation patterns. The guide on why moisture problems keep returning can help you think through those repeat patterns.
If you are documenting water damage for a contractor or insurance claim, save normal photos along with thermal images. Thermal images are easier to understand when they are paired with visible-light photos of the same wall, ceiling, or floor area.
Common Thermal Camera Mistakes That Can Hide Moisture Problems
Mistake 1: Thinking thermal cameras directly detect water
A thermal camera does not see water inside a wall. It sees surface temperature differences. Those differences may be caused by moisture, but they may also be caused by airflow, insulation, sunlight, material changes, or HVAC operation.
Many false alarms happen when someone sees a blue patch on the screen and immediately assumes the wall is wet.
Mistake 2: Scanning immediately after sunlight hits the wall
Sunlight can heat surfaces unevenly and create false patterns. Exterior walls, window areas, and attic surfaces can look very different depending on sun exposure. If possible, compare readings under stable conditions.
Mistake 3: Ignoring humidity
High indoor humidity can make surfaces damp without a plumbing leak. It can also create condensation on cold surfaces. If several rooms show moisture-like patterns, test indoor humidity and look for whole-home moisture sources before assuming every cold patch is a leak.
A bathroom wall after hot showers, a cold basement corner in summer, or a closet against an exterior wall may show suspicious thermal patterns even when there is no active pipe leak.
Mistake 4: Relying on one image
One thermal image is a clue, not a conclusion. Look for repeated patterns, compare similar areas, test with a moisture meter, and inspect the surrounding conditions.
Mistake 5: Choosing a phone camera without checking compatibility
Phone-based thermal cameras can be excellent, but compatibility matters. Check Android or iOS requirements, connector type, app support, and whether your phone case blocks the connection.
Mistake 6: Buying more tool than you will use
If you only need to check one small area after a known leak, a simpler tool may be enough. If you plan to inspect multiple areas over time, a more capable standalone camera is easier to justify.
Mistake 7: Skipping safety concerns
Do not let a thermal camera give you false confidence. Stay out of unsafe attics, flooded basements, wet electrical areas, unstable ceilings, and mold-contaminated spaces.
If there are electrical hazards, structural warning signs, sewage water, or large mold growth, step back and call a qualified professional.
Mistake 8: Forgetting That Shiny Surfaces Can Mislead Thermal Cameras
Glossy tile, metal, glass, and shiny paint can reflect surrounding temperatures and create confusing readings. When possible, compare nearby matte surfaces and avoid making decisions from reflective surfaces alone.
FAQ About Thermal Imaging Cameras and Moisture Detection
Can a thermal camera detect moisture behind walls?
A thermal camera can help find temperature patterns that may suggest moisture behind walls, but it does not directly measure moisture. Damp areas often appear cooler because of evaporation, but similar patterns can come from air leaks, missing insulation, or thermal bridging. Always confirm suspect areas with a moisture meter before making repair decisions.
What is the best thermal imaging camera for detecting moisture?
For most homeowners, the TOPDON TC004 is the best overall choice because it offers a strong balance of standalone usability, image detail, and practical home inspection features. For contractors or serious inspection work, the FLIR C5 is the better professional-style option.
What should I look for during a thermal imaging moisture inspection?
During a thermal imaging moisture inspection, look for unusual patterns rather than one random cold spot. Damp areas often appear as irregular cool patches, streaks below leak sources, or temperature changes that match the shape of framing, ceilings, floors, or wall cavities.
Is a thermal camera better than a moisture meter?
No. They do different jobs. A thermal camera helps locate suspicious temperature patterns over a wider area. A moisture meter helps confirm whether a material is actually damp. For hidden moisture investigation, the best approach is often to use both tools together.
Can thermal imaging find mold?
Thermal imaging does not find mold directly. It may help locate damp areas where mold could grow if moisture persists, but mold identification requires visual inspection, proper testing, or professional evaluation when needed. If mold is the concern, start with the site guide on how to remove mold permanently.
Are phone thermal cameras good enough for homeowners?
Phone thermal cameras can work well for homeowners, especially for occasional inspections and basic documentation. The TOPDON TC001 is a strong option for Android users. The FLIR ONE Gen 3 may work for some older iPhone users, but compatibility must be checked carefully.
When should I use a thermal camera after a leak?
Use a thermal camera after the area is safe and surface conditions are stable enough to show useful contrast. It can help you scan nearby walls, floors, ceilings, cabinets, and baseboards for suspicious patterns. Follow up with a moisture meter to confirm whether materials are still wet.
Can thermal cameras help with basement moisture?
Yes, thermal cameras can help identify unusual cold or damp-looking patterns on basement walls and floors, especially after rain or during seasonal temperature shifts. However, basement moisture can also come from hydrostatic pressure, condensation, poor drainage, or wall seepage, so thermal imaging should be part of a broader inspection.
Do I need a professional thermal camera for home moisture problems?
Not always. Many homeowners can use a mid-range or budget thermal camera to identify suspicious areas. A professional-grade camera is more helpful when you need documentation, repeated inspections, contractor-level reporting, or more confidence across several areas of the home.
Conclusion
The right choice depends on whether you are checking one suspicious spot or building a tool kit for repeated moisture problems. For most homeowners, the TOPDON TC004 is the best overall choice because it works as a dedicated standalone tool and gives enough capability for repeated moisture investigations. The TOPDON TC004 Mini is the better choice if you want a lower-cost standalone camera for basic checks.
If you are a contractor, home inspector, or serious DIY user who wants stronger documentation features, the FLIR C5 is the best fit. Android users who want a compact phone-based tool should consider the TOPDON TC001. If you want a simple FLIR tool for quick spot inspections, the FLIR TG165-X is the most straightforward choice. The FLIR ONE Gen 3 is worth considering only if you have a compatible older iPhone.
If you are dealing with a musty smell, a stain that keeps returning, or a cold patch near a window or ceiling, thermal imaging can help you stop guessing and start narrowing down the source.
No thermal camera should be treated as a final moisture diagnosis by itself. Use it to find suspicious patterns, then confirm with a moisture meter, humidity readings, visual inspection, and professional help when the damage appears serious. For a broader moisture strategy, see how to find, fix, and prevent moisture problems in homes.
The best results come from using the camera patiently: scan, compare, confirm, and then decide what kind of repair or professional help is actually needed.