Should You Repair or Replace Crawl Space Vapor Barriers?
You can usually repair a crawl space vapor barrier when the liner is durable, mostly intact, properly positioned, and only has small holes, isolated seam gaps, or limited edge separation. You should replace it when the plastic is thin, brittle, torn across large areas, poorly sealed, missing coverage, exposing soil, contaminated, repeatedly displaced, or failing as part of a larger crawl space moisture problem.
A crawl space vapor barrier is meant to reduce moisture vapor coming up from exposed soil. It is not a flood-control system, a drainage system, or a substitute for crawl space encapsulation. That distinction matters because a torn seam may be a simple repair, while standing water on top of the liner may point to a drainage or water-entry problem that tape will not solve.
This article focuses on the repair-or-replace decision for existing crawl space vapor barriers. For the broader structural moisture context, see Structural Moisture Problems in Homes: Causes, Risks, and Repair Guide.
Can a Crawl Space Vapor Barrier Be Repaired?
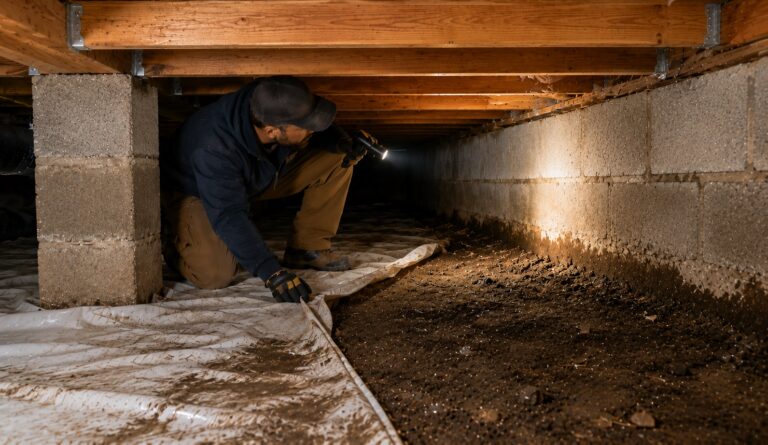
Yes, a crawl space vapor barrier can often be repaired if the damage is minor and the rest of the liner is still in good condition. Small punctures, isolated tears, loose seams, or limited gaps around piers may be repairable when the plastic is thick enough, flexible enough, and still covering the crawl space soil properly.
Repair makes the most sense when the vapor barrier is basically doing its job. If the floor is covered, the seams mostly overlap, the liner is not brittle, and only a few areas have been damaged by foot traffic, tools, pests, or maintenance work, patching and resealing may restore performance without full replacement.
Repair is less useful when the liner was never installed correctly or has failed across the crawl space. If large areas of soil are exposed, seams are open everywhere, plastic is shredded, water keeps moving the liner, or the material cracks when handled, replacing the vapor barrier is usually more practical than chasing one repair after another.
What a Crawl Space Vapor Barrier Does
A crawl space vapor barrier reduces moisture vapor that rises from exposed soil into the crawl space. Dirt floors can release moisture even when they do not look wet, which can contribute to humidity, musty odors, damp insulation, condensation on ducts, and mold risk on nearby wood framing.
A properly installed vapor barrier helps separate the crawl space from the soil moisture below it. It works best when it covers the ground continuously, overlaps at seams, is sealed at joints, and is detailed around piers, posts, plumbing, and foundation edges.
When it is intact and properly sealed, a vapor barrier may help reduce:
- Ground moisture vapor entering the crawl space
- Humidity coming from exposed soil
- Musty odors caused by damp crawl space conditions
- Moisture exposure to insulation, ducts, and wood framing
- Long-term crawl space dampness when paired with proper drainage and ventilation strategy
If your crawl space has general moisture symptoms beyond damaged plastic, compare them with signs of moisture in crawl spaces. The vapor barrier may be one part of the problem, but it may not be the only moisture source.
What a Crawl Space Vapor Barrier Does Not Do
A vapor barrier does not stop crawl space flooding by itself. It does not drain standing water, repair foundation seepage, fix plumbing leaks, remove humidity from the air, or strengthen wet wood framing. If bulk water is entering the crawl space, the water source must be corrected before a liner repair or replacement can perform well.
A homeowner may see water on top of the plastic and assume the vapor barrier has failed. Sometimes the liner is damaged, but water on top of the vapor barrier usually means water is entering from somewhere else, such as grading problems, downspout discharge, groundwater, plumbing leaks, foundation seepage, condensation, or crawl space drainage failure.
A vapor barrier does not replace:
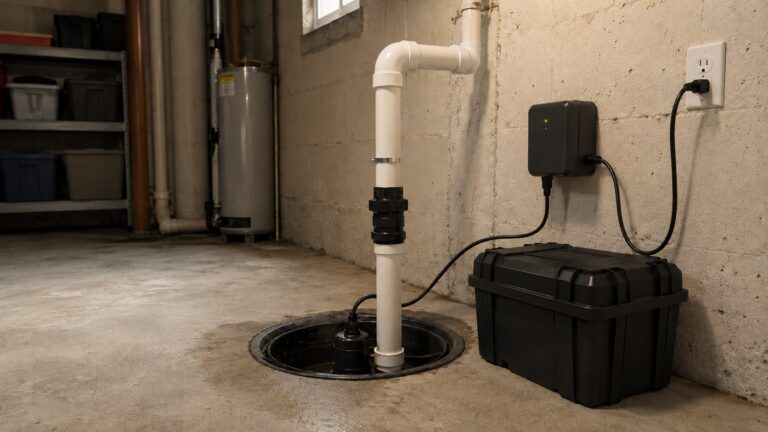
- Crawl space drainage
- Sump systems where bulk water is present
- Foundation water control
- Plumbing leak repair
- Dehumidification when humidity remains high
- Insulation correction
- Structural wood repair
- Full crawl space encapsulation
If water is collecting in the crawl space, diagnose the water source before spending money on liner patches. A new vapor barrier installed over an unresolved water problem can become dirty, displaced, contaminated, or trapped above wet soil.
The Short Answer: Patch Small Damage, Replace Failed Systems
The simplest rule is this: patch small damage on a good liner, but replace a failed liner system. A few holes do not always mean the vapor barrier is ruined, but a liner that leaves soil exposed, has loose seams everywhere, or breaks apart when touched is not worth endless repair.
Repair may be enough when:
- The liner is thick, flexible, and still durable.
- The damage is limited to a few small holes or tears.
- Most seams remain overlapped and sealed.
- The liner still covers the crawl space floor.
- Gaps around piers or posts are minor and accessible.
- The plastic has not become brittle or shredded.
- There is no standing water moving or lifting the liner.
Replacement is usually better when:
- Large areas of soil are exposed.
- The liner is thin, brittle, torn, or badly wrinkled.
- Seams are open across much of the crawl space.
- The vapor barrier does not reach the foundation walls or important edges.
- The liner is loose around piers, posts, and penetrations.
- Water repeatedly sits on top of or underneath the plastic.
- The material is contaminated by sewage, pests, flood debris, or heavy mud.
- The crawl space has broader moisture, mold, drainage, or insulation problems.
If the liner itself is poor quality, too thin, or incomplete, replacement may be a better long-term decision than patching. For product-level comparison, see Best Crawl Space Vapor Barriers. This article is not a product roundup, but liner quality does affect whether repair is worth doing.
Signs a Crawl Space Vapor Barrier Can Usually Be Repaired
Repair is more realistic when you see:
- A few small holes from tools, shoes, pests, or maintenance work
- One or two loose seams that can be properly resealed
- Minor gaps around piers, posts, or plumbing penetrations
- A small torn section where the surrounding plastic is still strong
- Edges that pulled loose in one accessible area
- Plastic that is dirty but still intact and covering the soil
- A liner that was installed well but damaged in a limited location
In these cases, the goal is to restore continuity. A vapor barrier works by limiting moisture movement from the ground into the crawl space. If only a small section is interrupted, a compatible patch, proper seam tape, or appropriate detail sealing may be enough.
Small Tears and Punctures
Small holes are often repairable if the liner is otherwise durable. A puncture from a tool, a service technician’s boot, a dropped object, or a small pest tear does not automatically mean the entire vapor barrier should be replaced.
The key is the condition of the surrounding plastic. If the liner is flexible and strong, a patch can bond to stable material. If the plastic is brittle, stretched, muddy, or shredding around the hole, the patch may fail quickly.
Limited Seam Failure
A loose seam can often be repaired when the overlap is still adequate and the liner is not contaminated or falling apart. Seams are important because open overlaps allow ground moisture vapor to bypass the liner and rise into the crawl space.
Use proper crawl space vapor barrier seam materials rather than household tape. Duct tape, packing tape, painter’s tape, and thin general-purpose tapes are not reliable long-term choices in damp crawl space conditions. For more detail on appropriate seam tape, butyl tape, and sealant uses, see Best Vapor Barrier Tape and Sealants for Crawl Spaces.
Minor Gaps Around Piers or Posts
Piers, posts, columns, and supports are common weak points because the liner must be cut and detailed around them. Minor gaps may be repairable if the liner is still sized correctly and the material has not pulled away from multiple sides.
Large loose openings around piers are more serious. They may allow moisture vapor from exposed soil to bypass the barrier. If many pier details are poorly cut, loosely draped, or unsealed, the vapor barrier may need major rework or replacement rather than small patch repairs.
Signs a Crawl Space Vapor Barrier Should Be Replaced
A crawl space vapor barrier should usually be replaced when it no longer functions as a continuous moisture-control layer. At that point, patching one hole does not solve the larger problem.
Replacement is usually the better decision when:
- Large sections of dirt are exposed.
- The plastic is thin, brittle, cracked, or tearing easily.
- Seams are open throughout the crawl space.
- The liner is bunched, shifted, wrinkled, or displaced by water.
- The vapor barrier does not reach important edges, walls, or piers.
- There are many holes from pests, workers, storage, or foot traffic.
- The liner is contaminated by sewage, flooding, heavy mud, or rodent activity.
- Water repeatedly collects on top of or underneath the liner.
- The crawl space still smells musty or stays humid despite the plastic.
A vapor barrier that fails across many areas is not a good repair candidate. Repeated patching may cost time and money without giving the crawl space a reliable moisture-control layer. Replacement also gives you a chance to correct layout problems, improve seam sealing, cover exposed soil, and choose a more durable liner.
Thin or Brittle Plastic
Thin plastic sheeting often tears easily, especially when workers crawl across it or when it is pulled around piers and plumbing. Over time, some liners become brittle or dirty enough that tape will not bond well. If the material cracks when moved, replacement is usually better than patching.
This is especially true when the vapor barrier is very thin, loosely laid, or not sealed at seams. A liner that was never designed as a durable crawl space moisture-control layer may not be worth repairing.
Widespread Open Seams
One open seam can be repaired. Many open seams suggest the original installation was incomplete, the tape failed, or the liner has shifted. If seams are open across much of the crawl space, the repair becomes more like reinstallation.
Widespread seam failure matters because vapor can rise through every open overlap. The crawl space may still have ground moisture problems even though plastic appears to cover the floor from a distance.
Contaminated or Mud-Covered Liner
A dirty vapor barrier does not automatically need replacement. Crawl spaces are dirty environments, and some staining or dust is normal. But heavy mud, flood debris, sewage exposure, rodent contamination, or persistent standing water can make replacement the cleaner and safer option.
If contamination is severe, repair should wait until the source is addressed. Otherwise, a new liner may become contaminated again.
Why Exposed Soil Matters
Exposed soil is one of the clearest signs that a crawl space vapor barrier is not doing its job. The liner’s main purpose is to separate the crawl space air from ground moisture. When soil is visible through gaps, missing sections, open seams, or pulled-back edges, moisture can bypass the barrier.
A few small exposed spots may be repairable. For example, a small tear near a plumbing line or a narrow gap at a seam may be patched. But widespread exposed soil usually means the vapor barrier is incomplete, shifted, damaged, or poorly installed.
Exposed soil can contribute to higher humidity, musty odors, condensation on ducts or insulation, mold risk on floor framing, damp insulation, and persistent moisture even after small repairs.
If exposed soil is widespread, replacement or reinstallation is usually more effective than trying to patch scattered areas. The new liner should be planned as a continuous ground moisture layer, not as random plastic sheets placed over the easiest areas.
What Open Seams, Wall Gaps, and Pier Gaps Mean
Open seams, wall gaps, and pier gaps reduce vapor barrier performance because they create moisture bypass points. The liner may look mostly complete, but moisture can still rise through every unsealed joint and exposed soil edge.
Open Seams
Open seams are repairable when they are limited and the material is clean enough for proper bonding. But if most seams are open, the barrier was either installed poorly or has aged beyond simple repair.
Wall Gaps
A ground-only vapor barrier may stop some soil vapor, but a more complete crawl space moisture system often extends the liner up foundation walls and secures it. If the liner has pulled away from walls or leaves major exposed perimeter gaps, repair may be possible only if the material is still correctly sized and durable.
Pier and Penetration Gaps
Piers, plumbing lines, drains, HVAC supports, and utility penetrations require careful detailing. Loose cuts around these areas can become recurring moisture paths. Minor gaps can be sealed. Large, messy, repeated gaps may require replacement sections or a more complete vapor barrier installation.
If you need a step-by-step installation reference, use How to Install a Crawl Space Vapor Barrier. This article is focused on deciding whether your current liner is worth repairing or should be replaced.
Water on Top of the Vapor Barrier: Repair or Drainage Problem?
Water sitting on top of a crawl space vapor barrier is usually not solved by patching the liner. It may look like the vapor barrier has failed, but the real issue is often bulk water entering the crawl space from another source. The liner may simply be catching water that should not be there in the first place.
Water on top of the vapor barrier may come from:
- Plumbing leaks above the crawl space
- Foundation seepage
- Poor exterior grading
- Downspouts draining near the foundation
- Groundwater intrusion
- Condensation dripping from ducts or pipes
- Water entering through crawl space vents or access doors
- Standing water that moved the liner out of place
If water pools on top of the vapor barrier after storms, the crawl space likely needs drainage evaluation. Replacing the plastic without correcting the water source may leave the new liner muddy, displaced, or contaminated. The vapor barrier controls ground vapor; it does not replace drainage corrections or bulk water management.
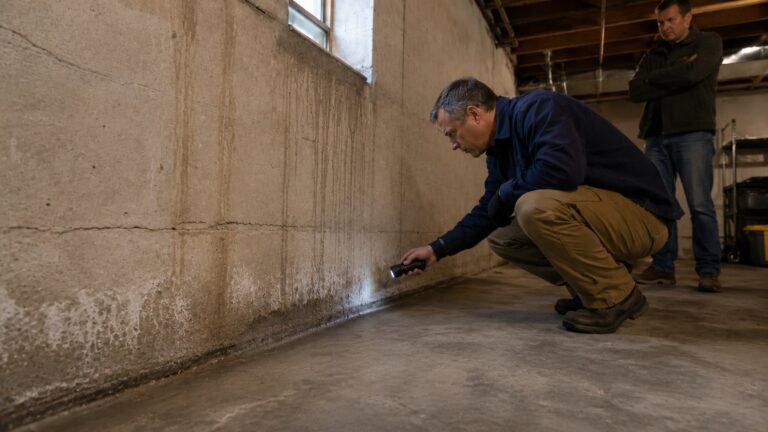
Before assuming the liner is the problem, look for the direction of water trails, wet foundation edges, dripping pipes or ducts, puddles near vents or access doors, and low spots where water collects repeatedly.
If you are seeing puddles, mud, or water trails in the crawl space, compare the situation with signs of standing water in crawl spaces. Standing water is a separate problem from ordinary liner wear.
Water Under the Vapor Barrier
Water under the vapor barrier also needs careful diagnosis. Some dampness under a liner can happen because the barrier is separating soil moisture from crawl space air. But visible pooling, saturated soil, mud, a floating liner, or water movement below the plastic suggests a larger water-control issue.
Water under the liner may point to:
- Poor drainage around the foundation
- Groundwater rising below the crawl space
- Surface water entering from outside
- Low spots in the crawl space floor
- Missing drainage channels or sump support
- Downspouts or grading sending water toward the foundation
A new vapor barrier can hide water underneath it if the drainage problem remains. That can leave the crawl space smelling musty and keep humidity high even though the ground looks covered. Before replacing the liner, correct the source of bulk water or plan the vapor barrier as part of a larger crawl space water-control system.
When Vapor Barrier Replacement Should Become Crawl Space Encapsulation
Replacing a vapor barrier is sometimes enough when the crawl space is otherwise dry, stable, and easy to control. But when vapor barrier damage is part of a larger moisture pattern, full crawl space encapsulation may be the better long-term strategy.
Encapsulation is more than laying plastic on the ground. It may include a sealed floor liner, wall coverage, sealed seams, sealed vents, drainage improvements, insulation changes, and humidity control, depending on crawl space conditions.
Consider encapsulation instead of simple liner replacement when:
- The crawl space stays humid even with plastic on the ground.
- There is recurring mold on joists, subflooring, or insulation.
- The vapor barrier repeatedly shifts, tears, or becomes wet.
- Open vents allow humid outdoor air into the crawl space.
- Ground moisture is paired with condensation on ducts or pipes.
- Insulation is sagging, damp, or moldy.
- The crawl space has persistent odor affecting the home above.
- Standing water or drainage problems have already damaged the liner.
If you are deciding whether the crawl space needs more than a new liner, see what crawl space encapsulation is and how it works. If the home already has an encapsulation system and the liner is failing, compare the situation with signs of failed crawl space encapsulation.
Why Thin 6-Mil Plastic Is Often Not Worth Repeated Repair
Thin plastic can provide some basic ground coverage, but it is often not durable enough for long-term crawl space conditions. Workers crawl across it, pests can tear it, tools can puncture it, and shifting soil or water can bunch it up. If thin plastic has many holes, loose seams, or brittle areas, repeated patching may become a temporary cycle.
This does not mean every older 6-mil liner must automatically be replaced. If it is intact, covering the soil, and the crawl space is dry, it may still be doing some useful work. But once thin plastic starts tearing across multiple areas or pulling apart at seams, upgrading to a more durable liner may be smarter than patching every failure.
Thin plastic is more likely to need replacement when:
- It tears when touched or moved.
- It has many punctures from foot traffic.
- It does not stay flat or in place.
- It has open seams throughout the crawl space.
- It is not sealed around piers, posts, or edges.
- It leaves soil exposed around the perimeter.
Should a Dirty Vapor Barrier Be Replaced?
A dirty vapor barrier does not always need replacement. Crawl spaces are naturally dirty, and dust or light soil on top of the liner does not automatically mean it has failed. The important questions are whether the liner is still intact, sealed, covering the soil, and dry enough to function.
A dirty liner may still be effective when:
- The plastic is not torn or brittle.
- The seams remain closed.
- The soil is still covered.
- There is no standing water or sewage contamination.
- The liner has not shifted out of place.
- The crawl space does not have persistent odor or high humidity.
Replacement becomes more likely when dirt is paired with heavy mud, flood residue, pest contamination, sewage exposure, repeated standing water, or widespread tears. In those cases, the liner may be both dirty and functionally compromised.
If the liner has sewage exposure, rodent contamination, or flood debris, avoid crawling through or disturbing the material without proper protective equipment and cleanup planning.
When to Call a Crawl Space Repair Specialist
You should call a crawl space repair specialist when vapor barrier damage is connected to standing water, mold, damp insulation, wood moisture, structural concerns, drainage failure, or repeated liner displacement. A small tear in a good liner may be a simple repair. A damaged vapor barrier in a wet, musty, mold-prone crawl space is usually part of a larger moisture-control problem.
Professional help is especially important when:
- Water collects on top of or underneath the vapor barrier.
- Large areas of soil are exposed.
- The liner is badly torn, brittle, contaminated, or missing sections.
- The crawl space has a strong musty odor.
- Insulation is sagging, damp, or moldy.
- Wood joists, beams, or subflooring show moisture or mold.
- The vapor barrier keeps shifting after rain.
- There are signs of rodents, sewage, flooding, or heavy contamination.
- You are considering encapsulation instead of basic vapor barrier replacement.
- You are unsure whether the problem is vapor, drainage, humidity, or structural moisture.
A specialist can determine whether the crawl space needs a simple liner repair, a new vapor barrier, drainage correction, encapsulation, dehumidification, insulation changes, or structural moisture repair. For contractor-readiness guidance, see when to hire a crawl space repair specialist.
How to Prevent New Vapor Barrier Failure
After repairing or replacing a crawl space vapor barrier, the goal is to keep it continuous, protected, and properly detailed. A new liner can fail quickly if the crawl space still has standing water, sharp debris, pest activity, poor access paths, or workers repeatedly dragging tools across it.
To reduce the chance of future vapor barrier failure:
- Correct drainage problems before installing or replacing the liner.
- Remove rocks, sharp debris, and construction waste from the crawl space floor.
- Use a liner thick enough for expected crawl space traffic and service access.
- Seal seams with compatible vapor barrier tape.
- Detail the liner carefully around piers, posts, plumbing, and penetrations.
- Keep downspouts and grading from sending water toward the foundation.
- Inspect the liner after plumbing, HVAC, pest-control, or repair work.
- Monitor for musty odor, condensation, damp insulation, or mold on framing.
- Do not use the crawl space as rough storage if stored items tear or shift the liner.
If the crawl space has ongoing moisture problems, vapor barrier replacement should be paired with prevention. The guide on how to prevent moisture build-up in crawl spaces can help connect the liner decision to drainage, humidity, airflow, and long-term moisture control.
Common Mistakes to Avoid
Using Household Tape for Long-Term Seam Repairs
Duct tape, packing tape, painter’s tape, and thin general-purpose tapes are not reliable long-term crawl space vapor barrier repairs. Crawl spaces are damp, dirty, and rough on adhesives. Use compatible vapor barrier seam tape, butyl tape, or appropriate sealant details for the right location.
Patching a Liner That Is Already Failing Everywhere
Patching makes sense when damage is isolated. It is usually a poor long-term strategy when the liner is thin, brittle, shredded, loose, or open at seams throughout the crawl space. In that case, replacement is more practical than chasing recurring failures.
Ignoring Exposed Soil
Exposed soil is not a minor cosmetic issue. It allows ground moisture vapor to bypass the liner. If large areas of soil are visible, the vapor barrier is not performing as a continuous moisture-control layer.
Treating Standing Water as a Vapor Barrier Problem
A vapor barrier can separate crawl space air from soil moisture, but it does not solve bulk water intrusion. Standing water usually requires drainage correction, grading improvement, sump support, foundation water control, or plumbing repair.
Replacing the Liner Before Fixing the Water Source
A new vapor barrier can fail quickly if installed over a wet crawl space with unresolved water entry. Correct drainage, leaks, and standing water before relying on a new liner.
FAQ: Repairing or Replacing Crawl Space Vapor Barriers
Can you patch a crawl space vapor barrier?
Yes, you can patch a crawl space vapor barrier when the damage is small and the surrounding liner is still durable. Patching is most useful for isolated holes, small tears, or limited seam gaps. If the plastic is brittle, thin, contaminated, or torn across many areas, replacement is usually better.
Is tape enough to repair vapor barrier seams?
Tape can be enough for limited seam repair if the liner is clean, durable, properly overlapped, and compatible with the tape being used. Household tapes are not a good long-term solution. Use proper vapor barrier seam tape or appropriate detail-sealing products designed for crawl space liner repairs.
When should crawl space plastic be replaced?
Crawl space plastic should usually be replaced when it is brittle, shredded, thin, poorly sealed, missing coverage, contaminated, repeatedly displaced, or exposing large areas of soil. Replacement is also more likely when the vapor barrier was never installed as a continuous moisture-control layer.
Is water on top of a crawl space vapor barrier normal?
No, repeated water on top of a crawl space vapor barrier is not something to ignore. It usually points to plumbing leaks, drainage problems, foundation seepage, condensation, groundwater, or exterior water entry. The water source should be corrected before replacing or patching the liner.
Does a replacement vapor barrier need to go up crawl space walls?
A basic vapor barrier may cover only the ground, but more complete crawl space moisture-control systems often extend the liner up foundation walls and seal it. Wall coverage becomes more important when the crawl space has persistent humidity, exposed masonry moisture, or encapsulation goals.
Is a dirty vapor barrier still effective?
A dirty vapor barrier can still be effective if it is intact, sealed, dry, and covering the soil. Light dirt or dust does not automatically mean replacement is needed. Heavy mud, sewage, flood debris, rodent contamination, standing water, or widespread tearing changes the decision.
Should thin 6-mil plastic be replaced?
Thin 6-mil plastic does not always need replacement if it is intact and the crawl space is dry. However, it is often not worth repeated repair when it tears easily, has open seams, shifts out of place, leaves soil exposed, or becomes brittle. A more durable liner may be a better long-term upgrade.
Does a vapor barrier stop crawl space flooding?
No. A vapor barrier does not stop crawl space flooding. It helps control ground moisture vapor. Flooding, standing water, groundwater intrusion, and drainage problems require water-control repairs before the liner can perform properly.
Final Decision: Repair the Liner or Replace the System?
You should repair a crawl space vapor barrier when the liner is durable, mostly intact, and damaged only in small, isolated areas. Small holes, limited seam gaps, and minor pier details can often be patched or resealed if the material is still strong enough to hold the repair.
You should replace a crawl space vapor barrier when the plastic is thin, brittle, incomplete, contaminated, poorly sealed, repeatedly displaced, or exposing large areas of soil. Replacement is also the better choice when the original liner was never installed as a continuous moisture-control layer.
Do not confuse vapor barrier failure with drainage failure. If water is collecting on or under the liner, diagnose the source before installing new plastic. A vapor barrier controls ground vapor, not flooding. When vapor barrier damage is part of a larger crawl space moisture problem, encapsulation or professional crawl space repair may be the stronger long-term solution.
One Comment
Comments are closed.