How to Prevent Recurring Moisture Damage
Recurring moisture damage usually means one part of the home is still feeding the problem. The visible water may be gone, but the source, hidden damp materials, humidity level, drainage pattern, condensation issue, or repair timing may still be wrong.
That is why moisture damage often comes back after a homeowner dries a wall, replaces damaged trim, cleans visible mold, runs a fan, or repairs the surface. The repair may look complete, but the moisture path may still be active.
This guide explains how to prevent recurring moisture damage by controlling the source, drying materials correctly, checking hidden areas, reducing future moisture pressure, and monitoring the places where damage is most likely to return. For the broader whole-home framework, use How to Find, Fix, and Prevent Moisture Problems in Homes.
Use This Guide by Problem Type
Recurring moisture damage can come from many different systems, so the fastest way to use this guide is to start with the area or pattern that matches your home. Use the sections below to narrow the problem before you repair, repaint, reinstall trim, replace flooring, or close up a wall.
- Walls, drywall, ceilings, and insulation: start here when stains, soft drywall, bubbling paint, damp insulation, or ceiling spots keep coming back.
- Floors, subfloors, carpet, baseboards, and trim: start here when flooring lifts, smells musty, cups, swells, or stays damp near wall edges.
- Kitchens, bathrooms, laundry rooms, and appliances: start here when leaks keep returning near sinks, tubs, toilets, washing machines, dishwashers, water heaters, or supply lines.
- Basements and crawl spaces: start here when moisture returns below the home, around foundations, near crawl space framing, or after rain and drainage problems.
- Attics, roofs, exterior walls, windows, doors, and flashing: start here when water enters from above, through exterior openings, or during specific weather conditions.
- Humidity, condensation, HVAC, and airflow: start here when moisture returns without an obvious leak or follows seasonal humidity, airflow, cooling, or temperature changes.
- Leak sensors, moisture alarms, and monitoring tools: start here when you want early warning in areas that have leaked before or are hard to inspect.
- Flood recovery, insurance, and repair planning: start here when the damage is larger, disputed, claim-related, or tied to contractor decisions.
Recurring Moisture Damage Is Usually a System Failure
Moisture damage rarely returns for no reason. When water stains, musty odors, swelling, mold, damp flooring, or bubbling paint come back after cleanup, the home still has an active moisture source, trapped damp material, poor drying conditions, or a repair that closed the area too soon.
The most common repeat failures are:
- The original leak was slowed down but not fully stopped.
- The visible surface dried, but moisture remained behind it.
- Wet materials were covered, painted, or repaired too soon.
- Humidity stayed high enough to keep feeding damp surfaces.
- Condensation kept forming because airflow, insulation, or temperature conditions were not corrected.
- Water kept entering from outside through walls, windows, doors, flashing, siding, roof details, basements, or crawl spaces.
- No one monitored the area after cleanup to confirm the moisture stayed gone.
If the main issue is understanding why the same problem keeps returning, start with why moisture problems keep returning. This page focuses on prevention, drying order, monitoring, and repair timing.
If the issue appears structural, such as sagging framing, foundation movement, rotted load-bearing wood, failing roof structure, or exterior wall deterioration, use this guide as the prevention framework, then move into structural moisture problems in homes before making final repair decisions.
The Source Has to Be Controlled First
Drying is not prevention if the source is still active. A fan can dry the surface of a wall, cabinet, or floor, but it cannot solve a slow pipe leak, roof leak, window leak, drainage problem, appliance drip, HVAC condensation issue, or basement water entry problem.
Before repairing water damage, identify what started the moisture problem. The source may be obvious, such as a leaking washing machine hose, or hidden, such as water entering behind siding or dripping inside a wall cavity.
Common repeat sources include:
- slow plumbing leaks
- appliance supply or drain leaks
- leaking water heaters
- roof leaks
- window and door intrusion
- siding or flashing failures
- basement seepage
- crawl space moisture
- attic condensation
- HVAC condensate or duct condensation
- high indoor humidity
Prevention begins when the source is corrected, not when the surface looks dry.
Hidden Moisture Has to Be Found Before Repairs
Moisture often remains where air cannot reach it. Drywall can feel dry on the painted side while the back of the panel is still damp. Flooring can look normal while the subfloor or underlayment is wet. Cabinets may dry on the face while the toe-kick, back panel, or floor beneath stays damp.
Hidden moisture is common behind:
- baseboards and floor trim
- drywall near the floor
- cabinet bases
- carpet padding
- laminate and vinyl flooring
- subfloors
- wall insulation
- ceiling cavities
- attic insulation
- crawl space framing
When damage keeps returning in the same area, do not assume the new stain or smell is separate from the old problem. Use the guide on how to find hidden moisture in different areas of your home if you need to trace damp materials by location.
Repairs Should Wait Until the Area Is Stable
Recurring damage often begins when repairs happen too soon. Paint, caulk, flooring, trim, insulation, drywall patches, and cabinets can all trap moisture if the material behind them is still damp.
The safest repair order is:
- Stop the source.
- Remove standing water if present.
- Expose trapped wet areas when needed.
- Dry the affected materials.
- Verify that moisture is no longer elevated.
- Monitor the area after normal use resumes.
- Repair, close, paint, or reinstall materials only after the area remains stable.
This sequence matters because a finished repair can hide the same damp condition that caused the original damage.
Do not close, paint, or reinstall materials if the area still smells musty, feels soft, tests damp, shows spreading mold, or may involve sewage, contaminated floodwater, electrical risk, or structural damage.
The Basic Sequence for Preventing Repeat Water Damage
The details change by room and material, but the prevention sequence stays mostly the same: source control, water removal, drying, verification, repair, and monitoring.
1. Stop the Moisture Source
Do not begin with cosmetic repairs. First, stop the water or moisture source as completely as possible.
That may mean shutting off a fixture valve, correcting an appliance leak, repairing a roof or window leak, improving drainage, fixing a condensate line, lowering indoor humidity, improving ventilation, or using a contractor when the source is structural or hidden.
2. Remove Standing Water Safely
Standing water increases the amount of material exposed to moisture. It can soak into flooring, baseboards, cabinets, drywall, insulation, subfloors, and framing. If flooding or pooled water is present, water removal comes before drying.
Use the guide on how to remove standing water safely if there is pooled water in the home. If the event is larger than a small leak, the guide on emergency flood cleanup steps gives a better first-response path.
3. Expose Materials That Are Holding Moisture
Air cannot dry what it cannot reach. Some materials dry poorly because they are covered, layered, or sealed inside an assembly.
Examples include:
- wet drywall behind baseboards
- insulation inside walls or ceilings
- water below floating floors
- wet carpet padding under dry-looking carpet
- cabinet bottoms sitting on damp flooring
- crawl space wood exposed to long-term ground moisture
- attic insulation below a roof leak or condensation area
Not every situation requires demolition. But when water is trapped behind a finish material, prevention depends on making sure the damp layer is actually dry before it is covered again.
4. Dry the Material, Not Just the Surface
Surface drying can be misleading. A wall can look dry while the bottom edge, backside, insulation, or framing is still wet. A floor can feel dry while moisture remains below it. A cabinet can appear clean while the base or wall behind it stays damp.
That is why recurring moisture prevention depends on drying the material itself. Depending on the situation, that may involve air movement, dehumidification, access behind finishes, moisture checks, removal of saturated material, or professional drying equipment.
For wall-specific recovery, use how to dry walls after water damage. For flooring structure, use how to dry subfloors after water damage.
5. Confirm the Area Does Not Re-Wet
A single dry moment is not enough if the source only appears during rain, appliance cycles, shower use, HVAC operation, or high humidity. After drying, recheck the area after the conditions that caused the problem happen again.
For example:
- Check window areas after wind-driven rain.
- Check under sinks after normal sink use.
- Check basement walls and floors after heavy rain.
- Check laundry floors after a wash cycle.
- Check HVAC areas during cooling season.
- Check bathrooms after repeated showers.
- Check attic areas after rain and during cold-weather condensation conditions.
If moisture returns, the problem is not ready for repair. Use how to detect repeated moisture problems to help confirm whether the same area is still active.
6. Repair Only After the Moisture Pattern Is Under Control
Repair should be the last step, not the first. Reinstalling baseboards, patching drywall, replacing flooring, painting over stains, or closing a ceiling before moisture is stable can restart the cycle.
When drywall is involved, the decision is not always obvious. Some wet drywall can be dried if exposure is limited and conditions are controlled. Other drywall may need to be removed because of saturation, contamination, mold, or damage. Use whether wet drywall can be saved before deciding whether to dry, cut, or replace it.
If repair is already the next step, use fixing water-damaged drywall instead of turning the prevention process into a repair project.
7. Monitor the Area After Repairs
The final prevention step is follow-up. Many recurring moisture problems do not show themselves the same day repairs are finished. They return after the next rain, shower cycle, HVAC cycle, appliance use, humidity spike, or seasonal change.
Watch for:
- new staining
- musty odor
- soft drywall
- swollen trim
- floor cupping or lifting
- paint bubbling
- condensation returning
- mold reappearing in the same area
- moisture readings that stay elevated
In high-risk areas, water leak sensors or moisture alarms can give earlier warning, but they should support a prevention plan rather than replace source correction.
Preventing Moisture Damage in Walls, Drywall, Ceilings, and Insulation
Walls, ceilings, and insulation are common places for recurring moisture because they can hide dampness behind a finished surface. A wall or ceiling may look dry while the backside of drywall, insulation, framing, or a cavity edge still holds moisture.
Why Walls Can Stay Wet After the Surface Dries
Drywall often dries unevenly. The painted face may feel dry while the bottom edge, paper backing, insulation, or framing behind it still contains moisture. This is especially common after pipe leaks, roof leaks, flood exposure, wet baseboards, and water that enters near floors or ceilings.
Before closing a wall, check whether the moisture source is stopped, whether the affected area has been exposed enough to dry, and whether readings or visible signs show that the wall has stabilized. If the wall was soaked, contaminated, moldy, swollen, crumbling, or repeatedly wet, repair or replacement may be safer than trying to save the material.
For wall-specific steps, use how to dry walls after water damage. If the wall material has already been damaged, use how to fix water-damaged drywall.
Why Insulation Needs Separate Attention
Insulation can hold water after the surface beside it appears dry. Wet insulation may reduce drying, hide odor, support mold, and keep surrounding framing damp. In walls, ceilings, attics, and crawl spaces, insulation should be evaluated separately instead of assumed dry because the drywall or ceiling surface looks normal.
If insulation was affected, use how to dry insulation after water damage before closing the cavity again.
Why Ceiling Damage Can Return
Ceiling stains often return when the source above the ceiling is still active or when wet insulation, framing, or drywall backing was never fully dried. Roof leaks, plumbing above ceilings, attic condensation, and HVAC condensation can all cause ceiling moisture to reappear after paint or patching.
For ceiling recovery, use how to dry ceilings after water damage before repainting or closing the repair.
Preventing Moisture Damage Under Floors, Subfloors, Carpet, Baseboards, and Trim
Floors can hide moisture because water moves under finished surfaces, along seams, beneath cabinets, into padding, and around baseboards before the visible floor looks damaged. Recurring floor damage usually means the lower layers were not dried, the source continued, or water kept entering at the same edge.
Why Flooring Hides Moisture
Finished flooring may look dry while moisture remains beneath vinyl, laminate, engineered flooring, carpet, padding, or underlayment. Watch for lifting edges, cupping, soft spots, odors, staining near trim, or moisture that returns after appliance use, mopping, showering, or rain exposure.
The prevention step is to dry and verify the layers below the surface before reinstalling trim, replacing flooring, or covering the area again. If the subfloor is involved, use how to dry subfloors after water damage.
Why Carpet Padding Is a Separate Risk
Carpet can feel only slightly damp while padding below it remains wet. Padding dries slowly, can hold odor, and may keep the subfloor damp. After water exposure, prevention depends on checking the padding and subfloor instead of judging the carpet surface alone.
Use how to prevent mold under carpet padding if carpeted flooring was affected by a leak, spill, flood, or damp subfloor.
Why Baseboards and Trim Trap Moisture
Baseboards and trim often hide damp drywall edges, wet flooring edges, and moisture that traveled along the wall-floor joint. Swelling, peeling paint, staining, soft trim, or recurring mold near the floor usually means the area needs more than surface cleaning.
For trim-specific prevention, use how to prevent mold around baseboards.
How Mold Prevention Fits Into Recurring Moisture Control
Mold prevention after water damage starts with moisture control. Cleaning visible mold does not prevent recurrence if wet materials, high humidity, condensation, leaks, or trapped dampness continue feeding the same area.
Mold Prevention Starts With Moisture Control
The main goal is to remove the moisture conditions that allow mold to return. That includes stopping leaks, drying hidden materials, improving airflow, lowering humidity when needed, and keeping repaired areas open long enough to confirm that moisture does not come back.
If mold keeps returning after cleaning, use why mold keeps coming back after cleaning to separate cleaning failure from moisture recurrence.
If you need cleanup or removal guidance instead of recurrence prevention, use how to remove mold permanently.
Common Mold-Prone Moisture Areas
The highest-risk areas are spaces that stay damp, enclosed, or poorly ventilated: behind walls, under flooring, bathrooms, closets, storage areas, garages, laundry rooms, and minor leak areas that were dried only on the surface.
For specific prevention steps, use how to prevent mold behind walls, how to prevent mold under flooring, how to prevent mold on bathroom walls, and how to prevent mold after minor water leaks.
Preventing Recurring Moisture in Kitchens, Bathrooms, Laundry Rooms, and Appliance Areas
Kitchens, bathrooms, laundry rooms, and appliance areas need extra monitoring because they combine plumbing connections, splash zones, cabinets, flooring edges, and repeated water use. The goal is to check the places where small leaks can stay hidden long enough to restart damage.
Kitchen Sink and Cabinet Leaks
Under-sink areas should be checked after normal use, not only when a leak is obvious. Look for damp cabinet bottoms, swollen panels, staining around pipe openings, musty odor, loose supply connections, and moisture along the wall or floor behind the cabinet.
For kitchen cabinet warning signs, use signs of water damage under sink cabinets. For leak checks, use how to detect slow plumbing leaks.
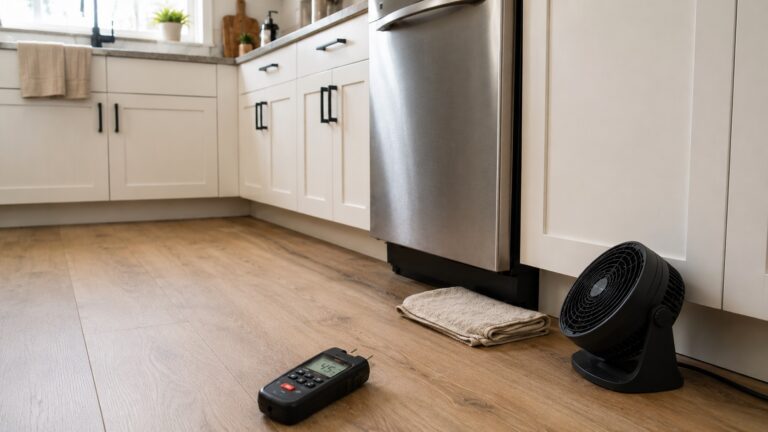
Dishwasher and Refrigerator Leak Areas
Dishwashers and refrigerators with water lines can leak behind or below the appliance where flooring, subflooring, trim, and cabinets hide the moisture. Prevention depends on checking the appliance base, adjacent cabinets, nearby flooring, and wall edges after normal appliance cycles.
If an appliance leak has already occurred, use how to dry floors after appliance leaks before replacing flooring or trim.
Laundry Room Moisture and Washing Machine Leaks
Laundry rooms need regular checks around washer hoses, drain connections, flooring edges, nearby baseboards, and the wall behind the machine. Small leaks can repeat during wash cycles and stay hidden beneath flooring or behind trim.
For washing machine prevention, use how to prevent washing machine leak damage.
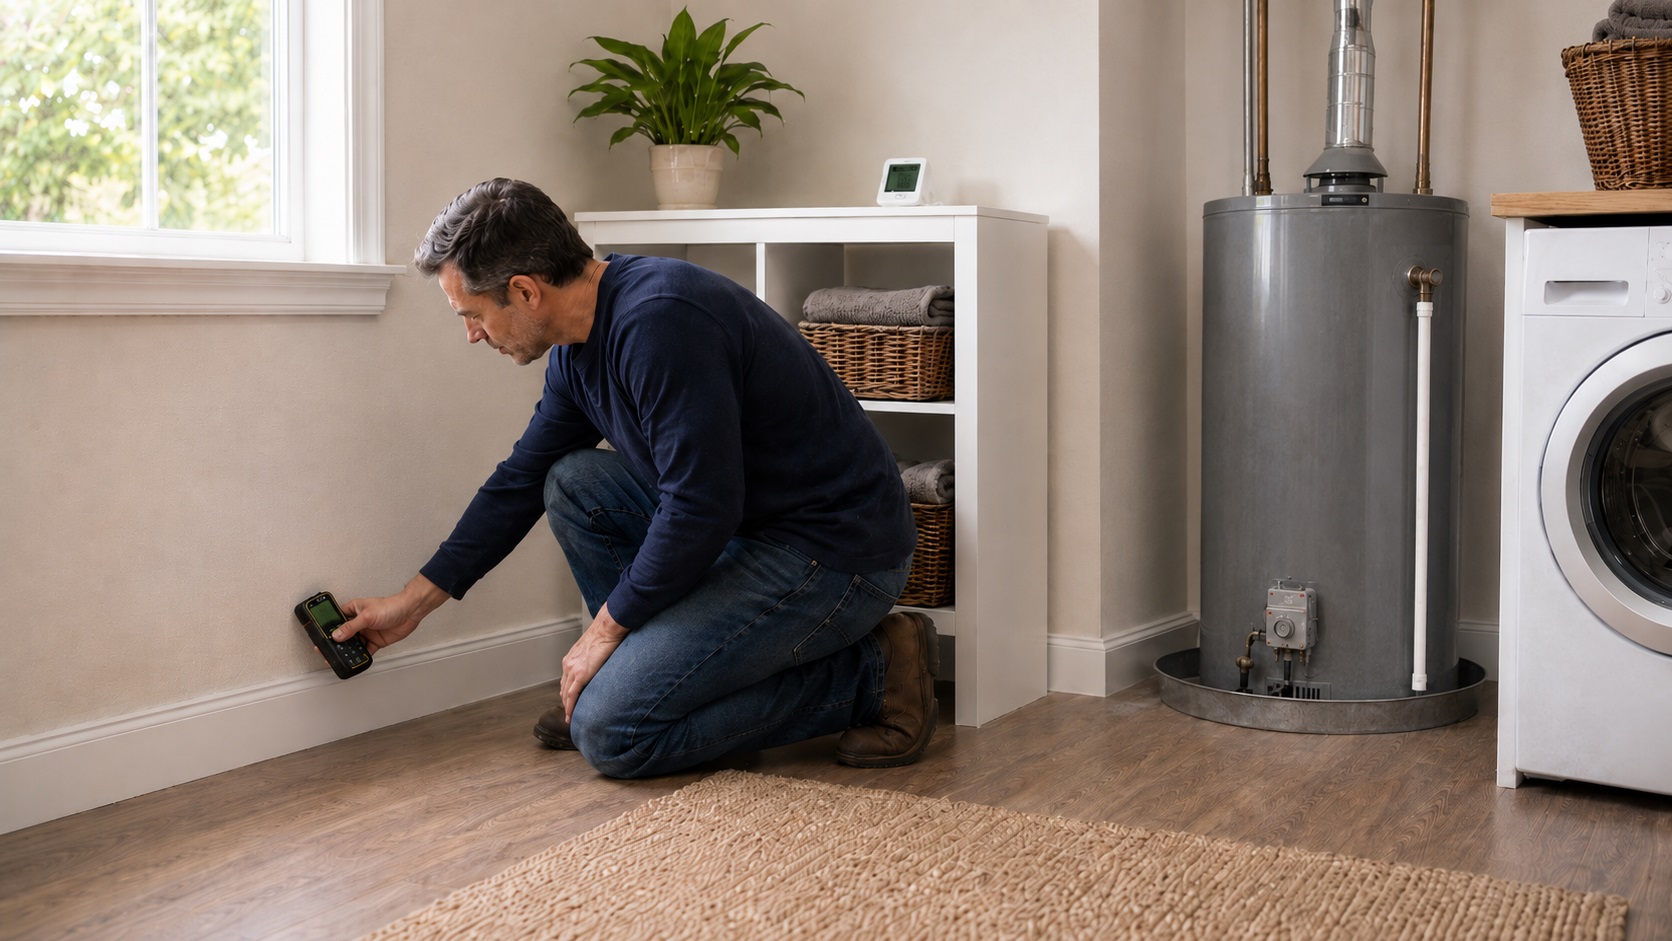
Water Heater Leak Areas
Water heater areas should be monitored because leaks can spread beneath flooring, into wall edges, around platforms, and across utility areas before the problem is noticed. Watch for rust, damp flooring, musty odor, staining, pressure-relief discharge, or repeated moisture near the tank base.
For water heater-specific prevention, use how to prevent water heater leak damage.
Preventing Basement and Crawl Space Moisture From Returning
Basements and crawl spaces often have recurring moisture because they are affected by soil moisture, drainage, foundation seepage, humidity, vapor movement, plumbing, and poor airflow. A one-time cleanup rarely solves the problem if the moisture source remains outside or below the structure.
Basement Moisture Prevention
Recurring basement moisture may come from wall seepage, floor dampness, foundation cracks, window wells, exterior grading, clogged gutters, hydrostatic pressure, sump pump failure, or high indoor humidity. Prevention starts by identifying whether the moisture is coming from outside water entry, interior humidity, plumbing, or condensation.
For system-level basement protection, use how to waterproof basements and control water intrusion. For basement leak causes, use why basement walls leak during rain.
Crawl Space Moisture Prevention
Crawl spaces can keep structural wood, insulation, subfloors, and floor systems damp when ground vapor, poor drainage, plumbing leaks, foundation vents, or inadequate air sealing are not controlled. Musty smells, sagging insulation, damp joists, and soft flooring above the crawl space are warning signs that moisture may be continuing below the home.
For crawl space-specific prevention, use how to prevent crawl space moisture problems. If wood structure may be affected, use signs of structural moisture problems.
Preventing Attic, Roof, Exterior Wall, Window, Door, and Flashing Moisture Problems
Exterior and upper-house moisture problems can return after cleanup when the entry path is not corrected. Roof leaks, flashing defects, siding gaps, window leaks, door leaks, attic condensation, and exterior drainage failures may only appear during certain weather conditions.
Because these problems are often seasonal or weather-driven, the area should be checked after rain, wind-driven rain, snowmelt, high humidity, or temperature swings that create condensation.
Attic Moisture and Insulation Exposure
Attics can develop recurring moisture from roof leaks, condensation, poor ventilation, bath fan discharge, air leaks from the living space, or damp insulation. Prevention depends on correcting both the water source and the airflow or insulation conditions that allow moisture to stay trapped.
For attic prevention, use how to prevent moisture build-up in attics.
Roof, Wall, Window, Door, and Flashing Entry Points
Water can enter through roofing details, siding failures, window and door openings, flashing seams, trim gaps, wall penetrations, and exterior joints. These areas may look dry between storms, so prevention often requires checking after the same weather pattern that caused the original damage.
For structural entry paths, use how water enters homes through structural gaps. For window and door moisture, use how windows and doors cause hidden moisture problems.
Preventing HVAC, Humidity, and Condensation Damage
Not all recurring moisture damage comes from liquid leaks. High humidity, HVAC condensation, duct sweating, poor ventilation, and weak airflow can keep materials damp or cause condensation to form repeatedly on cool surfaces.
These problems often show up as recurring damp walls, musty rooms, mold in closets, condensation near windows, moisture around vents, or dampness that returns during certain seasons.
High Humidity Can Keep Moisture Problems Active
High humidity slows drying and can keep porous materials damp even after a leak is fixed. Bathrooms, basements, crawl spaces, closets, laundry rooms, and storage areas are especially vulnerable because airflow is often limited.
For humidity measurement, use how to test indoor humidity levels. For reduction steps, use how to reduce humidity in a house.
HVAC Condensation and Drainage Problems
HVAC systems can create recurring moisture when condensate drains clog, pans overflow, ductwork sweats, insulation is missing, or equipment areas stay damp. Check HVAC moisture during cooling season, after long run times, and whenever musty odor or dampness appears near vents, air handlers, or ducts.
If HVAC moisture keeps returning, inspect the condensate line, drain pan, nearby flooring, duct insulation, and surrounding wall or ceiling materials before assuming the problem is only surface condensation.
Airflow Problems That Slow Drying
Poor airflow lets moisture linger in closets, cabinets, corners, behind furniture, around fixtures, and inside enclosed rooms. Prevention may require improving ventilation, leaving space around stored items, using exhaust fans correctly, opening enclosed areas after leaks, or using dehumidification where humidity remains high.
Monitoring Tools That Help Prevent Repeat Damage
Monitoring tools do not fix moisture problems, but they can help catch water earlier. They are most useful after the source has been corrected and in areas where a future leak would be hard to notice quickly.
Where Leak Sensors Are Most Useful
Leak sensors are most useful near water heaters, washing machines, dishwashers, refrigerators with water lines, under sinks, sump pumps, basement low points, HVAC equipment, and any area that has already had moisture damage.
They work best when they are placed where water would actually collect, not where they are easiest to see. In some homes, more than one sensor may be needed because water may flow away from the appliance, pipe, or fixture before pooling.
When Moisture Alarms and Flood Detection Systems Make Sense
Moisture alarms and flood detection systems make sense in areas with repeated leaks, finished basements, hidden appliance spaces, vacation homes, utility rooms, sump pump risk, or expensive flooring that would be costly to replace.
For specific early-warning and water-removal tools, see the Hydro Check HC6000 Water Watch Alarm review and the Superior Pump 91250 Utility Pump review.
Monitoring Does Not Replace Source Control
Use monitoring as the last layer of prevention, not the only layer. A sensor can warn you that water is present, but it cannot repair the source, dry hidden materials, correct condensation, or prevent mold if moisture remains trapped.
Emergency, Flood, and Whole-House Recovery Planning
Large water events need a different prevention strategy than small leaks. When water affects multiple rooms, standing water, flooring, walls, insulation, cabinets, electrical areas, or contaminated materials, the goal is not only to dry the visible area. The goal is to prevent missed damage from turning into recurring moisture, mold, material loss, or structural problems.
What Changes When There Is Standing Water
Standing water can spread into areas that were not part of the original leak. It can reach under walls, into floor cavities, beneath cabinets, under appliances, around trim, and into finished materials.
If standing water is present, start with how to remove standing water safely. If the event is a flood, use what to do immediately after home flooding.
Flood Cleanup and Drying
Flood recovery requires careful sequencing. Safety, water removal, documentation, material decisions, drying, and repair timing all matter. Rebuilding too soon can trap moisture inside materials that were never fully dried.
Use emergency flood cleanup steps for the first cleanup stage. Use how to dry a house after flood damage for whole-house drying after a larger event. If the flood affected carpet, padding, or the structure below finished flooring, use carpet and subfloor flood recovery.
Material Salvage and Repair Priorities
After a larger water event, not every material should be saved. Saturated drywall, wet insulation, contaminated porous materials, swollen cabinetry, damaged flooring, and structural materials may need different decisions. The safest prevention approach is to decide what can be dried, what must be removed, and what should wait for professional evaluation.
If the event may involve contaminated water, electrical hazards, structural damage, or widespread saturation, stop the DIY repair path and get professional help before closing or reinstalling materials.
Insurance, Documentation, and Repair Timing
Insurance does not prevent moisture damage, but documentation and repair timing can affect how a homeowner responds after damage occurs. Photos, moisture readings, repair notes, and proof of source correction can help show what happened and what was done before materials were closed again.
Document Damage Before Covering or Removing Materials
Before removing wet materials or covering a damaged area, photograph the source, the affected surfaces, the surrounding rooms, the water path, and any visible staining, swelling, mold, or material damage. Keep records of drying steps, repair work, and any professional evaluation.
For claim-related documentation, use how to photograph water damage for insurance.
Know What the Claim Path Requires
Coverage depends on the policy, the cause of damage, timing, exclusions, maintenance history, and whether the loss was sudden or gradual. If you may file a claim, document the damage before major changes and contact your insurer or agent for policy-specific guidance.
For claim steps, use how to file a water damage insurance claim. For coverage basics, use what water damage insurance typically covers.
When to Call a Professional
Recurring moisture damage is not always a DIY problem. Call a professional when the source is hidden, moisture keeps returning, structural materials are affected, mold spreads or returns, flooding is widespread, water may be contaminated, or electrical systems may be involved.
Call a Professional for Structural Risk
Soft subfloors, sagging floors, damaged joists, wet framing, foundation seepage, roof leaks, wall movement, or long-term wood decay should be evaluated before cosmetic repairs continue. Structural moisture can keep worsening behind finished surfaces if the cause is not corrected.
For structural warning signs, use structural moisture problems in homes.
Call a Professional for Electrical, Sewage, or Contaminated Water
Do not handle water damage as a basic drying project if water may involve sewage, contaminated floodwater, electrical exposure, soaked electrical components, or unsafe structural conditions. These situations need safety-first evaluation before cleanup, drying, or repair.
Call a Professional When Moisture Keeps Returning
If an area has been dried and repaired but the same stain, odor, swelling, condensation, mold, or elevated reading returns, the moisture path is still active. A professional inspection may be needed to locate hidden leaks, exterior intrusion, drainage problems, HVAC condensation, or trapped moisture inside assemblies.
How to Build a Long-Term Moisture Prevention Routine
The best prevention plan is simple enough to repeat. A homeowner does not need to inspect every wall every day, but high-risk areas should be checked regularly and after the conditions that usually trigger moisture problems.
Check High-Risk Areas Monthly
Once a month, check the places where moisture usually starts or hides:
- under sinks
- behind and beside toilets
- around tubs and showers
- near water heaters
- behind washing machines
- around dishwashers and refrigerators with water lines
- basement walls and floors
- crawl space access areas
- attic areas below roof penetrations
- windows, doors, and exterior wall openings
- HVAC equipment, condensate lines, and ducts
- any area that has already had water damage
Look for stains, swelling, softened materials, peeling paint, musty smells, condensation, damp flooring, or new mold growth.
Recheck After Rain, Heavy Appliance Use, or Seasonal Changes
Some moisture problems only appear after a trigger. Recheck vulnerable areas after heavy rain, wind-driven rain, long appliance cycles, repeated showers, high humidity, snowmelt, cooling-season HVAC use, or seasonal temperature changes.
Use the fall moisture prevention checklist for homes before cooler, wetter, or more humid seasonal conditions begin. For a broader room-by-room prevention plan, use how to prevent moisture problems across your entire home.
Keep Indoor Humidity Stable
Humidity control is part of water damage prevention because damp air slows drying and can create condensation on cool surfaces. Stable humidity also helps reduce mold risk in closets, bathrooms, basements, crawl spaces, storage areas, and rooms with poor airflow.
If humidity is the recurring problem, use how to reduce indoor humidity levels and how to stabilize indoor humidity levels.
Do Not Close Repairs Too Quickly
One of the best ways to prevent repeat moisture damage is to slow down the repair stage. Painting, patching, caulking, installing flooring, reinstalling baseboards, or closing a ceiling too soon can trap moisture inside materials that still need to dry.
Before closing a repair, ask three questions:
- Has the source been corrected?
- Have hidden materials been checked?
- Has the area stayed dry after normal use or weather exposure?
If the answer is no, the repair may hide the next moisture problem instead of solving the last one.
Once the source, drying, repair timing, and follow-up checks are working together, recurring moisture damage becomes much less likely to restart in the same area.
Related Guides for Preventing Recurring Moisture Damage
Use these related guides for more specific prevention, drying, monitoring, recovery, and repair-planning steps by material, room, system, or moisture source.
Mold, Trim, Storage, and Surface Prevention
Use these guides when recurring mold or dampness affects closets, trim, baseboards, bathroom edges, cabinets, garages, storage areas, laundry rooms, or other enclosed surfaces where moisture can linger after cleanup.
- How to Prevent Mold in Closets
- How to Prevent Mold Behind Baseboards
- How to Dry Baseboards After Water Damage
- How to Prevent Mold Around Floor Trim
- How to Prevent Mold Around Bathroom Fixtures
- How to Prevent Mold Around Bathroom Baseboards
- How to Prevent Mold Behind Bathroom Walls
- How to Prevent Mold Behind Kitchen Cabinets
- How to Prevent Mold Under Kitchen Flooring
- How to Prevent Mold From Returning Permanently
- How to Prevent Mold in Garages
- How to Prevent Moisture Buildup in Garages
- How to Prevent Mold in Storage Areas
- How to Prevent Mold in Laundry Rooms
Floors, Cabinets, Kitchens, Appliances, and Water Heaters
Use these guides when recurring damage is connected to fixtures, appliances, cabinets, supply lines, drain lines, shower walls, laundry areas, or repeated room use.
- How to Dry Flooring After Minor Flooding
- How to Dry Cabinets After Kitchen Leaks
- How to Dry Kitchen Sink Cabinets After Leaks
- How to Prevent Mold Under Dishwashers
- How to Dry Flooring After Dishwasher Leaks
- How to Prevent Mold Behind Refrigerators
- How to Dry Flooring After Refrigerator Leaks
- How to Dry Kitchen Flooring After Leaks
- How to Dry Floors After Washing Machine Leaks
- How to Prevent Moisture Build-Up in Laundry Rooms
- How to Dry Floors After Water Heater Leaks
Attics, Roof Areas, Crawl Spaces, Basements, and Structural Drying
Use these guides when the moisture source may be outside the living space, below the floor, above the ceiling, or entering through structural openings, drainage pressure, roof details, vents, or foundation areas.
- How to Dry Attic Insulation After Moisture Exposure
- How to Dry Roof Areas Affected by Condensation
- How to Dry Structural Roof Components
- How to Prevent Moisture Build-Up in Crawl Spaces
- How to Dry Crawl Spaces After Moisture Exposure
- How to Prevent Moisture with Proper Crawl Space Ventilation
- How to Inspect Crawl Space Vents for Blockages
- How to Improve Airflow in Crawl Spaces
- Why Crawl Space Encapsulation Prevents Mold Growth
- How to Maintain a Crawl Space After Encapsulation
- How to Prevent Structural Moisture in Crawl Spaces
- How to Dry Crawl Space Structural Wood
- How to Prevent Moisture Build-Up in Basements
- How to Dry Basement Areas After Water Exposure
- How to Dry Basement Walls After Water Intrusion
- How to Dry Basement Floors After Water Intrusion
Exterior Walls, Siding, Windows, Doors, and Flashing
Use these guides when recurring moisture may be entering through exterior walls, siding, window openings, door thresholds, flashing details, wall penetrations, or weather-exposed building joints.
- How Exterior Walls Allow Moisture Into Homes
- How to Prevent Moisture Build-Up in Exterior Walls
- How to Dry Exterior Walls After Water Intrusion
- How to Prevent Moisture Damage Behind Siding
- How to Inspect Exterior Siding for Water Damage
- How to Dry Walls After Siding Water Intrusion
- How to Prevent Window Water Intrusion
- How to Dry Walls After Window Leaks
- How to Prevent Water Intrusion Around Doors
- How to Dry Flooring After Door Leaks
- How to Prevent Flashing Failures
- How to Dry Walls After Flashing Water Intrusion
HVAC, Humidity, Condensation, and Airflow
Use these guides when moisture keeps returning because of humidity, condensation, airflow problems, HVAC operation, seasonal changes, or weak follow-up monitoring after repairs.
- How to Choose and Use a Dehumidifier Effectively
- How to Prevent Moisture Build-Up in HVAC Systems
- How to Dry HVAC Systems After Moisture Problems
- How to Prevent HVAC Condensation Problems
- How to Dry Areas Affected by HVAC Condensation
- How to Prevent Condensation in HVAC Ducts
- How to Dry HVAC Ducts After Moisture Exposure
- How to Improve HVAC Airflow
Leak Sensors, Moisture Alarms, Flood Detection, and Monitoring Tools
Use these guides when you want early warning in areas that have leaked before, contain hidden plumbing or appliances, hold expensive flooring, depend on a sump pump, or are difficult to inspect during normal use.
- Best Smart Leak Detectors for Homes
- Best Water Leak Sensors for Early Detection
- Best Moisture Alarms for Homes
- Best Flood Detection Systems for Homes
- Govee Water Leak Detector Review
- YoLink Water Leak Sensor Review
- Flume Smart Water Monitor Review
- Vacplus Moisture Absorber Review
Flood Recovery, Restoration Costs, Insurance, and Repair Planning
Use these guides when the damage is larger than a small leak, involves cleanup timing, insurance documentation, repair sequencing, contractor decisions, or long-term recovery planning.
- How Much Does Water Damage Restoration Cost?
- Does Home Insurance Cover Mold Damage?
- Does Insurance Cover Water Damage from Leaks?
- What to Do Immediately After Water Damage for Insurance
- How Long Water Damage Takes to Cause Mold
- How to Salvage Materials After Flood Damage
- Common Reasons Water Damage Claims Are Denied
- How Long Water Damage Insurance Claims Take
- What Insurance Adjusters Look For During Water Damage Inspections
- How to Prioritize Repairs After Water Damage
- How to Create a Water Damage Recovery Plan
FAQ About Preventing Recurring Moisture Damage
What is the best way to prevent recurring moisture damage?
The best way to prevent recurring moisture damage is to correct the source, dry the affected materials, check hidden areas, avoid premature repairs, control humidity or condensation, and monitor the area after normal use resumes. If any one of those steps is skipped, the damage may return.
Why does water damage come back after repairs?
Water damage usually comes back because the original source was not fully corrected, hidden material stayed wet, repairs were made too soon, humidity remained too high, or the area was not monitored after cleanup. Cosmetic repairs can cover moisture without solving the underlying problem.
Can a dehumidifier prevent recurring moisture damage?
A dehumidifier can help when high humidity is part of the problem, but it cannot fix an active leak, exterior water intrusion, wet insulation, saturated flooring, a roof leak, or a plumbing failure. Use a dehumidifier as part of a larger source-control and drying plan.
How do I know if an area is dry enough to repair?
An area is more likely ready for repair when the source has been corrected, visible and hidden materials have been dried, moisture does not return after normal use or weather exposure, and the affected materials are stable. If the area still smells musty, stains spread, trim swells, or readings stay elevated, it is not ready to be closed.
What areas of a house are most likely to have recurring moisture?
The highest-risk areas are basements, crawl spaces, bathrooms, kitchens, laundry rooms, water heater areas, under sinks, around appliances, windows, exterior doors, attics, HVAC systems, and any place that previously had water damage.
Do leak detectors prevent water damage?
Leak detectors do not prevent leaks by themselves. They help detect water earlier so you can respond before damage spreads. They work best near water heaters, washing machines, sinks, dishwashers, refrigerators with water lines, sump pumps, and other high-risk areas.
When should I call a professional for recurring moisture damage?
Call a professional when moisture keeps returning, the source is hidden, mold spreads or returns, structural wood is affected, flooding is widespread, water may be contaminated, electrical systems are involved, or wet materials cannot be dried safely with basic methods.
The Key to Keeping Moisture Damage From Returning
Recurring moisture damage is prevented by controlling the full moisture path, not by relying on one fan, one product, one coat of paint, or one cleanup step.
Start with the source, dry the affected materials, check hidden areas, control humidity or condensation, repair only after the area stays stable, and keep monitoring the places most likely to fail again.
The goal is not just to make moisture damage disappear. The goal is to keep the same moisture path from reopening after the repair looks finished.
One Comment
Comments are closed.